element14 Community
element14 Community
    Register Log In
  • Site
  • Search
  • Log In Register
  • About Us
  • Community Hub
    Community Hub
    • What's New on element14
    • Feedback and Support
    • Benefits of Membership
    • Personal Blogs
    • Members Area
    • Achievement Levels
  • Learn
    Learn
    • Ask an Expert
    • eBooks
    • element14 presents
    • Learning Center
    • Tech Spotlight
    • STEM Academy
    • Webinars, Training and Events
    • Learning Groups
  • Technologies
    Technologies
    • 3D Printing
    • FPGA
    • Industrial Automation
    • Internet of Things
    • Power & Energy
    • Sensors
    • Technology Groups
  • Challenges & Projects
    Challenges & Projects
    • Design Challenges
    • element14 presents Projects
    • Project14
    • Arduino Projects
    • Raspberry Pi Projects
    • Project Groups
  • Products
    Products
    • Arduino
    • Avnet Boards Community
    • Dev Tools
    • Manufacturers
    • Multicomp Pro
    • Product Groups
    • Raspberry Pi
    • RoadTests & Reviews
  • Store
    Store
    • Visit Your Store
    • Choose another store...
      • Europe
      •  Austria (German)
      •  Belgium (Dutch, French)
      •  Bulgaria (Bulgarian)
      •  Czech Republic (Czech)
      •  Denmark (Danish)
      •  Estonia (Estonian)
      •  Finland (Finnish)
      •  France (French)
      •  Germany (German)
      •  Hungary (Hungarian)
      •  Ireland
      •  Israel
      •  Italy (Italian)
      •  Latvia (Latvian)
      •  
      •  Lithuania (Lithuanian)
      •  Netherlands (Dutch)
      •  Norway (Norwegian)
      •  Poland (Polish)
      •  Portugal (Portuguese)
      •  Romania (Romanian)
      •  Russia (Russian)
      •  Slovakia (Slovak)
      •  Slovenia (Slovenian)
      •  Spain (Spanish)
      •  Sweden (Swedish)
      •  Switzerland(German, French)
      •  Turkey (Turkish)
      •  United Kingdom
      • Asia Pacific
      •  Australia
      •  China
      •  Hong Kong
      •  India
      •  Korea (Korean)
      •  Malaysia
      •  New Zealand
      •  Philippines
      •  Singapore
      •  Taiwan
      •  Thailand (Thai)
      • Americas
      •  Brazil (Portuguese)
      •  Canada
      •  Mexico (Spanish)
      •  United States
      Can't find the country/region you're looking for? Visit our export site or find a local distributor.
  • Translate
  • Profile
  • Settings
Freedom development platform
  • Products
  • Dev Tools
  • Freedom development platform
  • More
  • Cancel
Freedom development platform
Blog Importing project from kinetis SDK2.0: [How to import the existing project from Kinetis SDK and execute using FRDM-K64F ]
  • Blog
  • Forum
  • Documents
  • Files
  • Members
  • Mentions
  • Sub-Groups
  • Tags
  • More
  • Cancel
  • New
Join Freedom development platform to participate - click to join for free!
  • Share
  • More
  • Cancel
Group Actions
  • Group RSS
  • More
  • Cancel
Engagement
  • Author Author: bheemarao
  • Date Created: 29 Mar 2016 12:37 PM Date Created
  • Views 1086 views
  • Likes 1 like
  • Comments 1 comment
  • ksdk2.0
  • frdm-k64f
  • kds3.2.0
Related
Recommended

Importing project from kinetis SDK2.0: [How to import the existing project from Kinetis SDK and execute using FRDM-K64F ]

bheemarao
bheemarao
29 Mar 2016

This document shows how to import the existing project of Kinetis SDK v2 using the kinetis Design Studio version: 3.2.0


KSDK V2.0

Kinetis SDK v2 is a collection of comprehensive software enablement for NXP Kinetis Microcontrollers that includes system startup, peripheral drivers, USB and connectivity stacks, middleware, and real-time operating system (RTOS) kernels. The Kinetis SDK also includes getting started and API documentation along with usage examples and demo applications designed to simplify and accelerate application development on Kinetis MCUs.


Pre-requisite:

1)   KDS3.2.0 installed on your computer

(You can download latest version of KDS from Here or direct download from below link:)

2) Download a Kinetis SDK Package online

Unpack the downloaded archive file to a folder (recommended into c:\nxp (e.g. (c:\nxp\SDK_v2.0-K64F) or into /nxp on other systems)

3)   Install Kinetis SDK v2.0 into Kinetis Design Studio

4)   Finally the  FRDM-K64FFRDM-K64F freedom hardware development board


Now let us begin to start working on the setup the downloaded SDK v2.0 is having set of example projects to work on Let us see how we can import these projects and execute on our target board i.e  FRDM-K64FFRDM-K64F development board

If we explore the downloaded sdk v2.0 we can find below folders

image

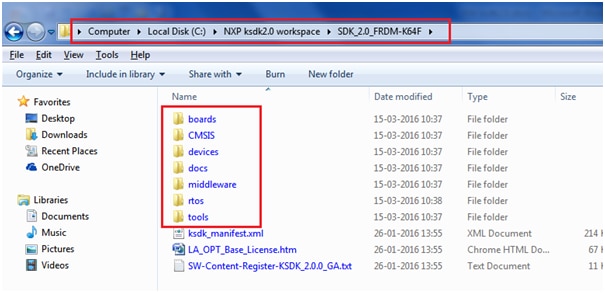
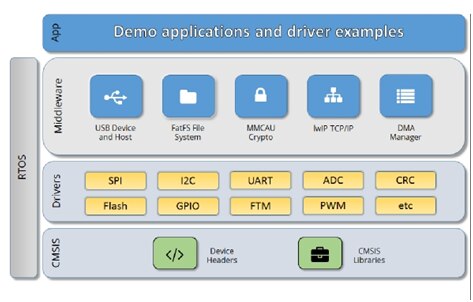
The Kinetis SDK architecture consists of five key components listed below:


1. The ARM Cortex Microcontroller Software Interface Standard (CMSIS) CORE compliance device specific header files, SOC Header, and CMSIS math/DSP libraries.

2. Peripheral Drivers

3. Real-time Operating Systems (RTOS)

4. Stacks and Middleware that integrate with the Kinetis SDK

5. Demo Applications based on the Kinetis SDK


image

Example projects can be found in folder

“C:\NXP ksdk2.0 workspace\SDK_2.0_FRDM-K64F\boards\frdmk64f”

image


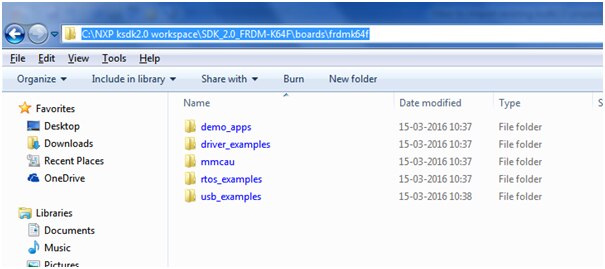
Let us examine the demo apps folder in which we can find many projects as shown:

image

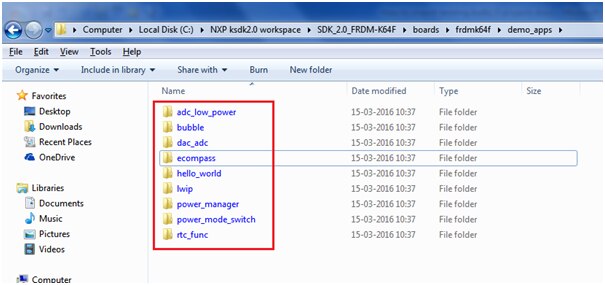
We will be executing ecompass example on KDS3.2.0

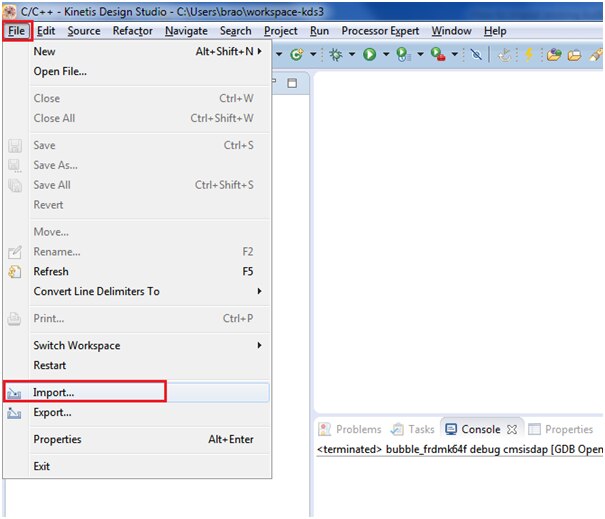
Open the KDS 3.2.0 and click on File > Import

image

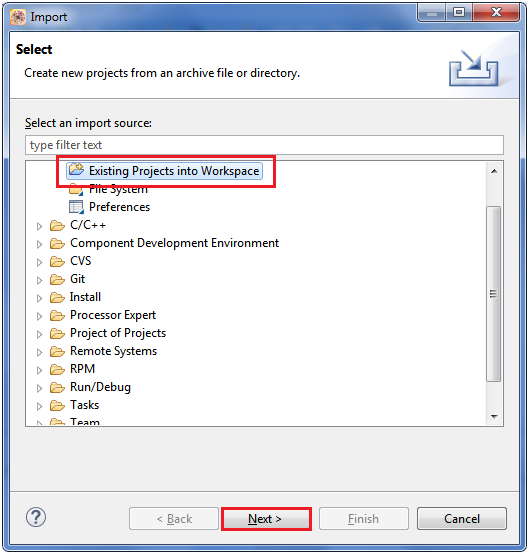
Next select on “Existing Projects into Workspace” as shown below:

image

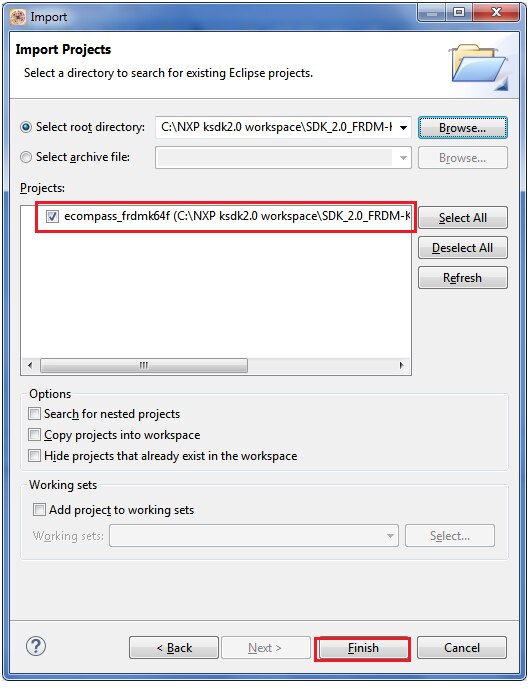
Navigate to the demo apps existing folder i.e

“C:\NXP ksdk2.0 workspace\SDK_2.0_FRDM-K64F\boards\frdmk64f\demo_apps\ecompass"

image

Click on finish

image

After opening the ecompass project you will see below


image

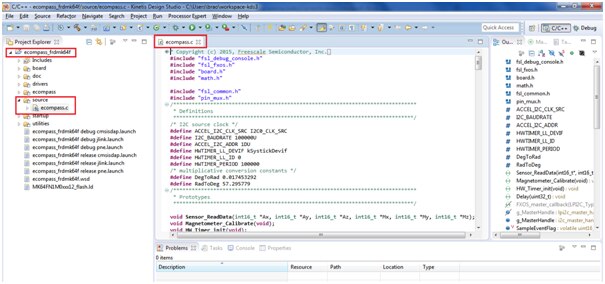
The E-Compass demo application demonstrates the use of the FXOS8700 sensor. The tilt-compensated algorithm calculates all three angles (pitch, roll, and yaw or compass heading).
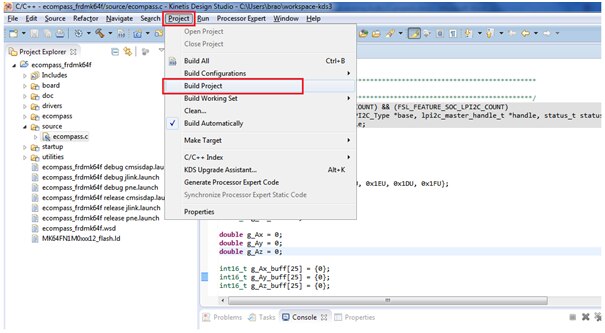
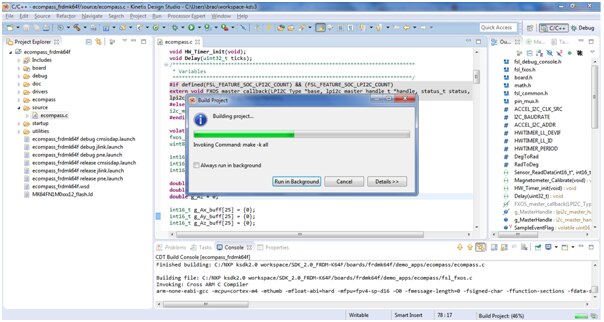
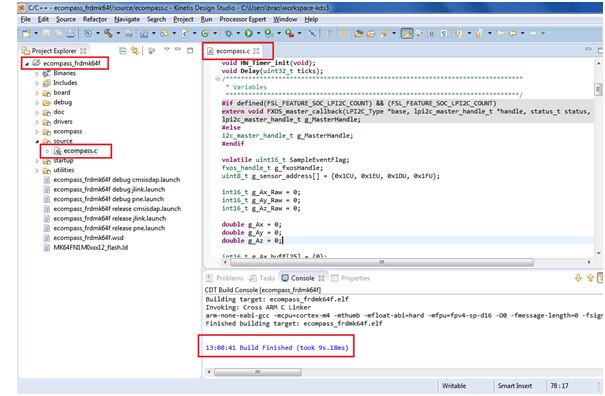
 

Build the project

image

image


image

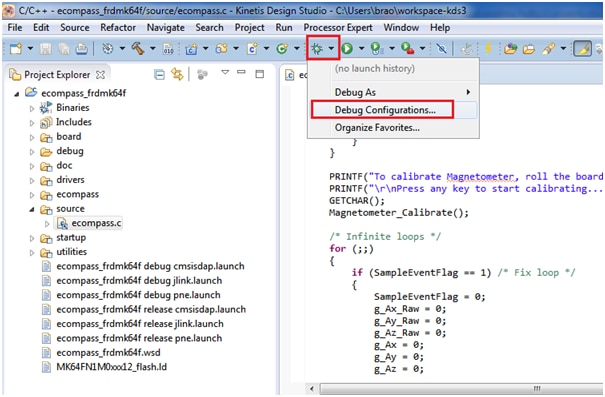
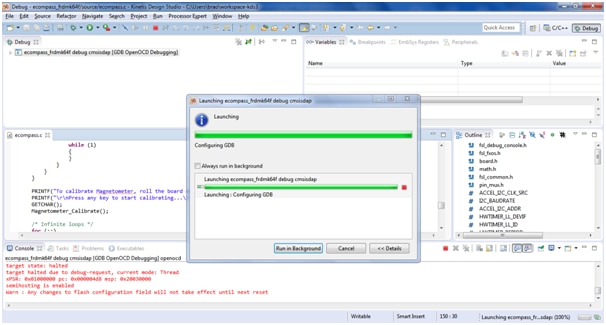
To Run the project click on debug configuration as shown

image

image

After clicking the debug you can see the compilation to debug the project as shown below:


image

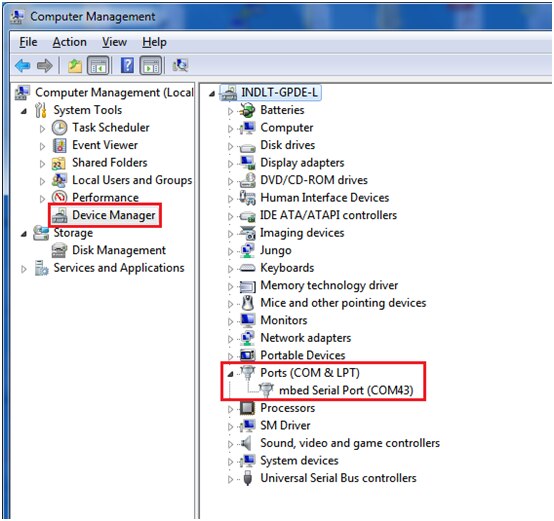
Now establish a serial communication with your computer via com port

Connect a USB cable between the host PC and the OpenSDA USB port on the target board.


To know your com port click on device manager: in my case it is com43 port connected to the K64 board

image

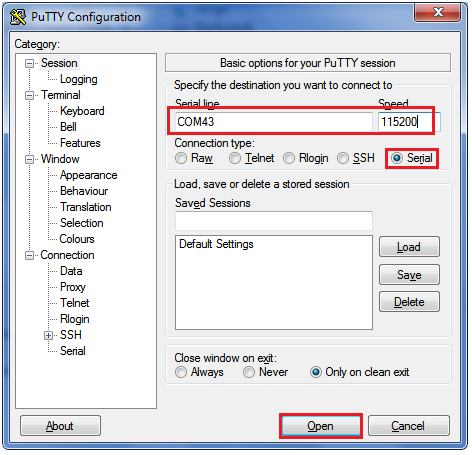
Open a serial terminal with the following settings:

    - 115200 baud rate - 8 data bits - No parity - One stop bit - No flow control


I am using the application putty with below configuration:


image

Now click on Resume button on KDS tool:


image

image

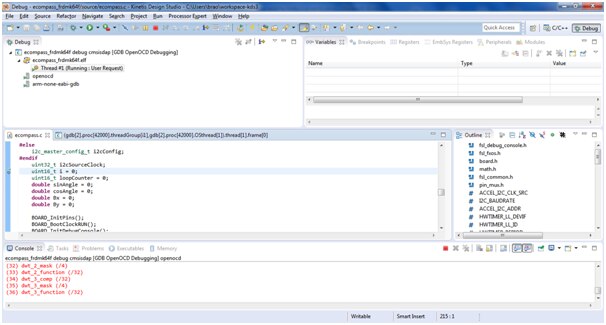
At starting of execution the project will ask for calibration of the sensors

image

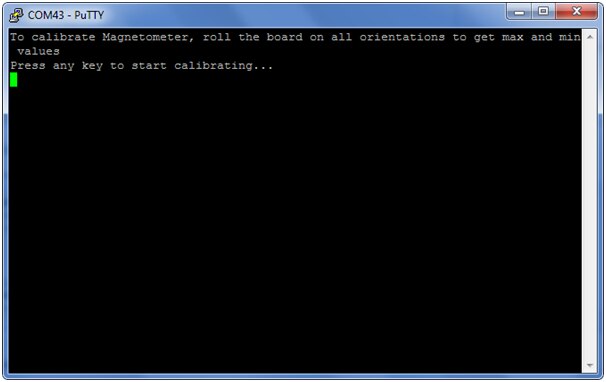
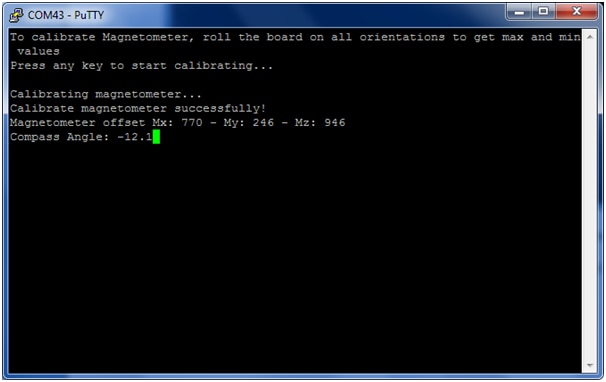
When the demo runs successfully, you can see the information below printed to the terminal.

Note: you must rotate the board 360 degrees to get the max / min value of the magnetic field.


image


Happy Importing and execution of the project with KSDK2.0...  image image image

  • Sign in to reply
  • clem57
    clem57 over 9 years ago

    Nice to know how to import rather than some other tedious way.

    Thanks,

    Clem

    • Cancel
    • Vote Up 0 Vote Down
    • Sign in to reply
    • More
    • Cancel
element14 Community

element14 is the first online community specifically for engineers. Connect with your peers and get expert answers to your questions.

  • Members
  • Learn
  • Technologies
  • Challenges & Projects
  • Products
  • Store
  • About Us
  • Feedback & Support
  • FAQs
  • Terms of Use
  • Privacy Policy
  • Legal and Copyright Notices
  • Sitemap
  • Cookies

An Avnet Company © 2025 Premier Farnell Limited. All Rights Reserved.

Premier Farnell Ltd, registered in England and Wales (no 00876412), registered office: Farnell House, Forge Lane, Leeds LS12 2NE.

ICP 备案号 10220084.

Follow element14

  • X
  • Facebook
  • linkedin
  • YouTube