


Introduction
In this blog I want to go demonstrate how to use a LabVIEW feature, LINX, to interact with Serial Devices, using an Arduino Uno as an example. Following this, it ought to be easy enough to get any serial device that is supported by LINX interacting. Note that the Raspberry PI Pico is NOT supported by LINX although one of the main PIs, e.g. PI 2, 3, 4 and 5 can be.
This isn't part of my Challenge Final Submission, which remains Blog number 7.
Table of Contents
Getting it Up and Running
We will follow these steps:
- Plug in Arduino to the PC and note the COM port it is running on
- Launch LabVIEW Community Edition
- Install the LINX firmware to the Arduino
- Open the Example Application and run it
- Have a celebratory drink/cake/sweet/[insert preferred option here]
Plug in the Arduino Uno
Using a USB A to B cable, plug in the Arduino Uno. This next bit is optional if you trust software to work properly: open up Device Manager, find the COM ports and note which the Arduino is attached to:

Launch LabVIEW
Run LabVIEW to view the getting started screen. The Community Edition comes with LINX already installed so any separate playing with VIPM (Package Manager) is not necessary. From here, select the Tools menu, Hobbyist and Firmware Wizard:
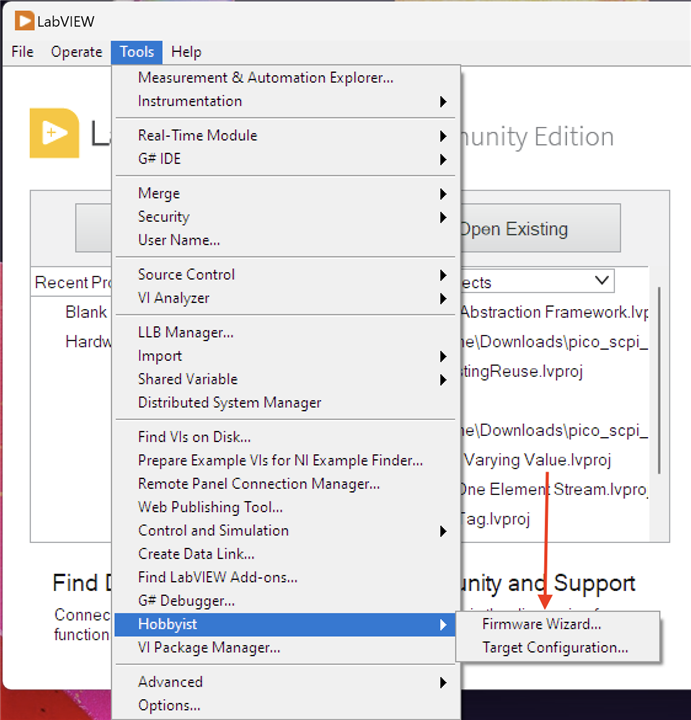
This is going to install the LINX firmware to the Arduino which will handle the Arduino end of the communications channel.
Install LINX Firmware
It should be easy enough to follow the steps:
| {gallery}LINX Firmware Installation Steps |
|---|
|
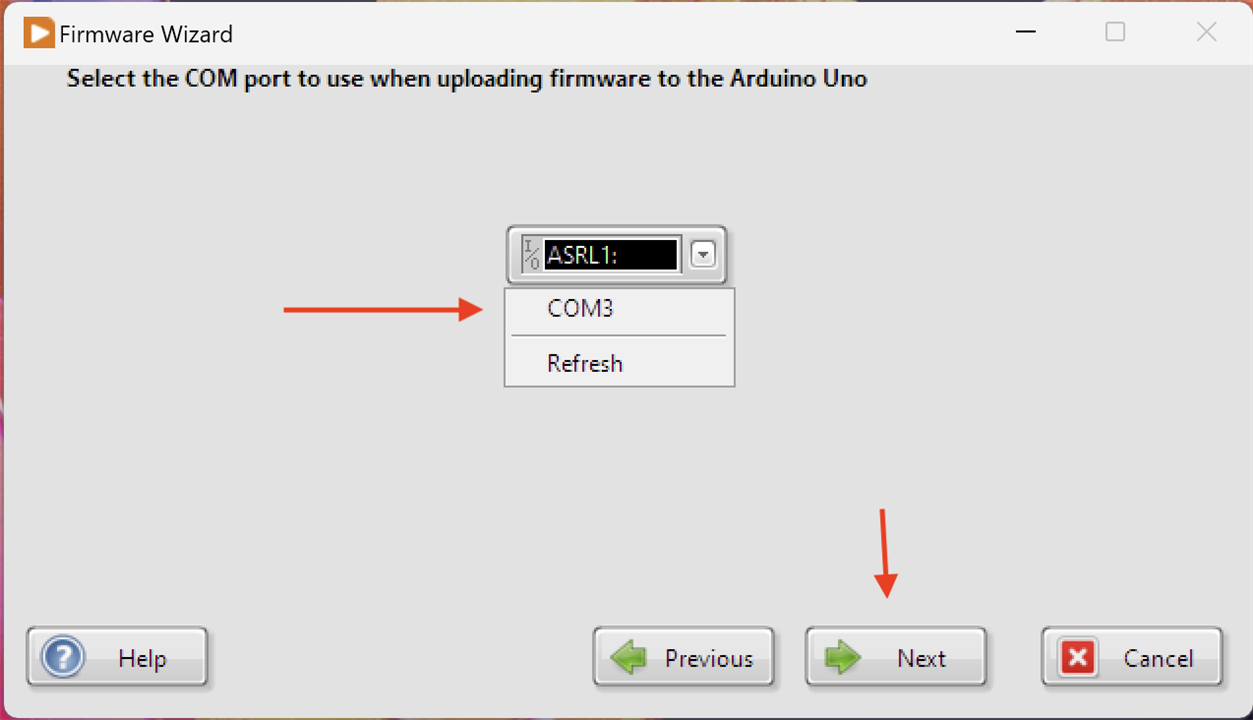
Step 1: Select the correct device |
|
Step 2: Select the right port. In this case, it doesn't have a name to identify the device and I only have the one. Use Device Manager if you aren't sure. |
|
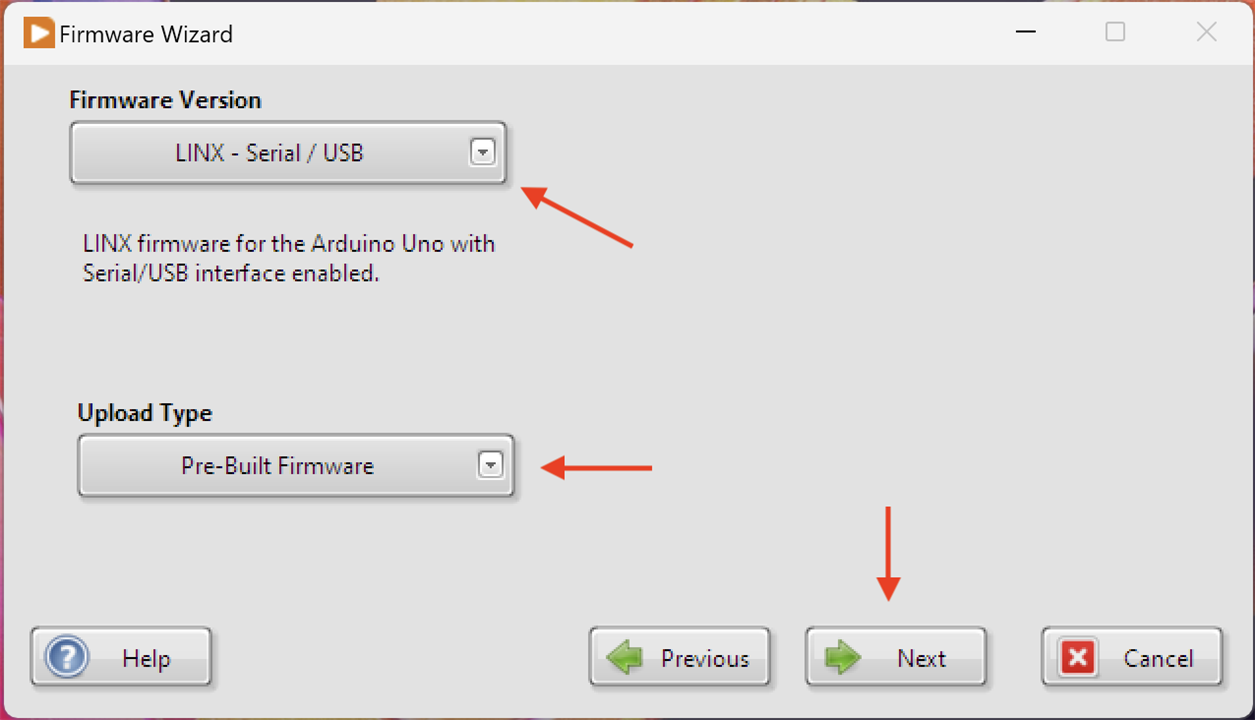
Step 3: Select the Version and Type. |
|
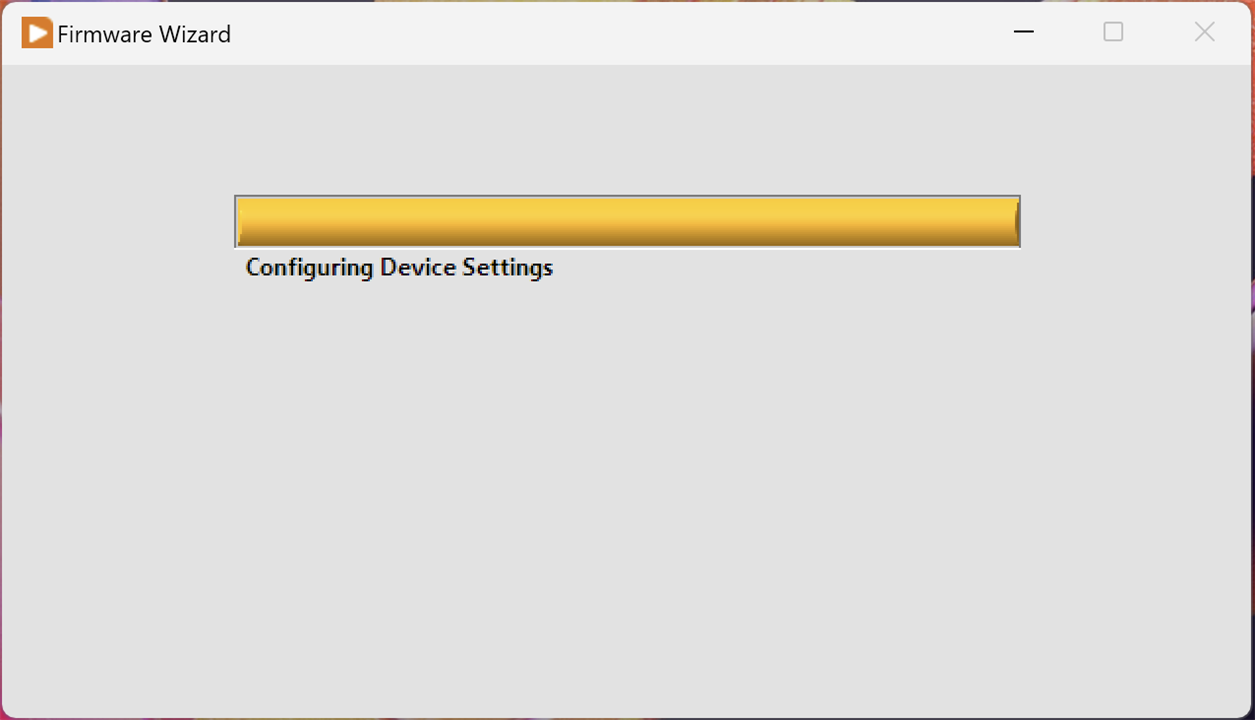
Step 4: Firmware will be installed to the Arduino. Wait for completion. |
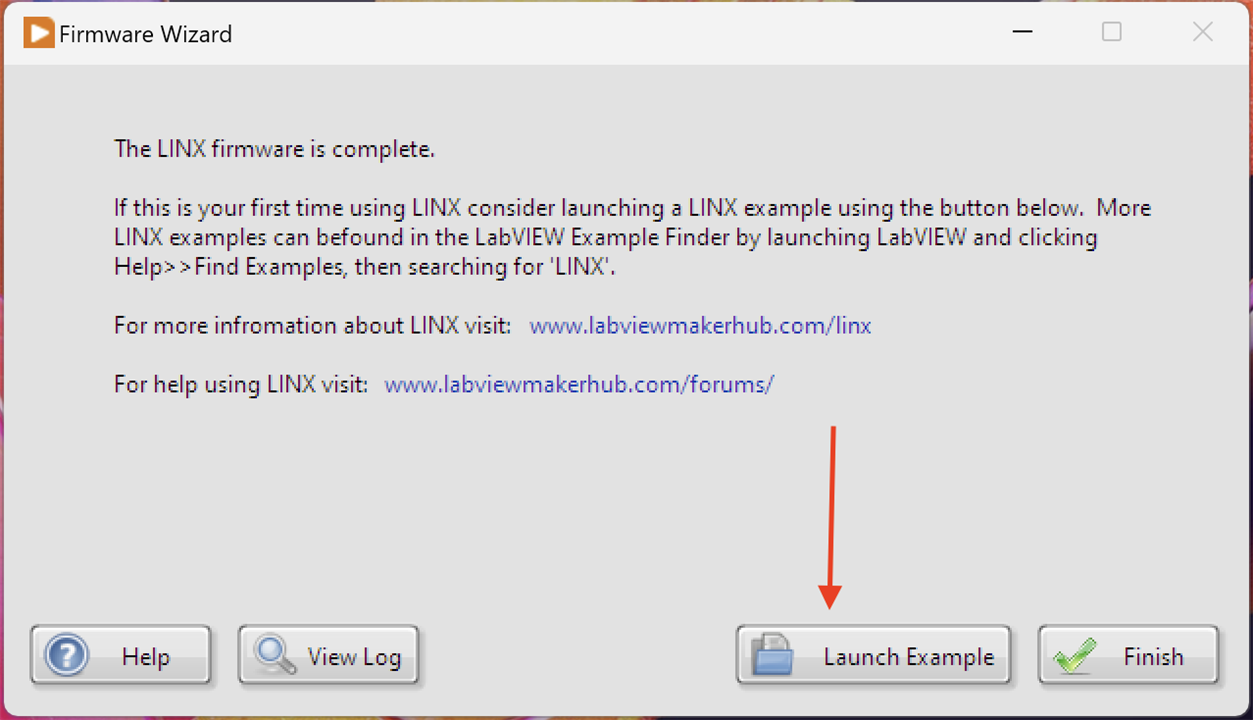
|
Step 5: Success. Launch the example to test it. |

Example Application
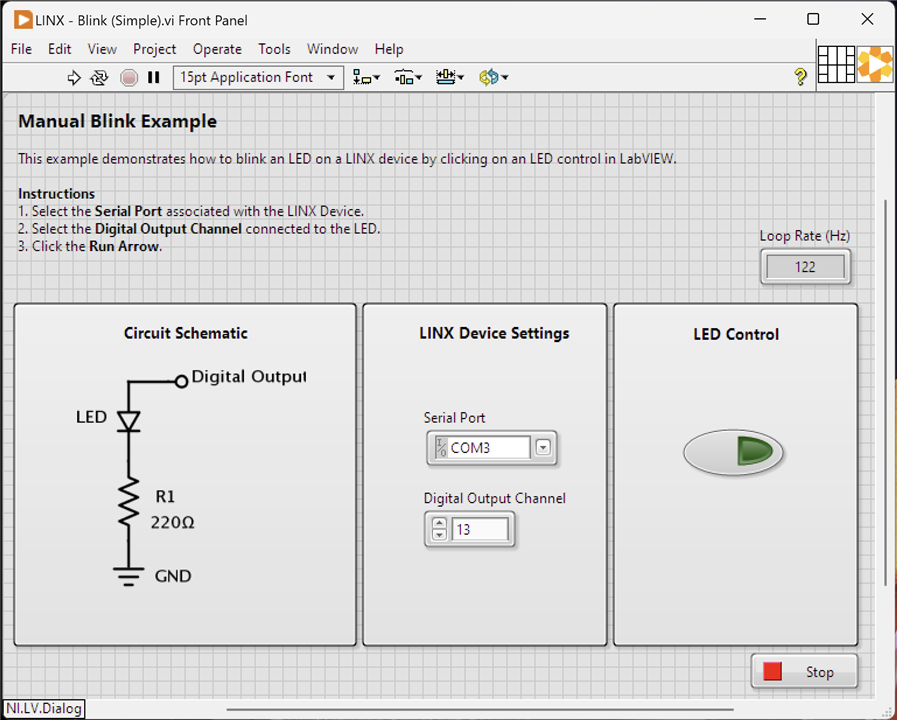
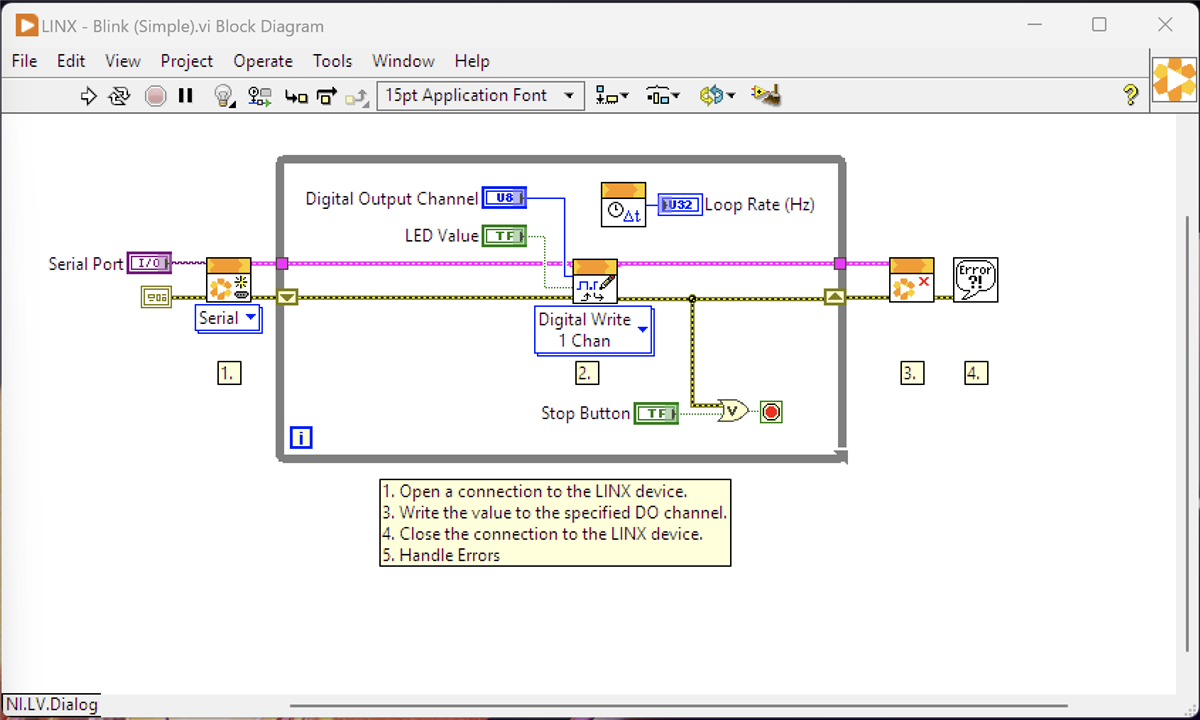
When the example is run, you will be able to turn on and off the in-built LED on Channel 13. Investigate the Block Diagram to see how it works.
| {gallery}Example LINX Application |
|---|
|
Front Panel: Select the right COM port and channel. Click the LED control on and off |
|
Block Diagram: Investigate how it works. |
Celebrate
Call the job a "good 'un" and go to the pub/cake shop/sweet shop/whatever you like. From here, you should be able to research how to add your own custom commands and build up a more complete LabVIEW/Arduino application to do what you want.
Resolving a Problem With Progressing
There's one snag though. For whatever reason, although LabVIEW Community Edition comes with LINX built in it doesn't actually populate the Palette with any of the usable VIs! They ought to be under the Hobbyist Palette or as a separately named Palette but they're just not surfaced. We need to fix that, and it isn't as easy as it ought to be unfortunately - at least, it took me a while to get it sorted.
The following steps should be done with a Block Diagram (BD) open. You can use the example or create a new VI it doesn't matter.
Step 1. Right click on the BD, open the Hobbyist Panel and pin it (it's simpler to do this, you don't actually need to). If you have a version of LabVIEW with the Palette surfaced, you should see something like a LINX icon here; alternative you may see a MakerHub option above the Hobbyist option in the main Palette list. If you do, then you're done!
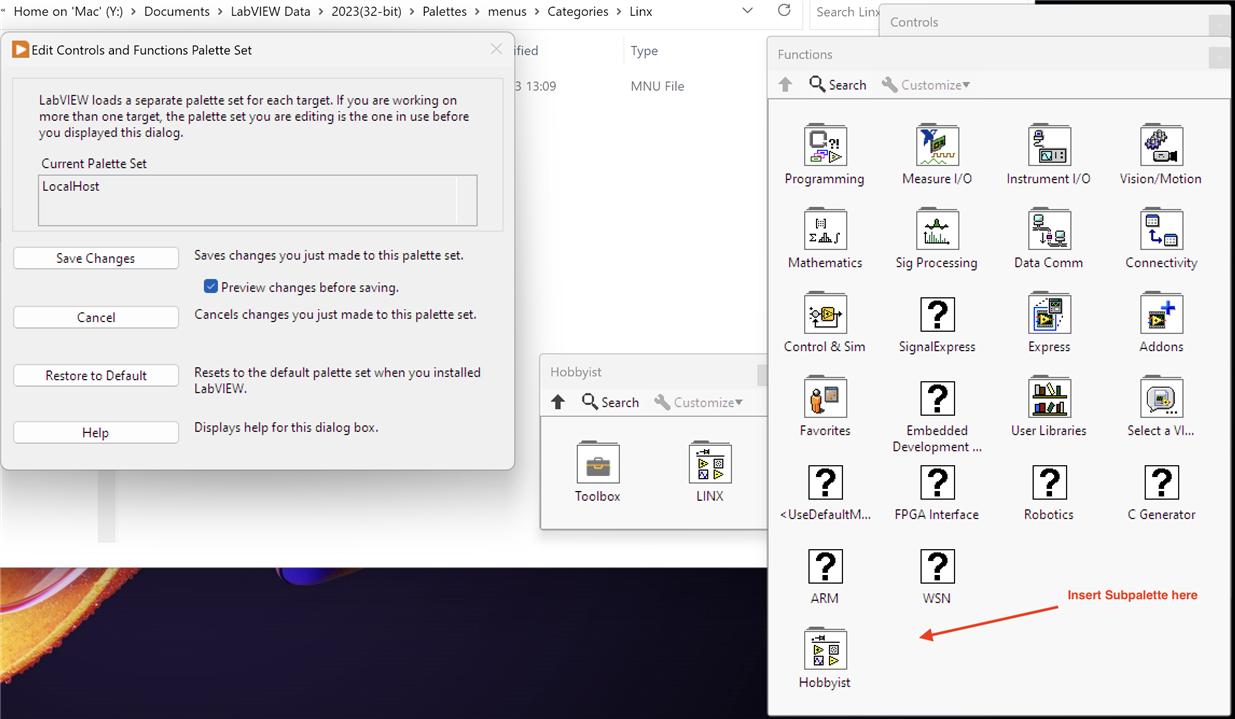
Step 2. From the menu bar for the BD, select Tools > Advanced > Edit Palette Set... You should see the following:
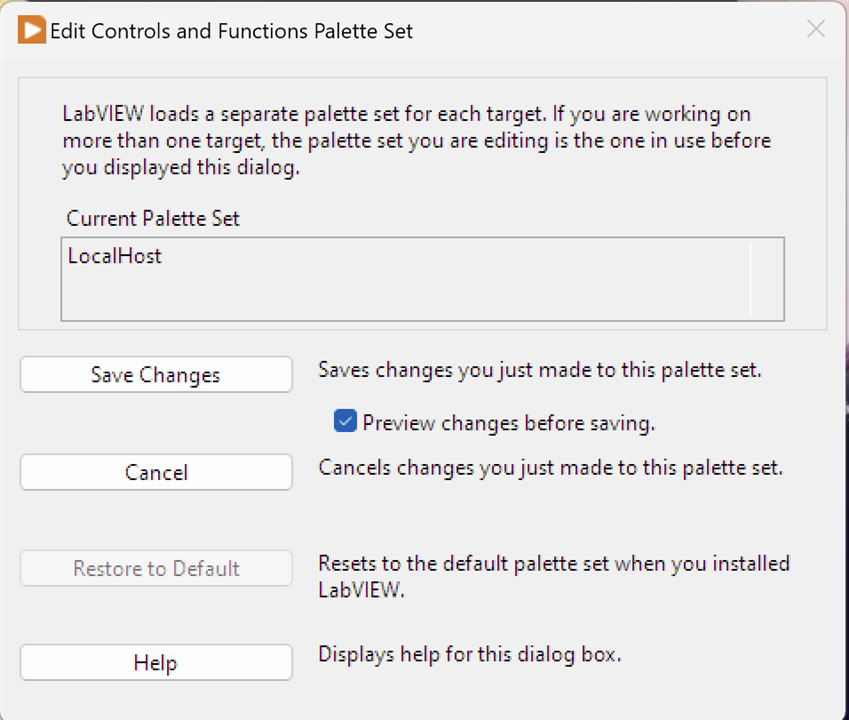
It should also have opened up the main Palette list.
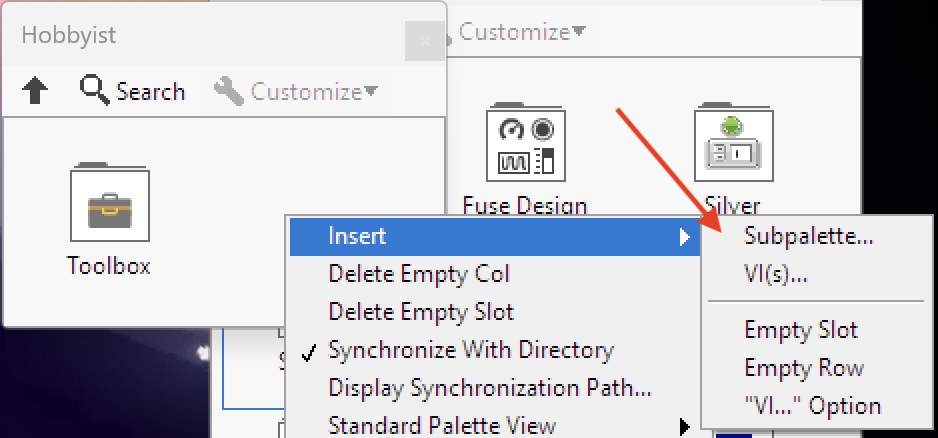
Step 3. In a blank space in Hobbyist, next to Toolkit, right click and select "Insert Subpalette":
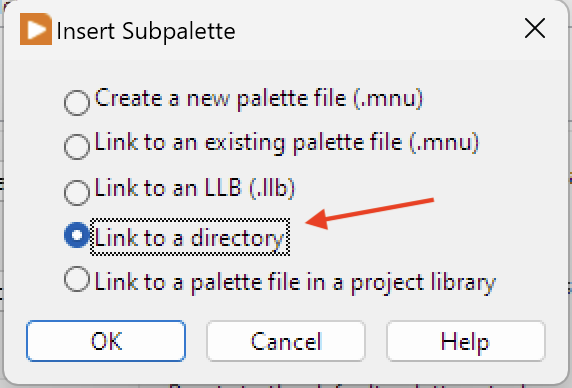
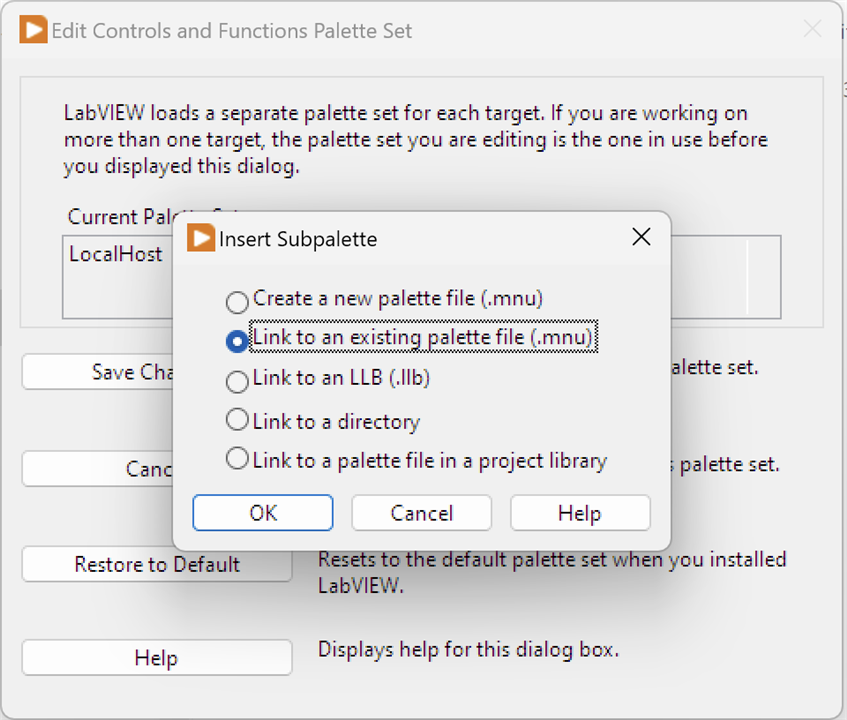
Step 4: Link to a Directory
In the next dialog, select link to a directory and click ok:
Step 5: navigate to the right directory
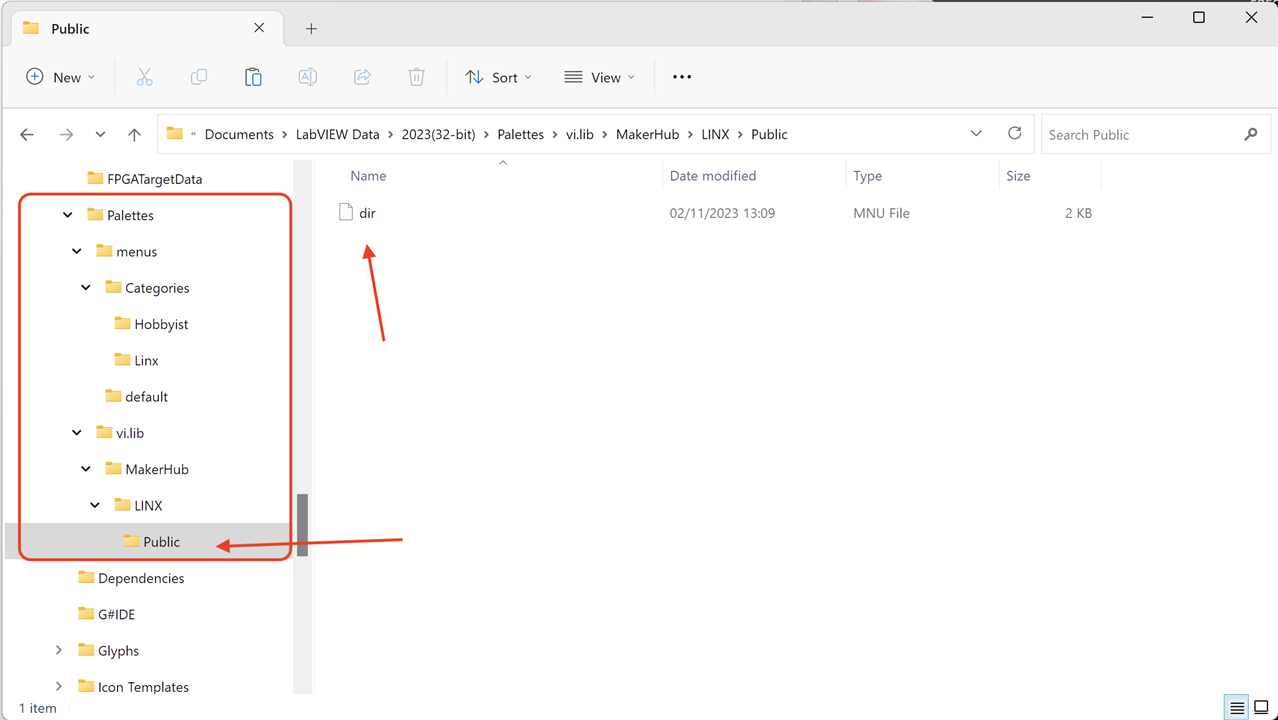
Find the MakerHub directory with LINK in it. You want the Public subdirectory:
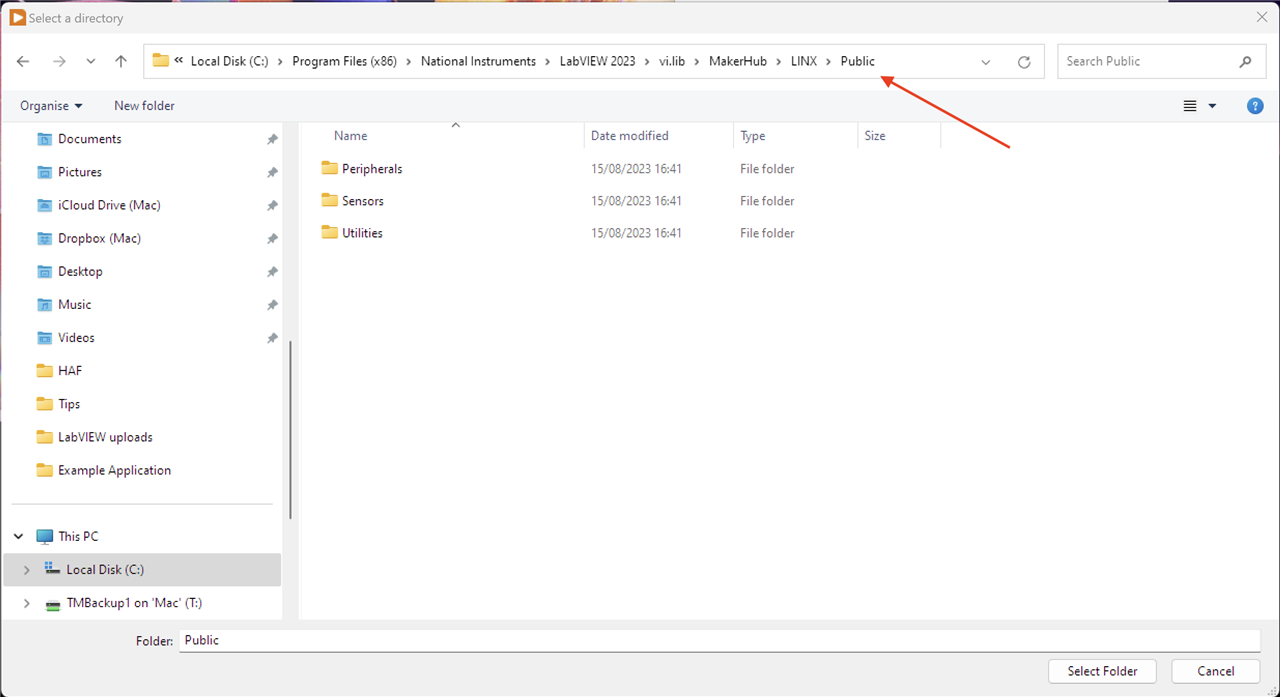
This is on my PC. When it opened, it was pointing to the Hobbyist directory so all I needed was to back track to the LabVIEW 2023 subdirectory, then forward from there. You will need to click Select Folder.
Step 6: Rename the Icon
Right click on the added icon and give it a better name than Public:
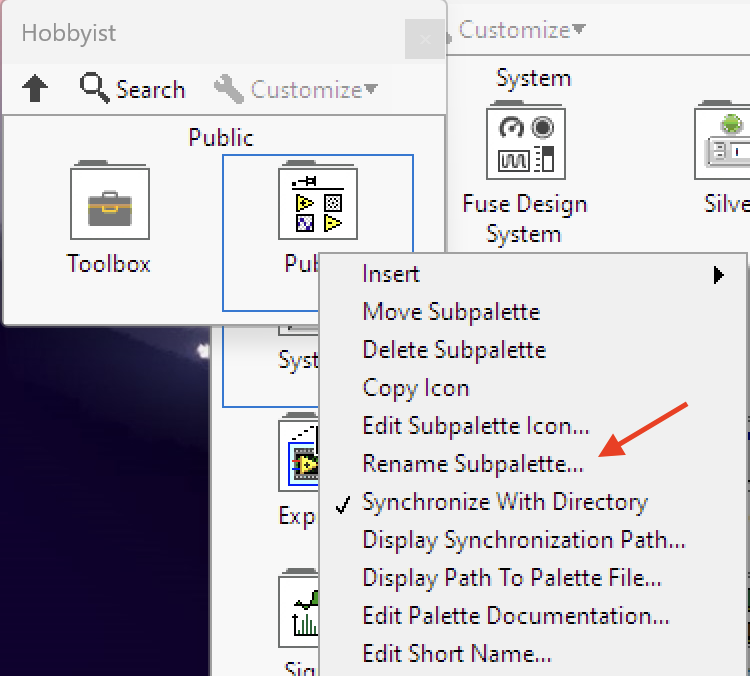
I called it LINX.
Step 7: Save the changes. If you selected Preview, you can see it is saving the changes into directory LabVIEW Data which is a personalised location for changes such as this. After saving the new Palette SHOULD BE there....If not, try restarting LabVIEW.
For me, at this point, it still wasn't there. If I repeated the above steps it would add it back in (with LINX as the name) but it just didn't stick following the save.
Step 8: Try this
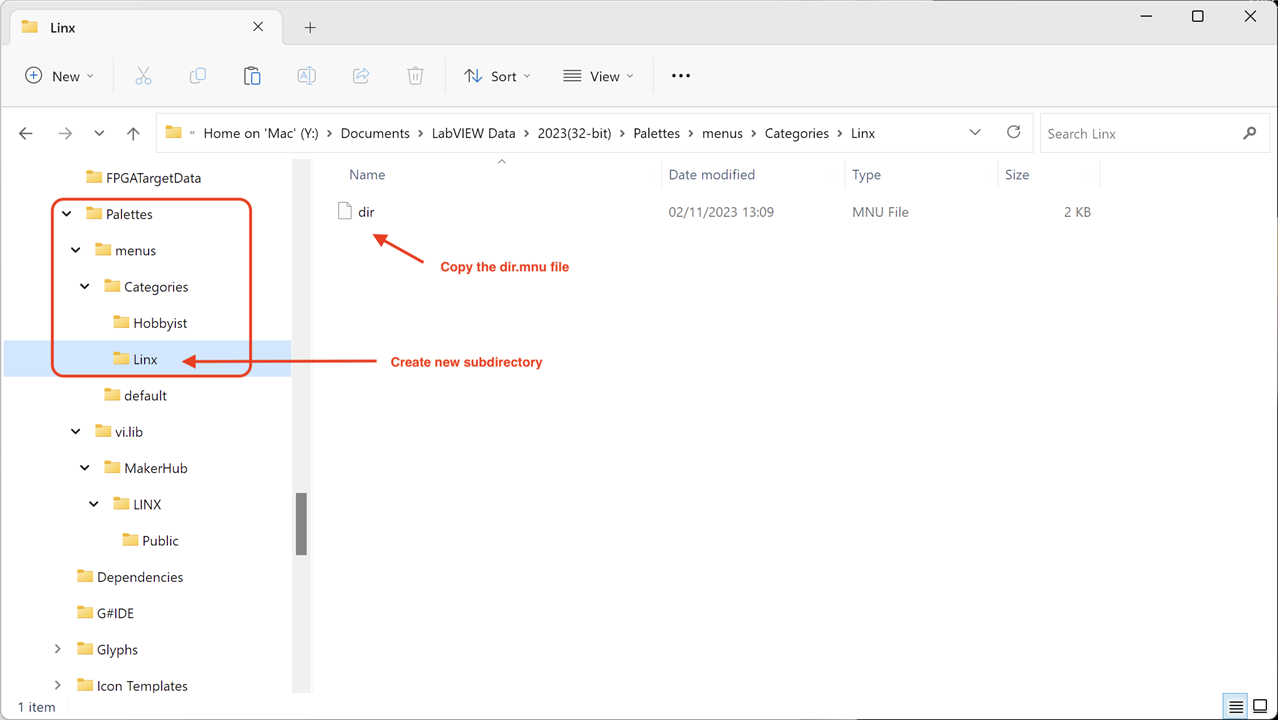
If you open an Explorer window at the directory where it saved the LINX palette you should see a DIR.MNU file
Copy this into a new location:
Now, restart LabVIEW and try again: does it now appear in the Hobbyist Palette? Yes, then all is good if not...
Step 9: Install to a level above Hobbyist
Repeat the above steps to insert a subpalette but this time insert it into the level above where you tried before
You can see that eventually it works, so persevere!
This time on the insert, select an existing palette file:
When the explorer opens, navigate to where you copied the LINK dir.mnu file to and select it. Now when you save changes it is copying a much larger chunk of the Palette to LabVIEW Data directory. At this point I found that I had two LINX palettes appear: one in the location I just inserted, and one in Hobbyist!! Go figure, but it's working it obviously just needed an extra kick. At this point, I deleted one of the entries and left the one in Hobbyist available.
If it still doesn't work at this time, I don't know. I could try and help, but it may be just as easy to try on the NI forum. Really, this ought to get fixed by NI.
Summary
It looks pretty simple to use LINX to interact with Serial devices. There's plenty of examples on YouTube to build from so you should be able to start creating your own test applications.