element14 Community
element14 Community
    Register Log In
  • Site
  • Search
  • Log In Register
  • About Us
  • Community Hub
    Community Hub
    • What's New on element14
    • Feedback and Support
    • Benefits of Membership
    • Personal Blogs
    • Members Area
    • Achievement Levels
  • Learn
    Learn
    • Ask an Expert
    • eBooks
    • element14 presents
    • Learning Center
    • Tech Spotlight
    • STEM Academy
    • Webinars, Training and Events
    • Learning Groups
  • Technologies
    Technologies
    • 3D Printing
    • FPGA
    • Industrial Automation
    • Internet of Things
    • Power & Energy
    • Sensors
    • Technology Groups
  • Challenges & Projects
    Challenges & Projects
    • Design Challenges
    • element14 presents Projects
    • Project14
    • Arduino Projects
    • Raspberry Pi Projects
    • Project Groups
  • Products
    Products
    • Arduino
    • Avnet Boards Community
    • Dev Tools
    • Manufacturers
    • Multicomp Pro
    • Product Groups
    • Raspberry Pi
    • RoadTests & Reviews
  • Store
    Store
    • Visit Your Store
    • Choose another store...
      • Europe
      •  Austria (German)
      •  Belgium (Dutch, French)
      •  Bulgaria (Bulgarian)
      •  Czech Republic (Czech)
      •  Denmark (Danish)
      •  Estonia (Estonian)
      •  Finland (Finnish)
      •  France (French)
      •  Germany (German)
      •  Hungary (Hungarian)
      •  Ireland
      •  Israel
      •  Italy (Italian)
      •  Latvia (Latvian)
      •  
      •  Lithuania (Lithuanian)
      •  Netherlands (Dutch)
      •  Norway (Norwegian)
      •  Poland (Polish)
      •  Portugal (Portuguese)
      •  Romania (Romanian)
      •  Russia (Russian)
      •  Slovakia (Slovak)
      •  Slovenia (Slovenian)
      •  Spain (Spanish)
      •  Sweden (Swedish)
      •  Switzerland(German, French)
      •  Turkey (Turkish)
      •  United Kingdom
      • Asia Pacific
      •  Australia
      •  China
      •  Hong Kong
      •  India
      •  Korea (Korean)
      •  Malaysia
      •  New Zealand
      •  Philippines
      •  Singapore
      •  Taiwan
      •  Thailand (Thai)
      • Americas
      •  Brazil (Portuguese)
      •  Canada
      •  Mexico (Spanish)
      •  United States
      Can't find the country/region you're looking for? Visit our export site or find a local distributor.
  • Translate
  • Profile
  • Settings
Cypress Kits
  • Products
  • Dev Tools
  • Cypress Kits
  • More
  • Cancel
Cypress Kits
Forum CY3280-MBR3 Example with Arduino (Uno/Mega)
  • Blog
  • Forum
  • Documents
  • Polls
  • Files
  • Members
  • Mentions
  • Sub-Groups
  • Tags
  • More
  • Cancel
  • New
Join Cypress Kits to participate - click to join for free!
Actions
  • Share
  • More
  • Cancel
Forum Thread Details
  • Replies 6 replies
  • Subscribers 29 subscribers
  • Views 3208 views
  • Users 0 members are here
Related

CY3280-MBR3 Example with Arduino (Uno/Mega)

cy.wbz
cy.wbz over 11 years ago

Hello!


Today I’m posting an example project using one of our new development kits the  CY3280-MBR3CY3280-MBR3 CapSense evaluation kit which is the third generation of our Mechanical Button Replacement solutions The CapSense device on the kit uses register configuration to enable CapSense features eliminating the need for firmware development This evaluation kit will be available for pre-ordering on 2/25/14 at the following web site http://uk.farnell.com/cypress-semiconductor/cy3280-mbr3/evaluation-board-mbr3-capsense/dp/2422247


image


We want to post to the community an example project that interfaces the  CY3280-MBR3CY3280-MBR3 evaluation kit with Arduino Uno and Mega development board Since this evaluation kit is designed to be a shield users can connect the board to any Arduino compatible board The kit will also include examples that work with the CY8CKIT-042 Pioneer Board. We will post this in the coming days.


The  CY3280-MBR3CY3280-MBR3 evaluation kit interfaces with our EZ-Click software tool We will be posting an update to the EZ-Click software version 2.0 on 2/25/14 that includes support for the MBR3 device family The software will be available at the following address


www.cypress.com/go/EZ-Click


Forum Post Attachments:

At the bottom of this post we are including the following items:

  • EZ-Click MBR3 example project
  • Arduino Sketch
  • Example Guide
 
Software:
 
Please note that both the kit and the software will be posted on 2/24/14. The following example will need software versions:
  • Arduino 1.0.5
  • EZ-Click 2.0


Firmware:

What is important to understand is that there is no firmware development for the MBR3 device family. The MBR3 devices are configured over I2C setting registers inside of the device to enable or disable certain features. On the MBR3 kit we support four CapSense buttons and one Proximity loop sensor. This kit can easily provide a CapSense front panel to your design.


We have provided in the download section of the post the EZ-Click project for the MBR3 kit and the Arduino sketch that supports both the Uno and the Mega formats.


The EZ-Click project provides all of the configuration values for the CapSense buttons and settings. The output file is used in the Arduino sketch to configure the MBR3 device.


The Arduino code configures the MBR3 over I2C (two wire interface) using the 128 byte configuration data generated using the EZ-Click tool. The code uses the Arduino built in library called “wire” for the I2C communication. Here the Arduino board behaves as master and the MBR3 silicon will be a Slave on the I2C bus. The 128 bytes of configuration data is copied from the EZ-Click generated IIC file and loaded in the configdata[] array.

The wire I2C library has a limitation that only a maximum of 32 bytes can be sent by a single call of wire.write (&data,num_of_bytes). Hence in the Arduino code we sets of 31 bytes of configuration Data along with the one byte offset address until all the 128 bytes are sent.


After this is complete we send the SAVECHECKCRC and SWRESET commands for the MBR3 device to save the configuration data and apply the new loaded configuration The Arduino code uses the pin 2 interrupt feature on Arduino board and Host interrupt feature on  CY3280-MBR3CY3280-MBR3 board to determine when to read the button status and display the same on serial monitor The MBR3 kit provides a low pulse(HIGH>LOW>HIGH on the HostINT pin whenever a sensor touch or proximity status changes


Attached to this example is an example guide that can help you navigate through the example.


Hardware Connections:


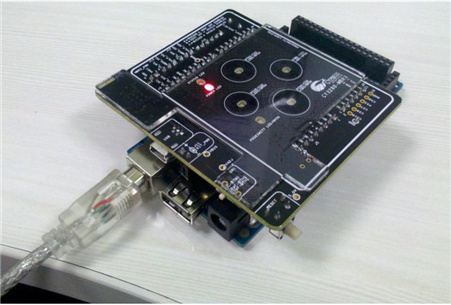
For this example the user will need to connect the  CY3280-MBR3CY3280-MBR3 evaluation kit to the Arduino Uno or Mega boards


Note When using  CY3280-MBR3CY3280-MBR3 with Uno please short R71 and R72 zero pads This is because the Uno board has the I2C lines on J2 instead of J3


The  CY3280-MBR3CY3280-MBR3 has a number of configurable options via jumpers Please make sure that the jumpers are in the following configurations

  • Shunt the jumper J11-1 to J11-2
  • Shunt the jumper J12-1 to J12-2
  • Shunt the I2C selection jumper J13 between J13-2 and J13-3
  • Shunt the I2C selection jumper J14 between J14-2 and J14-3.
  • Jumper 15: Keep the jumper J15 in configuration A as indicated on the board silkscreen using the 3 shunts i.e.
    • Shunt J15-1 to J15-2
    • Shunt J15-3 to J15-4
    • Shunt J15-5 to J15-6


Test Your Project:


Program the Arduino Uno or Mega development kit with the Sketch and power up the kit The Arduino base board will communicate to the  kit configuring the device over I2C and then monitor the device for any button touches on the kit These button touches will correspond to LED flashes on the  CY3280-MBR3CY3280-MBR3 Kit The button status from the MBR3 kit can be monitored on the serial monitor of the Arduino IDE


I hope this example project helps you. We will have more information on the MBR3 kit in the coming days. We will include examples on how to use the MBR3 kit with your Pioneer Board. Stay tuned!


Best,

Matthew Buza

Attachments:
MBR3 - Arduino_HOST_INT.zip
Arduino Sketch - MBR3_Read_Status.zip
  • Sign in to reply
  • Cancel

Top Replies

  • cy.wbz
    cy.wbz over 11 years ago in reply to DAB +1
    DAB, Thanks for the comment. So the device (silicon) can support up to 30 cm with an SNR of at least 5:1. The kit supports 5-6 cm. The design guide includes details on best practices when designing with…
  • cy.wbz
    cy.wbz over 11 years ago

    Hello!


    Updated the post to fix some text and update a hyperlink in the example project text.


    Thanks!

    -Matt

    • Cancel
    • Vote Up 0 Vote Down
    • Sign in to reply
    • Cancel
  • DAB
    DAB over 11 years ago

    Nice video.


    How reliable is the device set to 30 cm detection?

    Also, what are the recommended temperature range for the kit?


    Very interesting device.

    DAB

    • Cancel
    • Vote Up 0 Vote Down
    • Sign in to reply
    • Cancel
  • cy.wbz
    cy.wbz over 11 years ago in reply to DAB

    DAB,


    Thanks for the comment.


    So the device (silicon) can support up to 30 cm with an SNR of at least 5:1. The kit supports 5-6 cm.  The design guide includes details on best practices when designing with the device. The design guides are linked on the following web page:


    http://www.cypress.com/capsensembr3/


    Click on the 'Documentation' tab.


    I'm not sure about the temperature range of the kit. I will have to check with the kit manufacturing teams on that one. Safe to say it works fine at room temperature image


    The device datasheet specs temperature ranges from -40-85C


    Thanks,

    Matt

    • Cancel
    • Vote Up +1 Vote Down
    • Sign in to reply
    • Cancel
  • elimathew
    elimathew over 10 years ago

    Guys this projects works nice but when i try to understand the code its quite difficult because the some comments in the codes I feel are wrong and leads to confusion any help

    • Cancel
    • Vote Up 0 Vote Down
    • Sign in to reply
    • Cancel
  • Former Member
    Former Member over 9 years ago in reply to elimathew

    The code works great ! The Capsense register mapping comes handy in understanding addressing and the bits to be set for different purposes (Buzz Frequency, ProxySensor Status etc) . Here is the link to the TRM -  http://www.cypress.com/file/127221/download.

    The config didn't work great with CY3280-MBR3CY3280-MBR3 Kit (Proxy didn't work), but i got the configuration from EZ Click 2.0 (opened it in Bridge Control Panel) and used that instead of the one given in the code. Works like a charm.


    I found a few comments that didn't make sense like //request 6 bytes from slave device #2 , I guess that should be 2 bytes, but you can figure that out with TRM.

    • Cancel
    • Vote Up 0 Vote Down
    • Sign in to reply
    • Cancel
  • rgostlin
    rgostlin over 9 years ago

    The example steps guide.doc link does not seem to work. where can I get a copy of this document?

    • Cancel
    • Vote Up 0 Vote Down
    • Sign in to reply
    • Cancel
element14 Community

element14 is the first online community specifically for engineers. Connect with your peers and get expert answers to your questions.

  • Members
  • Learn
  • Technologies
  • Challenges & Projects
  • Products
  • Store
  • About Us
  • Feedback & Support
  • FAQs
  • Terms of Use
  • Privacy Policy
  • Legal and Copyright Notices
  • Sitemap
  • Cookies

An Avnet Company © 2025 Premier Farnell Limited. All Rights Reserved.

Premier Farnell Ltd, registered in England and Wales (no 00876412), registered office: Farnell House, Forge Lane, Leeds LS12 2NE.

ICP 备案号 10220084.

Follow element14

  • X
  • Facebook
  • linkedin
  • YouTube