element14 Community
element14 Community
    Register Log In
  • Site
  • Search
  • Log In Register
  • Community Hub
    Community Hub
    • What's New on element14
    • Feedback and Support
    • Benefits of Membership
    • Personal Blogs
    • Members Area
    • Achievement Levels
  • Learn
    Learn
    • Ask an Expert
    • eBooks
    • element14 presents
    • Learning Center
    • Tech Spotlight
    • STEM Academy
    • Webinars, Training and Events
    • Learning Groups
  • Technologies
    Technologies
    • 3D Printing
    • FPGA
    • Industrial Automation
    • Internet of Things
    • Power & Energy
    • Sensors
    • Technology Groups
  • Challenges & Projects
    Challenges & Projects
    • Design Challenges
    • element14 presents Projects
    • Project14
    • Arduino Projects
    • Raspberry Pi Projects
    • Project Groups
  • Products
    Products
    • Arduino
    • Avnet & Tria Boards Community
    • Dev Tools
    • Manufacturers
    • Multicomp Pro
    • Product Groups
    • Raspberry Pi
    • RoadTests & Reviews
  • About Us
    About the element14 Community
  • Store
    Store
    • Visit Your Store
    • Choose another store...
      • Europe
      •  Austria (German)
      •  Belgium (Dutch, French)
      •  Bulgaria (Bulgarian)
      •  Czech Republic (Czech)
      •  Denmark (Danish)
      •  Estonia (Estonian)
      •  Finland (Finnish)
      •  France (French)
      •  Germany (German)
      •  Hungary (Hungarian)
      •  Ireland
      •  Israel
      •  Italy (Italian)
      •  Latvia (Latvian)
      •  
      •  Lithuania (Lithuanian)
      •  Netherlands (Dutch)
      •  Norway (Norwegian)
      •  Poland (Polish)
      •  Portugal (Portuguese)
      •  Romania (Romanian)
      •  Russia (Russian)
      •  Slovakia (Slovak)
      •  Slovenia (Slovenian)
      •  Spain (Spanish)
      •  Sweden (Swedish)
      •  Switzerland(German, French)
      •  Turkey (Turkish)
      •  United Kingdom
      • Asia Pacific
      •  Australia
      •  China
      •  Hong Kong
      •  India
      •  Japan
      •  Korea (Korean)
      •  Malaysia
      •  New Zealand
      •  Philippines
      •  Singapore
      •  Taiwan
      •  Thailand (Thai)
      •  Vietnam
      • Americas
      •  Brazil (Portuguese)
      •  Canada
      •  Mexico (Spanish)
      •  United States
      Can't find the country/region you're looking for? Visit our export site or find a local distributor.
  • Translate
  • Profile
  • Settings
Atmel Xplained Boards
  • Products
  • Dev Tools
  • Atmel Xplained Boards
  • More
  • Cancel
Atmel Xplained Boards
Blog Boot Debian from an SD Card on the SAMA5D3 Xplained
  • Blog
  • Forum
  • Documents
  • Files
  • Members
  • Mentions
  • Sub-Groups
  • Tags
  • More
  • Cancel
  • New
Join Atmel Xplained Boards to participate - click to join for free!
  • Share
  • More
  • Cancel
Group Actions
  • Group RSS
  • More
  • Cancel
Engagement
  • Author Author: cstanton
  • Date Created: 25 Apr 2014 12:08 AM Date Created
  • Views 6005 views
  • Likes 5 likes
  • Comments 27 comments
  • sama5d3_xplained
  • sama5d3-ek
  • atmel_sama5d3
  • sama5d3
  • sama
  • atmel_sama5d3_xplained
  • atmel
  • xplained
Related
Recommended

Boot Debian from an SD Card on the SAMA5D3 Xplained

cstanton
cstanton
25 Apr 2014

So when I wanted to build a version of Linux for the SAMA5D3 board that wasn't Yocto or a demonstration image, then I started to struggle to find solutions.image


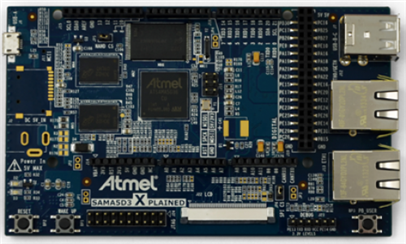
Here I present the steps I took to have Debian working on the SAMA5D3, I also have a .IMG of the SD Card I created available.


I set this up using a laptop with Debian Linux installed; I imagine it doesn't matter which version of Linux you have; you could probably use Cygwin on windows.


You will need:


  • An SD card (I tend to work with at least a Class 6, 8GByte)
  • An Atmel SAMA5D3Atmel SAMA5D3 board with a Micro-A to USB-A cable (should come with the board)
  • A computer with Linux (unless you're able to translate the steps to Windows, feel free) with an internet connection
  • An FTDI 3v3 TTL type cableFTDI 3v3 TTL type cable


I built the SAMA5D3 image on an installation of Debian Wheezy, 64bit. Because the pre-compiled GCC compiler is 32bit you need to have the i386 architecture added and some packages installed (you'll have to find the relevant equivalent for your Linux distribution):


sudo dpkg --add-architecture i386

sudo apt-get update

sudo apt-get install libc6:i386 libstdc++6:i386 libncurses5:i386 zlib1g:i386 -y


Open up a terminal, create a directory to work in and run the following commands to grab Linaro, the ARM cross compiler:


    wget -c http://releases.linaro.org/latest/components/toolchain/binaries/gcc-linaro-arm-linux-gnueabihf-4.9-2014.09_linux.tar.xz
    tar x -f gcc-linaro-arm-linux-gnueabihf-4.9-2014.09_linux.tar.xz
    export CC=`pwd`/gcc-linaro-arm-linux-gnueabihf-4.9-2014.09_linux/bin/arm-linux-gnueabihf-


The version of the cross compiler will change as it is updated, if you don't keep up to date with it then you may discover unexpected errors as the make files below might expect a more recent version. You can grab the latest compiled binary of gcc-linaro here.


Then test the version of gcc:


    ${CC}gcc --version


Which should output something like this:


    arm-linux-gnueabihf-gcc (crosstool-NG linaro-1.13.1-4.8-2014.03 - Linaro GCC 2014.03) 4.8.3 20140303 (prerelease)
    Copyright (C) 2013 Free Software Foundation, Inc.
    This is free software; see the source for copying conditions.  There is NO
    warranty; not even for MERCHANTABILITY or FITNESS FOR A PARTICULAR PURPOSE.


Now we need to grab U-Boot and patch it for the SAMA5D3, you will need to have GIT installed on your distribution of Linux:


    git clone git://git.denx.de/u-boot.git
    cd u-boot/
    git checkout v2014.04 -b tmp
    wget -c https://raw.github.com/eewiki/u-boot-patches/master/v2014.04/0001-sama5d3_xplained-uEnv.txt-bootz-n-fixes.patch
    patch -p1 < 0001-sama5d3_xplained-uEnv.txt-bootz-n-fixes.patch
    make ARCH=arm CROSS_COMPILE=${CC} distclean
    make ARCH=arm CROSS_COMPILE=${CC} sama5d3_xplained_mmc_config
    make ARCH=arm CROSS_COMPILE=${CC}


If you're reading this and you have the SAMA5D3-EK, then the steps are different in which patch you get and apply (thanks mathivanan) :


git clone git://git.denx.de/u-boot.git

cd u-boot/

git checkout v2014.04 -b tmp

wget -c https://raw.githubusercontent.com/eewiki/u-boot-patches/master/v2014.04/0001-sama5d3xek-uEnv.txt-bootz-n-fixes.patch

patch -p1 < 0001-sama5d3xek-uEnv.txt-bootz-n-fixes.patch

make ARCH=arm CROSS_COMPILE=${CC} distclean

make ARCH=arm CROSS_COMPILE=${CC} sama5d3xek_mmc_config

make ARCH=arm CROSS_COMPILE=${CC}


Now time to build a kernel for the board!


    git clone https://github.com/RobertCNelson/armv7_devel.git
    cd armv7_devel/

As of the time of writing the current mainline kernel was v3.14:


    git checkout origin/v3.14.x-sama5-armv7 -b tmp
    ./build_kernel.sh


After the kernel has compiled, you're presented with a menu config screen where you can include or build additional modules. For example, you can incorporate GSPCA webcam support.


Now, we want to acquire the root system files for Debian, which are handily available (check https://rcn-ee.net/deb/minfs/wheezy/ for latest version(s)) :


    wget -c https://rcn-ee.net/deb/minfs/wheezy/debian-7.5-minimal-armhf-2014-07-07.tar.xz
    tar x -f debian-7.4-minimal-armhf-2014-04-01.tar.xz

Then insert your SDCard, either using a USB SDCard reader or one on your computer if you have one. I had to use a USB SDCard reader. In Linux we can type "dmesg" at a terminal to give us the /dev/ information for the device we've plugged in (for example mine's /dev/sdb), in the following examples, we use mmcblk0, so just replace it for your relevant device id.


In the following steps we will erase the SDCard and set it up with the relevant partitions:


    export DISK=/dev/mmcblk0
    sudo dd if=/dev/zero of=${DISK} bs=1M count=16

    sudo sfdisk --in-order --Linux --unit M ${DISK} <<-__EOF__
    1,48,0xE,*
    ,,,-
    __EOF__


If the linux system you're using identifies the device as something similar to mmcblk0 then to format and mount, execute:


    sudo mkfs.vfat -F 16 ${DISK}p1 -n boot
    sudo mkfs.ext4 ${DISK}p2 -L rootfs

    sudo mkdir -p /media/boot/
    sudo mkdir -p /media/rootfs/


    sudo mount ${DISK}p1 /media/boot/
    sudo mount ${DISK}p2 /media/rootfs/

Else if the device identifies itself as something similar to sdb then to format and mount, execute:


    sudo mkfs.vfat -F 16 ${DISK}1 -n boot
    sudo mkfs.ext4 ${DISK}2 -L rootfs


    sudo mkdir -p /media/boot/
    sudo mkdir -p /media/rootfs/


    sudo mount ${DISK}1 /media/boot/
    sudo mount ${DISK}2 /media/rootfs/

Note: You may not need to mount the partitions as new(ish/er) distributions tend to automatically mount partitions upon detection/insertion/creation.


Create a text file using your editor of choice (for the record I prefer vi ...) called uEnv.txt and put in it the following, the sama board uses the 'mmc' naming convention:


    optargs=quiet init=/lib/systemd/systemd
    console=ttyS0,115200
    mmcroot=/dev/mmcblk0p2 ro
    mmcrootfstype=ext4 rootwait fixrtc


Now we'll extract and copy across all of the necessary files, the locations should all be relative to the initial directory we've been working in and you created, they should all be executed as root/sudo:


    sudo cp -v ./u-boot/spl/u-boot-spl.bin /media/boot/BOOT.BIN
    sudo cp -v ./u-boot/u-boot.img /media/boot/


    sudo cp -v ./uEnv.txt /media/boot/


    sudo tar -xvp --same-owner --numeric-owner -f ./debian-0.4-minimal-armhf-2014-04-01/armhf-rootfs-debian-wheezy.tar -C /media/rootfs


    sudo cp -v ./armv7_devel/deploy/3.14.0-sama5-armv7-r9.zImage /media/boot/zImage
   
    sudo mkdir -p /media/boot/dtbs/
    sudo tar xvo -f 3.14.0-sama5-armv7-r9-dtbs.tar.gz -C /media/boot/dtbs


    sudo tar xv -f 3.14.0-sama5-armv7-r9-modules.tar.gz -C /media/rootfs

And to setup the partition mounting (if you don't like vi, replace with nano, emacs or whatever your preferred editor is):


    sudo vi /media/rootfs/etc/fstab


Insert into it (in vi, press 'i' on your keyboard, then type it in, or copy/paste it into your terminal window):


    /dev/mmcblk0p2  /          auto  errors=remount-ro  0  1
    /dev/mmcblk0p1  /boot/uboot auto  defaults            0  2


Close and save the file (in vi, press ESC then type in : x (colon then x) and hit enter, which saves and quits).


Then setup the network interfaces:


    sudo vi /media/rootfs/etc/network/interfaces


With the following at the end of the file (you can use your cursor keys to navigate vi until you get to where you want to insert):


    allow-hotplug eth0
    iface eth0 inet dhcp

    allow-hotplug eth1
    iface eth1 inet dhcp


And setup our serial line:


    sudo vi /media/rootfs/etc/inittab


With the following at the end of the file:


    T0:23:respawn:/sbin/getty -L ttyS0 115200 vt102


Now we want to unmount our SD Card, so close down any windows/open files that're on the card and run the following from a terminal:


    sync
    sudo umount /media/boot
    sudo umount /media/rootfs


Our SD Card should be setup! The only thing to do now, is remove the jumper at JP5 on the SAMA5D3 to ensure it'll boot from the SD Card, connect a serial cable to the debug header J23 so we can see what it's doing, with the settings in minicom/Putty/your terminal editor of choice:


    Baud:        115200
    Data Bits:    8
    Stop Bits:    1
    Parity:        None
    Flow Control:    None


Then connect the USB cable to power the board, then press the reset button for good measure and watch it boot up!


The login details are:


User: root

Pass: root


User: debian

Pass: temppwd

When I created this image from scratch initially I encountered a number of problems. The main part is that the SD Card needs to be setup as root, with the files copied over as root. This is because of the permission level required to read the SD Card when the SAMA5D3 board loads up.


The other problem I encountered was the settings for uEnv were confusing me on the eewiki guide.


Something that might trip up anyone following this guide word for word in future is if the kernel version increases, this will need to be altered in the filenames in the guide above. Failing that, the SD Card img I have prepared should help.


The SD Card IMG file is available here and is sized at approximately 544MByte, and an MD5 to check it against. IT Support lost the file Q_Q;


If you have any questions, login/register to the site and add a comment below. If I've made an error, let me know, chances are that I have.


I've also found alternate guides, which worked well when building on Debian Jessie.

  • Sign in to reply

Top Comments

  • Former Member
    Former Member over 11 years ago in reply to sjcchuma +2
    Same here, but i do figured it out. In uEnv.txt file, comment out all 4 lines, and put there only this: fdt_file=/dtbs/sama5d36ek.dtb The put this line g_serial into /etc/modules empty file to load the…
  • Former Member
    Former Member over 11 years ago in reply to Former Member +1
    Okay, tested on your image: # modprobe g_serial This should make the device show up in dmesg on the host # getty -L ttyGS0 115200 vt102 And now you should be able to picocom/minicom into it over usb!
  • Former Member
    Former Member over 11 years ago in reply to Former Member +1
    I figured out the way to do it. Now SAMA5D3x-EK runs the debian. I just changed way of building the u-boot: git clone git://git.denx.de/u-boot.git cd u-boot/ git checkout v2014.04 -b tmp wget -c https…
  • davorin
    davorin over 11 years ago in reply to cstanton

    Okay...thanks (o;


    Wonder why with your setup it sees only 6 MTD partitions on the NAND flash whereas when booting from NAD it sees 8 paritions...

    Maybe that's why I get this bit flip errors during boot?


    But at least I have now a small Debian running from NAND where I can add packages as I like...


    root@arm:~# df -k

    Filesystem     1K-blocks  Used Available Use% Mounted on

    rootfs            220312 58036    157440  27% /

    ubi0:rootfs       220312 58036    157440  27% /

    devtmpfs          126368     0    126368   0% /dev

    tmpfs              25288   116     25172   1% /run

    tmpfs               5120     0      5120   0% /run/lock

    tmpfs              50560     0     50560   0% /run/shm

    tmpfs             126424     0    126424   0% /tmp


    Always do from time to time a "apt-get clean" to save on space (o;

    • Cancel
    • Vote Up 0 Vote Down
    • Sign in to reply
    • More
    • Cancel
  • cstanton
    cstanton over 11 years ago in reply to davorin

    https://rcn-ee.net/deb/minfs/wheezy/


    rootfs had been updated which is why the URL didn't work.

    • Cancel
    • Vote Up 0 Vote Down
    • Sign in to reply
    • More
    • Cancel
  • davorin
    davorin over 11 years ago

    eth1 seems to be working after boot...though it also ignores the environment setting "eth1addr" from u-boot....

    • Cancel
    • Vote Up 0 Vote Down
    • Sign in to reply
    • More
    • Cancel
  • davorin
    davorin over 11 years ago

    Followed now this guide with some minor changes as the debian rootfs URL isn't valid anymore...


    Booted out of the box...but eth0 is still unusable at all....not even with manual configuration...


    [8.700000] IPv6: ADDRCONF(NETDEV_UP): eth1: link is not ready                                                                                                              [8.980000] IPv6: ADDRCONF(NETDEV_UP): eth0: link is not ready                                                                                                              [   10.490000] macb f0028000.ethernet eth0: link up (1000/Full)                                                                                                                [   10.490000] IPv6: ADDRCONF(NETDEV_CHANGE): eth0: link becomes ready                                                                                                         [   20.490000] macb f0028000.ethernet eth0: link down                                                                                                                         
    • Cancel
    • Vote Up 0 Vote Down
    • Sign in to reply
    • More
    • Cancel
  • cstanton
    cstanton over 11 years ago in reply to vsluiter

    Hivsluiter,


    Sorry, not at all, I just meant it as that's how I discover/discovered the answers to what you're asking about, I feel there's no such thing as a dumb question and that may unintentionally come across as sarcasm and condescending as it does to some but it's just my genuine thought and I was trying to show what search terms I used to find the answer to your query(ies).


    For the Linux market it seems like there's just a bunch of tools available, and once Linux is running you're on your own.


    I feel the same way, believe it or not, because I find a lot of people have managed to explain to others how to get so far and then we don't hear anything because they've not documented what else they have done or just assume people know how to do it.


    This is the main issue I have with open source in general, it's like an elephant's graveyard of non-maintained packages scattered everywhere and for some software that you may rely on one day, the next day it could no longer be maintained and you're forced to either learn how to code it from scratch and pick up the maintenance of it (if they shared the source code) or let it die and find another solution.


    I don't have all of the answers, but I do search a lot to find them.


    I'd like to be able to setup my PWM with the register settings from Atmel. Can I still do that, or do I have to write my own drivers?


    My understanding is that PWM is supported by the kernel drivers that are in Linux4SAM which Linaro linux uses (which this guide pulls from I think, there's more information at at91.com. To interface with the PWM pinouts this is where I think sysfs comes in; but I haven't dedicated time to working with it myself yet.


    Where does this whole device tree come in?


    The device tree is initially a text file that follows a specific syntax and layout; which is then compiled into a binary and loaded by the board when it boots. This over-rides any that is set up in the kernel.


    What is it? It configures the pinouts of the chip of the board which are configured in the software of the device tree to what you want them to be by instructing the pinmux (I think that's right). Sometimes this covers everything from the onboard LEDs to each individual pin. You can typically specify the bitmask of whether it's an input or output pin, whether or not it will use PWM or not. When I was looking this up for the BeagleBone Black (BBB) the information for setting this was in the documentation for the Sitara chip - so I imagine you would have to look in the documentation for the SAMA5D3 for setting up the device tree.


    People have created tools for the BBB to help with setting up the pinmux (I made some elaborate spreadsheet that simplified a lot of it) but I haven't seen such a thing for the SAMA5D3, even from Atmel.


    I picked up a lot of what I know from other people at Leeds Hackspace and searching Google for definitions and reading through it until something made sense.


    I think in the case of the SAMA5D3 board it's a matter of reading through Linux4SAM, at91.com and making notes on Atmel's data sheets. Unless the company(ies) make something user friendly then this is (unfortunately, I think) standard fare for handling dev' kits.

    • Cancel
    • Vote Up 0 Vote Down
    • Sign in to reply
    • More
    • Cancel
<>
element14 Community

element14 is the first online community specifically for engineers. Connect with your peers and get expert answers to your questions.

  • Members
  • Learn
  • Technologies
  • Challenges & Projects
  • Products
  • Store
  • About Us
  • Feedback & Support
  • FAQs
  • Terms of Use
  • Privacy Policy
  • Legal and Copyright Notices
  • Sitemap
  • Cookies

An Avnet Company © 2026 Premier Farnell Limited. All Rights Reserved.

Premier Farnell Ltd, registered in England and Wales (no 00876412), registered office: Farnell House, Forge Lane, Leeds LS12 2NE.

ICP 备案号 10220084.

Follow element14

  • X
  • Facebook
  • linkedin
  • YouTube