


Introduction
I recently needed a small form-factor computer and I was lucky enough to get given an Intel NUC (model NUC7i3DNKE) as part of my work. I thought I’d take some photos of it as I explored it.
My primary use-case will be to use it for demos. It is very small so it can be taken with me when I travel. However, there are other uses planned for it too.
In the drive for a silent environment to work in, I hardly ever turn on the desktop PC. The laptop works fine for me, I don’t need a large display for my day-to-day work either. But I do fire up some things that I’d like to leave running for long periods of time. Also, working close to a noisy server all day is tiring. I was wondering if I needed to get a low-power server. I already use BeagleBones and Raspberry Pi’s, and also have a network storage device that can run a few apps. The storage device has served me well too, but now needs some maintenance (it has a fan that is failing).
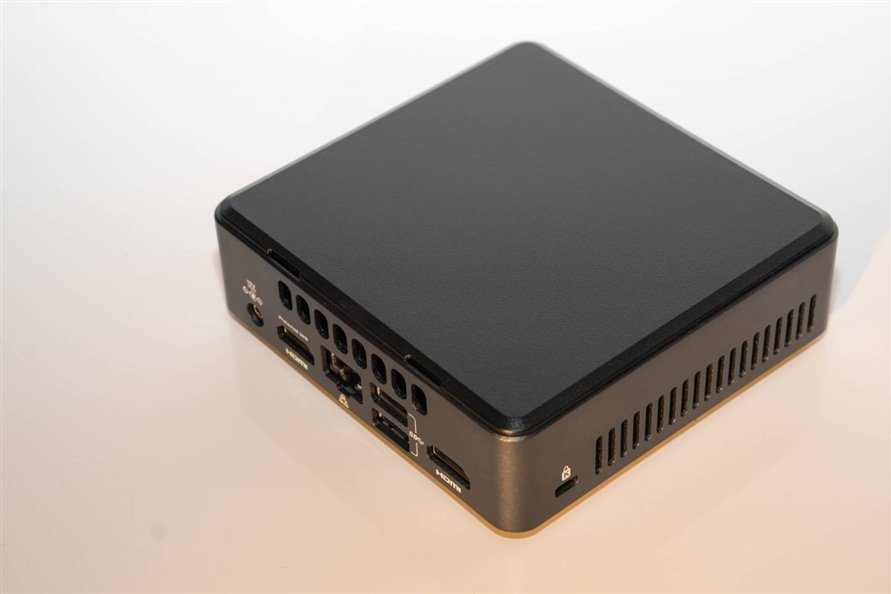
The Intel NUC is a really tiny PC at approximately 115x111x37mm. Whilst not completely silent (it has a laptop-like cooling system) it is extremely quiet and reasonably powerful. The version in the photo is the Intel i3-7100U variant (2.4GHz, 3MB cache, dual core with 4 threads total), but Intel i5 and i7 options are available too. The NUC also contains 802.11ac Wave 2 wireless (which far exceeds 100Mbit Ethernet speeds - it approaches Gigabit Ethernet speeds, but needs an appropriate wireless access point) and Bluetooth Classic and Bluetooth LE (BLE) version 4.2.
Read on to see what’s inside the NUC...
What’s Inside?
The NUC comes in a tiny box – inside there is the NUC itself, DC power brick from a reputable manufacturer, (the supplied cable has a C5 connector which is less popular than C13 : ( and a plate to mount the NUC on the back of a monitor if desired! The apple in the photo is there just for scale purposes.
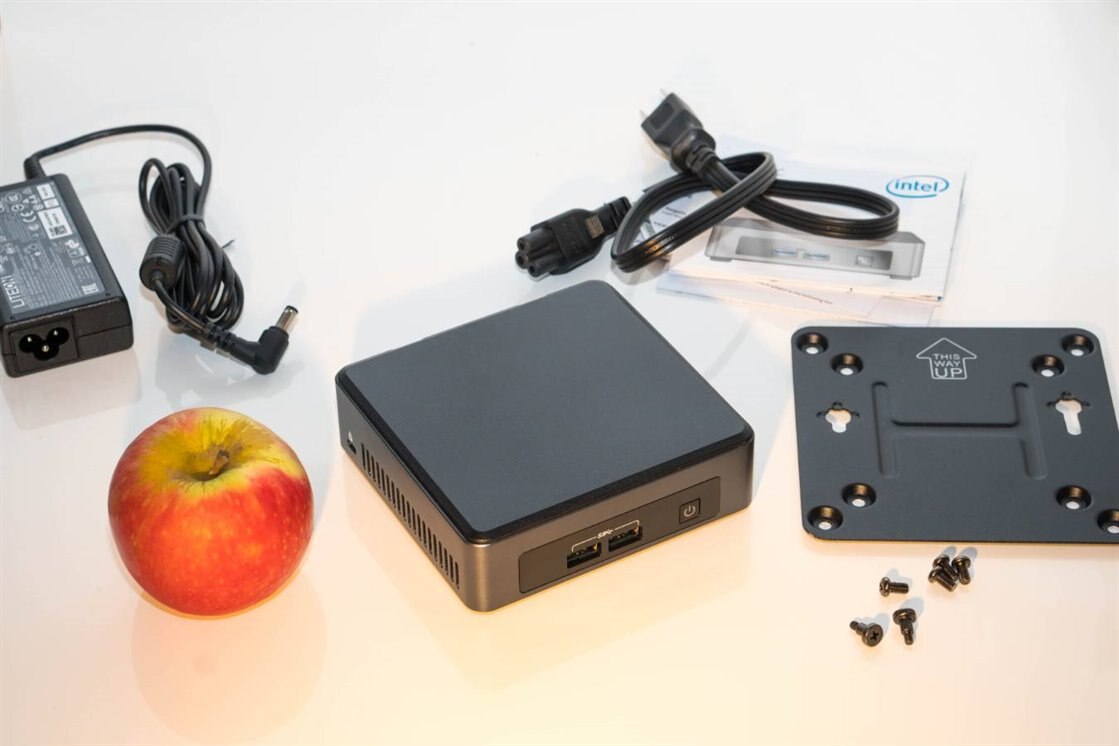
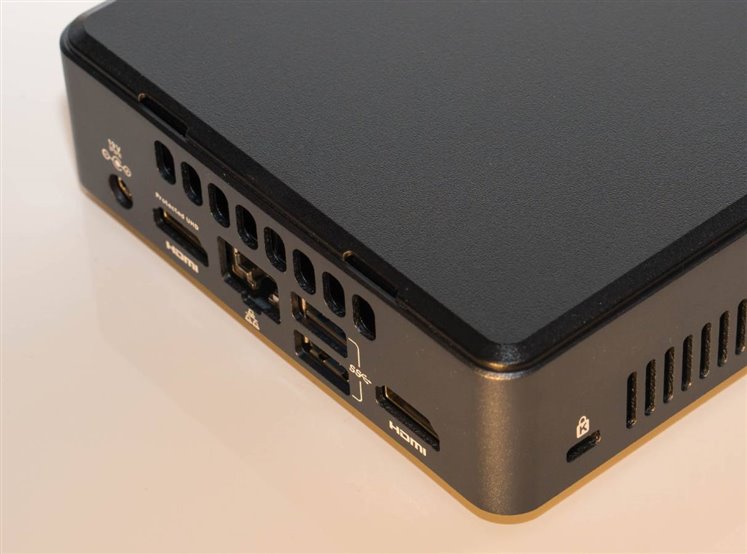
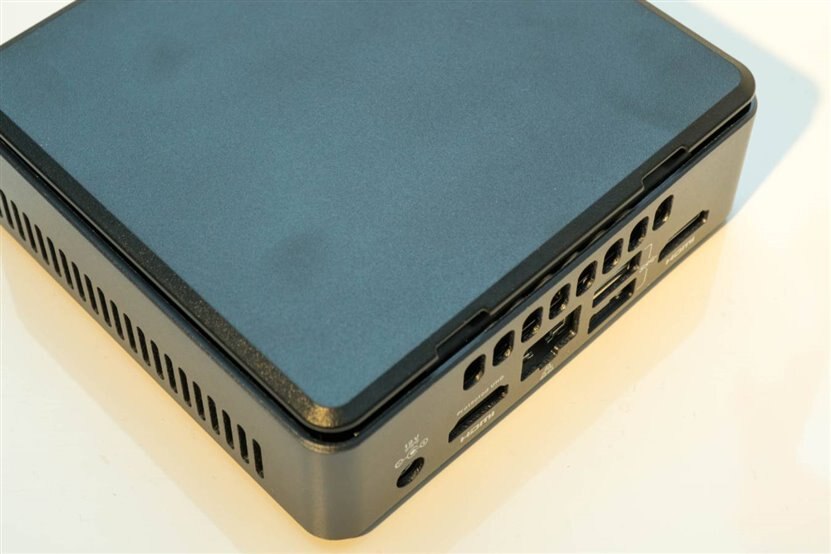
The NUC device is surprisingly heavy (almost half a kilogram!) for its size. The chassis internally is metal mainly (stamped/folded steel). The sides are metal too (it appears cast). The NUC has an illuminated power button and a couple of USB 3.0 ports on one side, and the other side has two more USB 3.0 ports, DC power socket (2.5mm inner pin2.5mm inner pin, 12-24V DC), Gigabit Ethernet, and two HDMI 2.0a connectors. The fan exhaust holes for air egress are located on that connector side too.
I like that so many USB ports are available! But there are a ton of connectors on the inside too that could theoretically be exposed with a bit of effort.
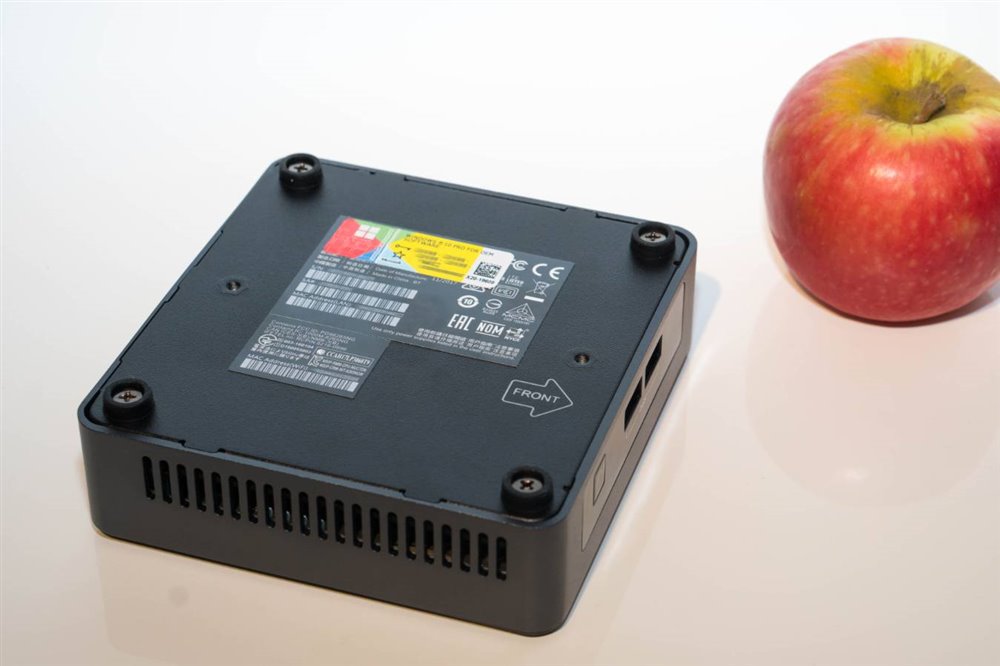
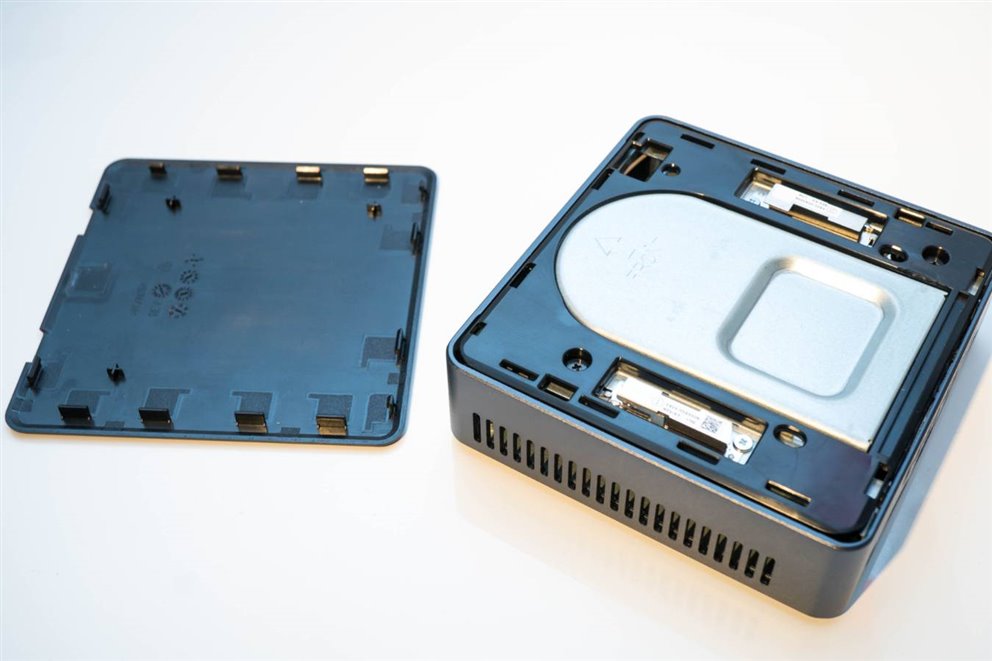
The underside is made of pressed steel plate, and has four caged screws which are the entry point into the internals of the NUC. Once they are undone, the plate comes off with no effort.
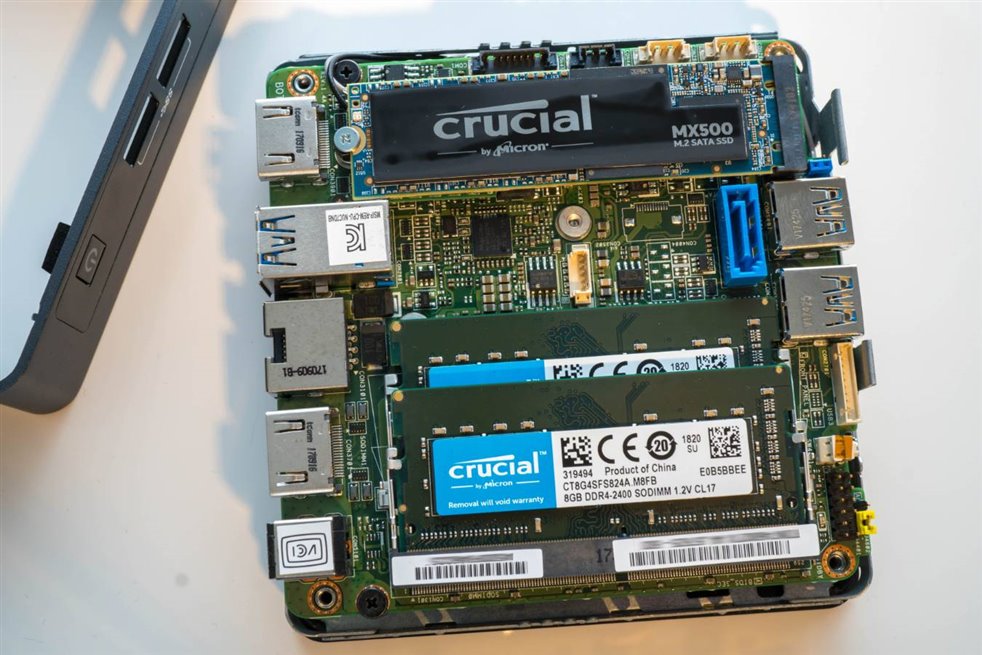
With the NUC opened, the tiny 4x4 inch motherboard is exposed. It is fairly packed inside the enclosure but there is a bit of space for very small user circuits if desired. The removed bottom plate has a thermal pad on it, which thermally interfaces the M.2 solid state disk (SSD) to the steel plate, to aid in a bit of passive cooling. There are electrically conductive pads on the edges of the steel plate for electromagnetic shielding reasons.
Barely visible under the M.2 SSD is the wireless card, in a smaller form-factor M.2 socket.
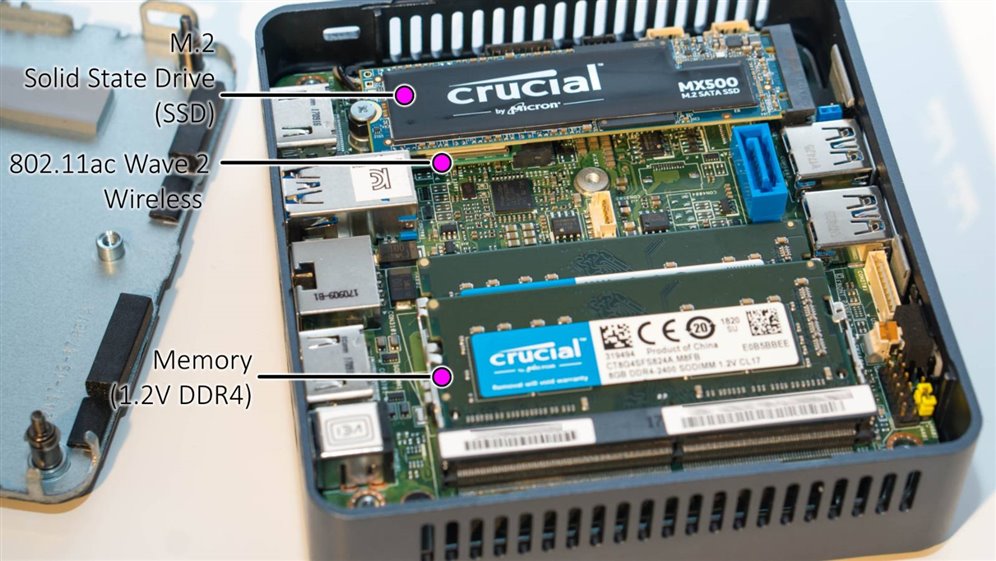
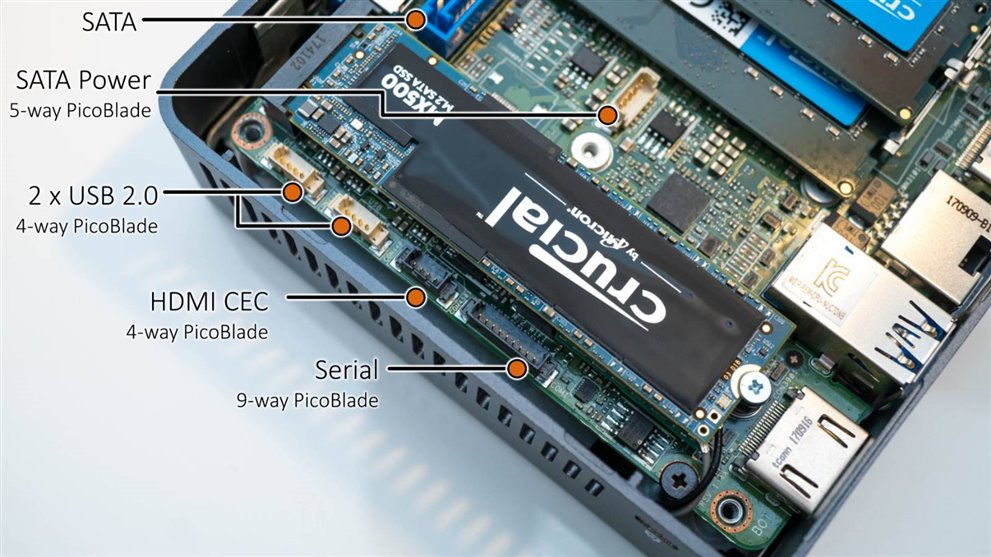
Up to 32GB of fast DDR4 memory can be inserted in total across two slots; my NUC had two 8GB sticks installed. The blue connector in the photos is a SATA port, at 6Gbps speed, for attaching optional drives. Power for the drive is available on a 4-way Molex PicoBlade connector (5V at up to 1.5A).
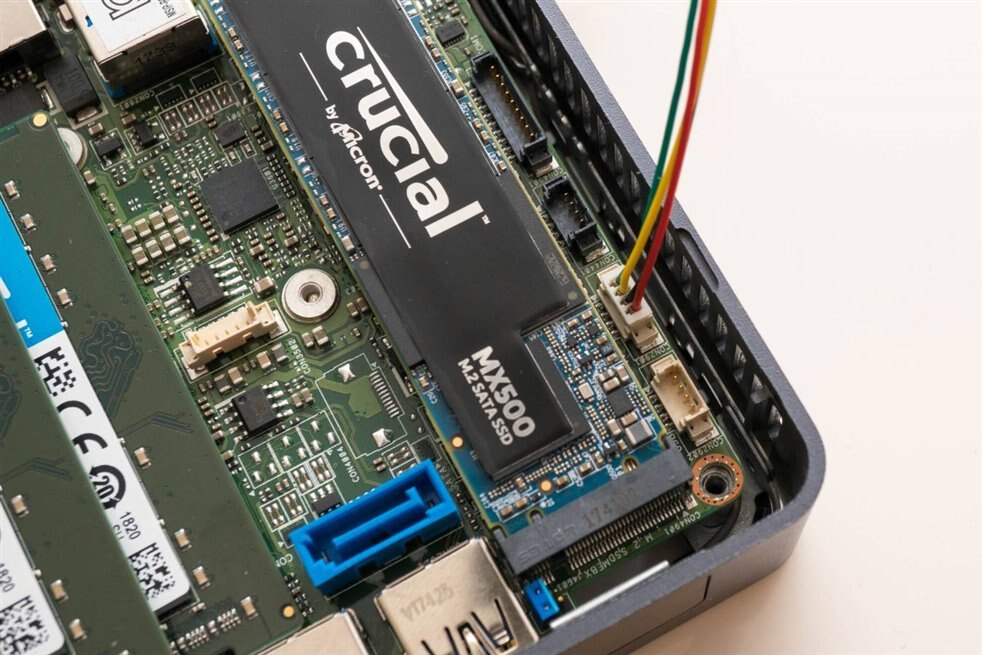
There are in fact lots of Molex PicoBlade connectors on the PCB! All ready for user expansion..
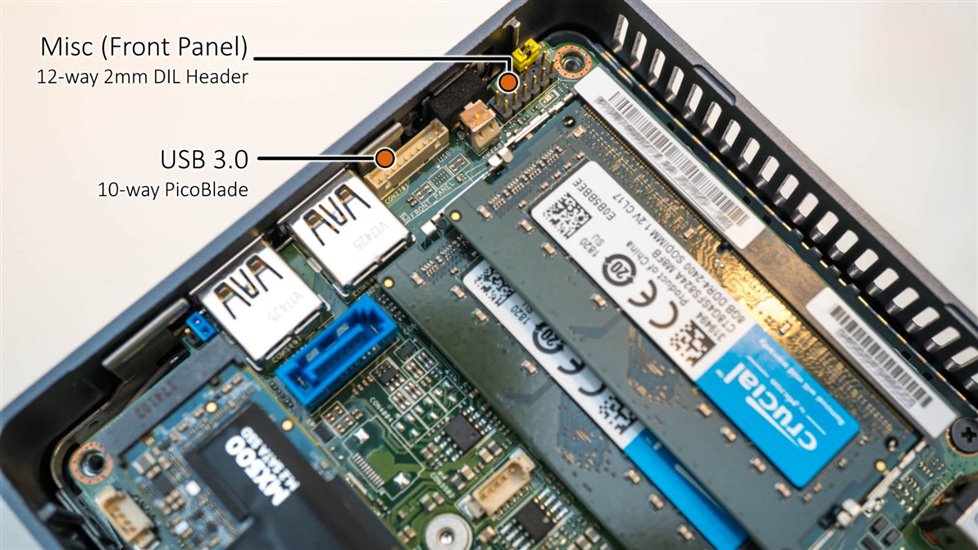
For those that need the very high throughput USB 3.0, there is a 10-way PicoBlade connector along another side of the circuit board too.
Of course, assembling a PicoBlade connector is extremely hard, since these are tiny 1.25mm pitch connectors. Fortunately it is possible to buy the connectors with wire ends pre-attached, or the wires already crimpedwires already crimped, all ready for pushing into a PicoBlade housing ( 4way4way, 5way5way, 9way9way, 10way10way housings ).
There is a 12-way 2mm pitch dual-in-line (DIL) header too, for some general purposes. A reset switch can be wired to it, and power and drive activity LEDs and 5V at 1A is available on it too.
There are actually other connectors too – even an embedded DisplayPort (eDP) connector for TFT screens is buried inside the NUC!
With the rear panel removed, it is possible to slide off the metal surround too if desired. This isn’t normally necessary at all. The possibility is there to take the internal chassis and mount it in a larger enclosure along with custom hardware.
With everything reassembled, it is also possible to remove the top plastic cover. There are two locations where fingernails will fit to assist with popping the cover off. There are inner clips on all four sides, but no tool is needed to remove the cover. Once it is partially popped off on the side with the fingernail locations, then there is a gap for fingernails on all three other sides, to pop off those sides in the same manner too. The photo here shows it partially unclipped.
With the top removed it is possible to see the fan cooling system. The two metal things on either side are the wireless antennas.
Since this NUC is so small, the question is how can all those nice internal connectors be easily used? One method would be to 3D-print a different top cover! With some space inside for the circuit. There is a gap in the chassis to feed wires through from the top of the NUC to the underside.
Also, a slightly taller NUC is available with the same functionality, but with the space to insert more custom electronics.
What Else is Out There?
There is quite a lot out there! About the lowest cost would be the Pi Desktop. It runs an ARM chip which is usually fine. Some things will require x86 or x86-64 however. There are many NUC-like devices on Amazon, running various CPUs such as Intel i3 or higher variants. Some are even fanless. The manufacturer GigaByte has a large range of mini PCs; I have not tried them however. I like that the PCs are so small that it would be easy to 3D-print extensions to the enclosures to house additional hardware. One example could be to combine a software defined radio (SDR) into the same enclosure as a small computer.
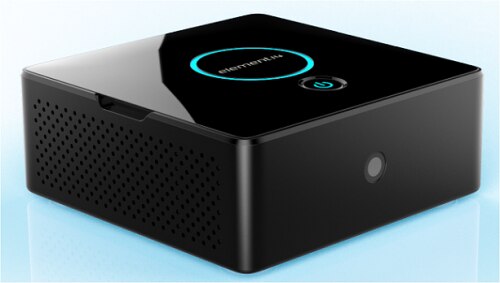
Pi Desktop image source: element14
Gigabyte BXBT-2807 image source: Amazon
Installing a Hypervisor
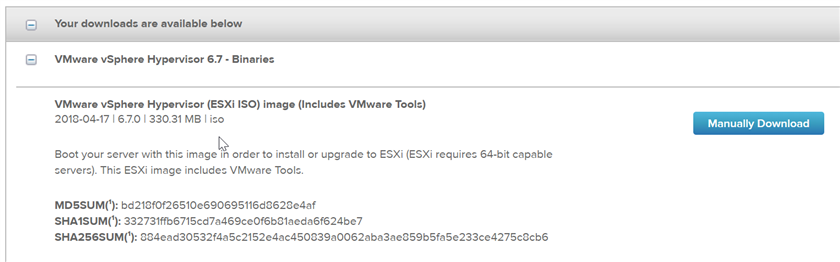
I wanted to have VMware ESXi installed on the NUC, so that I could run up to a couple of virtual machines, and swap around different VMs on demand. This proved to be very straightforward. I downloaded VMware vSphere Hypervisor (version 6.7 in my case), it comes as an ISO image of about 330MB as shown in the screenshot here.
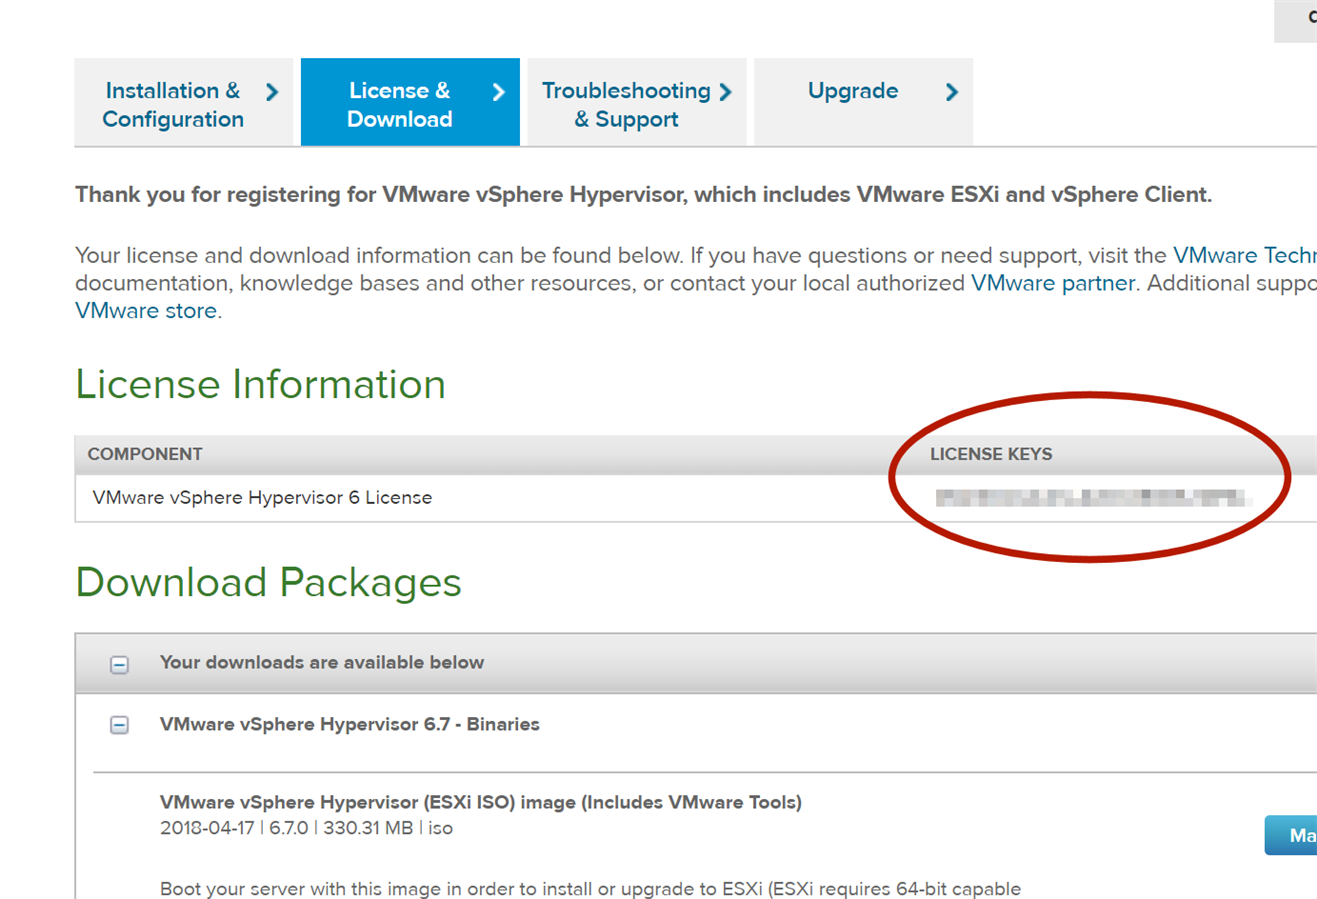
While you're at it, make a note of the license key; it is visible just above the downloads:
Next, I downloaded an ISO burner called Rufus (it is a free download) and installed it on my PC. It allowed me to convert the ISO file into a bootable USB memory stick. I plugged that memory stick into the NUC and powered up the NUC. Quickly press function key F10 on the keyboard, and select to boot from the USB stick. This starts up the ESXi installer, and I basically just followed the prompts. I didn't have to do anything special. Once it is installed, make sure the Ethernet connection is plugged into your network (since wireless isn't configured with ESXi), and then go into the menu system in ESXi and configure the network settings (if desired). I gave my ESXi instance a static IP address in my case. Press Escape and allow ESXi to save the settings when prompted. Then, hit F12 (Restart) and when ESXi comes up, it should be pingable from your PC.
Configuring the Hypervisor and Creating a VM
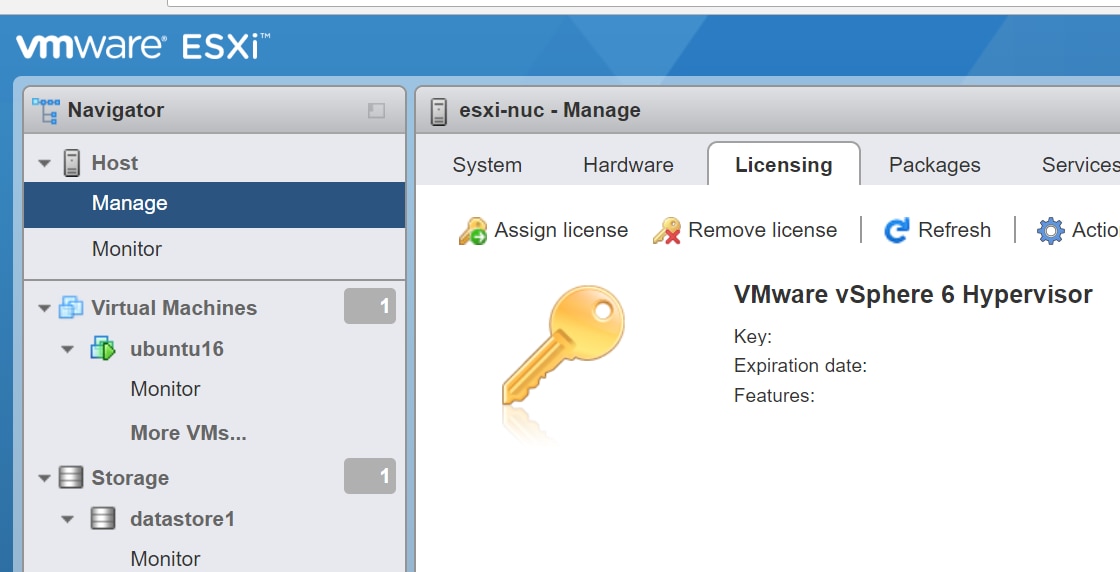
ESXi can be managed from a web browser. The first thing to do is to navigate to it from your browser, and then under Host click on Manage and then select the Licensing tab as shown below, and enter the license key captured earlier. Without that, ESXi runs in a 60-day evaluation mode.
Before creating a VM, I decided to first upload an ISO file to ESXI's datastore. I downloaded an Ubuntu ISO file from the Internet, and used that. Click on Datastore and then go to Datastore Browser, and there is an option to create a folder (e.g. call it ISO) and to upload the file to there.
Next, to create the VM, click on Virtual Machines and then select Create. Click through and make selections as desired. Once the VM has been defined, click on it in the left pane, and then in the right pane you can select Edit. Scroll down to CD/DVD Drive and from there you can select the ISO from the datastore, and check the button so that the virtual CD/DVD drive is connected on VM power-up. Start up the VM, and it should boot the Linux ISO.
Once Ubuntu (or your OS of choice) is installed, use the Edit option again to disable the virtual CD/DVD drive being connected on start-up. You're all set.
Inside Ubuntu, you can enable the SSH server (so you can connect to it remotely) using apt-get install openssh-server (you need to be root user to do that, so type sudo su in a terminal, then type passwd to assign the root user a password.
Summary
In summary I like the idea of compact, silent or near-silent servers for the home. I also like the idea of 'hackable' or easily modifiable small computers such as pioneered by the PiPi with its Pi DesktopPi Desktop and BeagleBone BlackBeagleBone Black. I'm impressed that the NUC didn't compromise on internal ports despite its size. It is very expensive for what it is though - I'd be curious to see what competitor products perform like. We already know that the new Pi 3B+ performs good enough for many home user purposes, so unless you need x86-64 I'd be tempted to try out other options too.
Top Comments