


1. Introduction
The MaaXboad by Avnet is based on the NXP i.MX 8M processor running quad Arm Cortex-A53s and a single Cortex-M4 core. Out of box the MaaXBoard supports both a Debian based linux image and a Android 9 image. In this blog lets discover what the Android enviroment has to offer.
To allow for a simple setup i'll be using a keyboard, mouse, and an external HDMI monitor to communicate with the MaaXBoard. If you wish you could connect to the board via TTL or use a SSH client to do a similar setup via a terminal interface.
2. Flash the SD Card
You can purchase your maaxboard from www.avnet.me/maaxboard-buy
- Download the Android Out of Box image from the "Reference Designs" tab on Element14.
- Unzip it using a program like 7zip (you should end up with a.img file)
- Download and install Balena Etcher. Select your image and flash it to an SD card (SD card should be between 16 and 64GB).
3. BOOT THE BOARD
Insert the SD card into the board. Plug in your USB mouse/keyboard. Connect your Ethernet cable. Plug your HDMI cable in your external monitor. Power the board on by plugging it into USB-C.
NOTE: If you use a USB-C cable to power your board, don't plug it into your computer's USB ports, since it may draw more power than your USB ports can supply. You can also purchase the recommended 5V 3A power supply for the board here.

When your board boots, you'll see the Android enviroment.
NOTE: Be careful when handling the board when it's powered on, because the heatsink can get very hot.
This initial boot will take a few minutes. Slide up to unlock the screen and enter the HOME page.


Congratualtions! The Android image is offically booted, now lets take a look at the features available!
4. Feature Configurations
Lets start off by verifyng the software versions used. Slide up to show the APP list. THen Go "Setting" -> "System" -> "About table" Here we can verify the software versions.
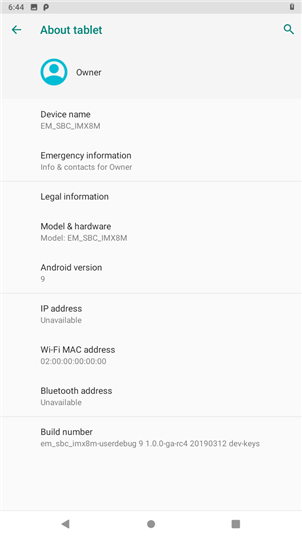
One thing you will want to do from the settings menu is enable Developer options. Do so by going to "Settings" -> "System" -> "About tablet" then tap "Build number" multiple times. When you tap the option, it will prompt : you are now x steps away from being a developer. Continue taping until the system prompts "You are now a developer!" Then go back to the "System" page and you will find "Developer options" you can enable or disable them from this setting. Take a look at the available options such as USB debugging, stay awake, etc. All are beneficial for developing users. If you would like to learn more about using these developers options take a look at the Android Getting Started Guide which can be found at Avnet.me/maaxboard under the Technical Documents section.


5. User Enviroment Exploration
5.1 PWR
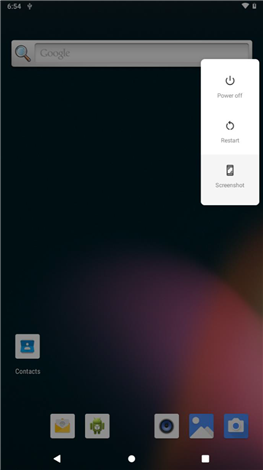
Short Pressing the PWR button on the MaaXBoard will put the system into a sleep mode. Pressing it once again will allow the system to resume from sleep. Long pressing pressing the power button will prmpt a 3 option menu on your display aloowing you to either Power off, Restart, or take a Screenshot.
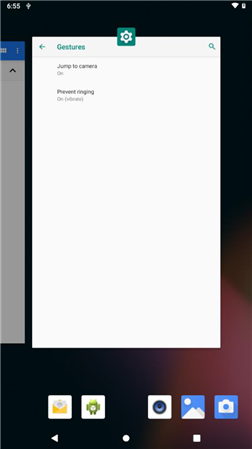
If you navigate to "Settings" -> "System" -> "Gestures" and ebale the "Jump to camera" option, you can now press the PWR button twice to quickly open the camera application.
5.2 User Push Buttons
The other two push buttons on the MaaXBoard are used for Back and Home. Pressing either will have the desired effect on your display.
5.3 Virtual Buttons
At the bottom of the screen you will see three virtual buttons : BACK, HOME, TASK

The function as the BACK and HOME button are the same as the physical buttons we just talked about on the MaaXBoard. If you tap TASK button it will open a recent task list in which you can use to switch to or clear various running applications.
5.4 Display Settings
Lets now check out the various display configurations we have acccess too. Go to "Settings" -> "Display". At this screen you can adjust the Brightness, Sleep, Font Size, Display Size, Screen saver and more.

5.5 Audio
There are three method for playing audio in this enviroment.
1. HDMI Audio
Use your HDMI display and connectup your audio output device. You can play audio from this HDMI device
2. USB Audio Device
The MaaXBoard can support USB audio devices which don't need specific drivers to play audio. Connect USB audio device to USB 1
3. Bluetooth Audio
The MaaXBoard also supports playing audio files via the Bluetooth interface. Connect your audio device via the blue tooth interface
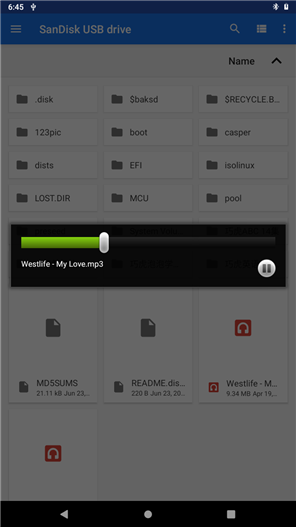
To play the audo copy a wav or mp4 file to U-disk, connect it to USB 1, then open "Settings" -> "Storage" -> "SanDisk USB drive" and double click to play the audio file.
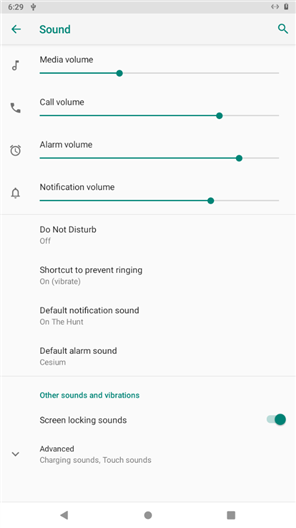
You can adjust the volume by going to "Settings" -> "Sound" and adjsuting the volume drag bar.
5.7 Camera Interface
The MaaXboard can support both a USB camera (USB1) and MIPI-CSI Camera. The reccomended MIPI-CSI camera can be found here https://www.avnet.com/shop/us/products/avnet-engineering-services/aes-acc-maax-cam1-3074457345642357172/
Connect up the desired camera and open the camera APP, choose "Allow" in the pop-up window. It will then show the cameras prview. Click the catch key to capture the photo.


5.8 WI-FI
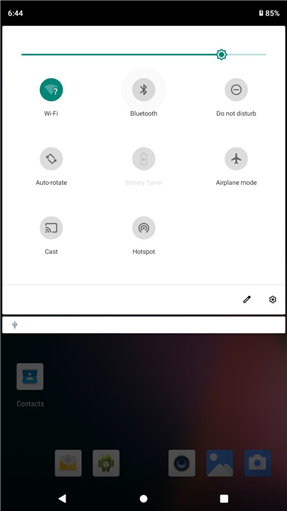
You can enable and disable the Wi-FI using the system drop-down box.
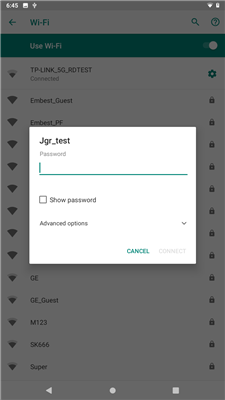
Go to "Settings" -> "Network & Internet", here you can also enable or disable the WI-FI interface.
Click to enable it then "Use Wi-Fi", ti will auto scan for available networks. Click the network you wish to connect to and input the password. You have successfully connected up the WI-FI
5.9 Storage
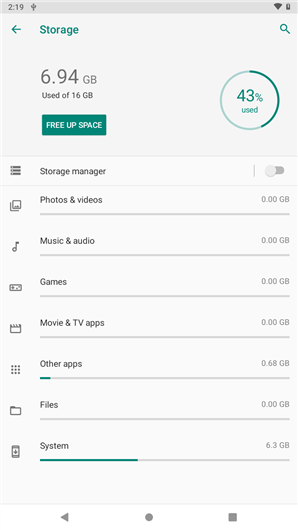
Another beneficial feature is checking the storage in settings. Go "Settings" -> "Storage". In this screen you can see the amount of available space and free up available storage.
Thanks for reading! A more thorough walk through can be found by checking out the Android Getting Started Guide at Avnet.me/maaxboard!
For more MaaXBoard content, check out the other blogs here!
Feel free to comment below with any questions