element14 Community
element14 Community
    Register Log In
  • Site
  • Search
  • Log In Register
  • Community Hub
    Community Hub
    • What's New on element14
    • Feedback and Support
    • Benefits of Membership
    • Personal Blogs
    • Members Area
    • Achievement Levels
  • Learn
    Learn
    • Ask an Expert
    • eBooks
    • element14 presents
    • Learning Center
    • Tech Spotlight
    • STEM Academy
    • Webinars, Training and Events
    • Learning Groups
  • Technologies
    Technologies
    • 3D Printing
    • FPGA
    • Industrial Automation
    • Internet of Things
    • Power & Energy
    • Sensors
    • Technology Groups
  • Challenges & Projects
    Challenges & Projects
    • Design Challenges
    • element14 presents Projects
    • Project14
    • Arduino Projects
    • Raspberry Pi Projects
    • Project Groups
  • Products
    Products
    • Arduino
    • Avnet & Tria Boards Community
    • Dev Tools
    • Manufacturers
    • Multicomp Pro
    • Product Groups
    • Raspberry Pi
    • RoadTests & Reviews
  • About Us
  • Store
    Store
    • Visit Your Store
    • Choose another store...
      • Europe
      •  Austria (German)
      •  Belgium (Dutch, French)
      •  Bulgaria (Bulgarian)
      •  Czech Republic (Czech)
      •  Denmark (Danish)
      •  Estonia (Estonian)
      •  Finland (Finnish)
      •  France (French)
      •  Germany (German)
      •  Hungary (Hungarian)
      •  Ireland
      •  Israel
      •  Italy (Italian)
      •  Latvia (Latvian)
      •  
      •  Lithuania (Lithuanian)
      •  Netherlands (Dutch)
      •  Norway (Norwegian)
      •  Poland (Polish)
      •  Portugal (Portuguese)
      •  Romania (Romanian)
      •  Russia (Russian)
      •  Slovakia (Slovak)
      •  Slovenia (Slovenian)
      •  Spain (Spanish)
      •  Sweden (Swedish)
      •  Switzerland(German, French)
      •  Turkey (Turkish)
      •  United Kingdom
      • Asia Pacific
      •  Australia
      •  China
      •  Hong Kong
      •  India
      •  Korea (Korean)
      •  Malaysia
      •  New Zealand
      •  Philippines
      •  Singapore
      •  Taiwan
      •  Thailand (Thai)
      • Americas
      •  Brazil (Portuguese)
      •  Canada
      •  Mexico (Spanish)
      •  United States
      Can't find the country/region you're looking for? Visit our export site or find a local distributor.
  • Translate
  • Profile
  • Settings
BeagleBoard
  • Products
  • Dev Tools
  • Single-Board Computers
  • BeagleBoard
  • More
  • Cancel
BeagleBoard
Blog Beagle Bone Black: Black Ops! (no not the game)
  • Blog
  • Forum
  • Documents
  • Quiz
  • Polls
  • Files
  • Members
  • Mentions
  • Sub-Groups
  • Tags
  • More
  • Cancel
  • New
Join BeagleBoard to participate - click to join for free!
  • Share
  • More
  • Cancel
Group Actions
  • Group RSS
  • More
  • Cancel
Engagement
  • Author Author: interested1
  • Date Created: 15 May 2013 7:50 PM Date Created
  • Views 1298 views
  • Likes 4 likes
  • Comments 8 comments
  • cape
  • camera_cape
  • beagle_bone_black
Related
Recommended

Beagle Bone Black: Black Ops! (no not the game)

interested1
interested1
15 May 2013

image

Background:

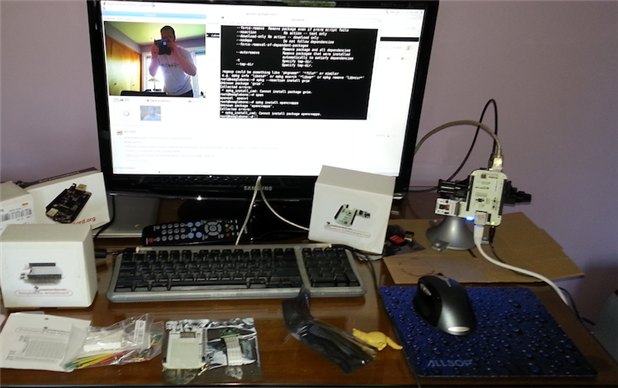
I have been enjoying my Beagle Bone Black for a few days now, but have been ready to take the beagle for a walk off the officially supported hardware path.  My mission: could I get the unsupported Camera Cape working despite no official support (so don't bother the developers about support questions) and not all that much to work with?  Succintly, YES! 


Black Ops. Plan:  all that follows relates to an unsupported cape and my own attempts to get it working on the Beagle Bone Black.  Please note that this is one person's confirmation of success.  I will give you some details of the journey to get this working, but mostly provide enough detail to excite the community into their own investigation.  With some good sluething you too can get your camera board working on the Beagle Bone Black.


Details:

My plan was simple, check the web and see if I couldn't find an SD dump of a developer's hack and then dd that onto my own card.  Once I got a hold of a devloper's SD dump, flashed my microSD card, and got the Beagle to boot off of the card I then mounted the camera cape.  I would be more detailed, but at the time I wasn't really taking notes or thinking I could get this to work.  Anyway, the first boot with the the caped Beagle you have to be patient as it seems to take a bit longer to boot that normal.  One key to look for is the two lights on the camera cape to be illuminated solid... if you have this, then you are getting close to Beagle sight.  Another issue to be aware of is that sometimes the Beagle seems to hang.  I am unsure if it actually hanging at boot, but the symptoms are that two of the Beagle's LEDs are illuminated and none of the chaotic flashing that signals proper operation.  What you want is for all four of the Beagles LEDs to be going wild and the two LEDs on the camera cape to be solid.  If you get to this point you have done most of the difficult stuff...


Once the Beagle booted with the cape on I got to the developer's GUI login --recall I didn't make the installation-- with usernames and passwords I had no clue about.  For good reason root was not an option at the GUI login; however, my Linux experience compelled me to attempt to switch tty and attempt to login as root --hoping that there remained no password set on the root account.  Success! 


Once logged in as root, and having written down the username I wanted to become since I don't like to use Linux as root, I did a simple password change for that user and jumped back to the GUI login.


At this point I began to feel like I had the Beagle and Cape in my clutches; yet, all was not finished...


image


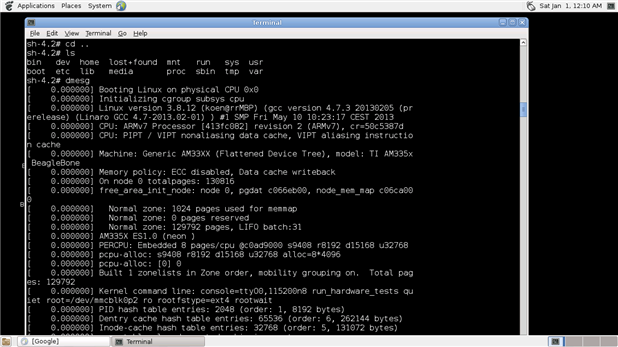
The above dmesg looked good to me and it might give a clue to how to get this [redacted?].

image

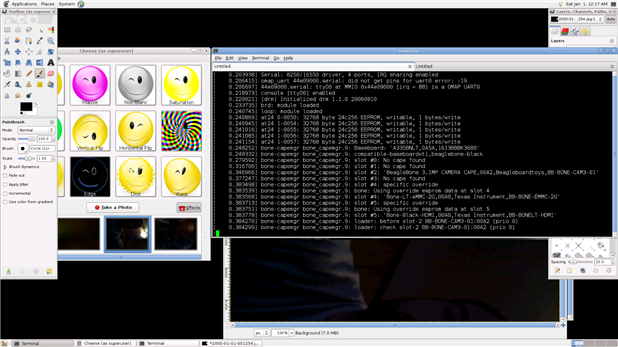
Since everything was seemingly working at this point I fired up cheese to test out the camera cape's talents viz. snapping pictures.  The screenshot above includes the dmesg covering the cape manager reportage and both the cheese and Gimp apps all running. 


On the initial running of cheese you will need to tweak the preferences.  For whatever reason the defaults in cheese have the camera set at an absurdly high resolution and with a very dark contrast.  This is the easiest fix in the entire mission!  Simply navigate your way to the preference menu in cheese and make the appropriate adjustments.


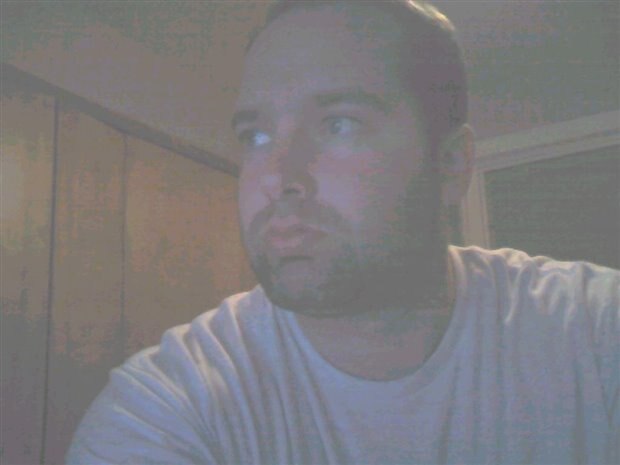
After a bit of tinkering with the preferences within chesse I could take pictures like the one below:

image


Conclusion:

So I hope I have sparked your interest in trying to get unsupported hardware working on the Beagle Bone Black.  This is not a howto nor a guide, so please don't be upset that this is a provocation only.  If I can get this working, so can you!


Happy Hacking!


  • Sign in to reply

Top Comments

  • DAB
    DAB over 12 years ago +2
    Hi David, Good post. I like how you approached the idea of using additional devices from other sources with your BBB. Hopefully, your efforts will help others realize that if you have the interface specifications…
  • Former Member
    Former Member over 12 years ago +2
    There's an official image that seemingly has some support for the camera cape now: Image 2013.05.20 This image does not support 1920x1080. That should appear sometime in the future. Add patch to make camera…
  • interested1
    interested1 over 12 years ago in reply to Former Member +1
    Thanks for the link for everyone, selsinork! I saw the link on my phone and began to download it -oops! Since I brought up the issue as a provocation for involvement I should give some advice, however…
  • clem57
    clem57 over 9 years ago in reply to Former Member

    This example is for data, but works for any directory. Warning: the card must be mounted nearly all the time so choose directory carefully and not pick data required to boot the system! I would pick you home directory for example.

    down v

    This is the way to have /data on the SD Card directory:

    1. Copy all /data to the SD card directory: /mnt/sdcard/data
    2. Delete /data
    3. Create a symlink that points to the SD: ln -s /mnt/sdcard/data /data

    The main problem is that /data could be EXT2/3/4 partition, while the SD Card is FAT32. The best thing to achieve what you want is to create an extra partition on the SD Card as EXT2/3/4 filesystem. Then you can link the directory /data with the partition.

    Clem

    • Cancel
    • Vote Up 0 Vote Down
    • Sign in to reply
    • More
    • Cancel
  • Former Member
    Former Member over 9 years ago in reply to clem57

    Thanks, is it possible to still boot from the emmc, yet install and execute programs from the sd-card?    I see the mounted (blank) sd-card, but how can I apt-get install onto the sd?  

    • Cancel
    • Vote Up 0 Vote Down
    • Sign in to reply
    • More
    • Cancel
  • clem57
    clem57 over 9 years ago in reply to Former Member

    Why not install on SD card instead? I cannot tell you how much with above, but if you use apt-get to install it will tell how much storage will be used.

    Clem

    PS, You can remove it even it partial installed using apt tool.

    • Cancel
    • Vote Up 0 Vote Down
    • Sign in to reply
    • More
    • Cancel
  • Former Member
    Former Member over 9 years ago

    I wanted to see if my cheapy usb webcam works on the bbb (stock, running debian 8.5).. so I installed cheese, but during installation it said out of memory!

    https://blog.adafruit.com/2014/08/26/use-cheese-to-add-a-usb-camera-to-your-beagleboneblack-txinstruments-beagleboardorg…


    Not sure how much space I started with, but this is now:


    root@beaglebone:~# df

    Filesystem     1K-blocks    Used Available Use% Mounted on

    udev               10240       0     10240   0% /dev

    tmpfs             100784    8520    92264   9% /run

    /dev/mmcblk0p1   3706992 3552016         0 100% /

    tmpfs            251956       4    251952   1% /dev/shm

    tmpfs               5120       4      5116   1% /run/lock

    tmpfs             251956       0    251956   0% /sy


    How much of /devmmcblk0p1 (emmc) is from cheese?  Since it didn't finish installing correctly, I'm guessing it's best not to run it, but how do unistall the partial install? And how can I see if the camera works without using cheese?


    BTW, the camera I'm using is an old Logitech Quickcam Chat (640x480 961413-0215).  I was hoping to use it before buying something better (Logitech C920, playstation eye, or microsoft kinect / lifecam studio Q2F-00014/X821857-003 Q2F-00015/Q2F-00003 Q2F-00013 5WH-00002 1425 Q2F-00001)

    http://www.diyinhk.com/shop/usb-microscope-1080p-for-smt-soldering/51-lifecam-studio-1080p-microscope-lens-mod-kit.html 

    • Cancel
    • Vote Up 0 Vote Down
    • Sign in to reply
    • More
    • Cancel
  • Former Member
    Former Member over 12 years ago in reply to interested1

    Good find David.  Interesting to see Jason talking about 'paying the [devicetree] tax early' while at the same time saying they're skipping the 3.9 & 3.10 kernels before trying again with 3.11-rc.  A couple of missed kernel versions could contain a lot of churn and result in having to pay the tax all over again.


    That said, all credit to them for actually actively pushing this stuff upstream, they obviously realise the benefits of doing it compared to maintaining an out-of-tree system...  I just wish others would follow their example!

    • Cancel
    • Vote Up +1 Vote Down
    • Sign in to reply
    • More
    • Cancel
>
element14 Community

element14 is the first online community specifically for engineers. Connect with your peers and get expert answers to your questions.

  • Members
  • Learn
  • Technologies
  • Challenges & Projects
  • Products
  • Store
  • About Us
  • Feedback & Support
  • FAQs
  • Terms of Use
  • Privacy Policy
  • Legal and Copyright Notices
  • Sitemap
  • Cookies

An Avnet Company © 2025 Premier Farnell Limited. All Rights Reserved.

Premier Farnell Ltd, registered in England and Wales (no 00876412), registered office: Farnell House, Forge Lane, Leeds LS12 2NE.

ICP 备案号 10220084.

Follow element14

  • X
  • Facebook
  • linkedin
  • YouTube