element14 Community
element14 Community
    Register Log In
  • Site
  • Search
  • Log In Register
  • Community Hub
    Community Hub
    • What's New on element14
    • Feedback and Support
    • Benefits of Membership
    • Personal Blogs
    • Members Area
    • Achievement Levels
  • Learn
    Learn
    • Ask an Expert
    • eBooks
    • element14 presents
    • Learning Center
    • Tech Spotlight
    • STEM Academy
    • Webinars, Training and Events
    • Learning Groups
  • Technologies
    Technologies
    • 3D Printing
    • FPGA
    • Industrial Automation
    • Internet of Things
    • Power & Energy
    • Sensors
    • Technology Groups
  • Challenges & Projects
    Challenges & Projects
    • Design Challenges
    • element14 presents Projects
    • Project14
    • Arduino Projects
    • Raspberry Pi Projects
    • Project Groups
  • Products
    Products
    • Arduino
    • Avnet & Tria Boards Community
    • Dev Tools
    • Manufacturers
    • Multicomp Pro
    • Product Groups
    • Raspberry Pi
    • RoadTests & Reviews
  • About Us
  • Store
    Store
    • Visit Your Store
    • Choose another store...
      • Europe
      •  Austria (German)
      •  Belgium (Dutch, French)
      •  Bulgaria (Bulgarian)
      •  Czech Republic (Czech)
      •  Denmark (Danish)
      •  Estonia (Estonian)
      •  Finland (Finnish)
      •  France (French)
      •  Germany (German)
      •  Hungary (Hungarian)
      •  Ireland
      •  Israel
      •  Italy (Italian)
      •  Latvia (Latvian)
      •  
      •  Lithuania (Lithuanian)
      •  Netherlands (Dutch)
      •  Norway (Norwegian)
      •  Poland (Polish)
      •  Portugal (Portuguese)
      •  Romania (Romanian)
      •  Russia (Russian)
      •  Slovakia (Slovak)
      •  Slovenia (Slovenian)
      •  Spain (Spanish)
      •  Sweden (Swedish)
      •  Switzerland(German, French)
      •  Turkey (Turkish)
      •  United Kingdom
      • Asia Pacific
      •  Australia
      •  China
      •  Hong Kong
      •  India
      • Japan
      •  Korea (Korean)
      •  Malaysia
      •  New Zealand
      •  Philippines
      •  Singapore
      •  Taiwan
      •  Thailand (Thai)
      • Vietnam
      • Americas
      •  Brazil (Portuguese)
      •  Canada
      •  Mexico (Spanish)
      •  United States
      Can't find the country/region you're looking for? Visit our export site or find a local distributor.
  • Translate
  • Profile
  • Settings
BeagleBoard
  • Products
  • Dev Tools
  • Single-Board Computers
  • BeagleBoard
  • More
  • Cancel
BeagleBoard
Blog BeagleBone Black IoT Project Bundle
  • Blog
  • Forum
  • Documents
  • Quiz
  • Polls
  • Files
  • Members
  • Mentions
  • Sub-Groups
  • Tags
  • More
  • Cancel
  • New
Join BeagleBoard to participate - click to join for free!
  • Share
  • More
  • Cancel
Group Actions
  • Group RSS
  • More
  • Cancel
Engagement
  • Author Author: cstanton
  • Date Created: 14 Apr 2016 2:25 PM Date Created
  • Views 3629 views
  • Likes 4 likes
  • Comments 3 comments
  • debian
  • sensortag
  • debian jessie
  • ibm cloud
  • jessie
  • BeagleBone
  • texas instruments
  • sensor tag
  • cc2650
  • ibm
  • BeagleBone Black
  • ti
Related
Recommended

BeagleBone Black IoT Project Bundle

cstanton
cstanton
14 Apr 2016
Follow the steps in this guide to join the Internet of Things using NodeJS, Bluetooth and 10 powerful sensors. You will need the BeagleBone Black IoT Solution Kit Buy KitBuy Kit See All Parts image

What Exactly are we Using Here?

You may have seen this guide in parts, however I like everything in one place, on one page and appropriately up to date. Or as much up to date as I can possibly do, technology moves so fast!


Texas Instruments (TI) have this interesting little board called a Sensor Tag and the version I have is a CC2650 running the default firmware. To update the firmware, you need the right cable to plug into it. This cute little board comes with a plastic enclosure, that then can be contained within a rubber sleeve. I imagine you could have a number of these devices placed around though with them being Bluetooth you're going to have to be in an open area or have thin walls, it is 2.4Ghz after all.image


What's ridiculous (in a good way) about the Sensor Tag is that it comes with 10 sensors on board, and it can sync with any Bluetooth device, including your phone, you can even expand it to add more sensors to it. I'm not sure why you'd want to add more sensors to it, because it already has these:


  • "10 sensors including support for light, digital microphone, magnetic sensor, humidity, pressure, accelerometer, gyroscope, magnetometer, object temperature, and ambient temperature"


Elementary, my Dear IoT

image

Those clever people at International Business Systems (IBM) have been developing a way to make sense of data, lots and lots of data, in various different ways. It may be an artificial intelligence, or it may just be intelligent ways of looking at data. I'm not entirely sure, it helps to watch a video and make sense of it all.


You don't have permission to edit metadata of this video.
Edit media
x
image
Upload Preview
image


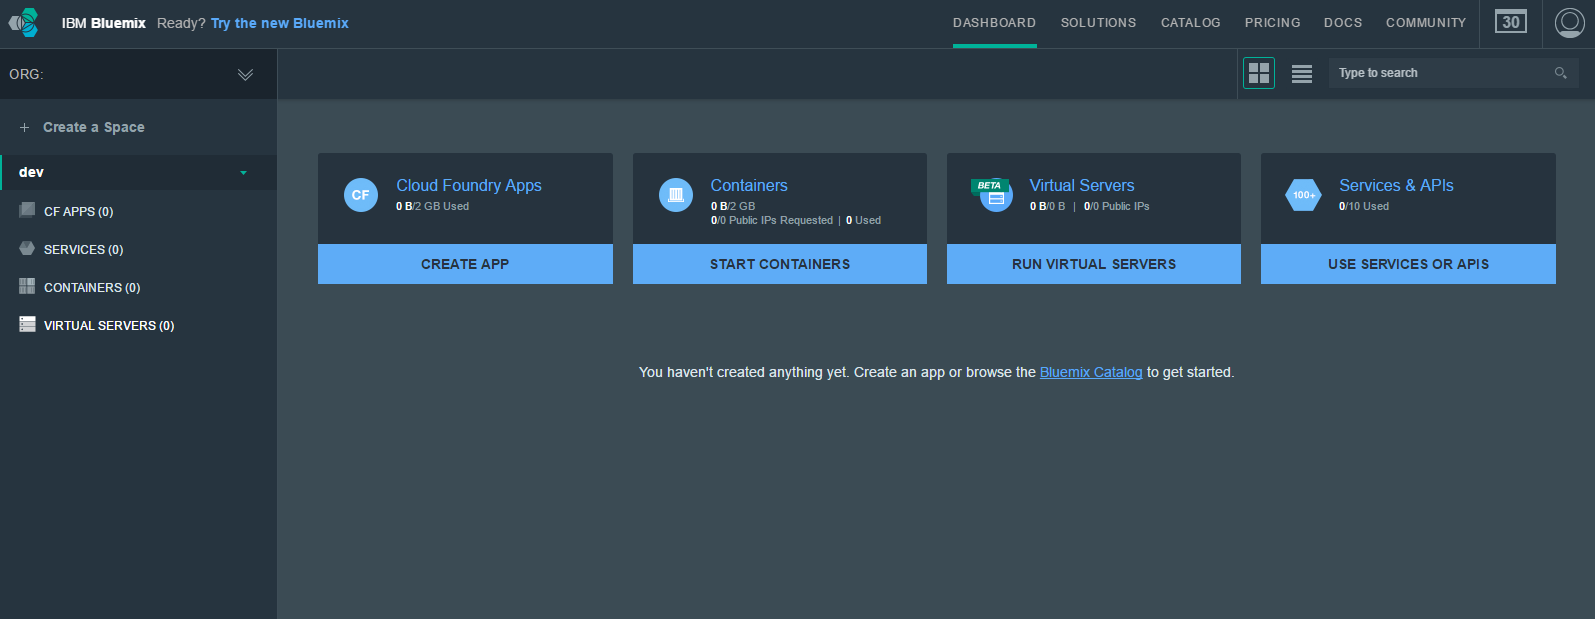
Since all things Internet will be creating a lot of data, it makes sense that Watson is thrown at IoT. You will need to sign up for an IBM Bluemix account to be able to work through attaching your IoT sensor(s) to it. Fortunately, there is a free tier of Watson IoT for us to play with, however this can scale up to cover thousands of devices with some amount of data traffic and storage. It is a little weird, even if you select Free you're put into the Free Trial, just see it as a nice 'try before you proceed' affair.


You need not be Sherlock to join Watson

In a few easy steps you can sign up for then IBM Bluemix account before we look at the hardware you'll need to get started with IBM - Explore IoT


{gallery} Joining IBM Watson

image

Step One: Visit the IBM Explore IoT site and click Sign Up

image

Step Two: Fill out your details on IBM Bluemix

image

Step Three: Confirm Sign Up with your E-Mail

image

Step Four: You'll be put onto a premium trial first, but this falls back to a free account.

image

Step Five: At the login prompt, your IBM ID is your e-mail


In case you missed it in the image gallery overlay, your IBM ID is your e-mail address.


What do I Need to Get Started?

Set yourself up with IBM and the BeagleBone Black with the Texas Instruments SensorTag. Follow the steps in this guide to join the Internet of Things using NodeJS, Bluetooth and 10 powerful sensors.

image

BeagleBone Black IoT Solution Kit Buy KitBuy Kit

The kit consist of the following 5 items:

BeagleBone BlackBeagleBone Black

TI Sensor Tag CC2650TI Sensor Tag CC2650

Bluetooth 4 USB AdapterBluetooth 4 USB Adapter

8GB microSD Card8GB microSD Card

Ethernet cableEthernet cable with a connection to the internet.

*You need a way to write to a microSD Card from a laptop or desktop computer.


With this hardware I'm making the assumption that you're going to plug the Beaglebone Black into a wired network. Yes, I know that it is possible to setup a 'soft network' using the USB cable that comes with the BeagleBone Black and connecting it to your computer. However, I discovered that the driver bundled with even the latest Debian image does not work with Windows 10 64bit, you're advised to compile the driver yourself. If you don't have a way to view the desktop on the BeagleBone Black (it does require a mini HDMI to something sensible cable) then you won't be able to setup WiFi either. So I suggest plugging in an Ethernet cable to a switch, whether that's a home gateway or on the same network as a computer that's running a DHCP server. If you're not connected to the internet via this connection, you'll have to scour the packages and offline files for yourself.


Setting up the BeagleBone Black

Let's get set up with a reasonably up to date version of Debian Linux. Angstrom hasn't been the default stable for the BeagleBone Black for a while now and thankfully we can use the armhf architecture from Debian. You can download the latest Debian 8.3 Jessie image. If you're using Linux then the setup of the microSD card is straight forward, you can use unxz as a command (or you can even use simply 'xz -d', search your distribution's repository if you don't have either) to extract the downloaded image file, and then use dd to write the image file to the microSD card using something like this:image


sudo dd if=./BBB*.img of=/dev/sdX


Be wary using BBB*.img as the filename if you have more than one image file in the folder you're running this command in. The command is ran from a terminal window, and /dev/sdX is an example name of your SDCard device reader where the microSD card is plugged into. If you're not sure which one it is, then you're going to have a fun dance with "ls /dev/" and dmesg commands as you plug/unplug your SDCard into the computer and correlate the names as to which device is your SDCard.


On Microsoft Windows, you can use win32DiskImager, insert your SDCard into your reader, select the appropriate drive letter and the .IMG file, after extracting it with something like 7-Zip and write it to the card. However, I encountered a problem when using win32DiskImager and writing the Debian image, it wouldn't do more than 2gByte of data sometimes and I had to resort to using Linux. Now, it may have been a faulty microSD card, or it could have been Windows to blame. Just be wary that if you're not able to write properly to your SDCard that you may need to try a different operating system, or your card is broken.


Once you have your microSD card setup, you can insert it into your BeagleBone Black and connect power to it. Either by powering it with the USB cable or a wall wart rated at 5V, perhaps above 1Amp. Ensure your BeagleBone Black is connected to the wired network.


Accessing the BeagleBone Black on the Network

There are many different ways you can find out what the IP address is of the BeagleBone Black if you haven't connected it to your computer using the USB port, ranging from a network scan using nMap (don't run that on corporate networks, your network administrator won't be happy) to looking up the DHCP allocation table on your network router. The method you use will be entirely dependent on your network setup and how you've chosen to connect to it, and unfortunately we won't be covering that here, but by all means ask in the comments below.


You'll want to login to the BeagleBone Black via SSH, using either PuTTy on Windows, or just ssh on Linux. You can login as root as by default there is no password set and root is permitted over ssh, alternatively the username and password is:


User: debian

Pass: temppwd


Once you're connected to your BeagleBone Black then it's time to ensure that your distribution is fully up to date. To keep track of any potential problems, separately you should run:


sudo apt-get update

sudo apt-get upgrade

sudo apt-get dist-upgrade

sudo apt-get autoremove

sudo apt-get clean


This will update your operating system, and you should run through this set of commands at least twice in case any packages are held back. A command I run when I'm being quick, dirty and lazy is:


sudo apt-get update; sudo apt-get upgrade -y; sudo apt-get dist-upgrade -y; sudo apt-get autoremove -y; sudo apt-get clean -y


Which goes through them autonomously, use at your own discretion. Yes, those are semi-colons between commands.


Configuring the BeagleBone Black and the Sensor Tag to Access IBM Watson

What we're going to do now involves using the repository software called 'git'. From here we're going to get hold of software from github, and then modify it because it's out of date. I did consider forking the repository and having this fixed in an element14 repo, but I think it serves as a good example to introduce you to the code and also using git.


The software basically downloads and installs bluetooth and also sets up nodejs which is a set of Javascript libraries.


Make sure you're connected to the internet and we'll download the git repository, effectively cloning it from github and then change to that directory. First you should navigate to your home directory, and we're assuming here that you logged into the BeagleBone Black as the root user:


cd ~/

git clone http://github.com/ibm-messaging/iot-beaglebone

cd iot-beaglebone/samples/nodejs


There is a setup script which should take care of everything for you. If you logged in as root, you do not need sudo:


sudo ./setup.sh


Take note of any error messages that you see, this bundled up setup script which installs the packages of bluez and libbluetooth-dev. It also performs an 'npm install'.


Fixing the Code

There is a Javascript file which we have to alter ourselves, This is not hosted in github, but is likely pulled through when npm is run, so it is not necessarily straightforward to have been able to apply a preliminary fix.


We need to replace a file after successful running of the setup.sh script, the file is attached to this blog post, you can download the file by using wget:


wget https://www.element14.com/community/servlet/JiveServlet/download/38-204521/cc2650.js


This will download the file to the current folder you are in, you then have to move the file to replace "iot_beaglebone/samples/nodejs/node_modules/sensortag/lib/cc2650.js". We should be able to do this in one command, like so:


wget https://www.element14.com/community/servlet/JiveServlet/download/38-204521/cc2650.js  -O ~/iot_beaglebone/samples/nodejs/node_modules/sensortag/lib/cc2650.js


This is to fix an API change in the node/javascript calls. The -O parameter here may not strictly be correct,


Using the IoT Cloud


Now to associate the Sensor Tag with the BeagleBone Black and use it with the IBM Watson service:


cd ~/iot_beaglebone/samples/nodejs

node iot_sensortag.js


Registering your Device


Now you'll want to register your devices in the IBM Watson IoT Platform, there is also a Quickstart where you can check what information the device(s) are sending.

Attachments:
Fullscreen 7673.cc2650.js Download
var NobleDevice = require('noble-device');

var Common = require('./common');

var MPU9250_UUID                            = 'f000aa8004514000b000000000000000';
var BAROMETRIC_PRESSURE_UUID                = 'f000aa4004514000b000000000000000';
var LUXOMTER_UUID                           = 'f000aa7004514000b000000000000000';

var BAROMETRIC_PRESSURE_CONFIG_UUID         = 'f000aa4204514000b000000000000000';

var MPU9250_CONFIG_UUID                     = 'f000aa8204514000b000000000000000';
var MPU9250_DATA_UUID                       = 'f000aa8104514000b000000000000000';
var MPU9250_PERIOD_UUID                     = 'f000aa8304514000b000000000000000';

var MPU9250_GYROSCOPE_MASK                  = 0x0007;
var MPU9250_ACCELEROMETER_MASK              = 0x0038;
var MPU9250_MAGNETOMETER_MASK               = 0x0040;

var LUXOMTER_CONFIG_UUID                    = 'f000aa7204514000b000000000000000';
var LUXOMTER_DATA_UUID                      = 'f000aa7104514000b000000000000000';
var LUXOMTER_PERIOD_UUID                    = 'f000aa7304514000b000000000000000';

var IO_CONFIG_UUID                          = 'f000aa6604514000b000000000000000';
var IO_DATA_UUID                            = 'f000aa6504514000b000000000000000';

var CC2650SensorTag = function(peripheral) {
  NobleDevice.call(this, peripheral);
  Common.call(this);

  this.type = 'cc2650';
  this.mpu9250mask = 0;
  this.mpu9250notifyCount = 0;

  this.onMPU9250ChangeBinded     = this.onMPU9250Change.bind(this);
  this.onLuxometerChangeBinded   = this.onLuxometerChange.bind(this);
};

CC2650SensorTag.is = function(peripheral) {
  var localName = peripheral.advertisement.localName;

  return (localName === 'CC2650 SensorTag') ||
          (localName === 'SensorTag 2.0');
};

NobleDevice.Util.inherits(CC2650SensorTag, NobleDevice);
NobleDevice.Util.mixin(CC2650SensorTag, NobleDevice.DeviceInformationService);
NobleDevice.Util.mixin(CC2650SensorTag, Common);

CC2650SensorTag.prototype.convertIrTemperatureData = function(data, callback) {
  var ambientTemperature = data.readInt16LE(2) / 128.0;
  var objectTemperature = data.readInt16LE(0) / 128.0;

  callback(objectTemperature, ambientTemperature);
};

CC2650SensorTag.prototype.convertHumidityData = function(data, callback) {
  var temperature = -40 + ((165  * data.readUInt16LE(0)) / 65536.0);
  var humidity = data.readUInt16LE(2) * 100 / 65536.0;

  callback(temperature, humidity);
};

CC2650SensorTag.prototype.enableBarometricPressure = function(callback) {
  this.enableConfigCharacteristic(BAROMETRIC_PRESSURE_UUID, BAROMETRIC_PRESSURE_CONFIG_UUID, callback);
};

CC2650SensorTag.prototype.convertBarometricPressureData = function(data, callback) {
  var tempBMP;     // Temperature processed value from sensor
  var pressure; // Pressure processed value from sensor

  // data is returned as 16 bit single precision float, convert to float
  // no idea at moment why divide by 10000 and not 100
  var exponent;
  var mantissa;

  var flTempBMP;
  var flPressure;
  tempBMP = data.readUInt16LE(0);

  exponent = (tempBMP & 0xF000) >> 12;
  mantissa = (tempBMP & 0x0FFF);

  flTempBMP = mantissa * Math.pow(2, exponent) / 10000;

  pressure = data.readUInt16LE(2);

  exponent = (pressure & 0xF000) >> 12;
  mantissa = (pressure & 0x0FFF);
  flPressure = mantissa * Math.pow(2, exponent) / 10000;

  callback(flPressure);
};

CC2650SensorTag.prototype.setMPU9250Period = function(period, callback) {
  this.writePeriodCharacteristic(MPU9250_UUID, MPU9250_PERIOD_UUID, period, callback);
};

CC2650SensorTag.prototype.enableMPU9250 = function(mask, callback) {
  this.mpu9250mask |= mask;

  // for now, always write 0x007f, magnetometer does not seem to notify is specific mask is used
  this.writeUInt16LECharacteristic(MPU9250_UUID, MPU9250_CONFIG_UUID, 0x007f, callback);
};

CC2650SensorTag.prototype.disableMPU9250 = function(mask, callback) {
  this.mpu9250mask &= ~mask;

  if (this.mpu9250mask === 0) {
    this.writeUInt16LECharacteristic(MPU9250_UUID, MPU9250_CONFIG_UUID, 0x0000, callback);
  } else if (typeof(callback) === 'function') {
    callback();
  }
};

CC2650SensorTag.prototype.notifyMPU9250 = function(callback) {
  this.mpu9250notifyCount++;

  if (this.mpu9250notifyCount === 1) {
    this.notifyCharacteristic(MPU9250_UUID, MPU9250_DATA_UUID, true, this.onMPU9250ChangeBinded, callback);
  } else if (typeof(callback) === 'function') {
    callback();
  }
};

CC2650SensorTag.prototype.unnotifyMPU9250 = function(callback) {
  this.mpu9250notifyCount--;

  if (this.mpu9250notifyCount === 0) {
    this.notifyCharacteristic(MPU9250_UUID, MPU9250_DATA_UUID, false, this.onMPU9250ChangeBinded, callback);
  } else if (typeof(callback) === 'function') {
    callback();
  }
};

CC2650SensorTag.prototype.enableAccelerometer = function(callback) {
  this.enableMPU9250(MPU9250_ACCELEROMETER_MASK, callback);
};

CC2650SensorTag.prototype.disableAccelerometer = function(callback) {
  this.disableMPU9250(MPU9250_ACCELEROMETER_MASK, callback);
};

CC2650SensorTag.prototype.readAccelerometer  = function(callback) {
  this.readDataCharacteristic(MPU9250_UUID, MPU9250_DATA_UUID, function(error, data) {
    if (error) {
      return callback(error);
    }

    this.convertMPU9250Data(data, function(x, y, z) {
      callback(null, x, y, z);
    }.bind(this));
  }.bind(this));
};

CC2650SensorTag.prototype.onMPU9250Change = function(data) {
  this.convertMPU9250Data(data, function(x, y, z, xG, yG, zG, xM, yM, zM) {
    if (this.mpu9250mask & MPU9250_ACCELEROMETER_MASK) {
      this.emit('accelerometerChange', x, y, z);
    }

    if (this.mpu9250mask & MPU9250_GYROSCOPE_MASK) {
      this.emit('gyroscopeChange', xG, yG, zG);
    }

    if (this.mpu9250mask & MPU9250_MAGNETOMETER_MASK) {
      this.emit('magnetometerChange', xM, yM, zM);
    }
  }.bind(this));
};

CC2650SensorTag.prototype.convertMPU9250Data = function(data, callback) {
  //PF edit..hard coding all values to 0 & commenting rest.
  //var xG = yG = zG = x = y = z = xM = yM = zM = 1;

  // 250 deg/s range
  var xG = data.readInt16LE(0) * (500.0 / 65536.0);
  var yG = data.readInt16LE(2) * (500.0 / 65536.0);
  var zG = data.readInt16LE(4) * (500.0 / 65536.0);

  // we specify 2G range in setup
  var x = data.readInt16LE(6) * 2.0 / 32768.0;
  var y = data.readInt16LE(8) * 2.0 / 32768.0;
  var z = data.readInt16LE(10) * 2.0 / 32768.0;

  // magnetometer (page 50 of http://www.invensense.com/mems/gyro/documents/RM-MPU-9250A-00.pdf)
  var xM = data.readInt16LE(12,true) * 4912.0 / 32760.0;
  var yM = data.readInt16LE(14,true) * 4912.0 / 32760.0;
  var zM = data.readInt16LE(16,true) * 4912.0 / 32760.0;

  callback(x, y, z, xG, yG, zG, xM, yM, zM);
};

CC2650SensorTag.prototype.notifyAccelerometer = function(callback) {
  this.notifyMPU9250(callback);
};

CC2650SensorTag.prototype.unnotifyAccelerometer = function(callback) {
  this.unnotifyMPU9250(callback);
};

CC2650SensorTag.prototype.setAccelerometerPeriod = function(period, callback) {
  this.setMPU9250Period(period, callback);
};

CC2650SensorTag.prototype.enableMagnetometer = function(callback) {
  this.enableMPU9250(MPU9250_MAGNETOMETER_MASK, callback);
};

CC2650SensorTag.prototype.disableMagnetometer = function(callback) {
  this.disableMPU9250(MPU9250_MAGNETOMETER_MASK, callback);
};

CC2650SensorTag.prototype.readMagnetometer = function(callback) {
  this.readDataCharacteristic(MPU9250_UUID, MPU9250_DATA_UUID, function(error, data) {
    if (error) {
      return callback(error);
    }

    this.convertMPU9250Data(data, function(x, y, z, xG, yG, zG, xM, yM, zM) {
      callback(null, xM, yM, zM);
    }.bind(this));
  }.bind(this));
};

CC2650SensorTag.prototype.notifyMagnetometer = function(callback) {
  this.notifyMPU9250(callback);
};

CC2650SensorTag.prototype.unnotifyMagnetometer = function(callback) {
  this.unnotifyMPU9250(callback);
};

CC2650SensorTag.prototype.setMagnetometerPeriod = function(period, callback) {
  this.setMPU9250Period(period, callback);
};

CC2650SensorTag.prototype.setGyroscopePeriod = function(period, callback) {
  this.setMPU9250Period(period, callback);
};

CC2650SensorTag.prototype.enableGyroscope = function(callback) {
  this.enableMPU9250(MPU9250_GYROSCOPE_MASK, callback);
};

CC2650SensorTag.prototype.disableGyroscope = function(callback) {
  this.disableMPU9250(MPU9250_GYROSCOPE_MASK, callback);
};

CC2650SensorTag.prototype.readGyroscope = function(callback) {
  this.readDataCharacteristic(MPU9250_UUID, MPU9250_DATA_UUID, function(error, data) {
    if (error) {
      return callback(error);
    }

    this.convertMPU9250Data(data, function(x, y, z, xG, yG, zG) {
      callback(null, xG, yG, zG);
    }.bind(this));
  }.bind(this));
};

CC2650SensorTag.prototype.notifyGyroscope = function(callback) {
  this.notifyMPU9250(callback);
};

CC2650SensorTag.prototype.unnotifyGyroscope = function(callback) {
  this.unnotifyMPU9250(callback);
};

CC2650SensorTag.prototype.enableLuxometer = function(callback) {
  this.enableConfigCharacteristic(LUXOMTER_UUID, LUXOMTER_CONFIG_UUID, callback);
};

CC2650SensorTag.prototype.disableLuxometer = function(callback) {
  this.disableConfigCharacteristic(LUXOMTER_UUID, LUXOMTER_CONFIG_UUID, callback);
};

CC2650SensorTag.prototype.readLuxometer = function(callback) {
  this.readDataCharacteristic(LUXOMTER_UUID, LUXOMTER_DATA_UUID, function(error, data) {
    if (error) {
      return callback(error);
    }

    this.convertLuxometerData(data, function(lux) {
      callback(null, lux);
    }.bind(this));
  }.bind(this));
 };

CC2650SensorTag.prototype.onLuxometerChange = function(data) {
  this.convertLuxometerData(data, function(lux) {
    this.emit('luxometerChange', lux);
  }.bind(this));
};

CC2650SensorTag.prototype.convertLuxometerData = function(data, callback) {
  var lux = data.readUInt16LE(0) /100;

  callback(lux);
};

CC2650SensorTag.prototype.notifyLuxometer = function(callback) {
  this.notifyCharacteristic(LUXOMTER_UUID, LUXOMTER_DATA_UUID, true, this.onLuxometerChangeBinded, callback);
};

CC2650SensorTag.prototype.unnotifyLuxometer = function(callback) {
  this.notifyCharacteristic(LUXOMTER_UUID, LUXOMTER_DATA_UUID, false, this.onLuxometerChangeBinded, callback);
};

CC2650SensorTag.prototype.setLuxometerPeriod = function(period, callback) {
  this.writePeriodCharacteristic(LUXOMTER_UUID, LUXOMTER_PERIOD_UUID, period, callback);
};

module.exports = CC2650SensorTag;
  • Sign in to reply
  • Fred27
    Fred27 over 9 years ago in reply to cstanton

    6LoWPAN is IPv6 over a mesh network - in this case ZigBee (802.15.4).

    • Cancel
    • Vote Up 0 Vote Down
    • Sign in to reply
    • More
    • Cancel
  • cstanton
    cstanton over 9 years ago in reply to Fred27

    Is that because 6LoWPAN isn't strictly bluetooth? From what I read it's still some subset of 802.15 though?

    • Cancel
    • Vote Up 0 Vote Down
    • Sign in to reply
    • More
    • Cancel
  • Fred27
    Fred27 over 9 years ago

    A nice write-up. The BBB also looks ideal as an edge router if you decide to use 6LoWPAN for mesh networking your Sensortags (or CC2650 launchpads). It does need a different radio (CC2538EM or another Sensortag) instead of the Bluetooth adapter.

    • Cancel
    • Vote Up 0 Vote Down
    • Sign in to reply
    • More
    • Cancel
element14 Community

element14 is the first online community specifically for engineers. Connect with your peers and get expert answers to your questions.

  • Members
  • Learn
  • Technologies
  • Challenges & Projects
  • Products
  • Store
  • About Us
  • Feedback & Support
  • FAQs
  • Terms of Use
  • Privacy Policy
  • Legal and Copyright Notices
  • Sitemap
  • Cookies

An Avnet Company © 2025 Premier Farnell Limited. All Rights Reserved.

Premier Farnell Ltd, registered in England and Wales (no 00876412), registered office: Farnell House, Forge Lane, Leeds LS12 2NE.

ICP 备案号 10220084.

Follow element14

  • X
  • Facebook
  • linkedin
  • YouTube