element14 Community
element14 Community
    Register Log In
  • Site
  • Search
  • Log In Register
  • Community Hub
    Community Hub
    • What's New on element14
    • Feedback and Support
    • Benefits of Membership
    • Personal Blogs
    • Members Area
    • Achievement Levels
  • Learn
    Learn
    • Ask an Expert
    • eBooks
    • element14 presents
    • Learning Center
    • Tech Spotlight
    • STEM Academy
    • Webinars, Training and Events
    • Learning Groups
  • Technologies
    Technologies
    • 3D Printing
    • FPGA
    • Industrial Automation
    • Internet of Things
    • Power & Energy
    • Sensors
    • Technology Groups
  • Challenges & Projects
    Challenges & Projects
    • Design Challenges
    • element14 presents Projects
    • Project14
    • Arduino Projects
    • Raspberry Pi Projects
    • Project Groups
  • Products
    Products
    • Arduino
    • Avnet Boards Community
    • Dev Tools
    • Manufacturers
    • Multicomp Pro
    • Product Groups
    • Raspberry Pi
    • RoadTests & Reviews
  • About Us
  • Store
    Store
    • Visit Your Store
    • Choose another store...
      • Europe
      •  Austria (German)
      •  Belgium (Dutch, French)
      •  Bulgaria (Bulgarian)
      •  Czech Republic (Czech)
      •  Denmark (Danish)
      •  Estonia (Estonian)
      •  Finland (Finnish)
      •  France (French)
      •  Germany (German)
      •  Hungary (Hungarian)
      •  Ireland
      •  Israel
      •  Italy (Italian)
      •  Latvia (Latvian)
      •  
      •  Lithuania (Lithuanian)
      •  Netherlands (Dutch)
      •  Norway (Norwegian)
      •  Poland (Polish)
      •  Portugal (Portuguese)
      •  Romania (Romanian)
      •  Russia (Russian)
      •  Slovakia (Slovak)
      •  Slovenia (Slovenian)
      •  Spain (Spanish)
      •  Sweden (Swedish)
      •  Switzerland(German, French)
      •  Turkey (Turkish)
      •  United Kingdom
      • Asia Pacific
      •  Australia
      •  China
      •  Hong Kong
      •  India
      •  Korea (Korean)
      •  Malaysia
      •  New Zealand
      •  Philippines
      •  Singapore
      •  Taiwan
      •  Thailand (Thai)
      • Americas
      •  Brazil (Portuguese)
      •  Canada
      •  Mexico (Spanish)
      •  United States
      Can't find the country/region you're looking for? Visit our export site or find a local distributor.
  • Translate
  • Profile
  • Settings
BeagleBoard
  • Products
  • Dev Tools
  • Single-Board Computers
  • BeagleBoard
  • More
  • Cancel
BeagleBoard
Blog Hackerspace challenge: PS1 PnP update - Debian, Python & Qt
  • Blog
  • Forum
  • Documents
  • Quiz
  • Polls
  • Files
  • Members
  • Mentions
  • Sub-Groups
  • Tags
  • More
  • Cancel
  • New
Join BeagleBoard to participate - click to join for free!
  • Share
  • More
  • Cancel
Group Actions
  • Group RSS
  • More
  • Cancel
Engagement
  • Author Author: fustini
  • Date Created: 26 Jul 2013 1:03 AM Date Created
  • Views 990 views
  • Likes 1 like
  • Comments 3 comments
  • debian
  • source_code
  • tinyg
  • python
  • beaglebone_black
  • ps1
  • motor_controller
  • cnc
  • chicago
  • qt
  • nerp
  • bbb
  • BeagleBone
  • texas_intruments
  • pumping_station_one
  • hackerspace_challenge
  • bb_black
  • beagle_bone_black
  • arm
  • wheezy
  • psone312
  • ti
  • linux
Related
Recommended

Hackerspace challenge: PS1 PnP update - Debian, Python & Qt

fustini
fustini
26 Jul 2013

Following my last update, we decided to use TinyG to do motion control for our Pick-n-Place machine.  The BeagleBone Black needs to send the appropriate g-code over the serial port to tell the TinyG what movements to make.  One of our team members, Ed Bennett, had the idea of using the mouse to control the PnP machine while we continue to develop it.  For now, we need "exercise" the X-Y gantry to see how well it works before mounting Ed's vacuum nozzle head which has Z-axis and alpha-axis (rotation).


Porting PyQt demo

Ed developed a PyQt demo for mouse control of PnP gantry on his Linux laptop.  Bonnie King and I then worked on getting Ed's program working on the BBB.  It turned out to be an issue that the code seems to use Qt3 classes.  It worked on Bonnie's Fedora laptop with Qt3 installed.  However, neither Angstrom, Debian 7 (www.armhf.com) or Ubuntu 13 (www.armhf.com) had Qt3 available in their repos.


We ended up rewriting the program for Qt4 based on various PyQt for Qt4 examples (using Debian 7 as it was last distro we tried when still search for Qt3):

https://github.com/pdp7/bbqt/blob/master/pnpcntrl.py


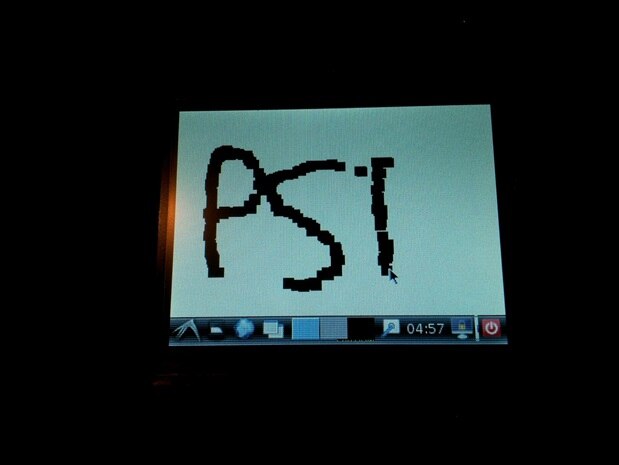
The code is messy right now, but it will writes g-code to the serial port (via PySerial) per mouse movement.  At first I thought there was a problem, as it was really slow, but I realized after awhile it was because I running it remotely via X.  I put my 4.3" LCD touchscreen cape on the BBB and installed LXDE desktop env into Debian on the BBB.  It then drew at a normal speed no problem - d'oh image  I could also draw using my finger on the touchscreen.  The photo attached looks crude as I was drawing points with a large pen at that point before going to drawing lines with a finer pen.

image

image


Software Setup:

Here is the process I followed to setup my BeagleBone Black to run the demo:


1) Download Debian 7.0 image from armhf.com and burn to microSD:


http://www.armhf.com/index.php/boards/beaglebone-black/#wheezy


2) Boot off microSD card and then copy to eMMC (so microSD card won't be needed anymore at bootup; based on armhf.com instructions)


a) Boot off of Debian SD card by holding down the boot button

b) copy the image file to the BBB from your computer (for example, filename debian-wheezy-7.0.0-armhf-3.8.13-bone20.img.xz).

c) the .img.xz can be directly applied to the Bone’s internal eMMC while booted from the external microSD card:


xz -cd debian-wheezy-7.0.0-armhf-3.8.13-bone20.img.xz > /dev/mmcblk1


d) power down and remove the microSD card

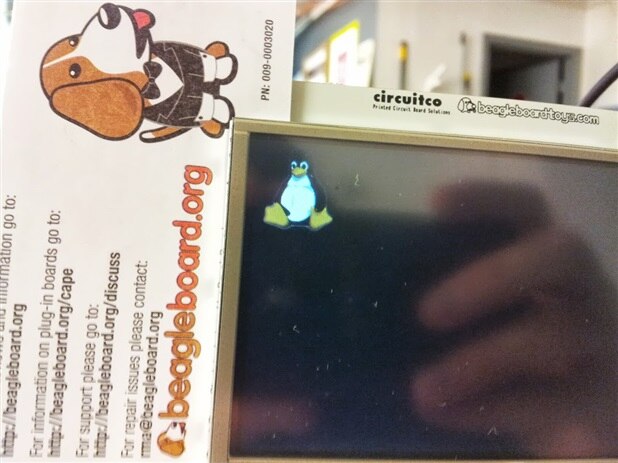
e) power on the BBB and you'll now enjoy a nice photo of Tux on the bootscreen image

image


3) Install required packages:

sudo apt-get update

sudo apt-get install lxde git python-sip python-qt4 python-setuptools python-pip python-serial minicom


4) Clone my bbqt GitHub repo:

debian@debian-armhf:~$ git clone git@github.com:pdp7/bbqt.git

Cloning into 'bbqt'...

remote: Counting objects: 31, done.

remote: Compressing objects: 100% (19/19), done.

remote: Total 31 (delta 12), reused 30 (delta 11)

Receiving objects: 100% (31/31), 10.01 KiB, done.

Resolving deltas: 100% (12/12), done.


5) Connect TinyG mini-USB port to the BBB's USB 2.0 host port & verify serial port exists

debian@debian-armhf:~$ ls /dev/ttyUSB0

#it could potentially be ttyUSB1, ttyUSB2, so check those if ttyUSB0 not present


6) Run pnpcntrl.py script in the bbqt repo (edit the path for serial port if not /dev/ttyUSB0)

debian@debian-armhf:~/bbqt$ sudo python ./pnpcntrl.py


Live Testing:

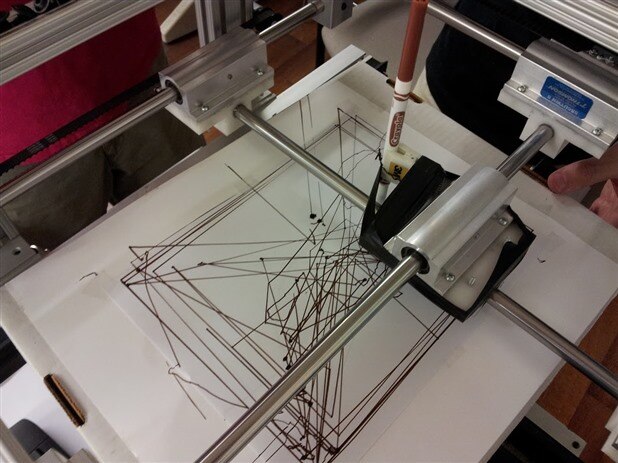
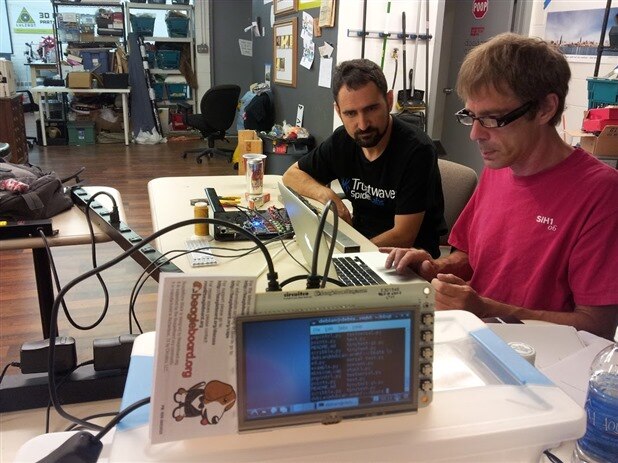
Here's a video of the gantry running under mouse control.  We taped a marker to the head and used a pizza box to simulate the PCB to determine if the machine's X & Y were calibrated properly:


You don't have permission to edit metadata of this video.
Edit media
x
image
Upload Preview
image


Here's a still photo from the process:

image

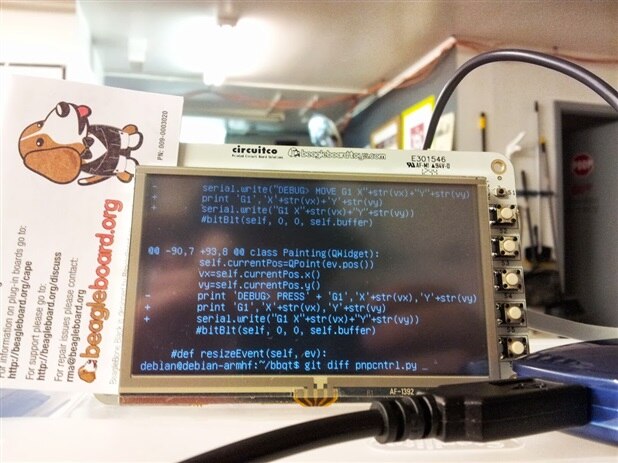
We learned we needed to adjust the size of the canvas in Qt and also scale the mouse coordinates to the dimensions of our machine (about 10" travel on both the X & Y).  Luckily, I was able to use the LCD4 cape directly to edit the (tiny) Python code:

image

Ed B (right) and Dan D (left) decided it would be better if we tried to draw a square exactly:

image

We wrote exact g-code for a square instead of using the mouse and it worked well:

image

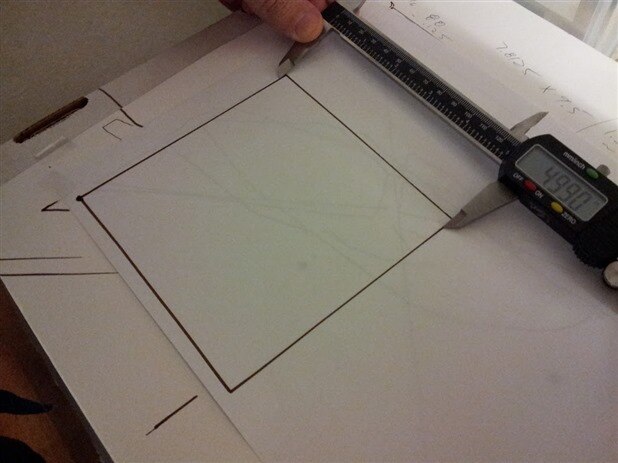
We were very proud to see our little PnP bot's artistic taste move from abstract to realism image

image


Coming Soon...

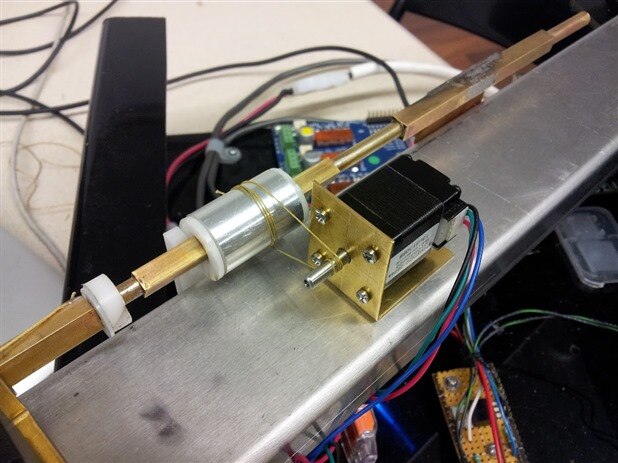
Our next big task is a mechanical one: mounting Ed's Z-axis + alpha-axis head onto the PnP gantry. 

image

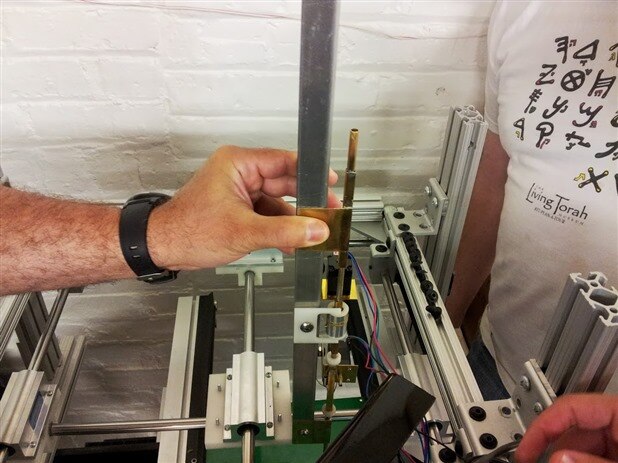
In my next post, I'll describe the process Ed went through in design the Z-axis and alpha-axis and how he machined the parts in the device

image


Reference:

  • Ongoing collection of photos and videos I shot:
    • Video: http://www.youtube.com/playlist?list=PLa1tazUyp-oPIq5ASIDDpTk5Vju63miN3
    • Photos: https://plus.google.com/photos/117542001281850354871/albums/5904271155402126145?banner=pwa
  • Read all "Hackerspace challenge: PS1 PnP update" posts:
    • http://www.element14.com/community/community/knode/single-board_computers/next-gen_beaglebone/blog/tags/psone312
  • pnpcntrl.py captured on 2013-07-25 and pasted into a Gist so I can embed it here:

  • Sign in to reply
Parents
  • dragonstyne
    dragonstyne over 12 years ago

    Greetings,


    Great job so far. What are you going to use for the grabber / picker? Also, how do you propose to feed the parts?

    It looks like this platform has many possibilities. Change the pin for a laser?


    Great job. Cant wait to see the finished product in action.


    Regards,

    Steve

    • Cancel
    • Vote Up 0 Vote Down
    • Sign in to reply
    • More
    • Cancel
  • fustini
    fustini over 12 years ago in reply to dragonstyne

    Hi - thanks, that's an interesting idea to change the pen to a laser pointer until our real head is mounted.


    I'm going to make another post shortly that covers more of the mechanicals.  Ed's head has the Z-axis and also rotation (theta).  A tube can be connected at the top going to a vacuum pump. The valve will be controlled by a solenoid that can be switched on and off from a transistor connected to the TinyG (certain G-Code will then actuate it when needed).  If that doesn't work, then we can interface to transistor to an output pin on the BBB.  When necessary, the Python program and toggle the BBB pin in between writing G-Code commands to the serial port (which goes to the TinyG).


    For the feeder, we have a piece a delrin (which is like a hard plastic) which another member had machined with 8mm slots in it (I think there are 10).  Cut tape with surface mount components will fit in the slots.  The slots are about 6" long and an acrylic covering would go over the top to hold the tapes in the slots.  One side of the slots wouldn't be covered so the PnP head pick the components out of the containers in the tape.


    Hopefully some photos and video in my posts will make it clearer.


    Thanks,

    Drew

    • Cancel
    • Vote Up 0 Vote Down
    • Sign in to reply
    • More
    • Cancel
Comment
  • fustini
    fustini over 12 years ago in reply to dragonstyne

    Hi - thanks, that's an interesting idea to change the pen to a laser pointer until our real head is mounted.


    I'm going to make another post shortly that covers more of the mechanicals.  Ed's head has the Z-axis and also rotation (theta).  A tube can be connected at the top going to a vacuum pump. The valve will be controlled by a solenoid that can be switched on and off from a transistor connected to the TinyG (certain G-Code will then actuate it when needed).  If that doesn't work, then we can interface to transistor to an output pin on the BBB.  When necessary, the Python program and toggle the BBB pin in between writing G-Code commands to the serial port (which goes to the TinyG).


    For the feeder, we have a piece a delrin (which is like a hard plastic) which another member had machined with 8mm slots in it (I think there are 10).  Cut tape with surface mount components will fit in the slots.  The slots are about 6" long and an acrylic covering would go over the top to hold the tapes in the slots.  One side of the slots wouldn't be covered so the PnP head pick the components out of the containers in the tape.


    Hopefully some photos and video in my posts will make it clearer.


    Thanks,

    Drew

    • Cancel
    • Vote Up 0 Vote Down
    • Sign in to reply
    • More
    • Cancel
Children
  • dragonstyne
    dragonstyne over 12 years ago in reply to fustini

    Thanks for the update Drew,

    Using a glow in the dark sheet, you should be able to see the lines and points (at lest in theory).

    And, with a cutting laser you could cut, drill and make stencils.

    Having multiple head options would be a nice future feature.


    Regards,

    Steve

    • Cancel
    • Vote Up 0 Vote Down
    • Sign in to reply
    • More
    • Cancel
element14 Community

element14 is the first online community specifically for engineers. Connect with your peers and get expert answers to your questions.

  • Members
  • Learn
  • Technologies
  • Challenges & Projects
  • Products
  • Store
  • About Us
  • Feedback & Support
  • FAQs
  • Terms of Use
  • Privacy Policy
  • Legal and Copyright Notices
  • Sitemap
  • Cookies

An Avnet Company © 2025 Premier Farnell Limited. All Rights Reserved.

Premier Farnell Ltd, registered in England and Wales (no 00876412), registered office: Farnell House, Forge Lane, Leeds LS12 2NE.

ICP 备案号 10220084.

Follow element14

  • X
  • Facebook
  • linkedin
  • YouTube