


Hello, my name is Timi Folayan and I am a SDE intern here at NI. I've noticed most of the community's DAQ content assumes you're using LabVIEW, which makes sense - it's the flagship tool. But I come from a software engineering background, and I wanted to see how far I could get controlling a mioDAQ using nothing but Python and the official nidaqmx-python API.
This is the first post in a short series where I'll build up complexity one step at a time: this post just turns an LED on, the next will read a button press, and eventually I'll combine input and output into something interactive. Starting simple on purpose - if you're newer to hardware, this is meant to be a post you can follow along with on your own bench.
What you'll need
- NI mioDAQ
- Breadboard
- 1x illuminated pushbutton (red)
- 1x 10k Ω resistor
- Jumper wires
- Python 3.8+ with
nidaqmxinstalled (pip install nidaqmx) and the NI-DAQmx driver installed
*A note on scope*
This post only turns the pushbutton's built-in LED on - it doesn't read the button press yet. I'm keeping input and output separate for now so each post in the series stays focused on one concept at a time.
Wiring it up

The LED lead from the pushbutton connects to P0.0 through a 10kΩ current-limiting resistor. The other LED lead ties into the mioDAQ's DGND. That's it for this post - the switch contacts on the pushbutton aren't wired yet.
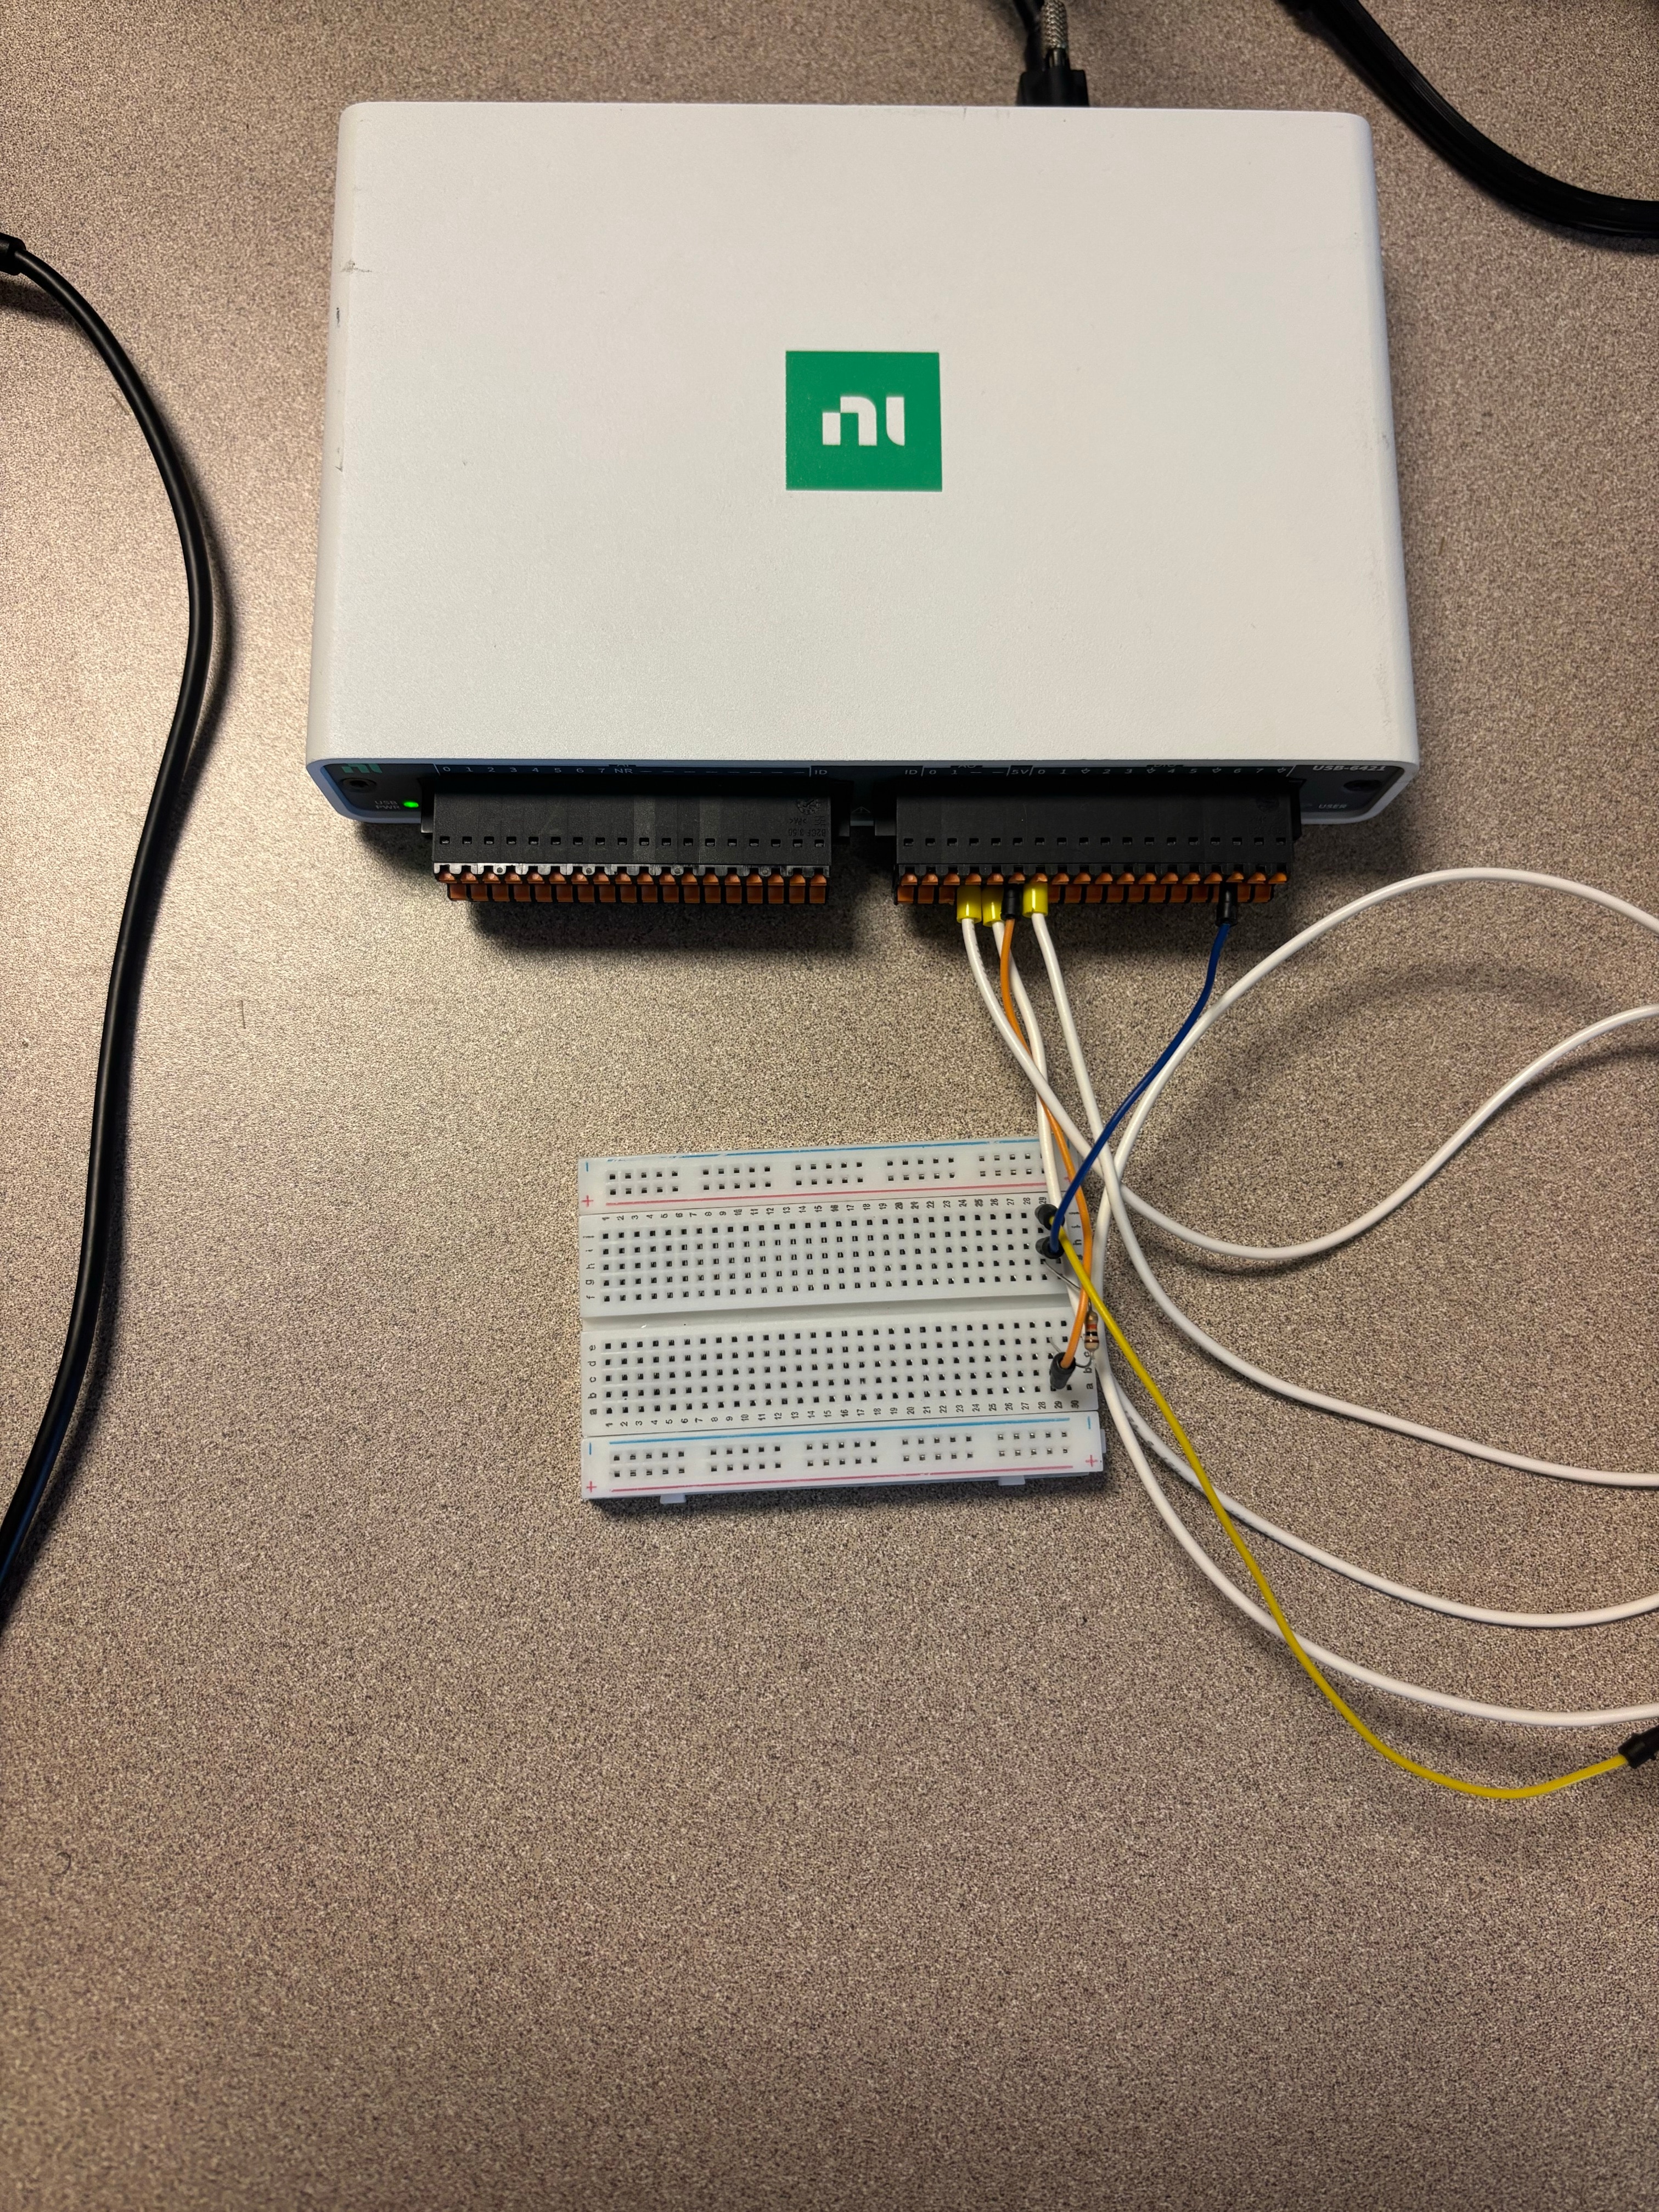
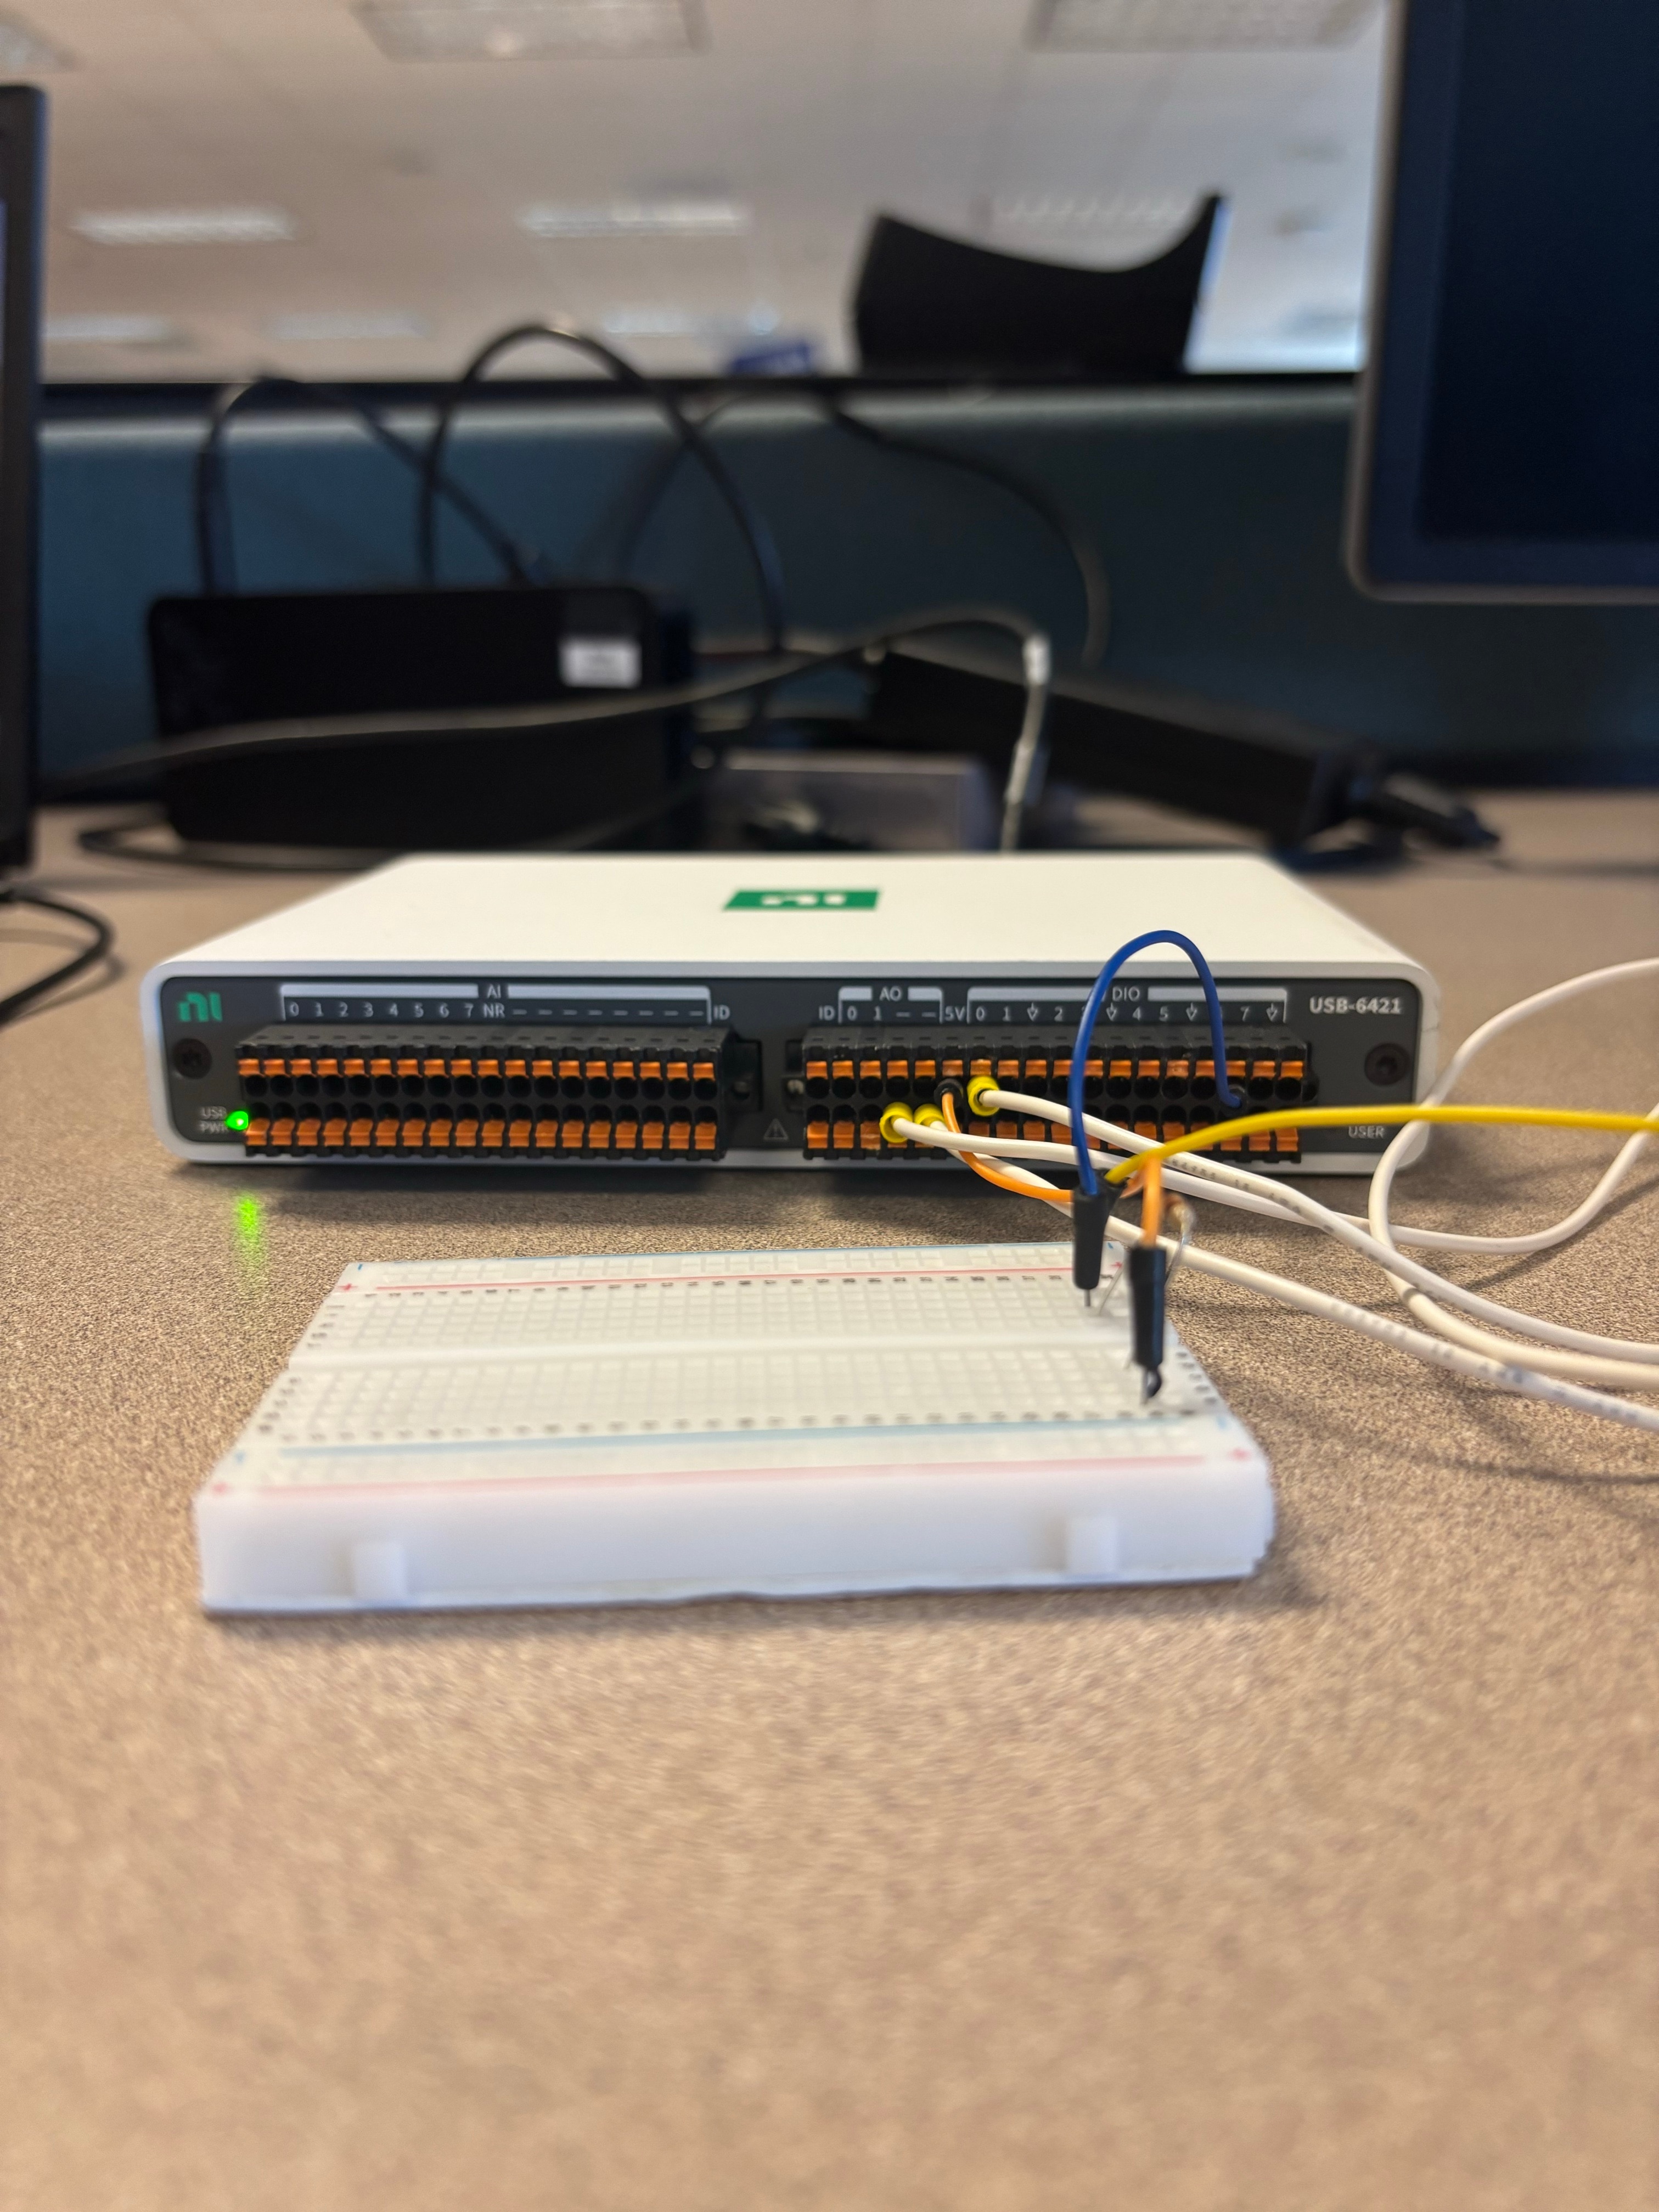
Two ways to write to an mioDAQ: analog vs. digital
The nidaqmx-python examples repo includes both analog and digital output patterns. Since a pushbutton LED is a simple on/off device, digital output is the right fit here — but it's worth seeing the analog version too, since it's the same basic task/channel pattern applied to a continuous voltage instead of a binary line.
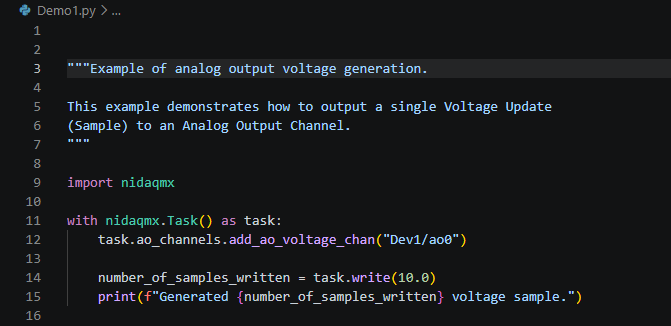
Analog output writes a specific voltage value (here, 10.0 V) to an analog channel - useful for things like driving a motor speed or simulating a sensor signal, where you need more than just on/off.
The digital output code (what I'm actually using)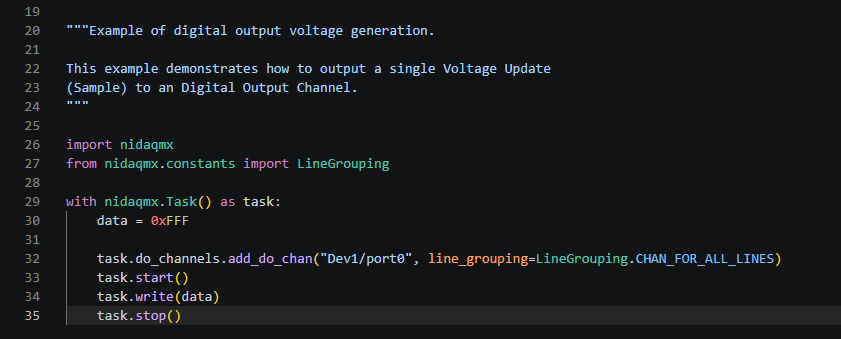
Demo Video:
Reference
The examples I started from are in the official nidaqmx-python repo: github.com/ni/nidaqmx-python - worth a look if you want to see the full range of what the API covers beyond digital and analog output.
Up next
Post 2 in this series will read the pushbutton's actual switch state as a digital input - the first step toward making this interactive instead of just scripted.