element14 Community
element14 Community
    Register Log In
  • Site
  • Search
  • Log In Register
  • Community Hub
    Community Hub
    • What's New on element14
    • Feedback and Support
    • Benefits of Membership
    • Personal Blogs
    • Members Area
    • Achievement Levels
  • Learn
    Learn
    • Ask an Expert
    • eBooks
    • element14 presents
    • Learning Center
    • Tech Spotlight
    • STEM Academy
    • Webinars, Training and Events
    • Learning Groups
  • Technologies
    Technologies
    • 3D Printing
    • FPGA
    • Industrial Automation
    • Internet of Things
    • Power & Energy
    • Sensors
    • Technology Groups
  • Challenges & Projects
    Challenges & Projects
    • Design Challenges
    • element14 presents Projects
    • Project14
    • Arduino Projects
    • Raspberry Pi Projects
    • Project Groups
  • Products
    Products
    • Arduino
    • Avnet & Tria Boards Community
    • Dev Tools
    • Manufacturers
    • Multicomp Pro
    • Product Groups
    • Raspberry Pi
    • RoadTests & Reviews
  • About Us
    About the element14 Community
  • Store
    Store
    • Visit Your Store
    • Choose another store...
      • Europe
      •  Austria (German)
      •  Belgium (Dutch, French)
      •  Bulgaria (Bulgarian)
      •  Czech Republic (Czech)
      •  Denmark (Danish)
      •  Estonia (Estonian)
      •  Finland (Finnish)
      •  France (French)
      •  Germany (German)
      •  Hungary (Hungarian)
      •  Ireland
      •  Israel
      •  Italy (Italian)
      •  Latvia (Latvian)
      •  
      •  Lithuania (Lithuanian)
      •  Netherlands (Dutch)
      •  Norway (Norwegian)
      •  Poland (Polish)
      •  Portugal (Portuguese)
      •  Romania (Romanian)
      •  Russia (Russian)
      •  Slovakia (Slovak)
      •  Slovenia (Slovenian)
      •  Spain (Spanish)
      •  Sweden (Swedish)
      •  Switzerland(German, French)
      •  Turkey (Turkish)
      •  United Kingdom
      • Asia Pacific
      •  Australia
      •  China
      •  Hong Kong
      •  India
      •  Japan
      •  Korea (Korean)
      •  Malaysia
      •  New Zealand
      •  Philippines
      •  Singapore
      •  Taiwan
      •  Thailand (Thai)
      •  Vietnam
      • Americas
      •  Brazil (Portuguese)
      •  Canada
      •  Mexico (Spanish)
      •  United States
      Can't find the country/region you're looking for? Visit our export site or find a local distributor.
  • Translate
  • Profile
  • Settings
Raspberry Pi
  • Products
  • More
Raspberry Pi
Blog Raspberry Pi - Image processing for UAV navigation
  • Blog
  • Forum
  • Documents
  • Quiz
  • Events
  • Polls
  • Files
  • Members
  • Mentions
  • Sub-Groups
  • Tags
  • More
  • Cancel
  • New
Join Raspberry Pi to participate - click to join for free!
Featured Articles
Announcing Pi
Technical Specifications
Raspberry Pi FAQs
Win a Pi
GPIO Pinout
Raspberry Pi Wishlist
Comparison Chart
Quiz
  • Share
  • More
  • Cancel
Group Actions
  • Group RSS
  • More
  • Cancel
Engagement
  • Author Author: Former Member
  • Date Created: 12 Feb 2013 9:31 PM Date Created
  • Views 3486 views
  • Likes 1 like
  • Comments 11 comments
Related
Recommended
  • raspberry
  • c
  • python
  • rpiintermediate
  • pi
  • processing
  • image
  • opencv
  • UAV
  • camera
  • webcam

Raspberry Pi - Image processing for UAV navigation

Former Member
Former Member
12 Feb 2013

Hey all,


I am quite new to the Raspberry Pi world but very interested. I have done a few basic things on the Raspberry Pi so far, the main one was learning to code in python (as I already know C) and learning to use a linux based system (first time!).


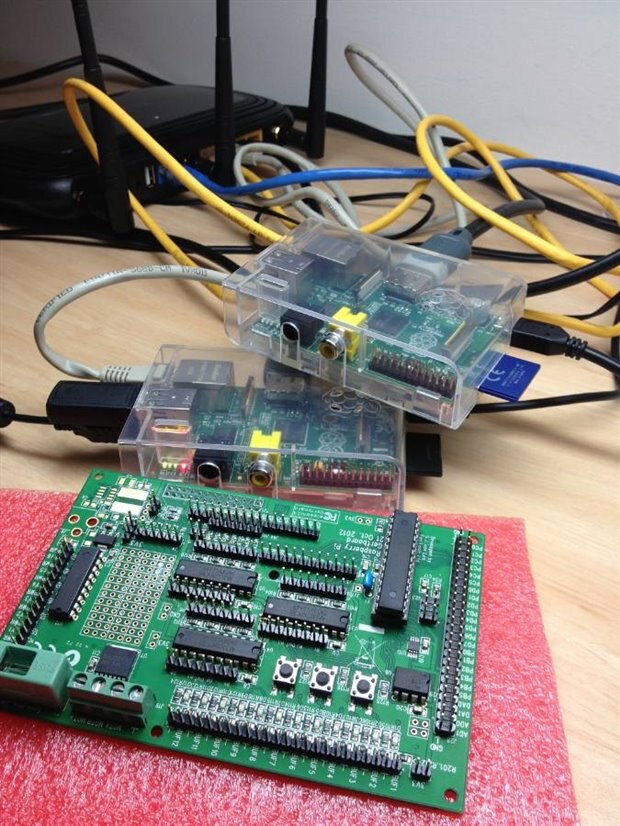
So far I own a 256Mb Raspberry Pi model B, 512Mb Raspberry Pi model B and a Gertboard.


The main project I will be working on involves:

     -Determining the image processing capabilities of the Raspberry Pi

     -Get a webcam working with the Raspberry Pi, accessed via python and C (most likely using openCV)

     -Write a program to capture an image, wait, capture another, compare these two images and determine the direction and speed (using the wait time)

     -Implement this on a UAV as the main navigation protocol (Pretty much like the AR Drones)


I will be using the new Raspberry Pi camera when I can get my hands on it but for now the webcam will suit for proof of concept, also will most likely be using C as my final programming language as it is faster than python (disregarding pypi)


Anyway, I will be no doubt be needing help in this project and hope to find others doing similar things, and I will try help others who need it.


Cheers,


PudFish (Dan)

image

  • Sign in to reply

Top Comments

  • eduardofv
    eduardofv over 13 years ago +1
    Hope this posts I wrote (a while ago) may help: http://eduardofv.com/read_post/185-Installing-OpenCV-on-the-Raspberry-Pi http://eduardofv.com/read_post/192-OpenCV-on-the-Raspberry-Pi-with-Arch-Linux-ARM…
  • Former Member
    Former Member over 13 years ago

    Thanks Eduardo,


    I have been away for the weekend but will be trying out your code tomorrow, it looks like that may fix my problem, or maybe I really want it to.


    James, think that link is broken now, did you mean Texas in QLD or USA?


    Anyway, I'll be on tomorrow to reveal if the problem is fixed and if so I'll post the max frames per second I can get my program running at.


    Cheers,

    Dan

    • Cancel
    • Vote Up 0 Vote Down
    • Sign in to reply
    • More
    • Cancel
  • Former Member
    Former Member over 13 years ago

    I hope you don't live in Texas. Although, it is a great Q.

    http://www.popsci.com/technology/article/2013-02/privacy-and-drones

    • Cancel
    • Vote Up 0 Vote Down
    • Sign in to reply
    • More
    • Cancel
  • eduardofv
    eduardofv over 13 years ago in reply to Former Member

    I had that same problem. I'm not completely sure but I think it's like a buffer in which images have to be retrieved in order, as they are captured. What I did was manage every interaction with the user with the OpenCV WaitKey function and keep reading and showing the image.


    This is a test program for the laser range finder. I modified it from somewhere but I've lost the link. It takes a couple of images, differences them, and makes some other processing to find the laser pointer position. You might need to make some changes for the specific version of OpenCV you are using. (Sorry about formatting, I didn't find how to quote code, if you tell me I will edit this)


    #! /usr/bin/env python
    
    import sys
    
    # import the necessary things for OpenCV
    from opencv import cv
    from opencv import highgui
    
    
    def TakePic(capture):
        highgui.cvNamedWindow ('camera', highgui.CV_WINDOW_AUTOSIZE)
        while 1:
            img = highgui.cvQueryFrame(capture)
            
            size = cv.cvGetSize(img)
            centerx = size.width/2
            centery = size.height/2
            crosslen = 4
    
         cv.cvLine(img,cv.cvPoint(0,centery),cv.cvPoint(size.width,centery),cv.cvScalar(255,255,0))
         cv.cvLine(img,cv.cvPoint(centerx,0),cv.cvPoint(centerx,size.height),cv.cvScalar(255,255,0))
         cv.cvLine(img,cv.cvPoint(centerx-crosslen,centery),cv.cvPoint(centerx+crosslen,centery),cv.cvScalar(255,255,0),2)
         cv.cvLine(img,cv.cvPoint(centerx,centery-crosslen),cv.cvPoint(centerx,centery+crosslen),cv.cvScalar(255,255,0),2)
    
            highgui.cvShowImage('camera',img)
            k = highgui.cvWaitKey(5)
            if k >= 0:
                return img


    if __name__ == '__main__':
    
        # a small welcome
        print "OpenCV Python capture video"
    
        # first, create the necessary window
        highgui.cvNamedWindow ('1', highgui.CV_WINDOW_AUTOSIZE)
        highgui.cvNamedWindow ('2', highgui.CV_WINDOW_AUTOSIZE)
        highgui.cvNamedWindow ('3', highgui.CV_WINDOW_AUTOSIZE)
    
        # move the new window to a better place
        #highgui.cvMoveWindow ('Camera', 10, 10)
    
        device = 0
    
        capture = highgui.cvCreateCameraCapture (device)
    
        # check that capture device is OK
        if not capture:
            print "Error opening capture device"
            sys.exit (1)
    
        img1 = TakePic(capture)
        simg1 = cv.cvCloneImage(img1)
        cv.cvSmooth(img1,simg1)
        imgg1 = cv.cvCreateImage(cv.cvGetSize(simg1), cv.IPL_DEPTH_8U, 1)
        cv.cvCvtColor(simg1,imgg1, cv.CV_RGB2GRAY)
        highgui.cvShowImage ('1', simg1)
        
        img2 = TakePic(capture)
        simg2 = cv.cvCloneImage(img2)
        cv.cvSmooth(img2,simg2)
        imgg2 = cv.cvCreateImage(cv.cvGetSize(img2), cv.IPL_DEPTH_8U, 1)
        cv.cvCvtColor(simg2,imgg2, cv.CV_RGB2GRAY)
        highgui.cvShowImage ('2', simg2)
    
        img3 = cv.cvCloneImage(img1)
        imgg3 = cv.cvCreateImage(cv.cvGetSize(img2), cv.IPL_DEPTH_8U,1)
        bitimage = cv.cvCreateImage(cv.cvGetSize(img2), cv.IPL_DEPTH_8U, 1)
    
        #cv.cvAbsDiff(simg2,simg1,img3)
        #cv.cvCvtColor(img3,imgg3, cv.CV_RGB2GRAY)
        print cv.cvAbsDiff(imgg2,imgg1,imgg3)
        simg3 = cv.cvCloneImage(imgg3)
        cv.cvSmooth(imgg3,simg3)
        cv.cvThreshold(simg3,bitimage,16,255,cv.CV_THRESH_BINARY)
        eimg3 = cv.cvCloneImage(bitimage)
        cv.cvErode(bitimage,eimg3)
    
        #highgui.cvShowImage ('3', bitimage)
        highgui.cvShowImage ('3', simg3)
        highgui.cvNamedWindow ('th', highgui.CV_WINDOW_AUTOSIZE)
        highgui.cvShowImage ('th', bitimage)
        highgui.cvNamedWindow ('eroded', highgui.CV_WINDOW_AUTOSIZE)
        highgui.cvShowImage ('eroded', eimg3)
    
        moments = cv.CvMoments()
        cv.cvMoments(eimg3,moments,0)
        moment10 = cv.cvGetSpatialMoment(moments,1,0)
        moment01 = cv.cvGetSpatialMoment(moments,0,1)
        area = cv.cvGetCentralMoment(moments,0,0)
        posX = int(moment10/area)
        posY = int(moment01/area)
        print "laser at "+str(posX)+","+str(posY)
    
        cv.cvCircle(simg2,cv.cvPoint(posX,posY),15,cv.cvScalar(0,255,0),2)
        cv.cvCircle(simg2,cv.cvPoint(posX,posY),2,cv.cvScalar(0,255,0),2)
        highgui.cvShowImage ('2', simg2)
    
        cv.cvSave("diff.png",bitimage)
     
        print "Bye"
        # handle events
        k = highgui.cvWaitKey (100000)
        #cv.cvReleaseCapture(capture)
    
    
    • Cancel
    • Vote Up 0 Vote Down
    • Sign in to reply
    • More
    • Cancel
  • Former Member
    Former Member over 13 years ago

    Hi all,


    I have got openCV working for python and C, just using python for now. But I have ran into problems and need help since I've tried everywhere and everything I can think of.

    -Using python with openCV but can use C instead

    -Running Raspberry Pi, 512Mb model B

    -Using a logitech QuickCam Communicate MP/S5500 Webcam

    Now, my ultimate goal is to capture an image, wait some time, capture another image, merge (add) the images together, save the output.

    The issue is the second image captured is just like the first, dispite the program correctly waiting, the camera does not wait to capture the next image. I have tried in both python and C and had the same issue so I believe I must be missing some key element.

    Here is the Code:

    # PudFish
    # cvTest.py
    # 11 Feb 13

    from cv import *

    SIZE=(HEIGHT,WIDTH)=(640,480) # Image capture size
    CAMERA_INDEX=-1 # -1 means any camera attached
    WAIT_TIME=10 # In seconds

    cam=CaptureFromCAM(CAMERA_INDEX) # Initializes capturing a video from a camera
    SetCaptureProperty(cam,CV_CAP_PROP_FRAME_WIDTH,WIDTH) # Set the capture image width
    SetCaptureProperty(cam,CV_CAP_PROP_FRAME_HEIGHT,HEIGHT) # Set the capture image height

    img1=QueryFrame(cam) # Capture an image and store as img
    print "img1 captured"
    SaveImage("img1.png",img1) # Save the img to file
    print "img1 saved"

    # Delay, indexed for debugging
    for i in range(0,WAIT_TIME):
    print "i: %d" %i # Print the current index
    WaitKey(1000)

    img2=QueryFrame(cam) # Capture an image and store as img
    print "img2 captured"
    SaveImage("img2.png",img2) # Save the img to file
    print "img2 saved"

    # Print the data types and ID's for debugging
    print "img1 Type: %s" %type(img1) # Print the data type of the img variable
    print "img1 ID: %d" %id(img1) # Print the unique ID of the img1 object
    print "img2 Type: %s" %type(img2) # Print the data type of the img variable
    print "img2 ID: %d" %id(img2) # Print the unique ID of the img2 object

    And the Output:

    VIDIOC_QUERYMENU: Invaild argument
    VIDIOC_QUERYMENU: Invaild argument
    VIDIOC_QUERYMENU: Invaild argument
    VIDIOC_QUERYMENU: Invaild argument
    VIDIOC_QUERYMENU: Invaild argument
    VIDIOC_QUERYMENU: Invaild argument
    VIDIOC_QUERYMENU: Invaild argument
    VIDIOC_QUERYMENU: Invaild argument
    VIDIOC_QUERYMENU: Invaild argument
    VIDIOC_QUERYMENU: Invaild argument
    VIDIOC_QUERYMENU: Invaild argument
    VIDIOC_QUERYMENU: Invaild argument
    VIDIOC_QUERYMENU: Invaild argument
    VIDIOC_QUERYMENU: Invaild argument
    img1 captured
    img1 saved
    i: 0
    i: 1
    i: 2
    i: 3
    i: 4
    i: 5
    i: 6
    i: 7
    i: 8
    i: 9
    img2 captured
    img2 saved
    img1 Type: <type 'cv2.cv.iplimage'>
    img1 ID: 1147448688
    img2 Type: <type 'cv2.cv.iplimage'>
    img2 ID: 1147448712

    So, I had the webcam facing the monitor for debugging:

    -img1 shows the last line as "VIDIOC_QUERYMENU: Invaild argument"

    -img2 shows the last line as "i: 2"


    Now the odd thing which occurs, I comment out the capturing of img1, and then img2 is captured at the correct time, i.e. the last line in the picture is i: 9


    Let me know if you need any more info or to clear things up, thanks in advance for any help.


    Dan.

    • Cancel
    • Vote Up 0 Vote Down
    • Sign in to reply
    • More
    • Cancel
  • Former Member
    Former Member over 13 years ago in reply to eduardofv

    Thanks Eduardo,


    That's a big help, and yeah I can't wait till the CSI camera, just have to put up with the webcam for now.


    Thanks,


    Dan.

    • Cancel
    • Vote Up 0 Vote Down
    • Sign in to reply
    • More
    • Cancel
<>
element14 Community

element14 is the first online community specifically for engineers. Connect with your peers and get expert answers to your questions.

  • Members
  • Learn
  • Technologies
  • Challenges & Projects
  • Products
  • Store
  • About Us
  • Feedback & Support
  • FAQs
  • Terms of Use
  • Privacy Policy
  • Legal and Copyright Notices
  • Sitemap
  • Cookies

An Avnet Company © 2026 Premier Farnell Limited. All Rights Reserved.

Premier Farnell Ltd, registered in England and Wales (no 00876412), registered office: Farnell House, Forge Lane, Leeds LS12 2NE.

ICP 备案号 10220084.

Follow element14

  • X
  • Facebook
  • linkedin
  • YouTube