element14 Community
element14 Community
    Register Log In
  • Site
  • Search
  • Log In Register
  • Community Hub
    Community Hub
    • What's New on element14
    • Feedback and Support
    • Benefits of Membership
    • Personal Blogs
    • Members Area
    • Achievement Levels
  • Learn
    Learn
    • Ask an Expert
    • eBooks
    • element14 presents
    • Learning Center
    • Tech Spotlight
    • STEM Academy
    • Webinars, Training and Events
    • Learning Groups
  • Technologies
    Technologies
    • 3D Printing
    • FPGA
    • Industrial Automation
    • Internet of Things
    • Power & Energy
    • Sensors
    • Technology Groups
  • Challenges & Projects
    Challenges & Projects
    • Design Challenges
    • element14 presents Projects
    • Project14
    • Arduino Projects
    • Raspberry Pi Projects
    • Project Groups
  • Products
    Products
    • Arduino
    • Avnet & Tria Boards Community
    • Dev Tools
    • Manufacturers
    • Multicomp Pro
    • Product Groups
    • Raspberry Pi
    • RoadTests & Reviews
  • About Us
    About the element14 Community
  • Store
    Store
    • Visit Your Store
    • Choose another store...
      • Europe
      •  Austria (German)
      •  Belgium (Dutch, French)
      •  Bulgaria (Bulgarian)
      •  Czech Republic (Czech)
      •  Denmark (Danish)
      •  Estonia (Estonian)
      •  Finland (Finnish)
      •  France (French)
      •  Germany (German)
      •  Hungary (Hungarian)
      •  Ireland
      •  Israel
      •  Italy (Italian)
      •  Latvia (Latvian)
      •  
      •  Lithuania (Lithuanian)
      •  Netherlands (Dutch)
      •  Norway (Norwegian)
      •  Poland (Polish)
      •  Portugal (Portuguese)
      •  Romania (Romanian)
      •  Russia (Russian)
      •  Slovakia (Slovak)
      •  Slovenia (Slovenian)
      •  Spain (Spanish)
      •  Sweden (Swedish)
      •  Switzerland(German, French)
      •  Turkey (Turkish)
      •  United Kingdom
      • Asia Pacific
      •  Australia
      •  China
      •  Hong Kong
      •  India
      •  Japan
      •  Korea (Korean)
      •  Malaysia
      •  New Zealand
      •  Philippines
      •  Singapore
      •  Taiwan
      •  Thailand (Thai)
      •  Vietnam
      • Americas
      •  Brazil (Portuguese)
      •  Canada
      •  Mexico (Spanish)
      •  United States
      Can't find the country/region you're looking for? Visit our export site or find a local distributor.
  • Translate
  • Profile
  • Settings
Raspberry Pi
  • Products
  • More
Raspberry Pi
Raspberry Pi Forum Cannot get 7" touch screen to power up.
  • Blog
  • Forum
  • Documents
  • Quiz
  • Events
  • Polls
  • Files
  • Members
  • Mentions
  • Sub-Groups
  • Tags
  • More
  • Cancel
  • New
Join Raspberry Pi to participate - click to join for free!
Featured Articles
Announcing Pi
Technical Specifications
Raspberry Pi FAQs
Win a Pi
Raspberry Pi Wishlist
Actions
  • Share
  • More
  • Cancel
Forum Thread Details
  • Replies 8 replies
  • Subscribers 707 subscribers
  • Views 1102 views
  • Users 0 members are here
  • raspberry_pi
Related

Cannot get 7" touch screen to power up.

e14 Contributor
e14 Contributor over 9 years ago

Can someone help me find the reason my screen will not power up?

  • Sign in to reply
  • Cancel
  • spannerspencer
    spannerspencer over 9 years ago

    Could you provide a couple more details, such as the power supply info, and how you've got it set up?


    In the meantime, I'll move this over to our Raspberry Pi section, where it'll get a few extra eyeballs.

    • Cancel
    • Vote Up 0 Vote Down
    • Sign in to reply
    • Cancel
  • balearicdynamics
    balearicdynamics over 9 years ago

    Hello,


    better if you will explain something more about your issue.


    Enrico

    • Cancel
    • Vote Up 0 Vote Down
    • Sign in to reply
    • Cancel
  • uscdadnyc
    uscdadnyc over 9 years ago

    To: didkona143:

    Q1; which model RaspPi? Q2: Which model 7" touchscreen? ( Stock # 49Y1712 from element14 perhaps?) Q3: Can you solder electrical connections? AAR (At Any Rate) I put together RaspPi 3 and Item in Q2. AND a SmartiPi Touch Case From MCM Electronics (MCM Part # 83-17627) together this past Spring 2016. I posted pictures at one of these threads, but I forget which one. AAR2 I can give you DETAILED instructions to connect-up  items in Q1 & Q2. BTW WRT Q3. It is not necessary to know how to solder, you can just use the Jumpers, but soldering will not occupy the GPIO pins in case you want to use them later.

    USCDADNYC (NY NY USA)

    • Cancel
    • Vote Up 0 Vote Down
    • Sign in to reply
    • Cancel
  • wadeelmore
    wadeelmore over 9 years ago

    When I first connected mine, I followed the instructions and did "sudo apt-get upgrade", to upgrade my OS.  The display did not work.  I had to change to Rasputin-Jessie OS.  That worked.


    Recently, I had a bad micro SD card and had to format another with the OS.  Jessie has been replaced by Pixel.  It works with my touch screen.

    • Cancel
    • Vote Up 0 Vote Down
    • Sign in to reply
    • Cancel
  • uscdadnyc
    uscdadnyc over 9 years ago in reply to wadeelmore

    So you are OK then? What type of Enclosure are you using for your RaspPi ?

    USCDADNYC (NY NY USA)

    • Cancel
    • Vote Up 0 Vote Down
    • Sign in to reply
    • Cancel
  • wadeelmore
    wadeelmore over 9 years ago in reply to uscdadnyc

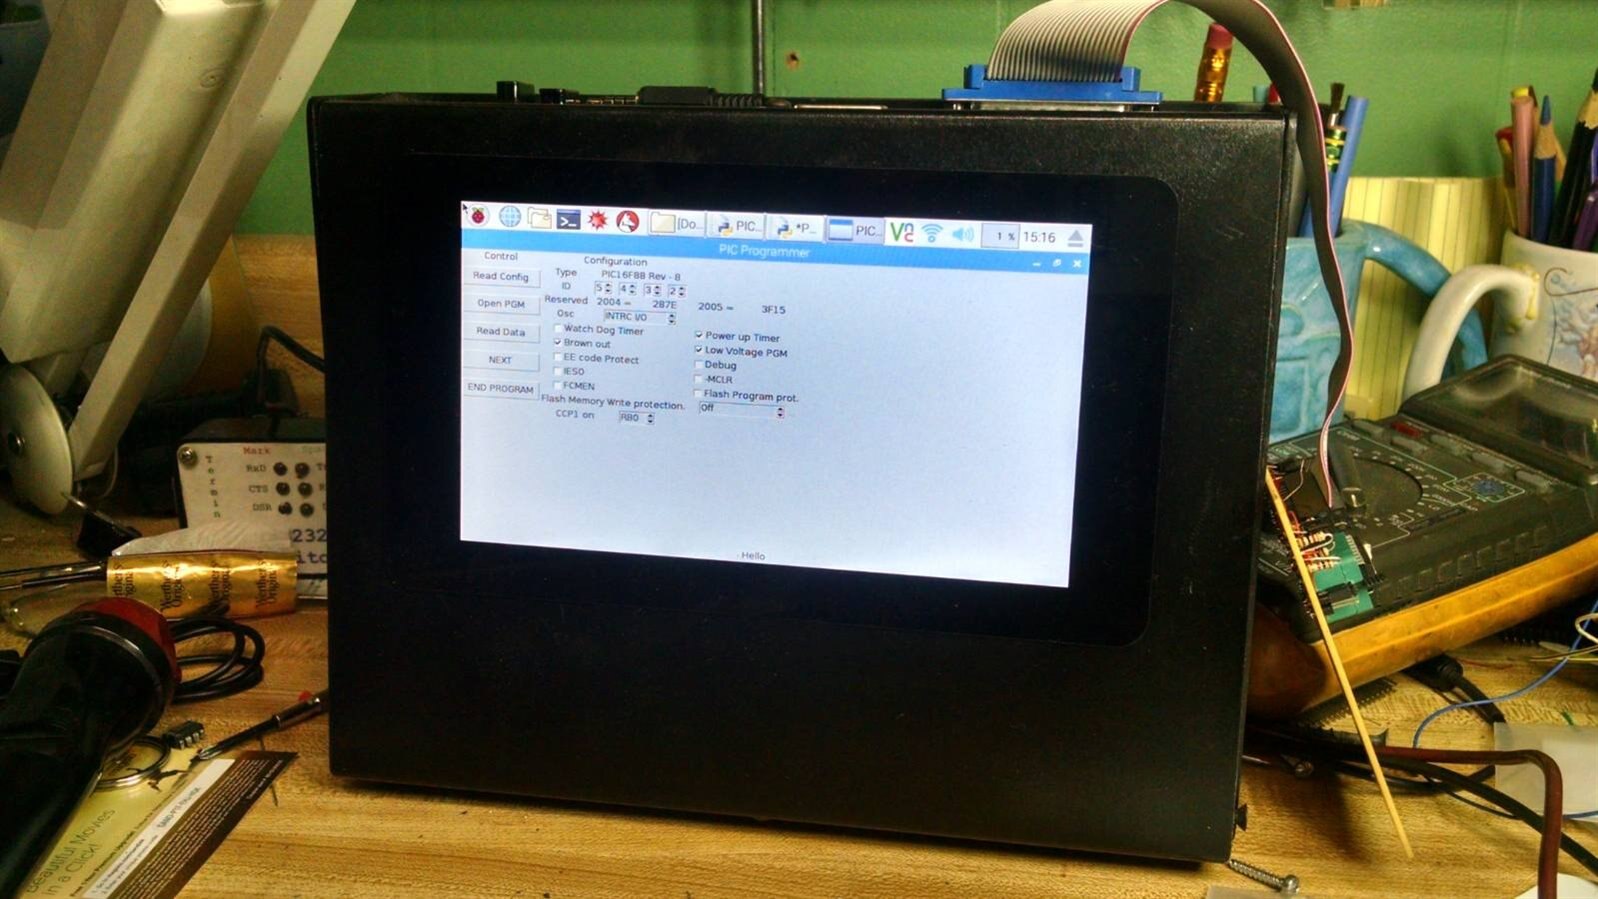
    image

    Custom metal enclosure.  Pi2 is mounted to back of the display.  The GPIO pins are extended to a DB25 and DB15 connector on top.

    I am working on putting a battery pack inside the case, making it self contained.

    Please excuse the messy work bench.


    Yes the display works great with Pixel.

    • Cancel
    • Vote Up 0 Vote Down
    • Sign in to reply
    • Cancel
  • uscdadnyc
    uscdadnyc over 9 years ago in reply to wadeelmore

    Nice Enclosure. The DB25 and DB15 are Nice Retro Touches.

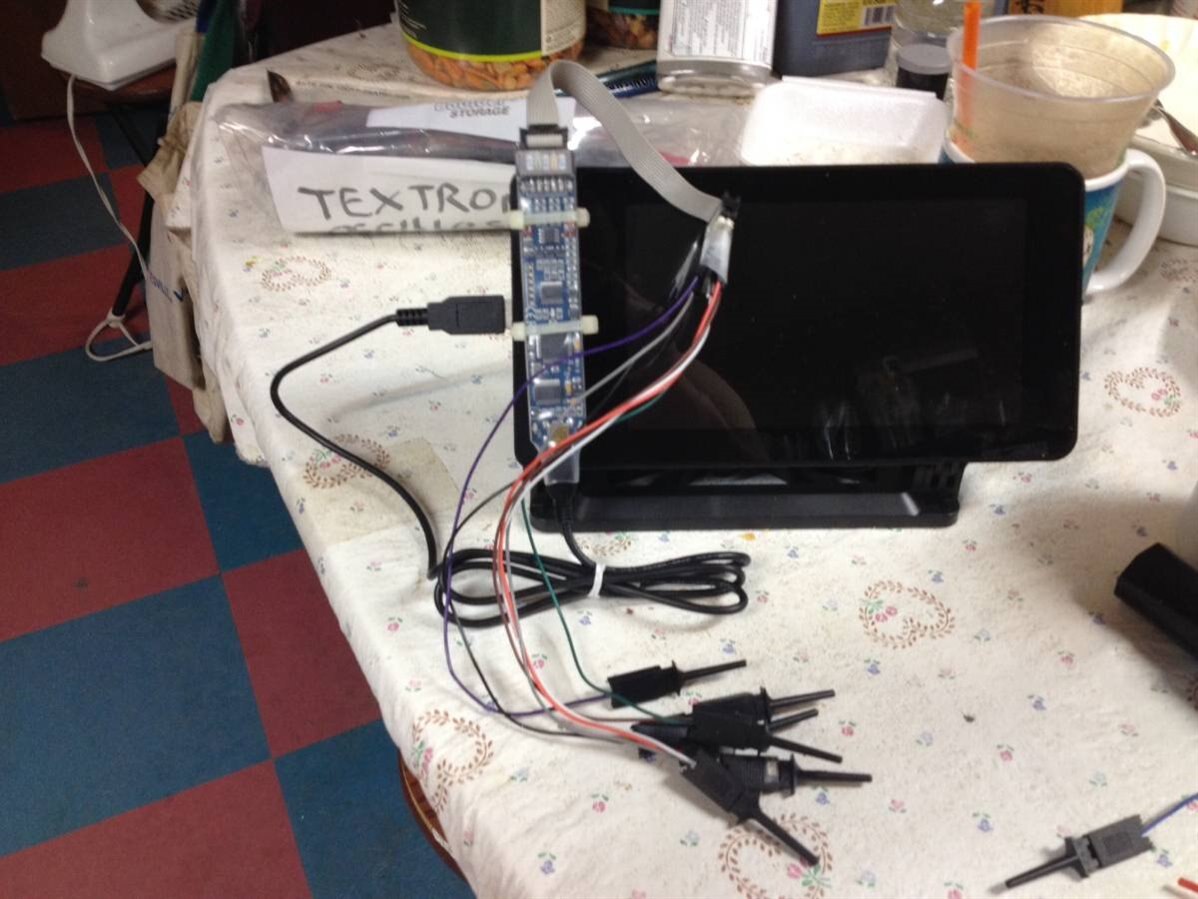
    Like I said I use a SmartiPi Enclosure:

    Pic of my unit assembled. That is a Bitscope USB Oscilloscope mounted on a Lego Brick (i.e. detachable)image

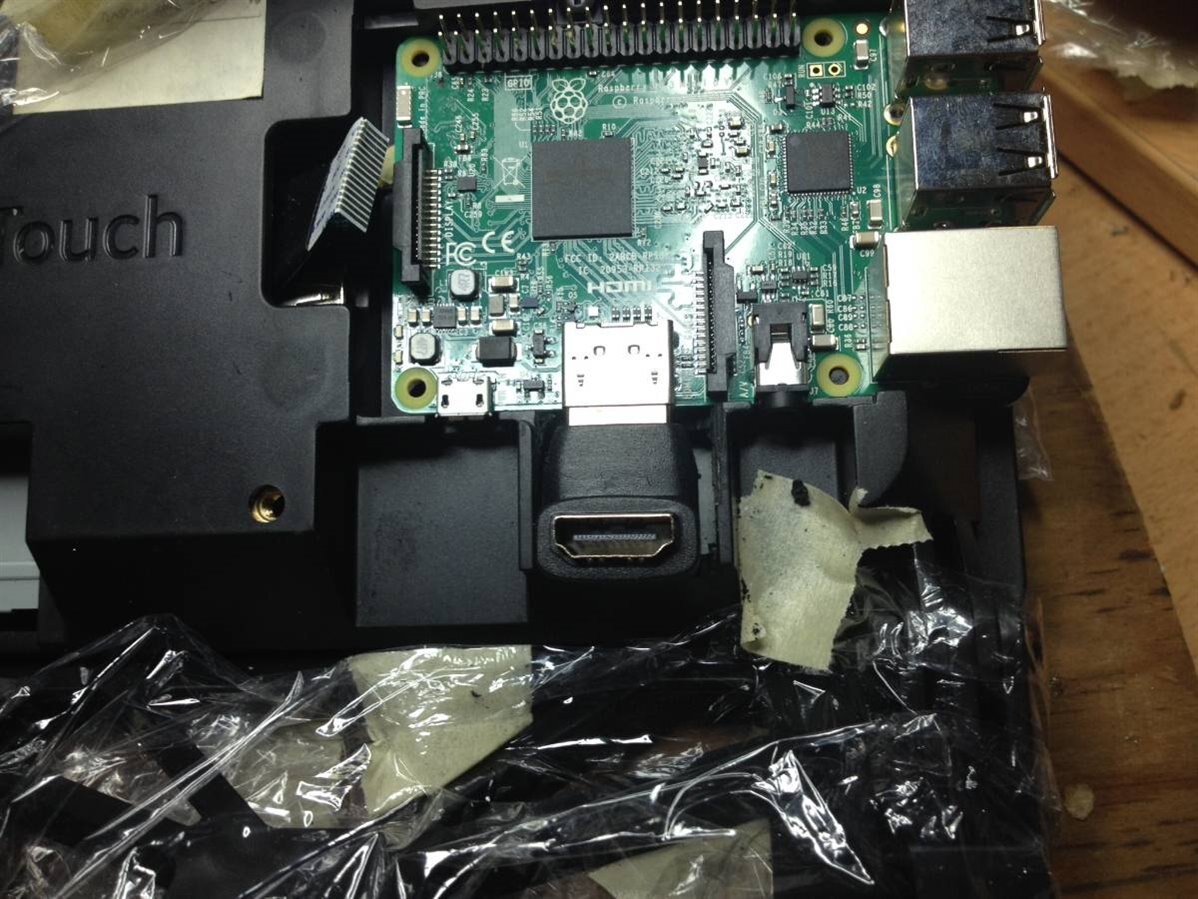
    Pic of the back of the SmartiPi -opened-Up. Note that the HDMI Port is blocked

    image

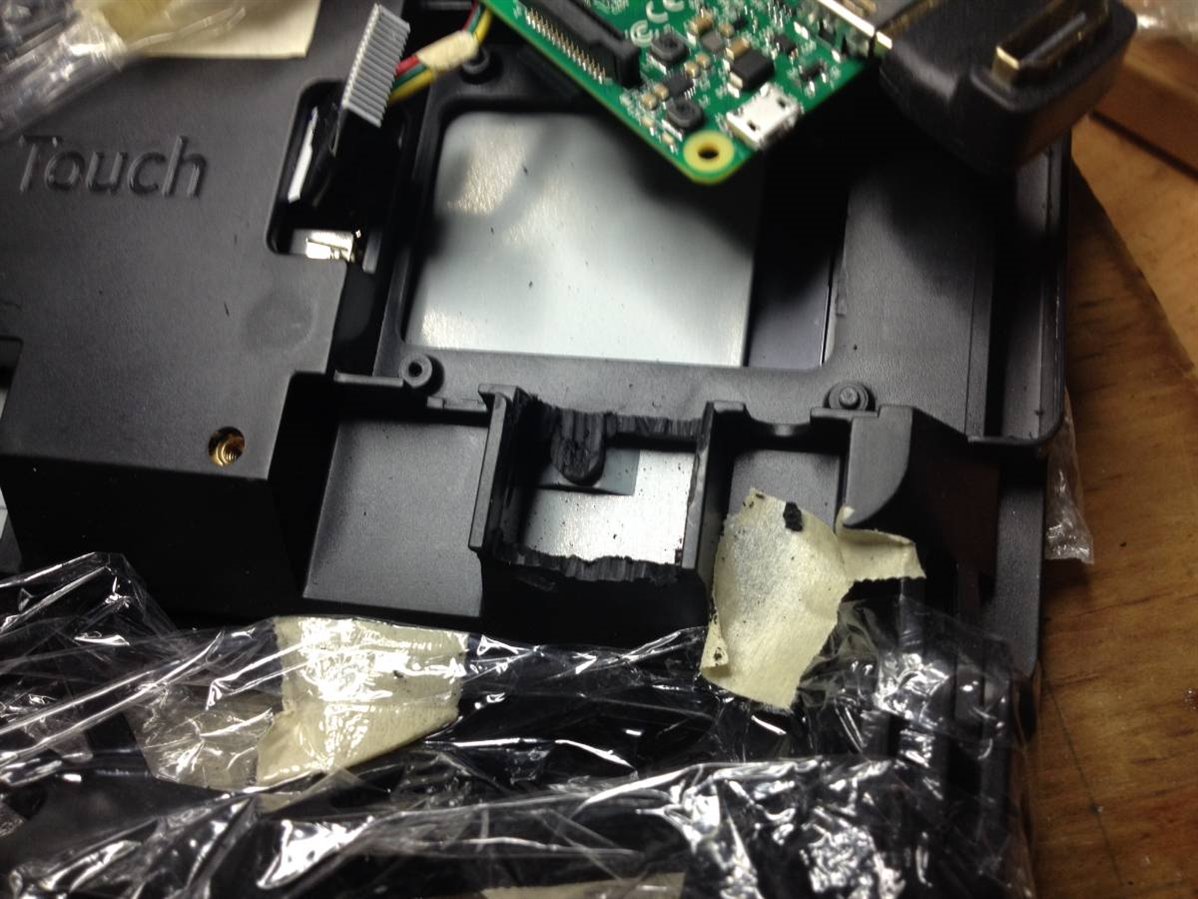
    Cutaway (using Dremel Tool) to expose the HDMI Port

    image

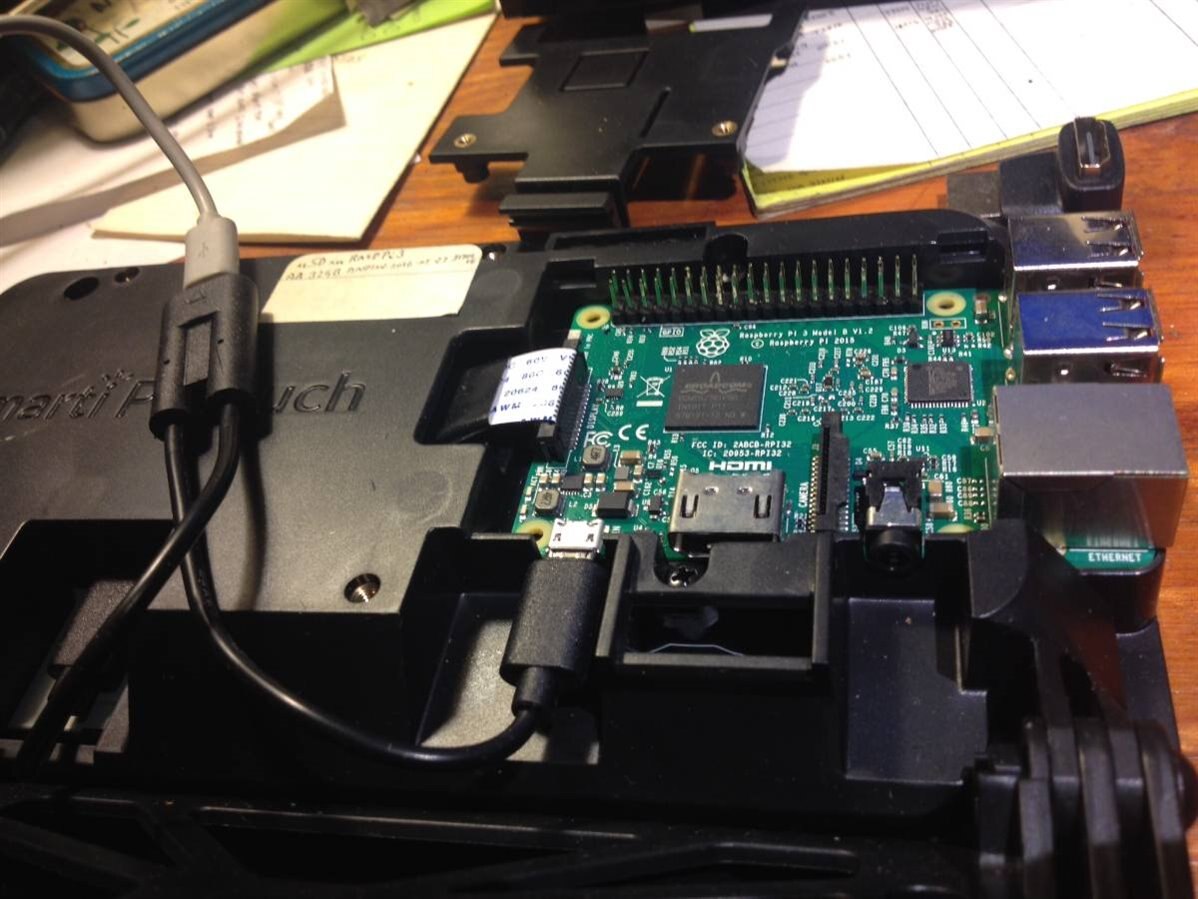
    RaspPi 3 B in SmartiPi Case and the HDMI-Port-Exposed using A Right-Angle HDMI Adapter

    image

    BTW the SmartiPi Enclosure Back Panel (Not Shown) has an Opening for attaching a 40pin Ribbon

    Cable to the GPIO Pins in the Photo above.

    The Touchscreen & the HDMI Port  (w/ HDMI Monitor) can be used CONCURRENTLY. Same as a USB

    Mouse and the Touchscreen Mouse, can be used CONCURRENTLY. I Didn't try using a USB Keyboard

    and the Touchscreen Keyboard at the Same Time Though. I didn't wan to push my Luck

    USCDADNYC (NY NY USA)

    • Cancel
    • Vote Up +1 Vote Down
    • Sign in to reply
    • Cancel
  • wadeelmore
    wadeelmore over 9 years ago in reply to uscdadnyc

    Nice

    • Cancel
    • Vote Up 0 Vote Down
    • Sign in to reply
    • Cancel
element14 Community

element14 is the first online community specifically for engineers. Connect with your peers and get expert answers to your questions.

  • Members
  • Learn
  • Technologies
  • Challenges & Projects
  • Products
  • Store
  • About Us
  • Feedback & Support
  • FAQs
  • Terms of Use
  • Privacy Policy
  • Legal and Copyright Notices
  • Sitemap
  • Cookies

An Avnet Company © 2026 Premier Farnell Limited. All Rights Reserved.

Premier Farnell Ltd, registered in England and Wales (no 00876412), registered office: Farnell House, Forge Lane, Leeds LS12 2NE.

Follow element14

  • X
  • Facebook
  • linkedin
  • YouTube