


This is a project that I embarked upon after reading Raspberry Pi Santa Catcher with Pi NoIR and PiFace CAD by Frederick Vandenbosch (fvan) who gets credit for a good majority of this write-up. I basically re-tailored it to focus on a practical problem that we face in our daily lives; especially those who have a hard time finding a parking spot at work: how can I be notified when a parking spot is vacated in a specific area of my workplace parking lot. Obviously, this is not a full-proof solution, and the end result is more of a proof-of-concept than a full-blown solution. However, I consider it as a good step toward accomplishing that goal and I hope others will expand it further and report back to spread the benefit to others.
I have followed more of a bullet-point "instruction set" style whereby someone can follow through them and get things running rather quickly. Fvan has done a better job elaborating on some of these so you could refer to his write-up for more details.
Before jumping into the content, an important addition that I made beyond the instructions is to share some pitfalls and the associated lessons-learned that I have gained as I implemented this project. These will be inserted within the instructions and typically preceded with a "Note" label; then they will be consolidated in the final "Wrap-Up" section.
Finally, and although this may be considered "a given", but I'll say it anyway: proper due diligence should be exercised when someone actually puts this project into practice; especially in terms of notifying people that monitoring is in progress. While the huge and fairly conspicuous camera may help with that, it may also be helpful to have a sign informing them that the property is being monitored - all of that of course, after getting proper authorization from the parking lot "owners."
Here's an overview of the topics that I will cover:
- Hardware Setup
- Software Installation
- Activating/Deactivating Monitoring
- Notifying based on movement
- Wrap-up and lessons-learned
Let's get right into it.
1. Hardware Setup: Required Parts (all obtained through Element14):
- Raspberry Pi Model B - 8GB SD Card pre-installed with NOOBS - (SKU: 04X5042)
- Pi NoIR (No InfraRed) Camera - (SKU: 08X2023)
- PiFace CAD (Control And Display) - (SKU: 01X3013)
- Enclosure for PiFace/Pi/Camera - (SKU: 95W3070)
- Wi-Pi Dongle/Module - (SKU: 07W8938)
- Dummy Camera, Monoprice - (Amazon ASIN: B007VDTTTM)

More About Pi NoIR
- NoIR (No InfraRed) Camera
- Infrared filter removed
- Black PCB (vs. usual green)
- 5 megapixel resolution
- 2592 x 1944 px static images
- 1080p30, 720p60 and 640x480p60/90 video
- Comes with instructions (easy)
- Easy Connection to Pi:
- SD Card
- Wi-Fi Dongle
- PiFace
- Harder Installations
- PiFace CAD
- “Unleash your Raspberry Pi from its keyboard, mouse and monitor! With PiFace
 Control & Display you can put your Raspberry Pi where you would never think possible. Saves space and power by removing the need for a monitor, yet still providing a user interface.”
 - This was practically one of the hardest parts in terms of physical setup since you have to carefully follow the instructions in order to wedge the the PCB inside of the container (without breaking anything). But here's a document that contains step-by-step instructions for doing that the right way: http://cpc.farnell.com/images/en_CC/PiFacecontrol&displayinstructions.pdf?COM=RaspberryPiProjects
2. Software Installation:
- NOOBS SD card
- Booted Pi with pre-installed NOOBS (from Element 14)
- Chose Raspbian as the installation
- This took almost 7 minutes
- Rebooted
- After installation, VERY important:
- sudo apt-get update
- sudo apt-get upgrade
- Configure Camera, SSH, and SPI
- Ran raspi-config (with sudo)
- Enable camera module
- Basic testing for camera after enabling it from raspi-config
- Command: raspistill -o noirimage.jpg
- Duration: took about 7 seconds to take picture and save it
- The key thing with Pi NoIR is that:
- IR light is visible to it but not to Pi Camera
- Used a TV remote control as an IR light source
- Enable SSH access (Advanced -> A4 SSH)
- Enable SPI (for PiFace CAD at Advanced -> A5 SPI)
- In raspi-config:
- Option 8 Advanced Options -> A5 SPI -> set to Yes -> select OK -> Finish
- Note: troubleshooting: if you don’t see this option (A5 SPI) in the options
- sudo apt-get update
- sudo apt-get upgrade
- In raspi-config:
- Enable camera module
- Ran raspi-config (with sudo)
- Set up PiFace CAD
- Install PiFace CAD software
- Will later pick a TV remote to control our PiFace CAD by following a set of steps:
- Reference: http://www.element14.com/community/servlet/JiveServlet/downloadBody/64123-102-4-285920/PiFace%20CAD%20Quick%20Start%20Guide%20V1.pdf
- Install the latest Control and Display software by typing the following command in a Terminal:
sudo apt-get install python3-pifacecad
- Test PiFace CAD Installation
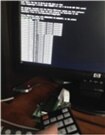
- Test that everything has been installed by running the sysinfo.py program:
- sudo python3 /usr/share/doc/python3-pifacecad/examples/sysinfo.py
- Note: don’t forget the sudo, otherwise you will get a permission denied
- You will get something like the following:
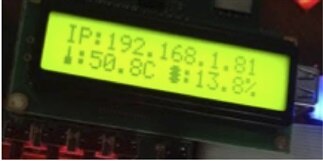
- sysinfo.py gives details about the Raspberry Pi’s IP address, temperature, and memory.
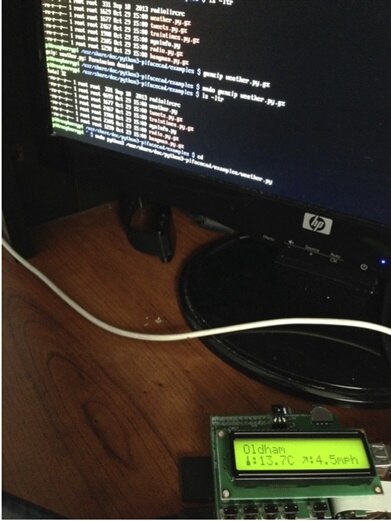
- I also tested other Python scripts (There are several gz files under that same folder. Unzip (sudo gunzip *.gz) and test.)
- Weather:
- sudo python3 /usr/share/doc/python3-pifacecad/examples/weather.py
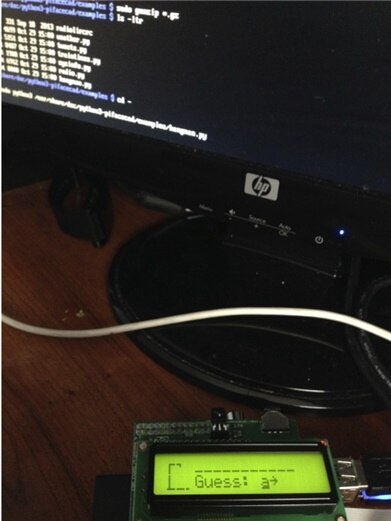
- Even hangman

- sudo python3 /usr/share/doc/python3-pifacecad/examples/hangman.py
- Set up IR remote with PiFace CAD
- Helps us control our PiFace CAD with a TV remote
- Before starting:
- Set up LIRC (Linux Infrared Remote Control):
- Software that handles interfacing between hardware & Pi media center
- Mostly included in recent Pi distros
- If not: apt-get install lirc
- Set up LIRC (Linux Infrared Remote Control):
- Set up Infrared
- This sets up the Raspbian Infrared module to use GPIO pin 23
- Command: sudo modprobe lirc_rpi gpio_in_pin=23
- No output is displayed as a result of this command but you can test it out.
- First run “pidof lirc” to see if LIRC processes are running
- If pidof is not installed: sudo apt-get install pidof
- If pidof returns a number then kill that process
- Command: sudo kill [-9] <process number>
- Test that it works with “mode2” program:
- Command: mode2 -d /dev/lirc0
- If it says: “No such file or directory” then LIRC is most likely not installed. If so, follow the earlier instruction to install it.
- To make sure the module is loaded each time you boot, add lines to /etc/modules:
- Command: sudo vi /etc/modules
- Add the following two lines:
- lirc_dev
- lirc_rpi gpio_in_pin=23
- To set up your Pi to receive IR data from the PiFace CAD
- Back up previous Linux IR control config
- Command: cp /etc/lirc/hardware.conf ~/.
- Edit the hardware.conf file
- Command: sudo vi /etc/lirc/hardware.conf
- In /etc/lirc/hardware.conf, change these values as follows:
- LIRCD_ARGS="--uinput"
- DRIVER="default"
- DEVICE="/dev/lirc0"
- MODULES="lirc_rpi"
- Save and Exit
- Back up previous Linux IR control config
- Reboot
B. Set up Your Remote
- The /etc/lirc/lircd.conf file tells LIRC about your remote control
- Every remote is different, so we need to download or generate a config for each remote
- Back up original LIRC config file
- Command: cp /etc/lirc/lircd.conf ~/.
- Note: This will save a copy of your original lirc configuration to your home directory. If you ever want to restore these original settings use the command:
- sudo cp ~/lircd.conf /etc/lirc/lircd.conf
- Try and find your remote control config file online:
- In midori or other browser, visit: http://lirc.sourceforge.net/remotes/
- Note: I initially chose to use the Apple TV remote but that didn’t work since the drivers at the above link seem to have been outdated.
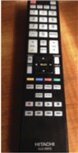
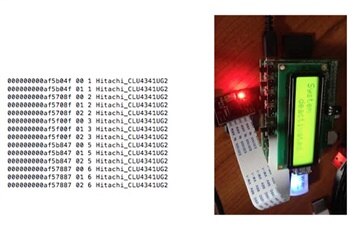
- I chose a Hitachi CLU-4997S. I found a driver that is close to it (CLU4341UG2) which was the closest to it.
- Under: http://lirc.sourceforge.net/remotes/
- Right-click on Hitachi (not .jpg file)
- Click Save as.. Then copy it to /etc/lirc/ directory
- Copy it as lircd.conf
- Command: sudo cp <file> /etc/lirc/lircd.conf
- Sudo Reboot
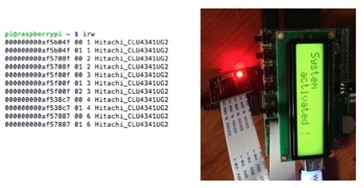
- Log in and issue command: irw
- Every time you click on a button on that remote, irw would output a confirmation that it has received these key signals. Great!
- Now that we're done with the IR/Remote setup, let's move on to the next two topics, namely: Detection and Activation.
- Detection
- Main goal: Use the motion application which utilizes the Pi NoIR camera to detect movement. When it does, it records until that motion stops.
- The motion application generates still images of moving objects. It can also be configured to generate videos of “live” camera stream and can be watched remotely.
- Instructions for the motion setup (partially) follows instructions found at the following link. Note that I have included the process that I followed below but you can always refer to this link if you'd like to implement it yourself.
•http://www.codeproject.com/Articles/665518/Raspberry-Pi-as-low-cost-HD-surveillance-camera
- The instructions that I followed and documented:
- Enable WiFi (done earlier - remember to use static IP configuration)
- Assemble hardware:
- Although doesn’t look complicated, it took a while
- Note 1: A really important thing to remember is to set up the Pi in a way that doesn’t risk tampering with the NoIR or the Pi itself.
- Note 2: you may want to disable the camera LED so it doesn’t flash every time it records. This can be done by adding the following to /boot/config.txt disable_camera_led=1
- Installing the motion detection software
- Command: sudo apt-get install motion
- It appears that the current version of motion does not (yet) support the Pi camera module. Therefore, we need to download and install a special build with such support
- Let's download and install that special build with such support. Commands:
- cd /tmp
- sudo apt-get install -y libjpeg62 libjpeg62-dev libavformat53 libavformat-dev libavcodec53 libavcodec-dev libavutil51 libavutil-dev libc6-dev zlib1g-dev libmysqlclient18 libmysqlclient-dev libpq5 libpq-dev
- wget https://www.dropbox.com/s/xdfcxm5hu71s97d/motion-mmal.tar.gz
- Unpack downloaded gz file. Command:
- tar zxvf motion-mmal.tar.gz
- Now must update the version of motion that we installed earlier with this downloaded build. Commands:
- sudo mv motion /usr/bin/motion
- sudo mv motion-mmalcam.conf /etc/motion.conf
- Enable the motion daemon so that motion always runs. Command:
- sudo vi /etc/default/motion
- Change the following parameter value (after =) to yes:
- start_motion_daemon=yes
- Permissions should be done correctly; should give user motion permissions to run motion application after rebooting. We do so with the following commands:
- sudo chmod 664 /etc/motion.conf
- sudo chmod 755 /usr/bin/motion
- sudo touch /tmp/motion.log
- sudo chmod 775 /tmp/motion.log
- Note: if you run into problems then you may need to remove and re-install (I ran into it and that was the most effective solution after pulling my hair out for a while). To remove, use the following command, then re-install it using the earlier instructions.
- sudo apt-get remove motion
- Time to configure motion. For that, let's edit and make the following changes to /etc/motion.conf. Command:
- sudo vi /etc/motion.conf
- Make the following changes:
- daemon on (motion always runs as daemon in bg)
- logfile /tmp/motion.log (store log file in this dir)
- width 640
- Height 480
- Note: The default values for width and height were initially set to 1280x720. Unfortunately, for some reason, that caused the system to crash, which is why I reduced them to the above values.
- framerate 2 (no need for realtime video, 2 pics/s ok)
- pre_capture 2
- post_capture 2 (rec 2 frames before/after motion detected)
- max_mpeg_time 600 (10 mins of movie time)
- Note: this may be called max_movie_time
- ffmpeg_video_codec msmpeg4 (this format allows video to run anywhere)
- stream_localhost off (allow access to live stream anywhere)
- stream_auth_method 2 (protect with uid/pwd)
- stream_authentication <uid>:<pwd>
- Note: I do NOT recommend that you use either one of these two "authentication" parameters right off the bat, until you become comfortable with a working setup. I wanted to include them for the sake of completeness
- Reboot: sudo Reboot
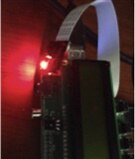
- After the reboot, the red light of the camera module should be turned on, which shows that motion currently is using the camera to detect any movement.
- Note: you can take that out (as mentioned earlier) by adding the following to /boot/config.txt:
- disable_camera_led=1
- Note: you can take that out (as mentioned earlier) by adding the following to /boot/config.txt:
- Open Firefox on another machine on network & enter the following URL:
- <Pi IP>:8081
- You will notice that it will starts streaming
- Note: Chrome did not work. After doing some research into it, it turns out that “Chrome does not properly handle the mjpg stream”
3. Activating/Deactivating Monitoring
- Main goal: Keep monitoring the spots using the motion application and control the activation and de-activation of such monitoring
- Activation/Deactivation
- The configuration of motion’s web interface does not persist, which requires that we automate this task
- Borrowed Fvan’s scripts (see later)
- Two main parameters:
- output_pictures: to generate a still image of moving object
- ffmpeg_output_movies: to generate a movie for movement
- Command to test initial configuration state for params:
- cat /etc/motion.conf | grep -e output_pictures -e ffmpeg_output_movies
- Output:

- Command (sed) to disable both params:
- sudo sed -i -e 's/output_pictures.*/output_pictures off/g' -e 's/ffmpeg_output_movies.*/ffmpeg_output_movies off/g' /etc/motion.conf
- Output: None
- Command to check params again after running script to disable params (same as above but we want to check the effect of running the above sed command):
- cat /etc/motion.conf | grep -e output_pictures -e ffmpeg_output_movies
- Output:

- Notice how both params are now set to off (due to the sed command)
- Now let’s test changing from off to on (enable), with the following command:
- sudo sed -i -e 's/output_pictures.*/output_pictures best/g' -e 's/ffmpeg_output_movies.*/ffmpeg_output_movies on/g' /etc/motion.conf
- Output: None
- Again, let's run the same earlier command to check params after enabling the params:
- cat /etc/motion.conf | grep -e output_pictures -e ffmpeg_output_movies
- Output:

- Great! So now, we have a fairly straightforward (well, at least short) command that helps us enable/disable the monitoring. Let's now turn our attention to one of the last tasks in this configuration, which is to use the PiFace CAD as a tool to visualize the status (param changes, etc.).
- LCD Visual Indicator
- Main Goal: Need a visual indicator once the parameters have been changed (activated/de-activated)
- How: Display a message on the PiFace’s LCD screen
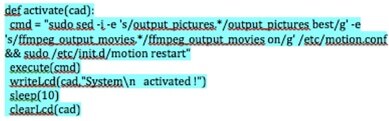
- As suggested by fvan, it is a good idea to combine the previous (sed) commands and LCD visual indicator in one script
- Have main snippets from script below but you're encouraged to pick it up from his post, at the reference link provided at the end of this post.
- We need to activate the remote control with scripts
- Refer to earlier section (Set up your Remote) for configuring remote, but remember:

- There's a standard script that listens for specific keys. The script Name is: .lircrc
- It reacts to signals decoded by lircd
- Note 1: this is placed in your home directory
- Note 2: you can optionally create a system-wide config file in /etc/lirc/lircrc which would be used when no .lircrc is found in home directory
- Syntax for .lircrc
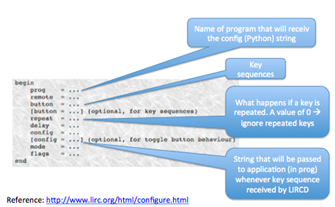
- Let’s see our .lircrc script
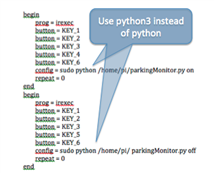
- Notes:
- As it states in this figure, use python3 which we installed earlier.
- Button config shows sequence of keys. In this case, similar to fvan's, I used 12346 for activating and 12356 for deactivating monitoring
- As explained in the earlier Syntax figure, repeat was set to 0 so that repetitions of 1 (for example) are not interpreted as 11, 111, etc.
- The "prog" parameter told .lircrc that irexec will respond, and therefore should be running, so let's do that.
- To ensure irexec is running, let's make an entry in /etc/rc.local
- Command: sudo vi /etc/rc.local
- Before exit 0, add:
- sudo -u pi irexec -d
- To monitor, go to the following link of Firefox: http://<IP>:8081
- kind-a lame pic of a ceiling (just for testing at this point)
- Notes:
- Testing
- Main goal: test that this setup is working and that I'm getting notified once a change takes place in the parking spots
- Activating system:
- Before detection
- Waved hand in front of camera (for basic testing)
- De-activating System
4. Notifying based on movement
- Main goal: how to get notified when the system detects a vacant spot
Just like fvan, I used Apache web server to host the content and checks continuously for recent content (using timestamps) and sending an e-mail with that content. a. Web Server Setup
- We need to offer the content from motion on a web server so that we can access it from any browser that can reach it. The first thing is to install the server:
- sudo apt-get install apache2
- Like fvan, I chose to link the media directory to the web server by creating a soft link to it as follows:
- sudo ln -s /path_to_media_files/ /var/www/media
- We need to offer the content from motion on a web server so that we can access it from any browser that can reach it. The first thing is to install the server:
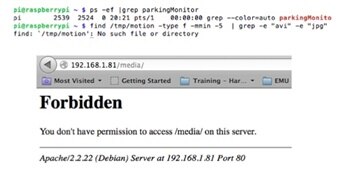
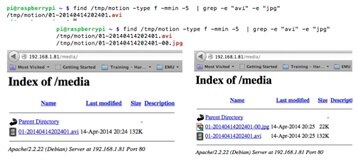
b. Checking for available (recent) media
- Look for available jpg or avi files that were modified in the last 2 minutes:
- find /path_to_media_files -type f -mmin -2 | grep -e "avi" -e “jpg"
- Look for available jpg or avi files that were modified in the last 2 minutes:
c. Script that checks for media and notifies
- I leveraged fvan's script with two changes:
- I added another function (method) and called it sendText(), which sends an SMS message out to my cell phone. This is almost identical to sendMail() but with an e-mail of <id>@txt.att.net
- I changed the "last modified" time to 2 minutes instead of 5
- I leveraged fvan's script with two changes:
Final Test:
So, after mounting the camera, positioning it toward an area in my driveway, pressing the proper combination on the remote control (to activate monitoring), and driving in, below are snapshots from what the system captured. Note that the figures below are from several detection events; I tried to include the best ones, but you get the gist of it  .
.
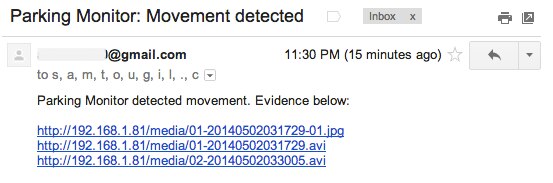
Here's a sample e-mail notification that I received:

A sample e-mail content:
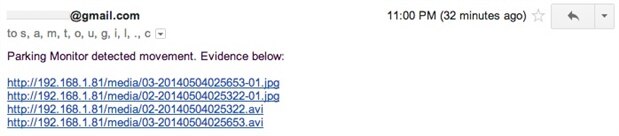
Another e-mail content:
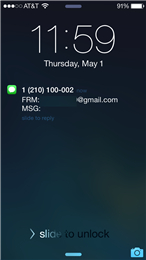
Here's a sample SMS notification that you would receive:
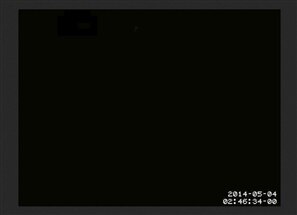
And Here's the picture that was captured in the link that I received. The first one was during a pitch black - no movement - time frame.
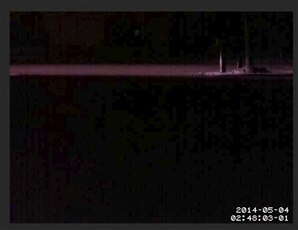
The second one was after Pi NoIR detected the lights of my car as I started it on the main street.
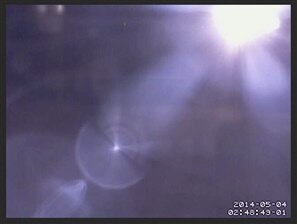
The third is when I turned onto my driveway.
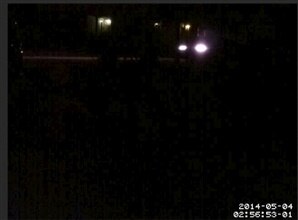
This is from another trial, when I realized that having the camera face the direction of the car (head-on) is probably not a good idea then I positioned it on the side. The image below shows when it detected the car as it was coming off of the main street onto my driveway.
5. Wrap-Up & Lessons-Learned
- I spent a lot of time on this project on certain tasks. To avoid having you face them:
- Set WiFi to static
- Work on the hardware setup first
- Work on software setup for each hardware and test it out
- Use “python3” instead of python in all files
- TEST the Python scripts by running them with python3 individually
- I spent a lot of time on this project on certain tasks. To avoid having you face them:
- Reference – huge credit to fvan for his work at:
This was a lot of fun, very educational, and eye opening. I hope others will benefit from it.
Top Comments