


See my wireless motion detection system after this link, it's pretty awesome! Or, carry on...
Disclaimer: I’m an engineer, not a pro film maker. Be advised.
Disclaimer: I’m an engineer, not a pro film maker. Be advised.
This project will retrofit an old washer or dryer to alert you via text message when the clothes are done.
With the IOT market hot right now, many appliances have applications in this realm. Recently we have seen internet connected cooking appliances and refrigerators. Of all the appliances in a house, the one that has remained mostly the same in its process is the washer and dryer. Most people dread using these machines because like baking, you have to wait and tend to the process when needed. With a washer, if you leave your clothes in there for too long without transferring all the clothes to the dryer, you risk having your clothes start to smell like mold or dry out, in which you have to rewash them. If you leave your clothes in the dryer for too long, they will wrinkle. In which you have to send them for another heated spin. Ideally, the clothes get transferred to the dryer as soon as the washer is done and the clothes are taken out of the dryer and folded or hung as soon as the dryer is done. People are either too busy or don’t hear the buzzer when it's done. These days, people are better at responding to their phone than when the dryer or washer is done. At this point, most washer and dryers only have the capability to remind you using a buzzer or chime which is short and sweet. Easy to forget or not hear at all. To make it life easier, why can’t that buzzer or chime reminder be a text message, something we are all now are very good at responding to.
I based this project on another I did some time ago using a Bealebone, but now it's ported to a Raspberry Pi since the Pi 3 has build in WiFi. I had to try it.
For this project we used a Raspberry Pi 3 to text your phone. Yes, that's all you need to send a text. Most people don’t realize that you can send a text (sms) via email. So by hooking up the Raspberry Pi 3 to wifi and using a email server we can send a text via email. The carriers for cell phone service have provided an easy way to do this.
This website popular mechanics list the ways to do this for most carriers:
http://www.popularmechanics.com/culture/web/how-to/a3096/email-to-text-guide/
It is the same way you address an email: number@insertcarrierhere.com provided in the list below:
- AT&T: number@txt.att.net
- T-Mobile: number@tmomail.net
- Verizon: number@vtext.com
- Sprint: number@messaging.sprintpcs.com or number@pm.sprint.com
- Virgin Mobile: number@vmobl.com
- Tracfone: number@mmst5.tracfone.com
- Metro PCS: number@mymetropcs.com
- Boost Mobile: number@myboostmobile.com
- Cricket: number@sms.mycricket.com
- Nextel: number@messaging.nextel.com
- Alltel: number@message.alltel.com
- Ptel: number@ptel.com
- Suncom: number@tms.suncom.com
- Qwest: number@qwestmp.com
- U.S. Cellular: number@email.uscc.net
Parts:
USB Battery Pack (Any external pack will work, here is an OK one.)
------------------------------------------------------------------------------------------------------------------------------
The Schematic:

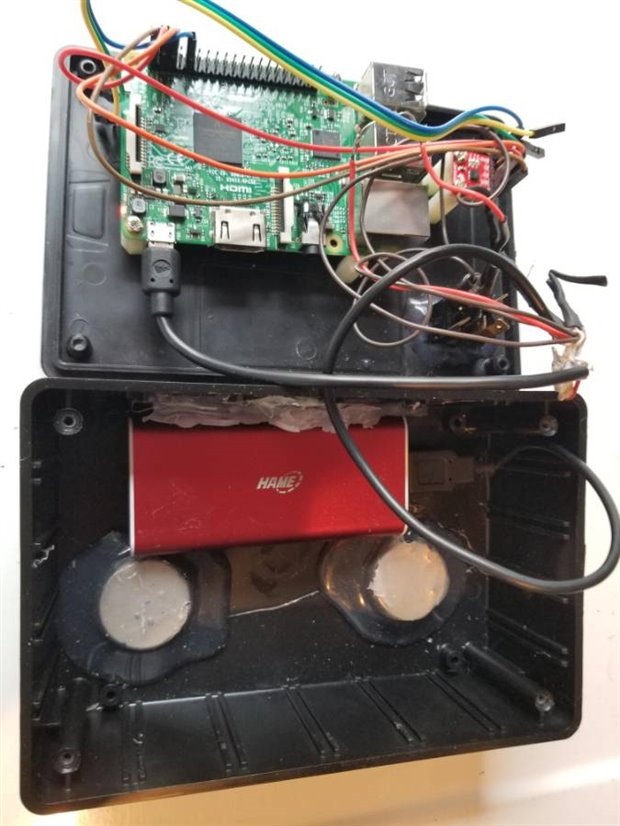
The schematic is simple. The accelerometer is attached to the Raspberry Pi 3 with four project wires.
The hardest part is OPTIONAL, adding an indicator LED and on/off switch. Technically, you can just plug in the Pi 3 to the USB battery very time you want to use it. But, if you want an easy fire-and-forget kind of device, place in that switch and LED!
The build:
How this is built doesn’t matter. At all.
All I did was slap the components inside a project box (enclosure). It can be inside any shape box it will all fit inside. However, with my build I wanted to mitigate any issue.
- I wanted to mount the accelerometer as ridged as possible inside the box. This is to make sure that most of the movement senses is from the machine it is attached to.
- I used two large rare-earth magnets to make sure it attaches to the washer/dryer as firmly as possible. Since the whole system works off of the idea the machine will have some vibration it can sense, it’s best to make sure it doesn’t get shaken off the machine!
- Portability and temporary use needed to be considered. I didn’t want to attach the sensor system to the machines permanently. I would only use it once a week or so anyway. Then I can turn it off and store it.
For those who want to see how I put it all together, see the following gallery:
| {gallery} Raspberry Pi 3 washer dryer texter |
|---|
The main components are attached to the lid of the enclosure, since it is easier to attach standoffs. |
The battery and he magnets are hot-glues to the bottom of the main enclosure compartment. |
Although project wires are long, they do not interfere with the battery. |
The micro-USB connection that powers the Pi 3 is spliced inside the box for the on/off switch and the LED/resistor. |
|
|
|
This is the complete system enclosed in the box and turned on. |


Function:
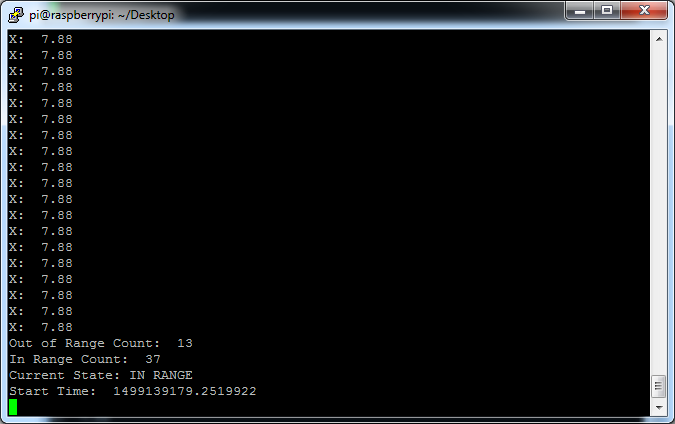
We created a wireless box that attaches to your washer or dryer via magnets. There is a switch and LED on the top of the box that let you turn on and off the device and show you an indication whether the box is on or off. When the user is using their washer or dryer, they simply turn on the device before they start the washer or dryer and turn it off when they retrieve their clothes after the washer or dryer is finished with the load. The device works by detecting if the washer/dryer is on or off by reading its vibration. There are of course cycle changes in a washer and dryer that would fool the device into thinking that it is off when the motor stops for up to 30 seconds usually. A timer is implemented into the code to determine if the washer/dryer has stopped for 1 minute. Since a cycle change takes less than 1 minute, it only sends a text after 1 minute of no activity. Ensuring that the washer/dryer is done with that load. If the washer/dryer starts back up within that 1 minute then it continues to read the vibration until 1 minute of no activity to send a text. To measure whether the washer/dryer was on or off the accelerometer measures the X axis of the 3 axis provided. This is because the X axis is the horizontal plane of the surface of the dyer that moves the most.
The vibration of the washer/dryer is a side to side motion and less of an up and down. So we only need to use the X axis for measurement. There is a subroutine that measures out 50 readings in 10 seconds. So that is a reading every 200ms. After 10 seconds of readings, the subroutine returns the current state of the device. It returns whether or not the accelerometer X axis numbers are in range of the baseline which is taken when the device is first turned on and the washer/dryer is off. The 50 readings are compared, then calculated, and it is determined whether the values of X axis are in-range or out-of-range. The in-range values indicate that the device does not detect vibration therefore system mode is in standby mode and waiting for the appliance to start. Once the device detects vibration, the mode is then set to ON and the cycle and timing detection starts. When a cycle ends the device vibration readings will go “in-range” and the cycle check mode starts and the 1 minute timer will start. If no activity, the device will go into Finish mode and send a text. Then go back to standby to wait for another start.
Code:
The texting part works by sending an email via the Raspberry Pi 3. Since we are using email, we need an email handling service like gmail to send the email which gets translated into a text by the carrier. To set this up you need an email to login to, for example, in python:
#Assign sender and receiver, X represents the digits of the phone number
sender = 'youremail@gmail.com'
receiver = 'XXXXXXXXXX@vtext.com'
#Next we create the message:
header = 'To: ' + receiver + '\n' + 'From: ' + sender
body = 'Laundry is DONE!'
signature = '- Sent From Rpi'
#Load the gmail server and port into the class “mail”
mail = smtplib.SMTP('smtp.gmail.com',587)
#run a subroutine with your email login and password for your gmail.
def sendText():
mail.ehlo()
mail.starttls()
mail.ehlo()
mail.login('youremail@gmail.com', 'password’)
mail.sendmail(sender, receiver, '\n\n' + body + '\n\n' + signature)
mail.close()
Running the sendText() function will send your text with the initialized variables loaded into it.
Wifi connection:
The python code for this project was written in the Raspbian OS using the python 3.4.2 IDE. VNC Viewer was used to View the Raspberry Pi’s Desktop with VNC server installed on the Raspberry Pi. Once the box is connected to wifi using the Raspberry Pi’s wifi IP address, you can ssh into it using a terminal program like putty or VNC viewer to see the Raspbian Desktop. Typing in “ifconfig” into the terminal gives you the IP address of the Raspberry Pi connected via wifi.

-Screenshot of the Raspbian Desktop, showing python code in python 3.4.2 IDE and terminal
I2C Library:
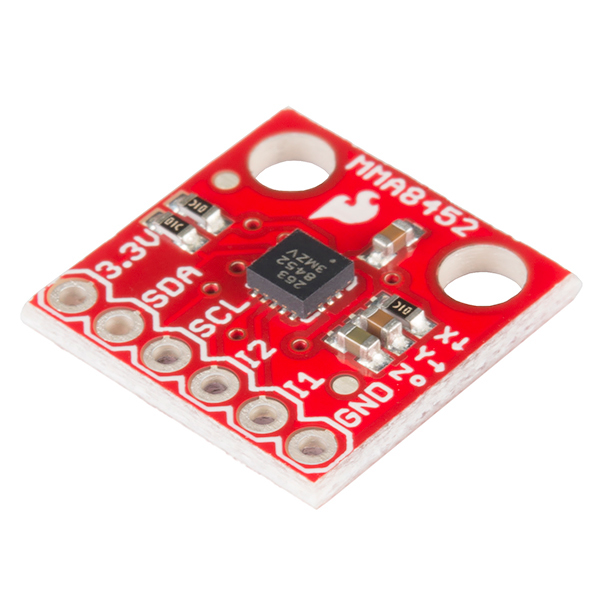
Python has a couple different libraries to use for i2c communication. For this project we used smbus for python 3.4.2. This requires us to install the python3-smbus package by typing “sudo apt-get install python3-smbus” into the terminal. The project code uses the function calls, bus.write_byte_data(device address, register address, data to write) and bus.read_i2c_block_data(device address, start register, and number of bytes to read). The “bus.” is set = at the beginning of the program, bus=SMBus(1). Which sets the variable “bus” to SMBus(1) for easier writing in the code. The SMBus(1) tells the library we are using i2c bus number 1 to read and write on. The Raspberry Pi uses i2c bus 1 by default. We write to the MMA8452Q chip’s configuration registers to configure the chip for use via i2c bus. Especially the register that puts the accelerometer into active mode so we can read values from the digital output registers to retrieve the acceleration data on the Raspberry pi. “bus.read_i2c_block_data()” lets us read the first 7 registers into an array. We then take the X acceleration data from the X output register and parse out that data into variables.
Accelerometer Connection:
The accelerometer is powered with 3.3V from the Raspberry Pi and communicates via I2C. The python program writes to the configuration registers setting up how the data should display and configuring the mode you want to use. For this project we used the XYZ mode where the device is pulled from the I2C where the X axis values are translated into g’s (acceleration). The python program reads the values from a register on the accelerometer and all mathematical translation from the pulled values to the units it uses to determine its state is done by the python program.
- Alternative Accelerometer here
Program Running Terminal Screenshots:
The program is run via ssh and executed using “sudo python3 txter.py”

-Running the Python script from the terminal, displays the hardware and variables being initiated

-Showing the readings, current state, and mode

-Showing the device reading the appliance vibration meaning its ON
-Starting the 1 minute timer when the values are back in range.
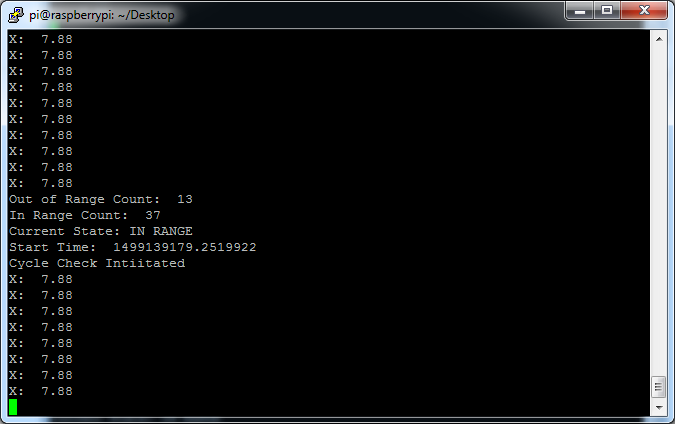
-Checking if the stop of vibration was a cycle change or finished

-Checking timer to see if 1 minute has passed without activity.
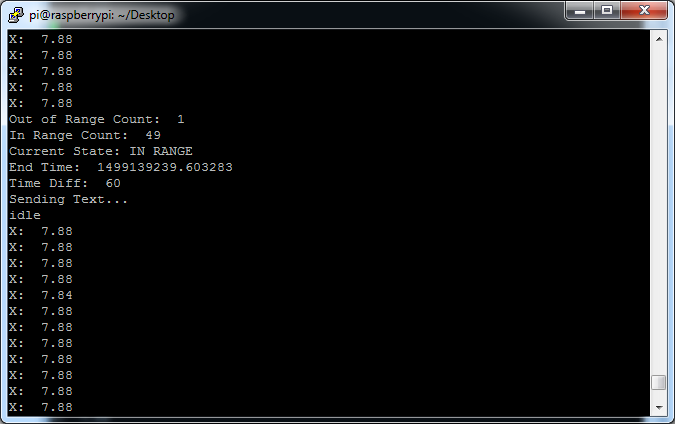
-1 minute has passed without activity meaning the laundry load is finished, sending text
Text Received:
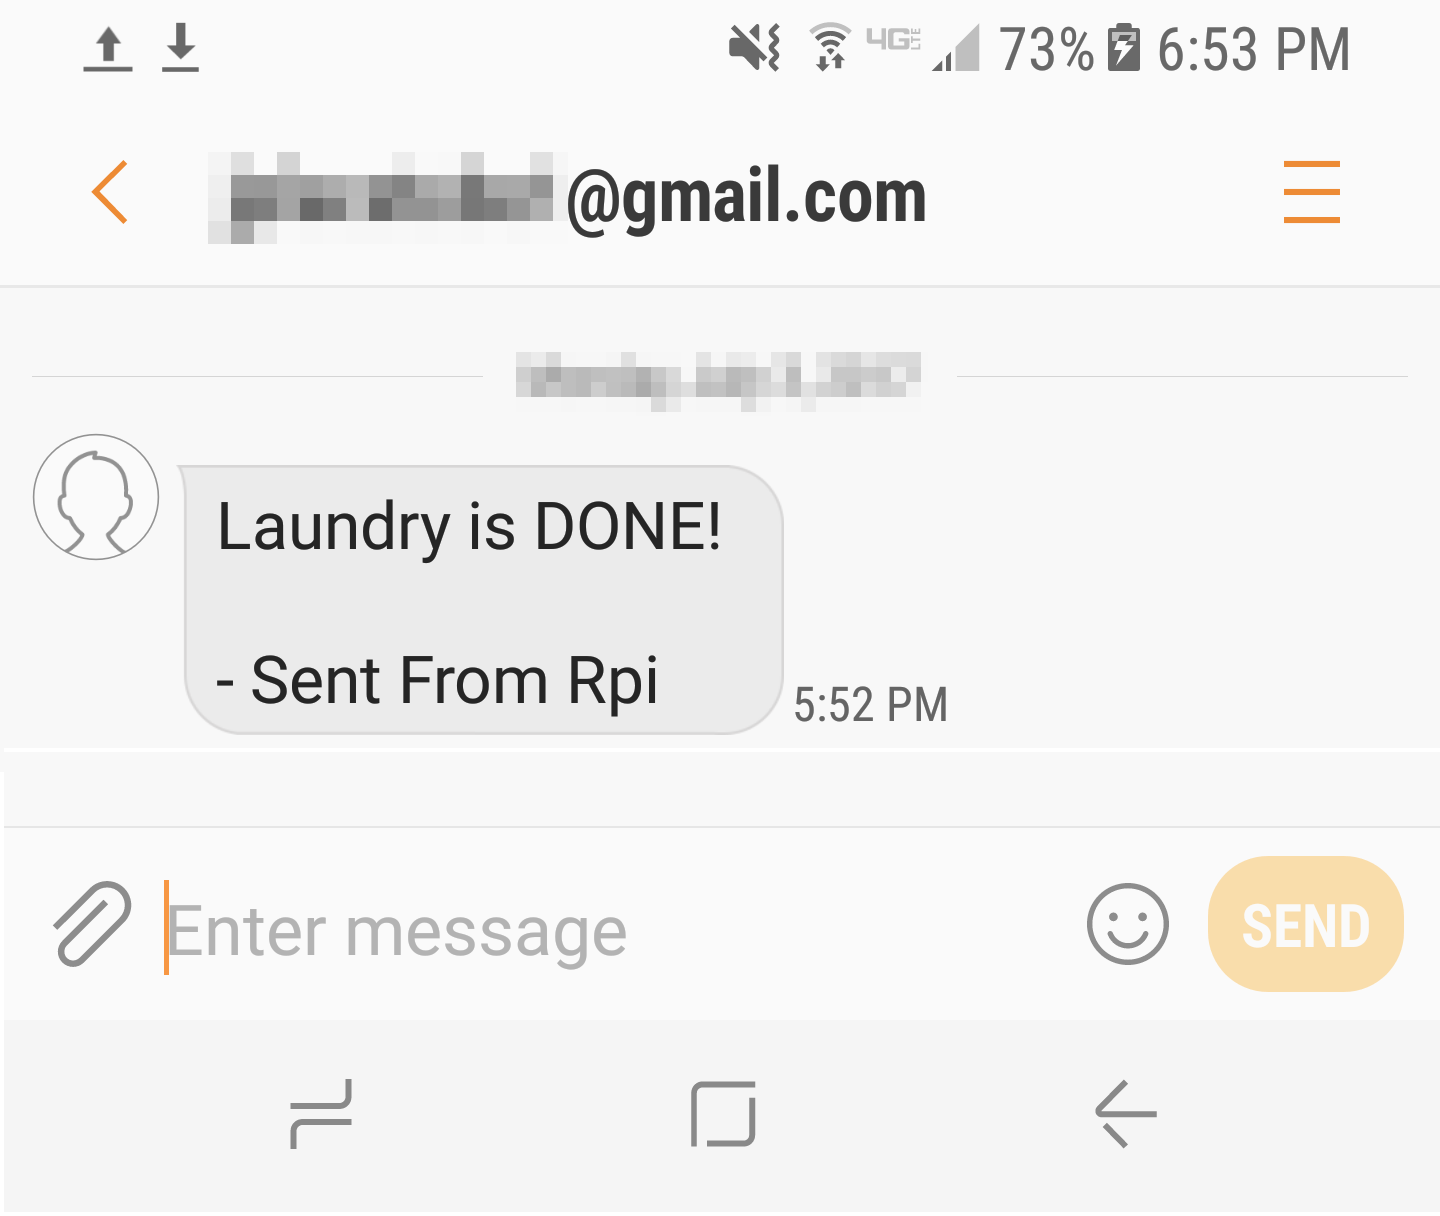
- Screenshot of received text on phone

