


Hi all !
I have a new updated version of this post - creating a Raspberry PI Printer RAW queue - Jetdirect 9100 port with a Raspberry PI
Today, I'm going to share a "hack" that I use in my work when a printer (Laser A4 or labels - Zebra printers) doesn't has network connectivity or a network wall socket is not available - but WIFI is present.
Using a Raspberry PI Zero W I'm able to share the printer with more than 1 client . To this day, I have 8 working without a problem and more are yet to come.
This is a neat solution that solves a lot of problems:
- I don't have to rely on a computer (Windows) to be on all the time for someone to be able to print.
- It's more stable and reliable
- Only requires WIFI
- Installation on Windows is easy
Of course, there are some downfalls as well:
- One more computer to have (albeit being a low power Raspberry PI W)
- Not compatible with programs/hardware that require a socket connection to a 900X port
But, it does provide a solution that works for me in many ways and allows many computers to be able to print.
Hardware
There's only a few requirements needed with a Raspberry PI Zero W
- USB OTG cable - to connect the printer
- Printer with USB interface (so, not to old printers)
- Power the RPI W with a power adapter, not a computer USB port.
STEPS
There are the steps we're going to take - simple and few
- We're going to install Raspbian OS Lite
- Configure CUPS and install a printer
- Configure SAMBA
Each step is easy and the configurations are very straightforward and fast.
Raspberry PI
First, let's install the Raspberry PI Zero W.
A 8GB SD CARD is enough. I use the Raspberry PI Imager. It's fast and there's no need to download the img file. Also, it downloads the latest version available.

For this, the Raspberry PI OS Lite is enough. Let's choose it - Second option (Other) - Raspberry PI OS Lite


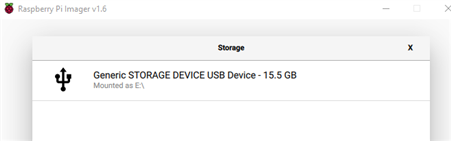
Next, you should insert the SD Card in the reader and choose it.
REMEMBER: All that it's inside, will be destroyed !
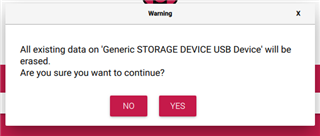
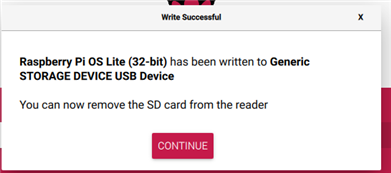
And next, press WRITE and wait

and done.
Headless setup
We can now perform a what's called a headless setup. We don't need a mouse, keyboard or monitor to be able to remotely access the Raspberry PI .
Using Windows, Mac or Linux, you now have a new partition (or drive letter) in your file manager - remove the SD card and insert it again if nothing shows up - it's the boot partition.
This is it on Windows
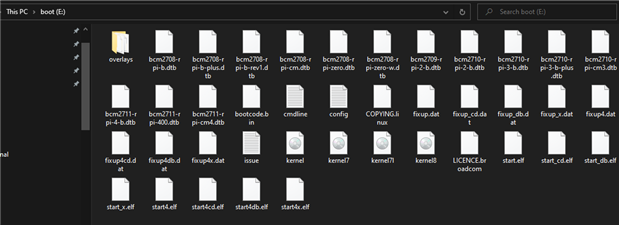
We will now create two files here: ssh and wpa_supplicant.conf .
If you are in Windows, with Powershell just execute New-Item .
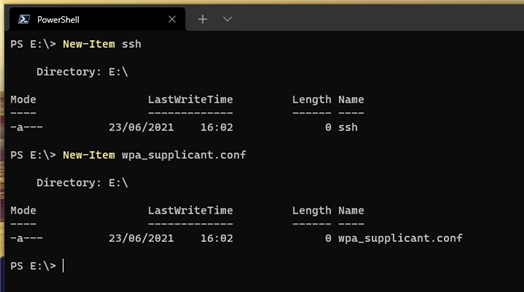
With Linux or Mac, just use the touch command (assuming your current location is the boot partition)
touch ssh
touch wpa_supplicant.conf
The ssh file can stay with 0 bytes - when booting, the Raspberry PI OS will, if the file is present, enable the ssh service
For the wpa_supplicant, we need to create some configuration. Just edit the file with your favorite editor and put the following lines in it:
vi wpa_supplicant.conf
country=<your country 2 letter code>
ctrl_interface=DIR=/var/run/wpa_supplicant GROUP=netdev
update_config=1

network={
        ssid="<wifi_name>"
        psk="<password>"
        proto=RSN
        key_mgmt=WPA-PSK
        pairwise=CCMP
        auth_alg=OPEN
}
The lines above, in the network section, those lines are the ones needed to connect to a WPA/WPA2 network that's broadcasting the SSID.
You need to change the <your country 2 letter code>. Without it, WPA_SUPPLICANT won't work.
Unmount the SD Card and put it on the Raspberry PI.
I'm going to assume you have a DHCP server on the network and now how to find the IP address of the Raspberry PI.
Pimoroni has a great tutorial on how to do that.
If you need to give a static IP address to the Raspberry PI, then you need a keyboard, mouse and monitor.
Raspberry PI documentation explains very well that step.
Software
After the PI boots and you know it's IP address, lets access it using ssh and update the software
ssh pi@<ip_of_rpiw>
The default password is raspberry. You SHOULD CHANGE IT :
passwd
or
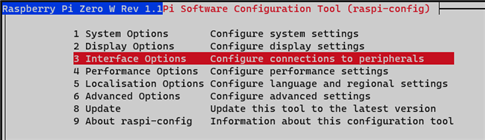
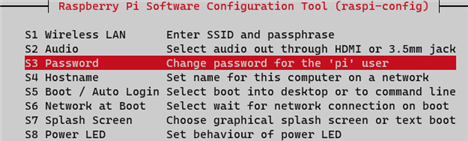
sudo raspi-config
Options 1 and S3
OPTIONAL
You can, if you want, set a root password. As pi user, just use sudo to launch a bash as root and set a new root password
sudo bash
passwd
and set a root password. You will not lose the ability to use sudo with the pi user, but will have root with a defined password.
Update
Let's update the software
sudo apt-get update
sudo apt-get upgrade -y
Reboot
After the reboot, let's install cups and samba
sudo apt-get install samba cups -y
Configure CUPS
First, let's configure CUPS to allow us to access the Web Interface and use the DNS name instead of just the IP address.
Note: Make a backup of the file first, just in case
sudo vi /etc/cups/cupsd.conf
We just need to change a line and add 3 new ones
Replace the following line:
Listen localhost:631
with
Listen 631
This will allow us to access CUPS web Interface from another computer.
Next, just before the first <Location /> tag, , add the following line:
ServerAlias *
This will allow us to also use DNS instead of just the IP address
Now, inside the <Location /> and <Location /admin> blocks, add the following line, just after Order allow, deny
Allow <your_computer_ip_address>
Or, if you want to loosen up a bit, you can use a network range or just all:
Allow 172.100.0.0/24
or
Allow All
This will stay like:
<Location />
    Order allow,deny
    Allow 10.11.23.1
</Location>
<Location /admin>
    Order allow,deny
    Allow 10.11.23.1
</Location>
where 10.11.23.1 is my IP address
Let's add the PI user to the lpadmin group
sudo gpasswd -a pi lpadmin
Although gpasswd will require to login again for the changes to take effect, we don't need it because it will be the cups service that will get restarted and thus, we don't need the group in the current session . But feel free .
This will allow the pi user to add, remove and configure printers
Now, let's enable cups and start it (or restart it)
sudo systemctl enable cups
Synchronizing state of cups.service with SysV service script with /lib/systemd/systemd-sysv-install.
Executing: /lib/systemd/systemd-sysv-install enable cups

sudo systemctl start cups
Add a printer to cups
This is the normal procedure - add a printer to cups on any Linux, using the CUPS Web Interface.
Open your browser of choice and head to:
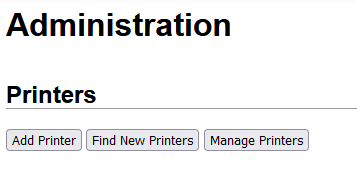
https://<your_pi_address/name>:631 and you will land at CUPS web

On CUPS Administration, press the "Add Printer" button
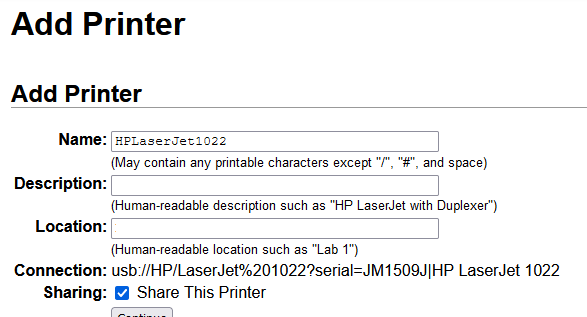
On the Printers list, we want the Local Printers - connected to USB. Choose the one you're connecting. In my case, a HP LajserJet 1022 - old, I know.

Fill in all the details. The name is specially important, since it's by it we will reach the printer. My advice is DO NOT USE SPACES.
Don't forget to tick the "Share This Printer" box.
On the next screen, choose the drivers

To terminate, just set the default options for the printer and you are ready. Options may vary according to printers and drivers.

Now that cups is set, let's configure SAMBA to share the printer with Windows.
Configure SAMBA
We need SAMBA to be able to add the printer on Windows. We can configure samba in many ways, but for this to work, we just need to add a line and change another.
IMPORTANT NOTE: This is the minimal way to allow Windows to print to any printer configured on the Raspberry PI. There's no security whatsoever, meaning that, any user will be able to print to this printer - just needs to add it to its Windows S.O.
SAMBA can be used to share folders and even allow Linux users to logon, with all the security measures and policies that SAMBA/Linux and Windows Active Directory will provide.
With a minimal setup, we could do this and just allow certain users/computers to print to this printer, but that's beyond this tutorial.
There are a lot of good ones out there. You can read this one and this one. And, of couse, the official Samba Wiki.
With your editor, open up smb.conf
sudo vi /etc/samba/smb.conf
You can read around and change, by example the Workgroup if you want.
On the [GLOBAL] section, add the following line just before the [homes] section
load printers = yes
And, in the [printers] (there's also a [print$] section - NOT THAT ONE) section, change the following line:
guest ok = no
to
guest ok = yes
Save the file and let's enable and start samba
sudo systemctl enable smbd
Synchronizing state of smbd.service with SysV service script with /lib/systemd/systemd-sysv-install.
Executing: /lib/systemd/systemd-sysv-install enable smbd
Let's start samba
sudo systemctl start smbd
Let's add the printer to Windows
Go to Control Panel -> Devices and Printers and press the "Add a printer" button.

In the next screen you'll see some printers available. Just press "The printer that I want isn't listed".

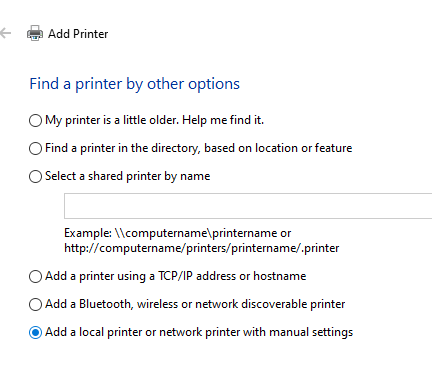
In the next screen, we have two options to add the printer connected to the Raspberry PI.
We can use the third option - "Select a shared printer by name" or the last one - "Add a local printer or network printer with manual settings".
Both will be using the same parameters and the same printer path, the former with less steps. The main difference between them is that, using the third option - Select a shared printer by name - will not allow you to change the printer's name.
When using the third option, on the final screen - you can't change the printer's name.
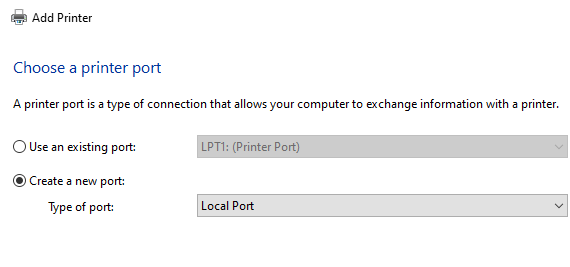
Let's continue by choosing the last option. Create a new port with Local Port as the type of port
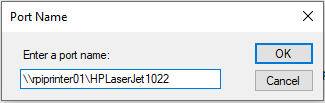
Now, enter the path to the printer.
The path is: \\<raspberry_pi_IP_OR_DNS>\<printer_name>
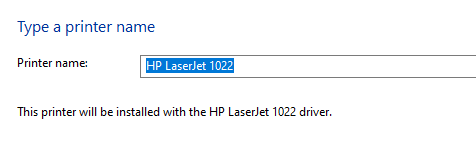
Next, Windows will ask you to select a driver for the printer.

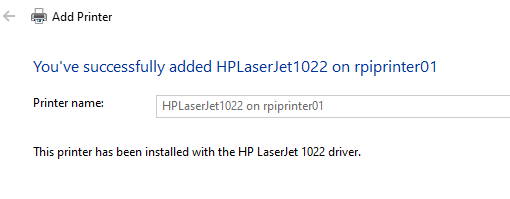
On the next screen, choose a name for the printer
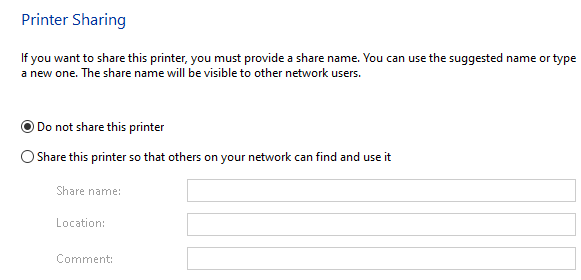
Now you have the option to share the printer - you can shared it if you like or need.
Final screen.
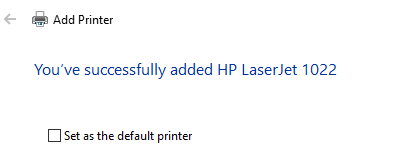
As you can see, all the options are the same as if a local printer is installed.

And, just like this, you can turn an old printer, a printer without network or a networked printer without network wall socket into a shared printer with wifi ! 
Top Comments