element14 Community
element14 Community
    Register Log In
  • Site
  • Search
  • Log In Register
  • Community Hub
    Community Hub
    • What's New on element14
    • Feedback and Support
    • Benefits of Membership
    • Personal Blogs
    • Members Area
    • Achievement Levels
  • Learn
    Learn
    • Ask an Expert
    • eBooks
    • element14 presents
    • Learning Center
    • Tech Spotlight
    • STEM Academy
    • Webinars, Training and Events
    • Learning Groups
  • Technologies
    Technologies
    • 3D Printing
    • FPGA
    • Industrial Automation
    • Internet of Things
    • Power & Energy
    • Sensors
    • Technology Groups
  • Challenges & Projects
    Challenges & Projects
    • Design Challenges
    • element14 presents Projects
    • Project14
    • Arduino Projects
    • Raspberry Pi Projects
    • Project Groups
  • Products
    Products
    • Arduino
    • Avnet & Tria Boards Community
    • Dev Tools
    • Manufacturers
    • Multicomp Pro
    • Product Groups
    • Raspberry Pi
    • RoadTests & Reviews
  • About Us
    About the element14 Community
  • Store
    Store
    • Visit Your Store
    • Choose another store...
      • Europe
      •  Austria (German)
      •  Belgium (Dutch, French)
      •  Bulgaria (Bulgarian)
      •  Czech Republic (Czech)
      •  Denmark (Danish)
      •  Estonia (Estonian)
      •  Finland (Finnish)
      •  France (French)
      •  Germany (German)
      •  Hungary (Hungarian)
      •  Ireland
      •  Israel
      •  Italy (Italian)
      •  Latvia (Latvian)
      •  
      •  Lithuania (Lithuanian)
      •  Netherlands (Dutch)
      •  Norway (Norwegian)
      •  Poland (Polish)
      •  Portugal (Portuguese)
      •  Romania (Romanian)
      •  Russia (Russian)
      •  Slovakia (Slovak)
      •  Slovenia (Slovenian)
      •  Spain (Spanish)
      •  Sweden (Swedish)
      •  Switzerland(German, French)
      •  Turkey (Turkish)
      •  United Kingdom
      • Asia Pacific
      •  Australia
      •  China
      •  Hong Kong
      •  India
      •  Japan
      •  Korea (Korean)
      •  Malaysia
      •  New Zealand
      •  Philippines
      •  Singapore
      •  Taiwan
      •  Thailand (Thai)
      •  Vietnam
      • Americas
      •  Brazil (Portuguese)
      •  Canada
      •  Mexico (Spanish)
      •  United States
      Can't find the country/region you're looking for? Visit our export site or find a local distributor.
  • Translate
  • Profile
  • Settings
Raspberry Pi
  • Products
  • More
Raspberry Pi
Documents I Can See Clearly Now! With the 4D Systems 2.4" Touch Screen for the Raspberry Pi
  • Blog
  • Forum
  • Documents
  • Quiz
  • Events
  • Polls
  • Files
  • Members
  • Mentions
  • Sub-Groups
  • Tags
  • More
  • Cancel
  • New
Join Raspberry Pi to participate - click to join for free!
Actions
  • Share
  • More
  • Cancel
Engagement
  • Author Author: cstanton
  • Date Created: 22 Jul 2015 9:49 AM Date Created
  • Last Updated Last Updated: 10 May 2021 8:50 PM
  • Views 7785 views
  • Likes 7 likes
  • Comments 31 comments
Related
Recommended

I Can See Clearly Now! With the 4D Systems 2.4" Touch Screen for the Raspberry Pi

If there is one add on for the Raspberry Pi that I have seen frequently requested, it has got to be a portable screen, and preferably a touch screen. There is no wonder, either, with the advent of smartphones and tablets that touch screens that are capacitive or resistive are verily sought after. Especially for development.


It is no secret that the Pi Foundation have been working on a 7" touch screen, and while that is appropriate for a number of projects where you may want to mimic a portable tablet or perhaps a laptop, I have been coveting a much tastier and cuter opportunity for smaller and embedded projects.


Finally, 4D Systems have brought out an affordable 2.4" TouchScreen2.4" TouchScreen compatible with the Raspberry Pi A+, B+ and 2 Model B! It's very, very nice.


{gallery} 4D Systems 2.4" TouchScreen

image

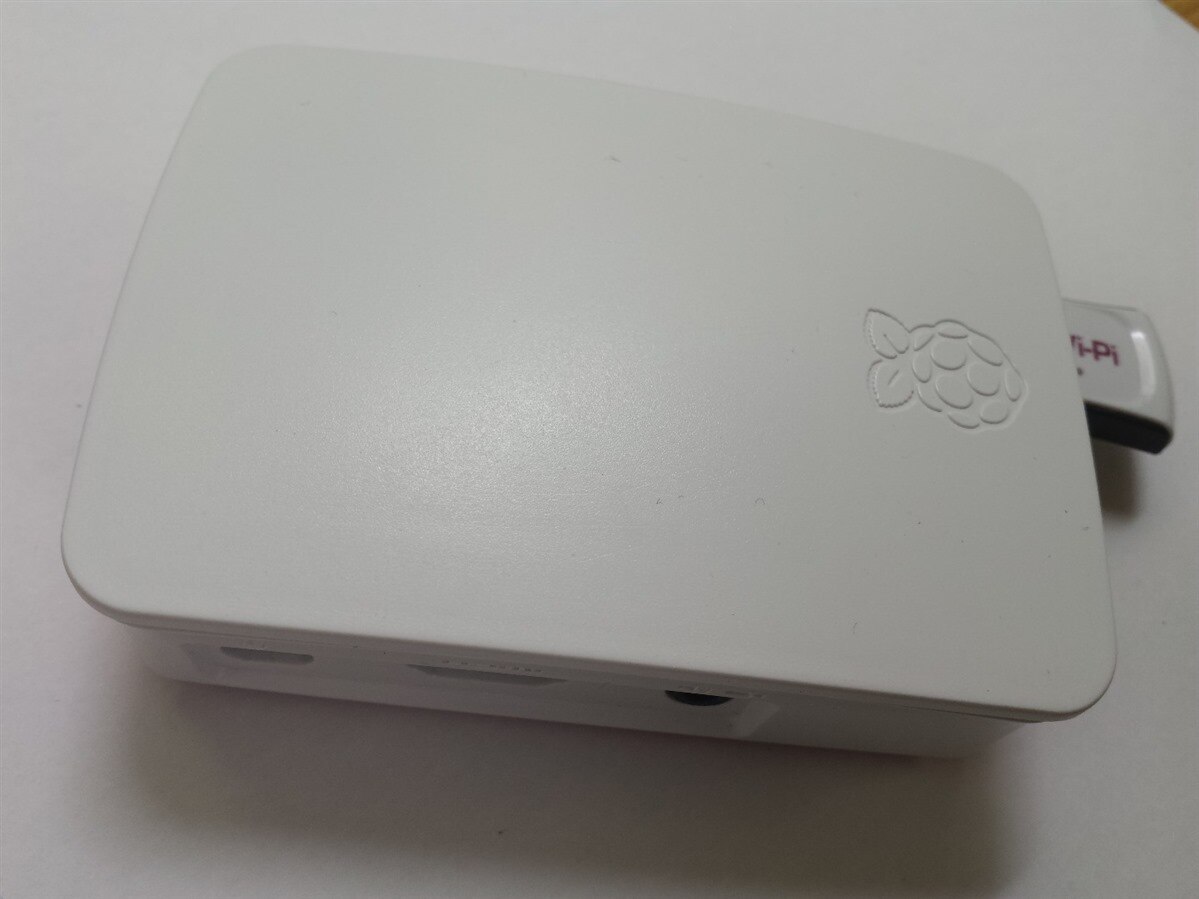
Pi Foundation Case: Well protected and contained, what's inside?

image

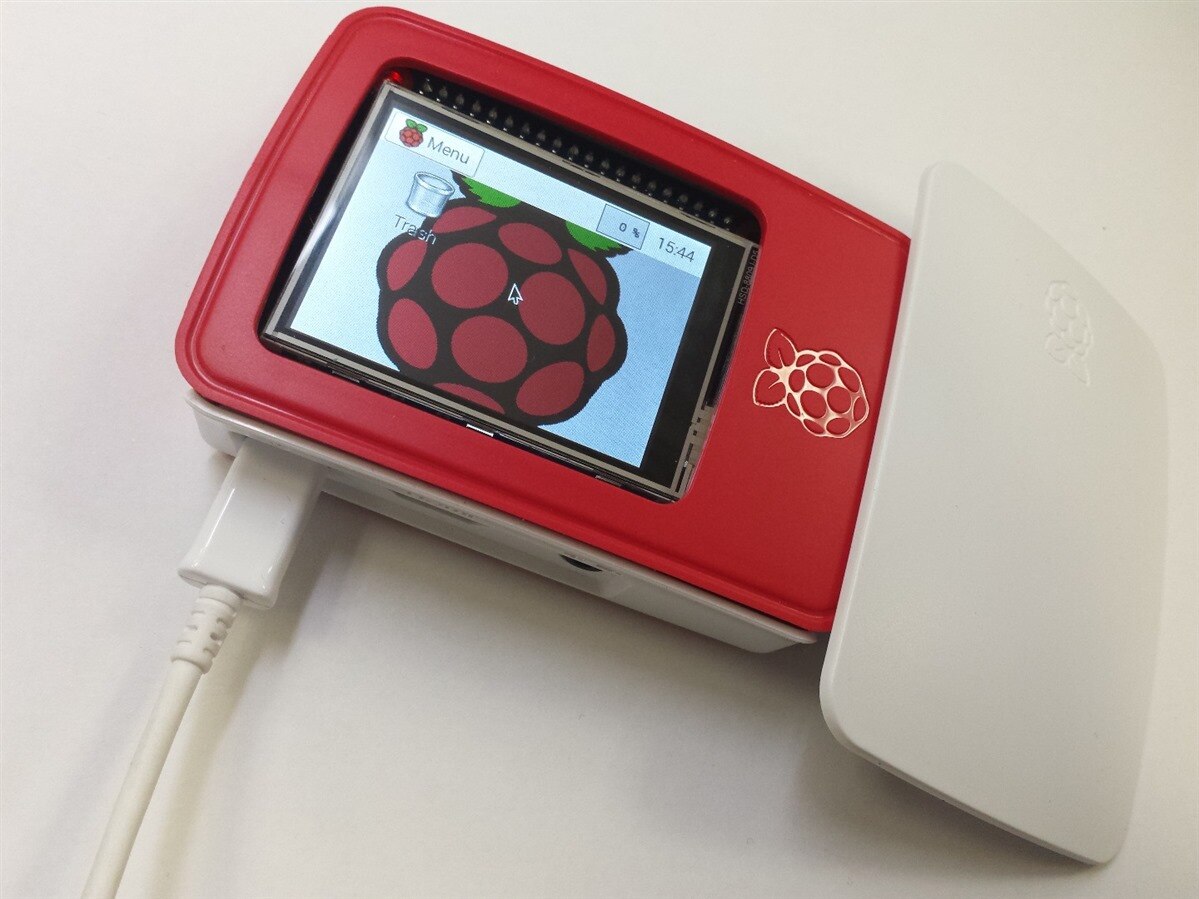
Bright and Cheerful: The 2.4" screen mounted on the Pi fits neatly and viewable through the top of the case

image

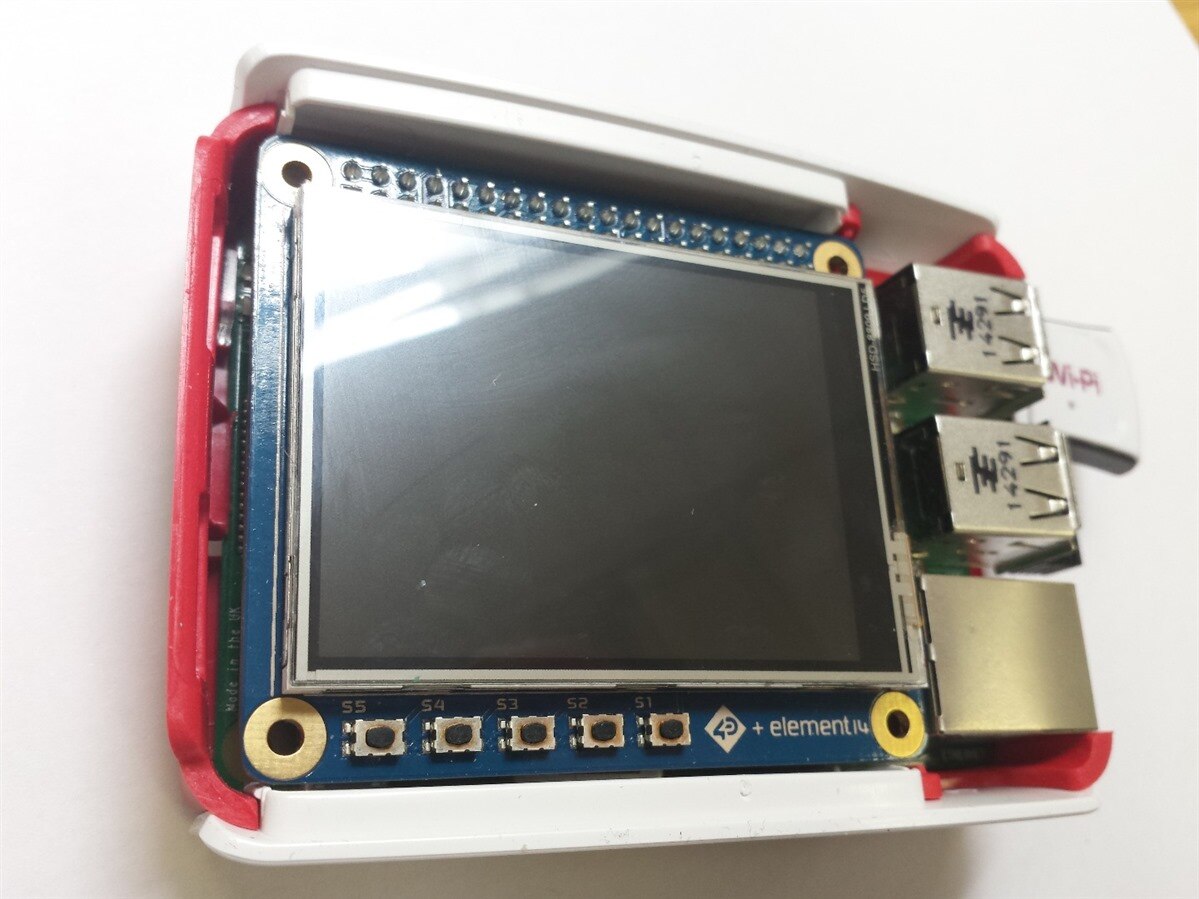
Gutted: With the entire top off, so we can see the five buttons.

image

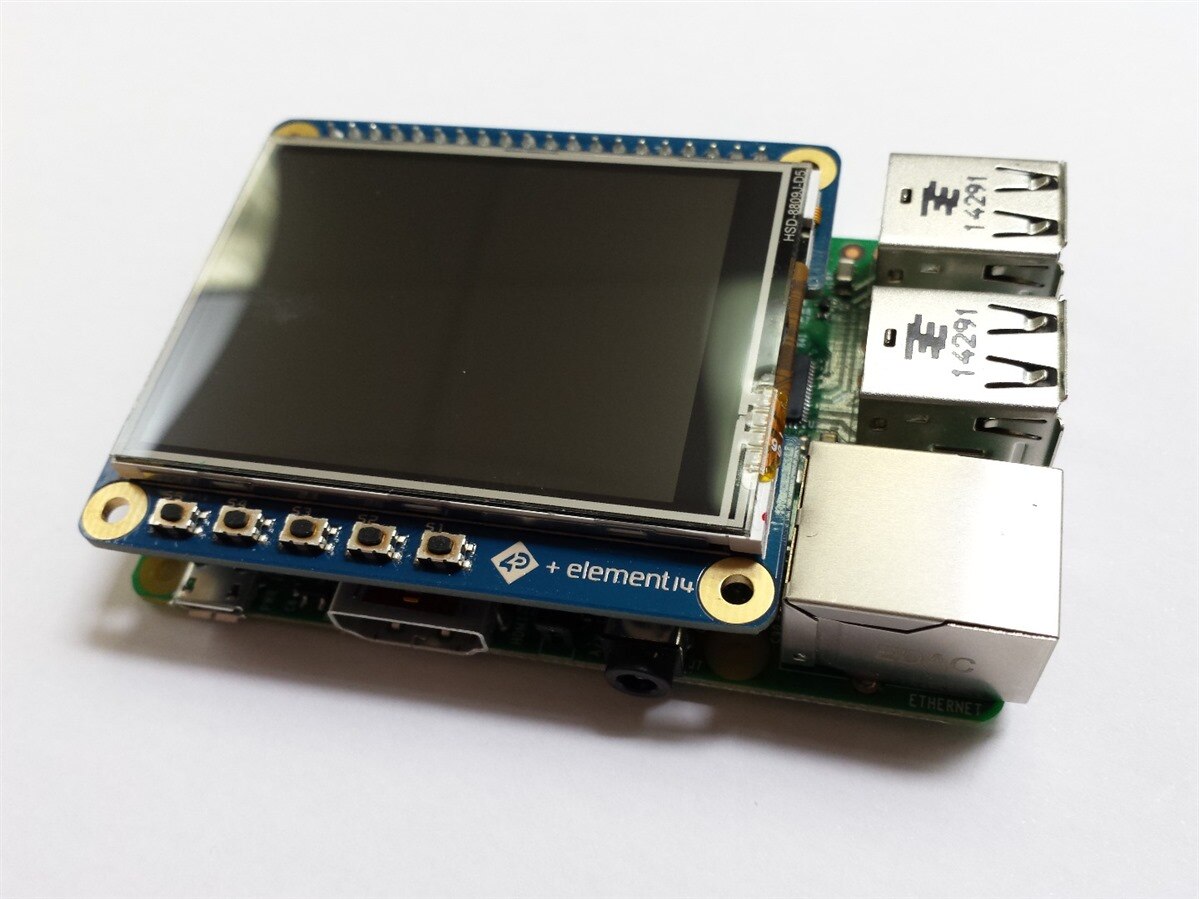
Barebones: Of course the screen works suitably without the case, if that's what you're after.

image

Packaged Up: You receive a small quick start guide inside the box, along with the screen. Nothing else is included.


All About Presentation

The TouchScreen sits on the bank of GPIO pins (all of them) and almost fully covers the exposed Raspberry Pi (not counting the USB / Ethernet ports) and it hovers and I am re-assured that there will be a set of "stand-offs" soon to be purchasable  to secure the screen above the pins and connectors of the Pi.


What you may immediately notice from the photographs is how nicely the screen fits inside the Official Raspberry Pi CaseOfficial Raspberry Pi Case, this was an intentional design decision between element14 and 4D Systems. Perhaps one day the official case will be designed with portable power in mind, too? We can only hope.


You don't have permission to edit metadata of this video.
Edit media
x
image
Upload Preview
image


The screen is very capable, but it does have limitations which are mainly introduced by how Linux handles framebuffers and how these interface with the VideoCore graphics hardware. For example, it is very capable of playing full motion video as can be seen in the YouTube video above. However, you cannot render OpenGL to the screen because of how it handles the backbuffers (I think that's right) though this may be theoretically possible if it was coded correctly (though the implementation may end up being slow) it means that you won't be seeing hardware acceleration to the SPI screen. This is not unique to the 4D Systems screen, you will find this with any SPI screen, and until someone plays with the Broadcom code for the VideoCore and OpenGL we may never see it happen (if it's even possible).


This means that the screen is appropriate for other applications than hardware accelerated video. Setup properly it could be used as a touch interface or even a portable video player and there's little stopping you from running two screens at once.


Not-So-Quick-Start

I'll pre-empt your gripes:

  • A debian package is being worked on for the driver.
  • A repo' is possibly being worked on, but co-operation with Raspbian for native support should be forthcoming


So I'm told,  and likely because it's early days, I haven't seen evidence of the source code to compile it yourself yet, but I am re-assured that there will be up to date releases in support of the latest kernel at least as the add-on is intended to be fully HAT compatible and automatically identify and setup itself when you plug it into the Pi 2 in future. This feedback has already been given internally to attempt to address and accelerate this.


Step by Step

To start using your 2.4" TouchScreen you can follow these steps, for ease of setup you'll need internet access and a keyboard, mouse and monitor:


  • Image the SDCard for your Raspberry Pi A+/B+/2 Model B with Raspbian
  • Power on your Raspberry Pi and set it up using either SSH or Keyboard & Mouse with a screen as per usual
  • Open up a terminal window, either within X (the desktop environment) or by pressing CTRL-ALT-F2 (F1 to F6 usually work)
  • Type the following:

wget http://www.4dsystems.com.au/downloads/4DPi/4DPi-24-HAT/4DPi-24-HAT_kernel_R_1_0.tar.gz

sudo tar -xzvf 4DPi-24-HAT/4DPi-24-HAT_kernel_R_1_0.tar.gz -C /


If you need it, I have also attached the file to this blog post. By default, this file replaces the file /boot/config.txt - so you may want to back that up or make a note of any settings you have in there in case you want to re-apply them.


If you have a Raspberry Pi A+ or B+ you will have to alter the /boot/config.txt file using your favourite text editor (I use vim). I'll let you choose which, but if you're having problems just ask in the comments. Change the following line:


kernel=kernel7_hat.img


to


kernel=kernel_hat.img


Which will give you support for the A+/B+ , why this is different, I do not fully understand but it is likely driver related in how the screen interfaces with the VideoCore on the Raspberry Pi as some of the DMA addressing changed between the two.


Everyday I'm Buffering

Your only steps now to get it to display are playing around with the framebuffer on the device, which it identifies as /dev/fb1 - so for example one way to get your desktop to appear on your touchscreen by default is to edit /etc/rc.local and put the following in before the 'exit 0' line:


sudo -u pi FRAMEBUFFER=/dev/fb1 startx &


Frankly, there are more fun ways to play with the framebuffer. For example, I found a project called "Raspberry Pi Framebuffer Copy" that allows you to extend playing about with what's displayed on the screen. So for example you can push a higher resolution image and possibly other features onto the screen if that's what's typically supported over HDMI pretty easily, though it may not look pretty!


Further Configuration

You may now be asking what else you can do with the screen with questions such as "Where's the calibration?", "How do I tweak the SPI communication speed?" or "What are these buttons?" and perhaps "How do I hold all of these melons?". Some of these questions, and more, will be answered in future released documentation (we're still making sure that they work).


In the file /boot/cmdline.txt you will find:


24-hat.rotate=0


Which you can change to equal '0, 90, 180 or 270' meaning the degrees at which the screen is rotated.


You may also be able to add the values:


4dpi.sclk=


and


4dpi.compress=


To cmdline.txt, example values of these are '48000000' and '7' respectively, this increases the frequency of the SPI bus and the compression of the data sent over it, if set to '1' it lets the kernel handle the compression, which may not be optimal and corruption may occur, '7' is the highest value.


4dpi.pwm=


May allow control over the backlight, setting to '0' will disable it and free up GPIO18 on the Pi, setting to '1' allows values to be sent to /sys/class/backlight/4dpi/brightness to control the backlight (between 1 and 255)


Undocumented Feature

Hidden within the config files for Xorg you will find that the kernel package for the 2.4" touch screen adds the following file:


/usr/share/X11/xorg.conf.d/99-fbturbo.conf

Within this file are settings for the following 'startx' parameters:


startx -- -layout TFT


Which starts the Xorg environment with output to the 2.4" touchscreen


startx -- -layout HDMI


Which starts the Xorg environment with output via the HDMI port on the Raspberry pi.


In the appendix attached to this post, you will find code that will let you configure the buttons for the screen. There's code for C and for Python, which will give you some diversity in using the buttons (first person to create a Kodi/OpenElec plugin gets a cookie).


Now all I need to do is mod a battery and camera into the case and I'll have a nice portable camera!


Attachments:
4DPi-24-HAT_kernel_R_1_0.tar.gz
image4DPi-24-HAT_appendix_R_1_0.pdf
  • raspberry_pi_touchscreen
  • raspberry_pi
  • touchscreen
  • 4d_systems
  • Share
  • History
  • More
  • Cancel
  • Sign in to reply

Top Comments

  • shabaz
    shabaz over 10 years ago +1
    Hi Christopher, This looks nice. And impressive that it all fits into the official case. The RPI blog was very silent that the case was manufactured with specific input from Element 14 to achieve this…
  • cstanton
    cstanton over 10 years ago in reply to shabaz +1
    Hi shabaz , As far as I am aware the screen was manufactured to fit the case, not the other way around. I've no idea about communication about the case between element14 and the Pi Foundation. The LCD…
  • mcb1
    mcb1 over 10 years ago +1
    It looks like there is some info here on their larger sizes 4D Systems | 4DPi-32 At least they ave brought the GPIO back out. Seems someone has been looking into what the display tick http://hardware-libre…
  • Former Member
    Former Member over 10 years ago

    Thank you. I will charge the jessie-lite.

    But how to have no-x ?

    • Cancel
    • Vote Up 0 Vote Down
    • Sign in to reply
    • More
    • Cancel
  • clem57
    clem57 over 10 years ago in reply to Former Member

    These are NOT stable tested yet! Official releases are from  https://www.raspberrypi.org/downloads/raspbian/

    Clem

    • Cancel
    • Vote Up 0 Vote Down
    • Sign in to reply
    • More
    • Cancel
  • Former Member
    Former Member over 10 years ago in reply to clem57

    wich raspbian do I choose : Index of /nightlyimages-v2/20160209-raspbian-wheezy-1/

    ?

    • Cancel
    • Vote Up 0 Vote Down
    • Sign in to reply
    • More
    • Cancel
  • clem57
    clem57 over 10 years ago in reply to Former Member

    Answer above:


    • Image the SDCard for your Raspberry Pi A+/B+/2 Model B with Raspbian
    • Cancel
    • Vote Up 0 Vote Down
    • Sign in to reply
    • More
    • Cancel
  • Former Member
    Former Member over 10 years ago

    Hello,


    I'm new in programmation and with raspberry.

    I have a raspberry pi A+, a 4Dpi-24-HAT and a raspicam.

    I use Noob. I would like to use your program which seems to be exactly what i want.

    But i followed all indications and i can't use the python script for buttons. I have errors.

    What is the distribution i need to use ? Raspbian ? an other ?


    Thank you.

    • Cancel
    • Vote Up 0 Vote Down
    • Sign in to reply
    • More
    • Cancel
  • shabaz
    shabaz over 10 years ago in reply to cstanton

    Not a bad screen!

    I purchased one to try on other SBCs, but have plugged it into a RPI and works fine. Nice, clean design and screw-holes for permanently attaching it.

    I might make it display some basic stats, e.g. IP address, connectivity, CPU usage just to get familiar with the display.

    • Cancel
    • Vote Up 0 Vote Down
    • Sign in to reply
    • More
    • Cancel
  • DAB
    DAB over 10 years ago

    Nice blog,


    I do worry about the size of the display.

    I could see it used for simple touch screen user interface, but I think it is too small for my old eyes to see much else.


    DAB

    • Cancel
    • Vote Up +1 Vote Down
    • Sign in to reply
    • More
    • Cancel
  • Former Member
    Former Member over 10 years ago

    Hello again, I managed to get rpi camera board to work, with preview on display, with buttons.


    First I made fresh sd card with raspbian wheezy with no x (http://nightly.raspberrypi.org/nightlyimages-v2/), rasci-config to expanded sd card, changed pass, hostname and enabled camera board.

    reboot

    I updated it.

    reboot

    Than I downloaded kernel and extracted it, and set kernel to rpi 1 (/boot/config.txt). Other stuff (calibration and direct log in) in not necessary, since I do not have X.

    shutdown -h now

    I mounted camera board, display, keyboard and internet cable, than powered it up - tadaaa!


    Now, camera records, but with no preview, for camera preview there is link Christopher Stanton posted (https://github.com/tasanakorn/rpi-fbcp), but for that to compile I needed sudo apt-get install cmake, than compiled it, it produced a file named fbcp, which I sudo cp fbcp /usr/local/bin and added fbcp & just before exit 0 line in /etc.rc.local, so it starts just before login. This renders display useless, but I plan to have this rpi just for hd recording, and display is really to small for anything else, but it enables camera preview.


    The next thing I did is disable display to go blank after 30 minutes, so I can still see what I am recording. In /etc/kbd/config I set BLANK_TIME=0. This way display is always on.


    EDIT:

    Now, for buttons to work I used python script that Christopher provided and modify it for my needs:

    #!/usr/bin/python
    # /usr/local/bin/buttons.py
    import array, fcntl, subprocess, os, picamera, random
    from time import sleep
    from subprocess import call
    _IOC_NRBITS= 8
    _IOC_TYPEBITS = 8
    _IOC_SIZEBITS = 14
    _IOC_DIRBITS = 2
    _IOC_DIRMASK= (1 << _IOC_DIRBITS) - 1
    _IOC_NRMASK= (1 << _IOC_NRBITS) - 1
    _IOC_TYPEMASK= (1 << _IOC_TYPEBITS ) - 1
    _IOC_NRSHIFT = 0
    _IOC_TYPESHIFT = _IOC_NRSHIFT+_IOC_NRBITS
    _IOC_SIZESHIFT = _IOC_TYPESHIFT+_IOC_TYPEBITS
    _IOC_DIRSHIFT = _IOC_SIZESHIFT+_IOC_SIZEBITS
    _IOC_NONE = 0
    _IOC_WRITE = 1
    _IOC_READ = 2
    
    camera = picamera.PiCamera()
    # is camera recording?
    bussy = False
    
    def _IOC(dir, type, nr, size):
      ioc = (dir << _IOC_DIRSHIFT ) | (type << _IOC_TYPESHIFT ) | (nr << _IOC_NRSHIFT ) | (size << _IOC_SIZESHIFT)
      if ioc > 2147483647: ioc -= 4294967296
      return ioc
    def _IOR(type,nr,size):
      return _IOC(_IOC_READ, type, nr, size)
    # move to directory where you want your recordings to be saved
    os.chdir("/home/pi/videos")
    # print button commands, incremantal from left to right
    print "1-record video\n2-stop recording\n3-commands\n4-reboot\n5-shut down"
    
    LCD4DPI_GET_KEYS = _IOR(ord('K'), 1, 4)
    buf = array.array('h',[0])
    # probably is a good idea to move 'stop recording' to it's own function
    # since it is repeated 3 times: in shutdown, reboot and stop recording
    with open('/dev/fb1', 'rw') as fd:
      while True:
        fcntl.ioctl(fd, LCD4DPI_GET_KEYS, buf, 1)
        keys = buf[0]
        if not keys & 0b00001:
          if bussy == True:
            camera.stop_recording()
            sleep(0.5)
            camera.stop_preview()
            sleep(0.5)
            camera.close()
            sleep(0.5)
            print "--------\nSHUTDOWN\n--------"
          else:
            print "--------\nSHUTDOWN\n--------"
          call(["sudo shutdown -h now"], shell=True)
        if not keys & 0b00010:
          if bussy == True:
            camera.stop_recording()
            sleep(0.5)
            camera.stop_preview()
            sleep(0.5)
            camera.close()
            sleep(0.5)
            print "------\nREBOOT\n------"
          else:
            print "------\nREBOOT\n------"
          call(["sudo reboot"], shell=True)
        if not keys & 0b00100:
          if bussy == False:
            call (["clear"],shell=True)
            print "-------------\nCommands:\n-------------"
            print "1-record video\n2-stop recording\n3-commands\n4-reboot\n5-shut down"
        if not keys & 0b01000:
          if bussy == True:
            camera.stop_recording()
            sleep(0.5)
            camera.stop_preview()
            sleep(0.5)
            call(["pkill fbcp"], shell=True)
            sleep(0.5)
            call (["clear"],shell=True)
            print "-------------\nRecording Stopped\n-------------"
            print "1-record video\n2-stop recording\n3-commands\n4-reboot\n5-shut down"
            bussy = False
          else:
            bussy = False
        if not keys & 0b10000:
          if bussy == False:
            bussy = True
            call (["fbcp &"], shell=True)
            # for file name I could go with date, but it is not likely I'll have wi-fi dongle
            # since wi-fi also drains battery, and I will not have rpi connected to cable internet,
            # so again, no way for rpi to tell date and time correctly.
            # Therefore I use 4 random numbers to ensure no filenames get repeated:
            sleep(0.5)
            a = random.randrange(1, 1000000)
            sleep(0.2)
            b = random.randrange(1, 1000000)
            sleep(0.2)
            c = random.randrange(1, 1000000)
            sleep(0.2)
            d = random.randrange(1, 1000000)
            sleep(0.2)
            video_file_name = str(a) + "." + str(b) + "." + str(c) + "." + str(d) + ".h264"
            # some camera parameters
            camera.awb_mode = 'auto'
            camera.image_effect = 'none'
            camera.rotation = 180
            camera.exposure_mode = 'auto'
            camera.resolution = (1296,972)
            camera.framerate = 42
            camera.start_preview()
            sleep(0.5)
            camera.start_recording(video_file_name, format='h264',  bitrate=5000000,)
          else:
            bussy = True
        if keys != 0b11111:
          print
        if keys == 0b01110: # exit if top and bottom pressed
          break
        sleep(0.1)


    I chmod the file to be executable and added /usr/bin/python /usr/local/bin/buttons.py & just before exit 0 line in /etc.rc.local, so it starts just before login. This way as rpi boots there is no need for login, I can use buttons to record videos.


    To reach buttons I use stylus, but I might chop that bit off of a case to reach buttons with my finger.


    Since I still do not have buttons working (yet), I need to ssh into rpi from desktop pc and isue the command:

    raspistill -t 0 -f -o myHDvideo.h264

    Than I disconnect internet cable and I have a camera which is recording, but I still leave ssh terminal open on desktop pc.

    When I am done recording, I need to connect internet cable back on, and ctrl-c to stop recording, and have a valid, uncorrupted video file.


    I plan to have a script for buttons, that starts also at boot time, so that there is no log in necessary, and recording could be done by push buttons.

    So I tried scripts Christopher Stanton left in his post's appendix. And they work nicely.

    The problem with it (both, C and Python scripts) is that preview is ~1 fps, and lagging behind. On top of it, file ends up corrupted: there is error message that camera board is not detected and searching the net I guess it is gpio clash.


    With this part, getting buttons to work with camera board preview I would like some help.


    Thank you, and here are some pictures of my pri camera with display pictures:

    imageimageimageimageimage

    • Cancel
    • Vote Up +1 Vote Down
    • Sign in to reply
    • More
    • Cancel
  • Former Member
    Former Member over 10 years ago in reply to cstanton

    Hey Christopher, hello, and thank you for your prompt answer,


    English is not mu native language, therefore I go about it long and slow; so you said:

    "The kernel is somewhat irrelevant,... "

    also, mind you, I am noob, but is this not a kernel setting?

    wget http://www.4dsystems.com.au/downloads/4DPi/4DPi-24-HAT/4DPi-24-HAT_kernel_R_1_0.tar.gz
    sudo tar -xzvf 4DPi-24-HAT/4DPi-24-HAT_kernel_R_1_0.tar.gz -C /

    that is why I said 'this display's kernel'...

    I was going to make a fresh no-X install and do those two commands, is this right way of understanding?


    my next question is how to go about tricky part:

    "...however your challenge is then setting up the terminal or whatever you have running to then output to the screen's framebuffer.

    So this framebuffer thingy, could you point out some useful tips for yours noob?


    Thank you.


    Kind regards, Goran

    • Cancel
    • Vote Up +1 Vote Down
    • Sign in to reply
    • More
    • Cancel
  • cstanton
    cstanton over 10 years ago in reply to Former Member

    Hello seiduna,

    My plan to use the camera with it is in a queue behind using the screen with my geocaching project.


    However, your question about using Raspbian without X is straightforward. For the most-part you can run 'raspi-config' and set it to go straight to the terminal. Further more you can run 'sudo apt-get autoremove <package name>' to uninstall any package, so for example, you can remove 'xorg' or any other packages you've identified as being related to X / the Gui and it won't be able to run.


    The kernel is somewhat irrelevant, however your challenge is then setting up the terminal or whatever you have running to then output to the screen's framebuffer.

    • Cancel
    • Vote Up 0 Vote Down
    • Sign in to reply
    • More
    • Cancel
<>
element14 Community

element14 is the first online community specifically for engineers. Connect with your peers and get expert answers to your questions.

  • Members
  • Learn
  • Technologies
  • Challenges & Projects
  • Products
  • Store
  • About Us
  • Feedback & Support
  • FAQs
  • Terms of Use
  • Privacy Policy
  • Legal and Copyright Notices
  • Sitemap
  • Cookies

An Avnet Company © 2026 Premier Farnell Limited. All Rights Reserved.

Premier Farnell Ltd, registered in England and Wales (no 00876412), registered office: Farnell House, Forge Lane, Leeds LS12 2NE.

ICP 备案号 10220084.

Follow element14

  • X
  • Facebook
  • linkedin
  • YouTube