


Initial Hardware Tests
I've started to learn my way around this board - it has a tremendous amount of capability/functionality. My plan is to use the VCU Design example (v2018.3) to learn the board (SOM + Carrier) and test the functionality that I will need to implement my roadtest project.
The design is well documented on GitLab: v2018.3_vcu_uz7ev_cc-06212019
There is a pre-built SD card image which makes it easy to get up and running.
For initial hardware testing I'm going to run through the test suite that is documented here: Instructions to validate the vcu_uz7ev_cc design
- Test features of DisplayPort Interface (configuration, Alpha Blending, and test pattern)
- Use video files as input to the VCU decoder and output to the DisplayPort
- Use a USB Webcam with gstreamer v4l2src plugin and output to DisplayPort
- Use USB Webcam and VCU encoder, to output to both the DisplayPort and an RTP Network stream simultaneously
Running through those tests should get me up to speed with the hardware and give me confidence that most of the pieces that I need are functioning. At the end of this exercise I'll have verified the VCU decode/encode, the DisplayPort, Ethernet, USB Webcam, USB Host (for storage), and USB UART. I am planning to use IP cameras for input so I'll probably do a specific Ethernet performance test later. I haven't decided on storage yet but I'm thinking of using the SATA interface so I'll need to check that. For local display I'll probably use the DisplayPort although it is limited in performance because it was implemented with only a single lane - should be capable of 1080p60. I will probably test the HDMI IN/OUT interfaces even if I don't end up using them. I'm going to leave the FMC HPC and SDI interfaces until later as I don't have the hardware to test them.
If there aren't any hardware issues, I think the biggest challenge is going to be using the tool suite to implement the design. The reference design is done using the 2018.3 tools. I'll probably do a quick check to verify that I can reconfigure the design starting with the 2018.3 BSP that it used. I'd like to move to the 2019.1 tools as I am also considering using PYNQ for prototyping. I don't have a lot of Vitis experience so that's probably too many things to tackle at the same time. I didn't get a license voucher with the kit so I hope that won't be an issue.
VCU TRD
Since there was a pre-built SD card "image", getting started was easy. Just copied the BOOT.BIN, image.ub, and system.dtb to a blank microSD card. Changed the Boot Mode switches, connected the Ethernet and DisplayPort cables, opened a Putty terminal and powered up. Everything came up cleanly. I could see the boot messages on the monitor and the Putty terminal.
DisplayPort tests
The individual tests are are documented in separate text files. The configuration and Alpha Blending tests were a mini tutorial on the system tools used with the display system. I found it extremely useful as I haven't used these tools before. They would have been useful when bringing up previous designs. I'll just highlight a few of them and show their output on the terminal.
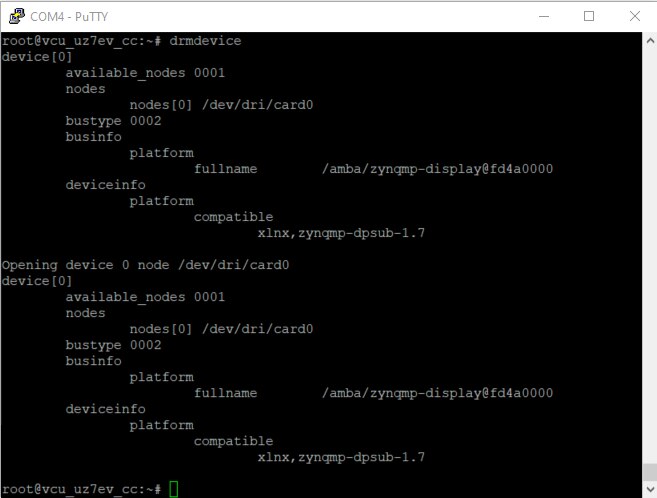
drmdevice - this finds system display devices so is useful to find device mapping and names. In this case the device is /dev/dri/card0 and its name is zynqmp-display@fd4a0000 (interestingly this name is morphed into fd4a0000.zynq-display for the modetest commands).
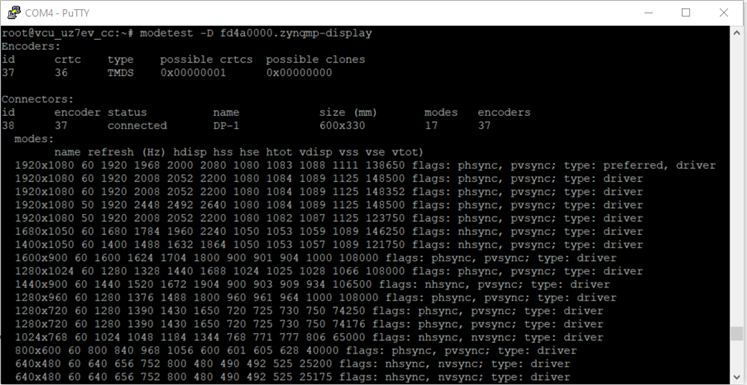
modetest - this command gets and sets display attributes like resolution. Here is a partial output of my interface showing available resolutions and frame rates (I'm connected to a portable 1920x1080 display via the DisplayPort).
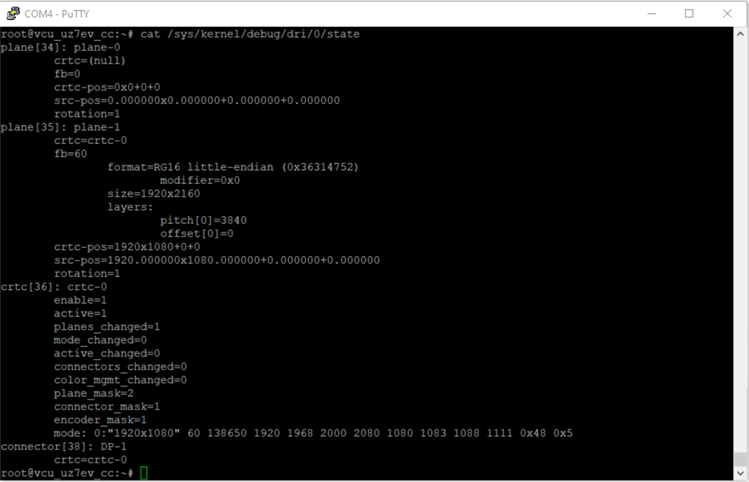
/sys/kernel/debug/dri/0/state - this text file contains the state of the device. Here it shows that there are two display planes and the current resolution (1920x1080).
Here is another section of the modetest output that shows how the planes are allocated (Primary plane is 35 [type:value: 1] and the Overlay plane is 34 [type:value: 0]). The tpg (Test Pattern Generator) is assigned to the Overlay plane.
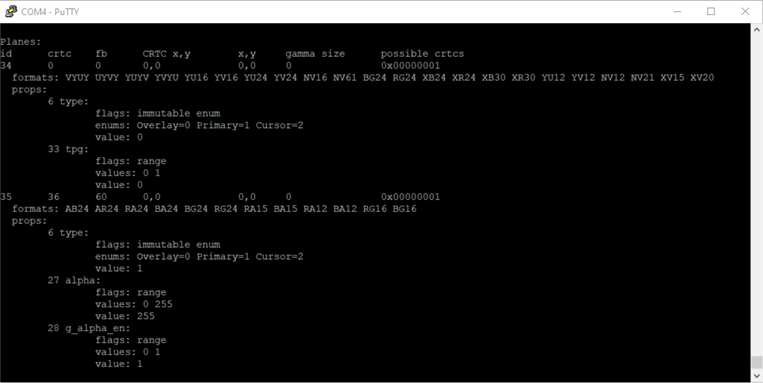
Alpha Blending is basically the merging of the Primary and Overlay planes and you can manage the contribution from each plane by the alpha value. Blending reduces the maximum achievable frame rate so you normally disable it if it isn't needed.
In this case the command to disable it would be modetest -D fd4a0000.zynqmp-display -w 35:g_alpha_en:0
Use GStreamer + 'videotestsrc' to send a test pattern to a DisplayPort Display:
We can query the available Test Pattern Generator (TPG) patterns using the command: gst-inspect-1.0 videotestsrc
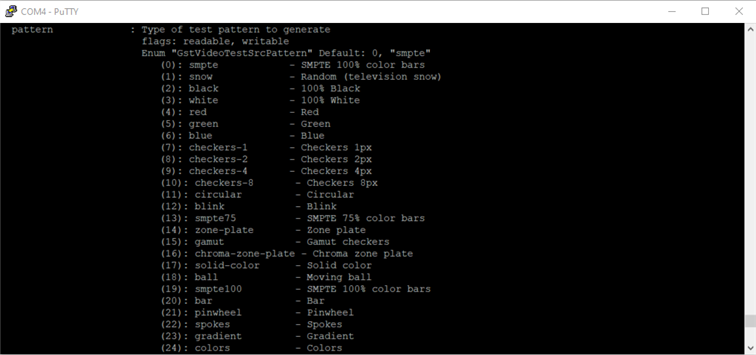
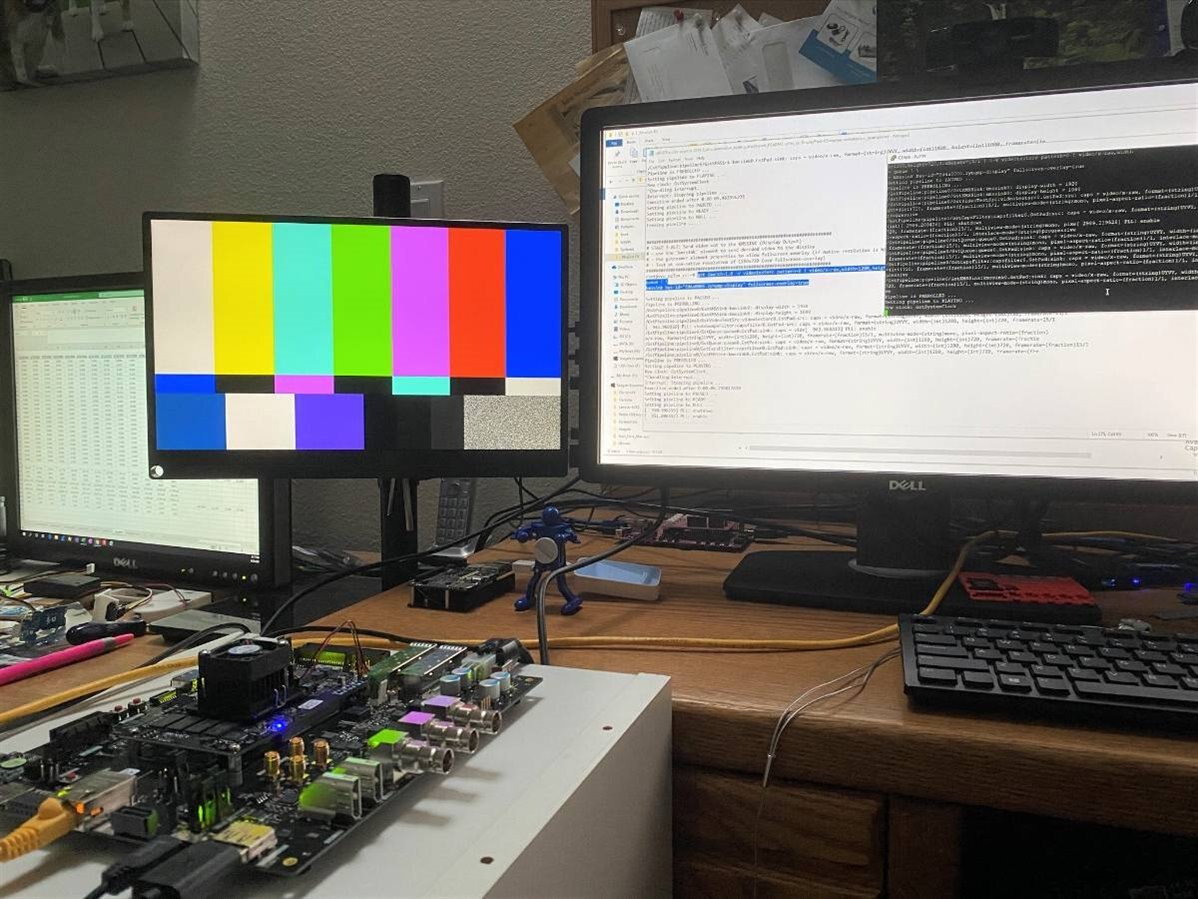
Then we can display a particular pattern (0 - color bars) with the command: gst-launch-1.0 -v videotestsrc pattern=0 ! video/x-raw,width=1280,height=720,framerate=15/1 ! queue ! kmssink bus-id="fd4a0000.zynqmp-display" fullscreen-overlay=true
VCU decoder test using video file input
The first VCU test uses a video file to test the VCU decoder. I'll be using the standard Big Buck Bunny video at 1080p 30fps. The mp4 file is stored on a local USB thumb drive (sda1).
gst-launch-1.0 -v filesrc location=/run/media/sda1/videos/bbb_sunflower_1080p_30fps_normal.mp4 ! qtdemux name=videodemux videodemux.video_0 ! h264parse ! omxh264dec latency-mode=0 ! video/x-raw,format=NV12,width=1920,height=1080,framerate=30/1 ! queue ! kmssink bus-id=fd4a0000.zynqmp-display fullscreen-overlay=true
To be continued....
In the next post I'll document the last two VCU tests and any other tests that I decide to run on the VCU TRD before moving on.
Links to previous posts for this roadtest
Avnet UltraZed-EV Starter Kit Road Test- the adventure begins.....