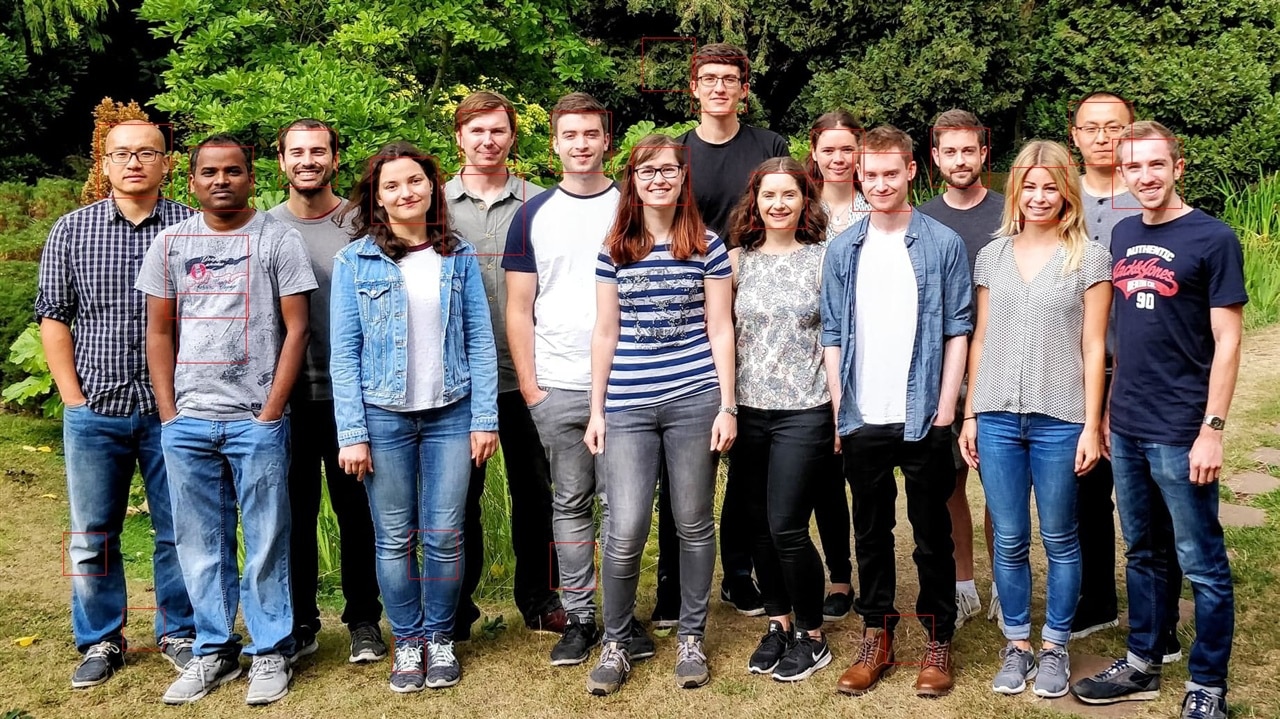
Introduction:
In this blog, I will implement face detection using Opencv on the Zero 2W.
Setup:
- Install pip:
sudo apt install python3-pip
- Install Opencv:
pip install opencv-python
- Install libgl1 to avoid some errors:
sudo apt install libgl1
- Download a pre-trained model for frontal face detection from opencv github project and save it in the current working directory by name: 'haarcascade_frontlface_default.xml'. Here is the link.
Now, lets test the code with some images.
Code:
import cv2

#Load the photograph
pixels = cv2.imread('test.jpg')

#Load the pre-trained model
classifier = cv2.CascadeClassifier('haarcascade_frontalface_default.xml')

#Perform face detection
bboxes = classifier.detectMultiScale(pixels)

#Print bounding box for each detected face
for box in bboxes:
	#Extract box lower left corner coordinates and width and height
	x, y, width, height = box
	x1, y1 = x + width, y + height
	#Draw a rectangle over the pixels
	cv2.rectangle(pixels, (x, y), (x1, y1), (0,0,255), 1)

#Save the image
cv2.imwrite('output.jpg', pixels)
Testing:
 |
 |
 |
 |
 |
 |
 |
 |
 |
 |
It can be seen from the table that all the people were detected in the 2nd and the 4th pic.
In the 1st pic, it seems the model was not able to pickup tilted faces. In the 3rd pic, the model couldn't detect faces because the resolution of the pic is very low. And in the 5th pic, the model could barely detect some of them due to tilted (upside down faces).
Implementing face detection in video:
Code:
import time
import cv2

start = time.time()
#Load the cascade model
face_cascade = cv2.CascadeClassifier("haarcascade_frontalface_default.xml")

#Capture video from the file
cap = cv2.VideoCapture("pexels.mp4")

#Video Resolution
frame_w = int(cap.get(3))
frame_h = int(cap.get(4))

size = (frame_w, frame_h)

#VideoWriter Object to save the video
result = cv2.VideoWriter("test.mp4", cv2.VideoWriter_fourcc('M', 'J', 'P', 'G'), 10, size)

while True:
    #Read the frame
    ret, frame = cap.read()

    #Break out of loop if End Of File is received
    if not ret:
        print("End")
        break

    #Convert to grayscale
    gray = cv2.cvtColor(frame, cv2.COLOR_BGR2GRAY)

    #Detect the faces
    faces = face_cascade.detectMultiScale(gray, 1.1, 4)

    #Draw the rectangle over the faces
    for (x, y, w, h) in faces:
        cv2.rectangle(frame, (x, y), (x+w, y+h), (255, 0, 0), 2)

    #Write the frame to the file
    result.write(frame)

    #Stop if 's' key is pressed
    if cv2.waitKey(1) & 0xFF == ord('s'):
        break

#Release the VideoCapture and the VideoWriter Objects
cap.release()
result.release()

end = time.time()
print("Time taken: ", (end-start))
I ran the same code on Raspberry Pi 4B (2GB RAM) for comparison and the results are as follows: -
Time taken for: 1st video - 77.74 sec | 2nd video - 34.39 sec
Conclusion:
The Zero 2W board detected faces easily without taking much time. It couldn't detect faces in some images but that's the model's limitation not board's. It shows that image processing can be implemented efficiently on the Zero 2W board.
In case of video processing, the Zero 2W seems to be a lot slower.
