


It's time to switch the host for the HVC-P2 from the RPi3 to the RPi0W.
Integration Steps:
1) Load software OS and python code and libraries
2) Connect using USB OTG cable
3) Test that application software is operating correctly
4) Modify case and install the RPi0W.
Software installation:
As usual, the easy stuff takes more time than expected. I had a RPi0W with an 8GB SD card that I had used for a Pi camera project. It had Raspbian Jessie installed and I wanted to update to the latest version of Stretch (I used Stretch on the RPi3). The first mistake that I made was to use the upgrade path rather than just reflashing a new image. I wanted to try upgrading since I had never tried upgrading a major release before. I knew that it would be slow, but the steps appeared straightforward.
I started by updating Jessie:
$ sudo apt-get update
$ sudo apt-get upgrade
$ sudo apt-get dist-upgrade
That all worked as expected.
I modified the package lists to Stretch:
$ sudo sed -i /deb/s/jessie/stretch/g /etc/apt/sources.list
$ sudo sed -i /deb/s/jessie/stretch/g /etc/apt/sources.list.d/*.list
Then I proceeded to upgrade to Stretch:
$ sudo apt-get update
$ sudo apt-get upgrade
$ sudo apt-get dist-upgrade
Everything ran fine for about 30 minutes but then the fetches from the repositories began taking excessively long (it took an hour to get from 87% to 92% complete). The next morning the files had downloaded and it was stopped at a prompt asking for disposition of a config file (keep previous or update). There are a few of these that you need to acknowledge. I thought the upgrade was about complete when it aborted because there was insufficient space left on the SD card. I was upgrading the "full" version that takes the better part of 4GB but I didn't think that there wouldn't be enough space to run the upgrade process (it does retain some old files that you can delete after the upgrade).
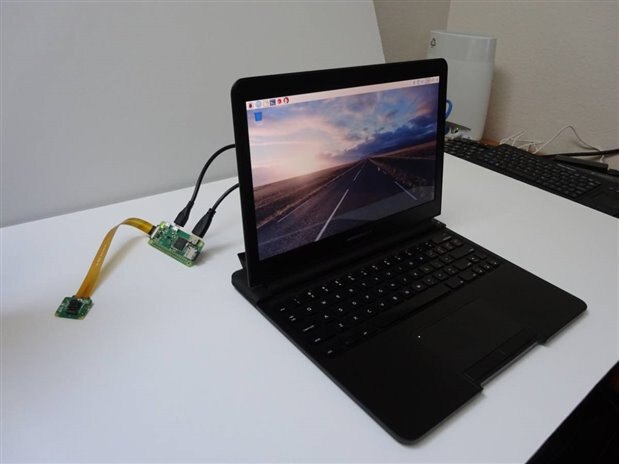
In any case, I just downloaded the latest Raspbian and reflashed the SD card. I could use the "lite" version for this project but I generally install the full version because I use a Motorola Atrix Lapdock as my initial development environment before going headless.
The reflashed SD card worked as expected and I configured the RPi0 (localisation, hostname, static IP, enable SSH). The Stretch release is 2018-10-09, but it uses the same kernel version 4.14 as the 2018-04-18 release that I used with the RPi3.
Then I installed the required Python libraries (pyserial, Pillow) using the following steps:
1) Verify python 2 installed: python -V returns Python 2.7.13 (same as RPi3)
2) Install pyserial: pip install pyserial returns Successfully installed pyserial-3.4 (same as RPi3)
3) Install Pillow: pip install Pillow returns Failed to install Pillow-5.3.0 (RPi3 used Pillow-5.2.0)
My initial thought when Pillow failed to install was that the 5.3.0 version might have additional dependencies not required by 5.2.0, so I tried to install 5.2.0 (pip install Pillow==5.2.0). Well, 5.2.0 also failed to install. After poking around I determined that I was missing the library libjpeg-dev. After installing that library I was able to install either version of Pillow, so I left 5.3.0 installed. It's possible that I had previously installed the libjpeg-dev library on the RPi3 because of other work that I was doing. I know that I didn't have issues when I installed Pillow on the RPi3.
Then I used Winscp on my Windows computer to copy the Python code from the RPi3 to the RPi0W. Now I was ready to connect the HVC-P2.
Connect using the OTG cable:
When they designed the RPi0 they used micro USB connectors for both data and power. Normally a micro USB connector is used as the peripheral data connection and a normal USB-A connector is used for the host data connection on a USB cable. That's how a RPi3 is configured, but they used the micro connector on the RPi0 to reduce overall size (plus the RPi0 does not use a USB hub so it can be configured for OTG). I needed a USB cable with micro USB male connectors on both ends (or cables with adapters). Adapters are quite messy so I hoped that an OTG (on-the-go) cable would work. These cables are generally used with devices (e.g. phones or drones) that can be configured to be either host or peripheral (slave). The one concern that I had was that I had read that these cables did not connect the USB power. That was to prevent power contention in case you accidentally connected two hosts together. Because of that you can find 3 headed OTG cables to provide power.
Anyway, I took a chance and ordered an OTG cable from Amazon: https://www.amazon.com/gp/product/B01M5GZ3N0/ref=oh_aui_detailpage_o02_s00?ie=UTF8&psc=1
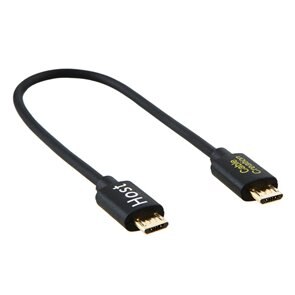
You'll notice that one connector is labeled host as that connector has the ID pin. That has to be connected to the RPi0.
I measured the cable with a DVM and happily there was a power connection in the cable, so I was good to go. I connected the RPi0 and the HVC-P2 and verified that the ttyACM0 device was installed.
Test the application software:
I then ran the Python code that I had tested on the RPi3 and verified that images were being captured and logs were being generated correctly.
Modify case and install RPi0W:
Unfortunately, when I originally printed the case I had not designed in the cutouts for the RPi0W cables. Fortunately, I had allowed for space to mount it.
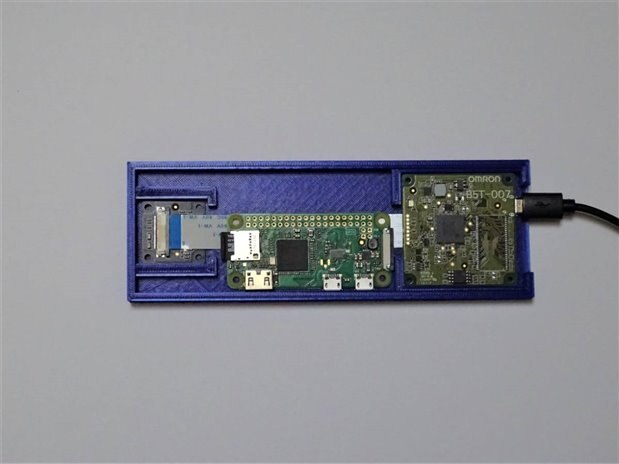
Since it would take many hours to print a modified case, I decided to use my Dremel tool and cut out the slots instead.
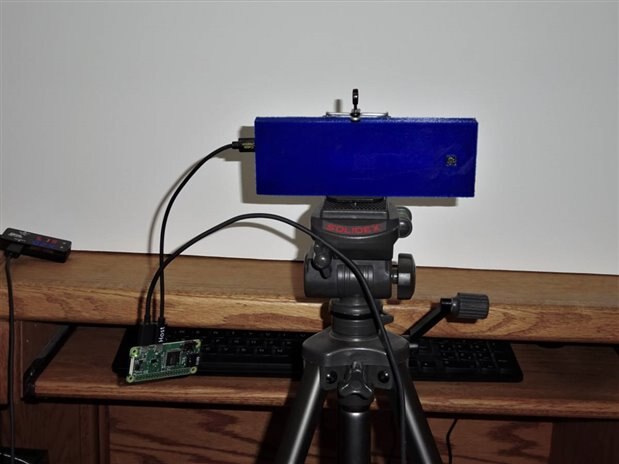
After a couple of rounds of tweaking, here is the finished case with the RPi0W installed:

Next steps:
Now, I need to finish up my application software and do some live testing. I was originally scheduled to complete this roadtest by October 31, but due to a death in the family I won't be able to complete it by then. And I also can't work on it for the next 2 weeks. Graciously, rscasny gave me an extension until the end of November which should allow me to complete the roadtest as I had intended.
