


In this last part of the Polarfire Video SOC review we'll develop a custom AI network from scratch to use the VectorBlox SDK and run on it on the Polarfire video board. Then we'll try to port a current state of the art like (SOTA) stereo network.
1. Designing a LENET network
LENET is a very simple CNN that is used for digit recognition invented by Yan Le Cunn. Like the MNIST network it is similar to a "Hello World" example. The plan is to design the network in a well-known framework like Pytorch and then export the network weights. The network weights can also be converted to the onnx format. A tool like netron.com will be used to visualize the network.
The main steps are:
1. Train the network using the Pytorch MNIST dataset
2. Evaluate the network on the tests data
3. Print the network summary and visualize using netron
4. Export to Onnx framework since pytorch is not supported by default on vectorblox
5. Save the model and write a vectorblox script to export to vnnx
6. run the network on board.
The main code that performs steps 1-4 is shown below.
import torch
import torch.nn as nn
import torch.optim as optim
import torch.nn.functional as F
from torchsummary import summary
from torchvision import transforms, datasets

class LeNet(nn.Module):
    def __init__(self, num_classes):
        super(LeNet, self).__init__()
        self.layer1 = nn.Sequential(
            nn.Conv2d(in_channels=1, out_channels=6, kernel_size=5, stride=1, padding=2),
            nn.BatchNorm2d(6),
            nn.ReLU(),
            nn.MaxPool2d(kernel_size=2, stride=2)
        )
        self.layer2 = nn.Sequential(
            nn.Conv2d(in_channels=6, out_channels=16, kernel_size=5, stride=1),
            nn.BatchNorm2d(16),
            nn.ReLU(),
            nn.MaxPool2d(kernel_size=2, stride=2)
        )
        self.fclayer = nn.Sequential(
            nn.Linear(16*5*5, 120),
            nn.ReLU(),
            nn.Dropout(0.50),
            nn.Linear(120, 84),
            nn.ReLU(),
            nn.Linear(84, num_classes)
        )

    def forward(self, x):
        x = self.layer1(x)
        x = self.layer2(x)
        x = x.view(-1, 16*5*5)
        x = self.fclayer(x)
        return x

class LeNetTrainer:
    def __init__(self, num_classes, num_epochs=5, lr=1e-3, batch_size=100):
        self.device = torch.device('cuda' if torch.cuda.is_available() else 'cpu')
        self.num_epochs = num_epochs
        self.lr = lr
        self.batch_size = batch_size
        self.num_classes = num_classes
        self.model = LeNet(num_classes).to(self.device)
        self.criterion = nn.CrossEntropyLoss()
        self.optimizer = torch.optim.Adam(self.model.parameters(), lr)
        self.train_loader, self.test_loader = self._prepare_data()

    def _prepare_data(self):
        root = './datasets/mnist'
        transform = transforms.Compose([transforms.ToTensor(), transforms.Normalize((0.1307,), (0.3081,))])
        train_set = datasets.MNIST(root=root, train=True, transform=transform, download=True)
        test_set = datasets.MNIST(root=root, train=False, transform=transform, download=True)
        train_loader = torch.utils.data.DataLoader(dataset=train_set, batch_size=self.batch_size, shuffle=True)
        test_loader = torch.utils.data.DataLoader(dataset=test_set, batch_size=self.batch_size, shuffle=False)
        return train_loader, test_loader

    def train(self):
        num_batches = len(self.train_loader)
        for epoch in range(self.num_epochs):
            for idx, (inputs, labels) in enumerate(self.train_loader):
                inputs = inputs.to(self.device)
                labels = labels.to(self.device)
                outputs = self.model(inputs)
                loss = self.criterion(outputs, labels)
                self.optimizer.zero_grad()
                loss.backward()
                self.optimizer.step()
                if (idx + 1) % 100 == 0:
                    print("epoch is {}/{} Step is: {}/{} loss is: {}".format(epoch, self.num_epochs, idx, num_batches, loss.item()))

    def evaluate(self):
        self.model.eval()
        with torch.no_grad():
            correct = 0
            total = 0
            for idx, (inputs, labels) in enumerate(self.test_loader):
                inputs = inputs.to(self.device)
                labels = labels.to(self.device)
                preds = self.model(inputs)
                values, indices = torch.max(preds, 1)
                total += labels.shape[0]
                correct += (labels == indices).sum().item()
            print("Accuracy of the network is: {}%".format(100 * correct / total))

    def print_summary(self):
        summary(self.model, input_size=(1, 28, 28))

    def export_to_onnx(self):
        dummy_input = torch.randn(1, 1, 28, 28).to(self.device)
        onnx_file_path = 'model.onnx'
        torch.onnx.export(self.model, dummy_input, onnx_file_path, verbose=True)
        print(f"Model successfully converted to ONNX format and saved at: {onnx_file_path}")

    def save_model(self):
        torch.save(self.model.state_dict(), 'model.pth')

if __name__ == "__main__":
    lenet_trainer = LeNetTrainer(num_classes=10, num_epochs=5, lr=1e-3, batch_size=100)
    lenet_trainer.train()
    lenet_trainer.evaluate()
    lenet_trainer.print_summary()
    lenet_trainer.export_to_onnx()
    lenet_trainer.save_model()
 '
'
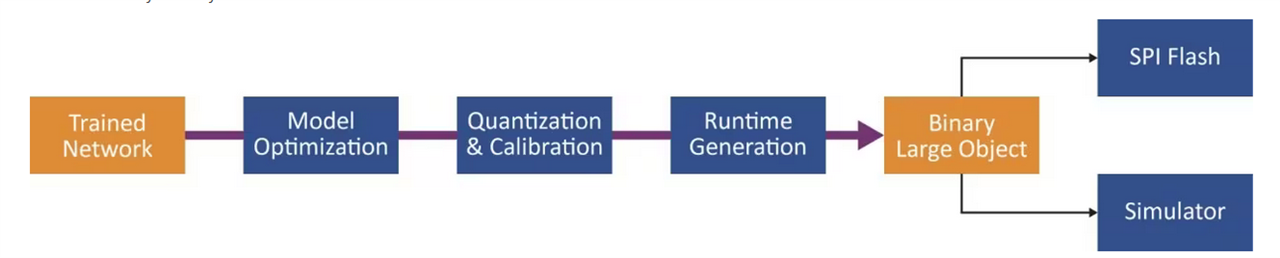
At this point, we can create a shell script that uses the exported shell weights and use model optimizer to convert it to the intermediate representation (IR) .vnnx format.
This generates an .xml file that lists the network operations (ops) . As you can see these correspond verbatim to the blocks shown on the netron tool.
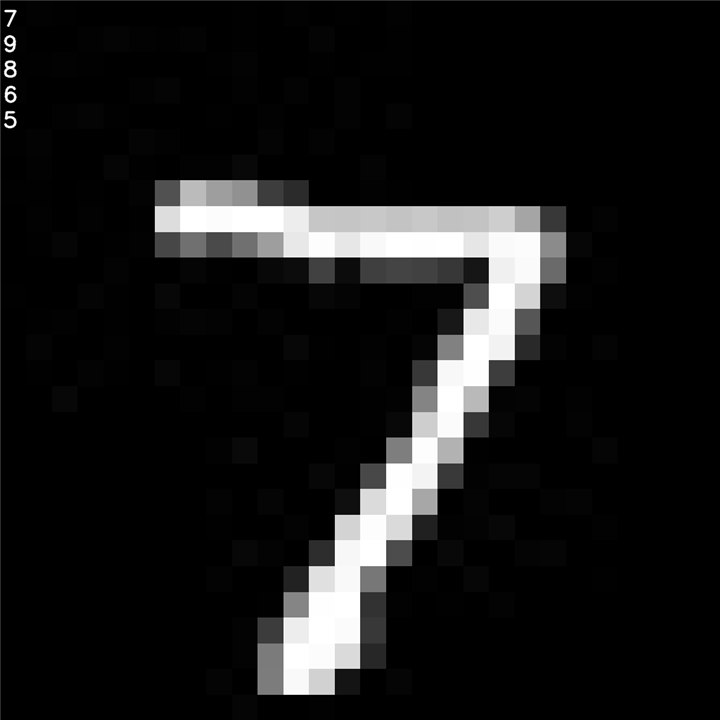
It then converts the network to .vnnx file and calls a python script that passes it an image (figure 7) from figures folder. The post process routine then overwrite the class with the highest probability on the image.
After creating a LENET Vectorblox shell script and copying the exported .onnx file on the same directory we can run the network.
set -e
echo "Checking and Activating VBX Python Environment..."
if [ -z $VBX_SDK ]; then
    echo "\$VBX_SDK not set. Please run 'source setup_vars.sh' from the SDK's root folder" && exit 1
fi
source $VBX_SDK/vbx_env/bin/activate

echo "Running Model Optimizer..."
mo --input_model lenet.onnx \
--static_shape \
--input_shape [1,1,28,28]

echo "Generating VNNX for V1000 configuration..."
generate_vnnx -x mnist-1.xml  -c V1000 -f ../../sample_images -o mnist.vnnx

echo "Running Simulation..."
python $VBX_SDK/example/python/classifier.py mnist.vnnx ../../test_images/seven.28.jpg

deactivate
Now , the .vnnx file can be copied on the Polarfire board and the steps below have been completed.. The pre-processing is already part of the classifier. For a custom network the preprocessing has to be implemented using Softconsole environment. In addition , using SMART -HLS kernels any functionality like image resize, thresholding and dewarping can be implemented on the PL.

2. Stereo network.
There are a number of stereo network for real time disparity calculation that have been implemented the last couple of years. Some of these networks also use only a single camera source. Only a subset of them are small enough to fit on the embedded SPI flash when converted to the VNNX format.In this part we'll document some of the issues encountered when porting such a network.
The first step is to take a Pytorch or Tensorflow model of the network and export the weights. One such light weight network is the HitNet designed by Google. They provide the full weights of the network trained on the Flying Things dataset. To re-train this network however it requires a lot of compute time (~6 weeks on 8 GPUs) hence it's not realistic to retrain a small laptop.
First a folder named DrivingStereo_demo_images was created which holds the left and right images. Each of the left and right images has a resolution of 640x480. OpenCV was then used to export a video of size 1280x480 with the two images side by side.
import cv2
import os
import re

# Function to get a natural sorting key
def natural_sort_key(s):
    return [int(text) if text.isdigit() else text.lower() for text in re.split('([0-9]+)', s)]

# Directory containing PNG files
input_directory = '/home/dimit/Documents/Tensorflow/HITNET-Stereo-Depth-estimation/DrivingStereo_demo_images/image_L/'

# Output video file path
output_video_path = 'output_video.avi'

# Get the list of PNG files in the directory
png_files = [f for f in os.listdir(input_directory) if f.endswith('.png')]
png_files.sort(key=natural_sort_key)  # Sort the files naturally

# Check if there are any PNG files in the directory
if not png_files:
    print("Error: No PNG files found in the specified directory.")
    exit()

# Read the first image to get the frame size
first_frame = cv2.imread(os.path.join(input_directory, png_files[0]))
height, width, _ = first_frame.shape

# Define the target size for resizing
target_size = (640, 480)

# Open a VideoWriter object with the MJPG codec
fourcc = cv2.VideoWriter_fourcc(*'MJPG')
video_writer = cv2.VideoWriter(output_video_path, fourcc, 10.0, target_size)

# Loop through the PNG files, resize each frame, and write to the video
for png_file in png_files:
    image_path = os.path.join(input_directory, png_file)

    # Read the image
    frame = cv2.imread(image_path)

    # Resize the image
    frame = cv2.resize(frame, target_size)

    # Write the resized frame to the video
    video_writer.write(frame)

# Release the VideoWriter object
video_writer.release()

print(f"Video created and saved as {input_video_path}")
This video was then used as input for the stereo network.
import os
import cv2
import numpy as np
from hitnet import HitNet, ModelType, draw_disparity, draw_depth, CameraConfig

# Initialize video
cap = cv2.VideoCapture("input_video.avi")

# Select model type
model_type = ModelType.eth3d

if model_type == ModelType.middlebury:
    model_path = "models/middlebury_d400.pb"
elif model_type == ModelType.flyingthings:
    model_path = "models/flyingthings_finalpass_xl.pb"
elif model_type == ModelType.eth3d:
    model_path = "models/eth3d.pb"

# Store baseline (m) and focal length (pixel)
camera_config = CameraConfig(0.1, 320)
max_distance = 5

# Initialize model
hitnet_depth = HitNet(model_path, model_type, camera_config)

frame_width = int(cap.get(3))
frame_height = int(cap.get(4))

size = (frame_width, frame_height)


output_video = cv2.VideoWriter('stereo.avi', cv2.VideoWriter_fourcc('F','M','P','4'), 10, size)

while cap.isOpened():

    try:
        # Read frame from the video
        ret, frame = cap.read()
        if not ret:
            break
    except:
        continue

    # Extract the left and right images
    left_img = frame[:, :frame.shape[1]//2]
    right_img = frame[:, frame.shape[1]//2:frame.shape[1]]

    # Estimate the depth
    disparity_map = hitnet_depth(left_img, right_img)
    depth_map = hitnet_depth.get_depth()

    color_disparity = draw_disparity(disparity_map)
    color_depth = draw_depth(depth_map, max_distance)
    combined_image = np.hstack((left_img, right_img, color_depth))
    output_video.write(combined_image)

    # Press key q to stop
    if cv2.waitKey(1) == ord('q'):
        break

cap.release()
output_video.release()
cv2.destroyAllWindows()
The idea was to then port the network to run on the Polarfirre board. However , when exporting the network the compiler fails due to un-supported ML operations. Specifically , MO (Model Optimzer) does not support variadic split.
(vbx_env) dimit@desktop:~/VectorBlox-SDK/tutorials/onnx/Hitnet$
  File "/home/dimit/VectorBlox-SDK/vbx_env/lib/python3.8/site-packages/openvino/tools/mo/main.py", line 394, in prepare_ir    ngraph_function = moc_pipeline(argv, moc_front_end)
  File "/home/dimit/VectorBlox-SDK/vbx_env/lib/python3.8/site-packages/openvino/tools/mo/moc_frontend/pipeline.py", line 147, in moc_pipeline
    ngraph_function = moc_front_end.convert(input_model)
RuntimeError: While validating ONNX node '<Node(Concat): concat>':
Check 'ov::PartialShape::merge_into(inputs_shape_scheme, this_input_shape)' failed at core/src/op/concat.cpp:74:
While validating node 'v0::Concat Concat_1637 (Pad:0[0]:f32{1,64,640,1}, Pad_1:0[0]:f32{1,64,640,479}) -> (dynamic...)' with friendly_name 'Concat_1637':
Argument shapes are inconsistent; they must have the same rank, and must have equal dimension everywhere except on the concatenation axis (axis 0).


[ ERROR ]  ---------------- END OF BUG REPORT --------------
[ ERROR ]  -------------------------------------------------
A similar issue was observed when trying to port YOLOV8 with no support for concat and sigmoid operations.
(vbx_env) dimit@DESKTOP:~/VectorBlox-SDK/tutorials/pytorch/ultralytics.yolov8nR2$ ./ultralytics.yolov8n.sh
Checking and Activating VBX Python Environment...
Downloading ultralytics.yolo8n.relu...
Running Model Optimizer...
Model Optimizer arguments:
Common parameters:
        - Path to the Input Model:      /home/dimit/VectorBlox-SDK/tutorials/pytorch/ultralytics.yolov8nR2/yolov8n.onnx
        - Path for generated IR:        /home/dimit/VectorBlox-SDK/tutorials/pytorch/ultralytics.yolov8nR2/.
        - IR output name:       yolov8n
        - Log level:    ERROR
        - Batch:        Not specified, inherited from the model
        - Input layers:         Not specified, inherited from the model
        - Output layers:        Not specified, inherited from the model
        - Input shapes:         [1,3,640,640]
        - Source layout:        Not specified
        - Target layout:        Not specified
        - Layout:       Not specified
        - Mean values:  Not specified
        - Scale values:         [255.]
        - Scale factor:         Not specified
        - Precision of IR:      FP32
        - Enable fusing:        True
        - User transformations:         Not specified
        - Reverse input channels:       True
        - Enable IR generation for fixed input shape:   True
        - Use the transformations config file:  None
Advanced parameters:
        - Force the usage of legacy Frontend of Model Optimizer for model conversion into IR:   False
        - Force the usage of new Frontend of Model Optimizer for model conversion into IR:      False
OpenVINO runtime found in:      /home/dimit/VectorBlox-SDK/vbx_env/lib/python3.8/site-packages/openvino
OpenVINO runtime version:       2022.1.0-7019-cdb9bec7210-releases/2022/1
Model Optimizer version:        2022.1.0-7019-cdb9bec7210-releases/2022/1
[WARN] 2023-11-13T01:07:41z frontends/onnx/frontend/src/ops_bridge.cpp 240      Currently ONNX operator set version: 17 is unsupported. Falling back to: 15
/home/dimit/VectorBlox-SDK/vbx_env/lib/python3.8/site-packages/numpy/lib/function_base.py:792: VisibleDeprecationWarning: Creating an ndarray from ragged nested sequences (which is a list-or-tuple of lists-or-tuples-or ndarrays with different lengths or shapes) is deprecated. If you meant to do this, you must specify 'dtype=object' when creating the ndarray
  return array(a, order=order, subok=subok, copy=True)
[ SUCCESS ] Generated IR version 11 model.
[ SUCCESS ] XML file: /home/dimit/VectorBlox-SDK/tutorials/pytorch/ultralytics.yolov8nR2/yolov8n.xml
[ SUCCESS ] BIN file: /home/dimit/VectorBlox-SDK/tutorials/pytorch/ultralytics.yolov8nR2/yolov8n.bin
[ SUCCESS ] Total execution time: 0.57 seconds.
[ SUCCESS ] Memory consumed: 108 MB.
It's been a while, check for a new version of Intel(R) Distribution of OpenVINO(TM) toolkit here https://software.intel.com/content/www/us/en/develop/tools/openvino-toolkit/download.html?cid=other&source=prod&campid=ww_2022_bu_IOTG_OpenVINO-2022-1&content=upg_all&medium=organic or on the GitHub*
[ INFO ] The model was converted to IR v11, the latest model format that corresponds to the source DL framework input/output format. While IR v11 is backwards compatible with OpenVINO Inference Engine API v1.0, please use API v2.0 (as of 2022.1) to take advantage of the latest improvements in IR v11.
Find more information about API v2.0 and IR v11 at https://docs.openvino.ai
Generating VNNX for V1000 configuration...
ERROR: Node /model.22/dfl/Softmax_output_0: input shape (1, 16, 4, 8400) with axis 1 not supported for softmax
Summary
As of December 2023 Vectoblox compiler supports a limited subset of ML-ops (operations) . When porting networks they have to be exported to TF, ONNX or keras. There is no direct support for Pytorch framework weights. Since there is no support for operations like variadic split , sigmoid and other custom ML-OPS one would either have to augment the compiler and patch it with custom operations or rewrite the network to use the supported operations which will impact accuracy.
It should be noted that some operations like variadic split are work in progress, so once Microchip decides to update the supported operation more networks can be ported. In summary, Vectoblox compiler can be used to port custom network however it requires patching for ML-ops which are not supported.
References
[1] https://docs.openvino.ai/2023.2/openvino_docs_ops_movement_VariadicSplit_1.html
[2] https://github.com/ibaiGorordo/HITNET-Stereo-Depth-estimation
[3] https://paperswithcode.com/method/hitnet
[4] https://www.microchip.com/en-us/products/fpgas-and-plds/fpga-and-soc-design-tools/vectorblox
Edit #1 - 9/01/2024 - Fixed Typos.
