


This part of the Polarfire SOC Video Kit review will detail the installation of the required software for working with the Polarfire Video SOC development board. Ubuntu 22.04 LTS was used for all the development work however similar steps can be used on a Windows system. The main application is the Libero SOC Design Suite which currently sits on version 2023.2 SP1. However the FPGA designs for the demos and VectorBlox CNN accelerator have not been updated as of December 2023 so older versions of Libero such as 2023.1 has to be used for compatibility reasons. Unlike , Vivado or Quartus where the licensing setup requires a single click for a free license, Libero has a multi step licensing approach that can take hours to troubleshoot if not set up properly.
In this part we'll install and configure licensing server for Libero, then we'll install SmartHLS and Softconsole and update the Yocto image on the board emmc chipset to the latest one. Finally we'll test the H264 encoder reference design and use VLC to send video from the board to an external server.
1. Licensing
First create a Microchip account . Once logged in , get the MAC address by issuing the command below. Next there are three licenses that must be downloaded to have a fully functional sub-system. Download the Vectorblox core IP license , Libero SOC license and SmartHLS license./sbin/ifconfig

The Libero SOC IDE does not include the licensing daemons. Download those from the link below:
Create a /flexlm folder and add all the licensing daemons to it. Add the following to the user .bashrc file# For Floating License from a License Server
export LM_LICENSE_FILE=1702@localhost:$LM_LICENSE_FILE
export SNPSLMD_LICENSE_FILE=1702@localhost:$SNPSLMD_LICENSE_FILE
export LANG=en_US.UTF-8
# <1702> is the port number
# <localhost> is the license server host name
LIC_PATH="/home/user/flexlm"
export LM_LICENSE_FILE=$LIC_PATH/LIB-SLV-F-1YR_License.dat:$LM_LICENSE_FILE
export LM_LICENSE_FILE=$LIC_PATH/SmartHLS-F-1YR_License.dat:$LM_LICENSE_FILE
export LM_LICENSE_FILE=$LIC_PATH/CoreVECTORBLOX-OM-FL_License.dat:$LM_LICENSE_FILE
export LD_LIBRARY_PATH=/usr/lib:$LD_LIBRARY_PATH
export LANG=en_US.UTF-8
export DISPLAY=:1
export PATH=/home/dhq/microchip/Libero_SoC_v2023.2/Libero/bin:${PATH}
Note that the above is set up for Libero 2023.2. All the development for this roadtest was done using Liber2023.1 so the version needs to be changed.
Source the bashrc file and issue : ./lmgrd -c LIB-SLV-F-1YR_License.dat
One issue that was encountered was that when one license was active the other licenses could not activate so all 3 licenses were combined in a single file to work.
At this point , libero can be launched from the command line by simply typing :
libero
When the Libero SOC IDE is installed it also creates desktop shortcut however launching the IDE from these gives an license missing message.
To verify that Libero is working correctly download the reference design from the Microchip Github account. This contains the .tcl files for the generating the project.
Installation of Libero will also install Smart-HLS. This is the current incarnation of the Leg_up HLS compiler that Microchip acquired some time ago. Smart HLS has similar functionality to Vitis HLS and allows designing IP blocks in C++ using additonal HW specific pragmas.
The first time Libero launches it will also download the missing IP cores. The licensing server can be added as a service to avoid launching it from the command line on every re-start.
2. Yocto images
The Linux images are based on the Yocto build flow. The latest releases are under:
https://github.com/polarfire-soc/meta-polarfire-soc-yocto-bsp/releases
Out of the factory the board comes pre-programmed with an old version of the Linux distribution on emmc. To update the emmc image download USB imager from :
https://gitlab.com/bztsrc/usbimager
The update procedure of the emmc Yocto image is given on this link:
Note that this failed once mid-way when I tried to had to give it a second try to proceed to completion. The whole process takes around 20-25 minutes.
The short version of the procedure is:
1. Connect USB cable to J12. This will enumerate 4 serial ports.
2. The first UARTport are the HSS.
3. Issue help , then issuing USBDMSC.
4. Connect USB cable to USB 1 (J19) . This will enumerate the internal emmc as a drive.
5. open USBimager and select .wic image and wait until transfer is complete. The figure below shows the process.
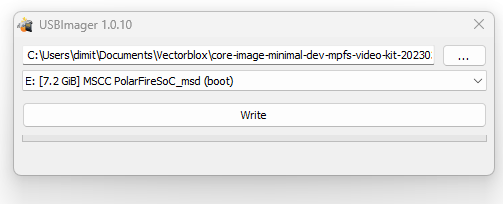
The update procedure will take around 20 minutes.
Softconsole Installation
https://www.microchip.com/en-us/products/fpgas-and-plds/fpga-and-soc-design-tools/soc-fpga/softconsole
Some additional dependencies have to be installed for Softconsole as follows:
sudo apt-get install build-essential
sudo apt-get install libwebkit2gtk-4.0-37
Next step is to test the reference design to verify working setup.
3. Reference design
The latest branch compatible with Libero 2023.1 is the following:
https://github.com/polarfire-soc/polarfire-soc-video-kit-reference-design/tree/v2023.06
The repo was cloned and the reference design project was created by executing the .tcl script. The H264 encoder is time limited as the IP requires a paid license hence after 1 hr it stops working.
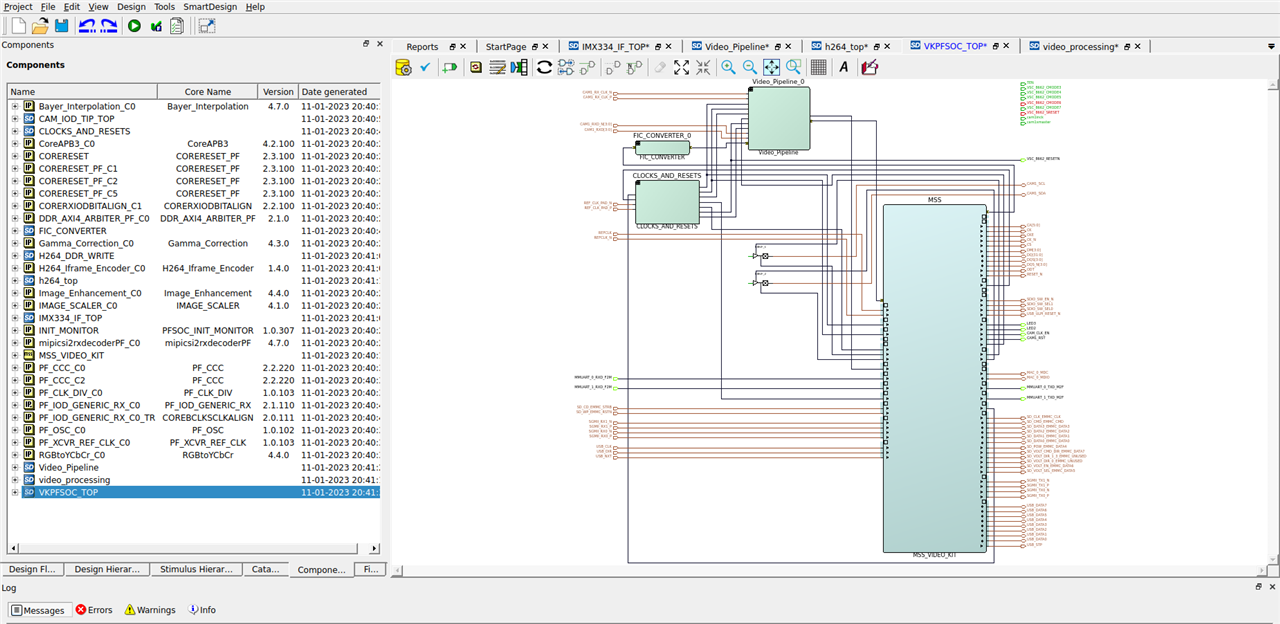
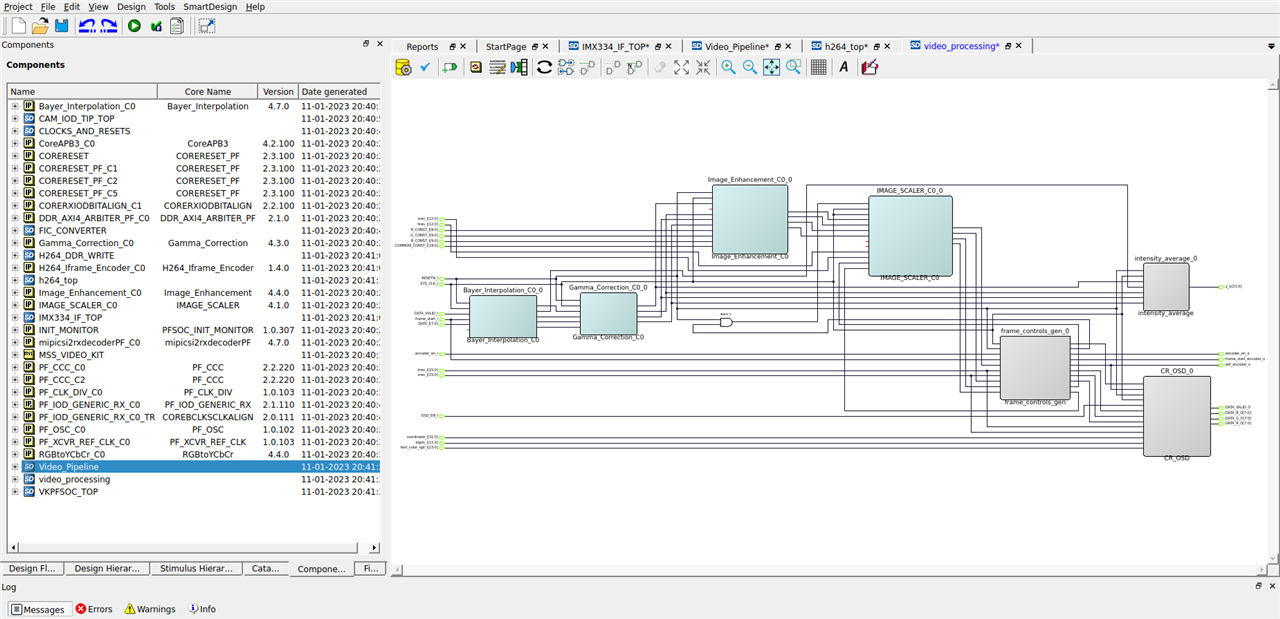
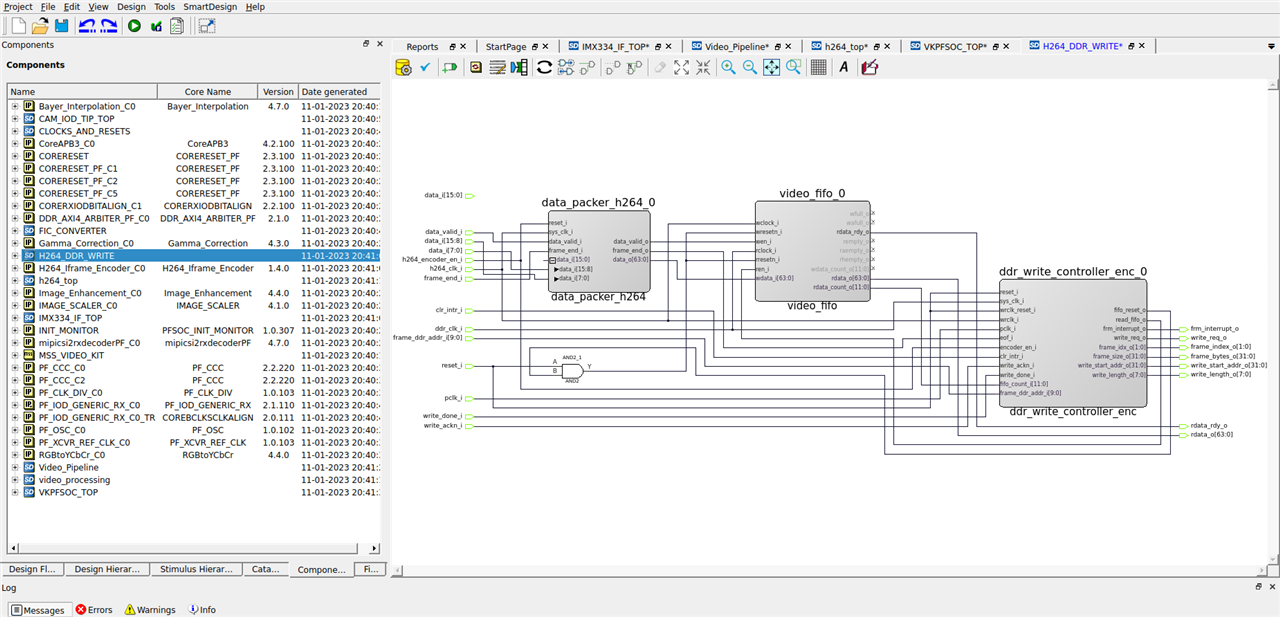
The reference design make use of only 1 camera (specifically the right camera) of the dual camera addon. The video pipeline is composed of the IMX334 MIPI camera block. The video stream then goes through a pre-processing block that contains bayer interpolation, gamma correction as well as image frame scaler and on-screen display IP blocks. The design makes use of a DDR frame writer.
One noticeable issue is that the graphic blocks are harder to follow compared to IDEs like Vivado or Quartus since the signal are not grouped. This makes the graphic design pretty tough to trace. Another observation is the single threaded nature of Libero 2023.1 (and 2023.2).
| {gallery}FPGA design |
|---|
 |
|
|
|
|
Compiling this will take at least 1 hr depending on the single threaded performance.
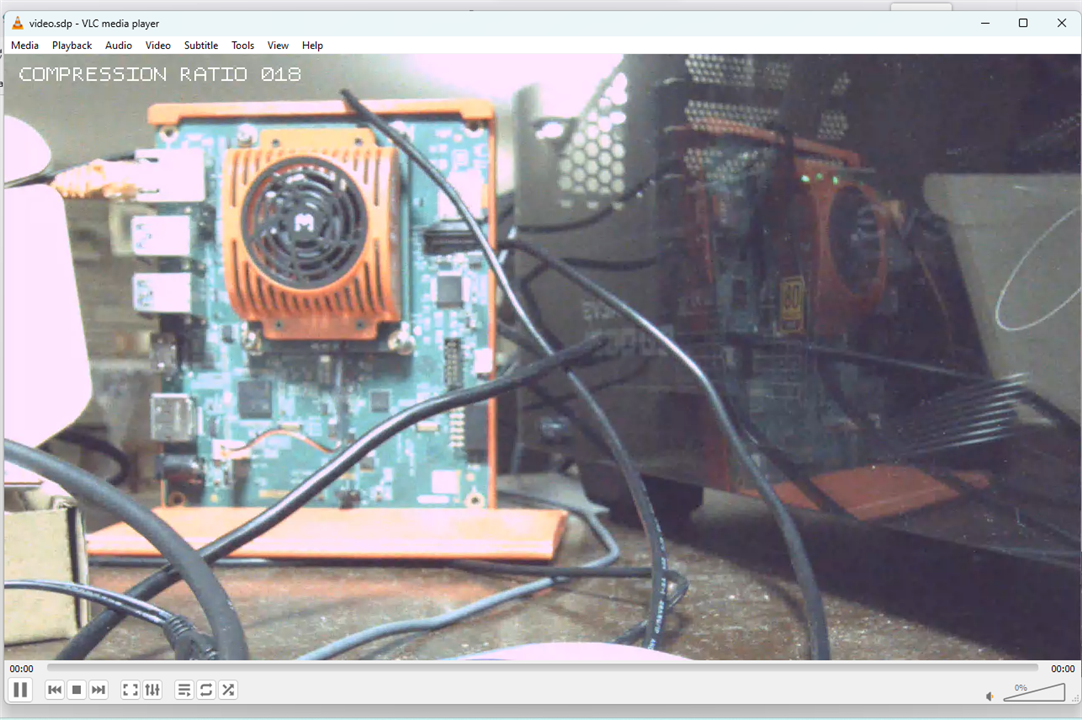
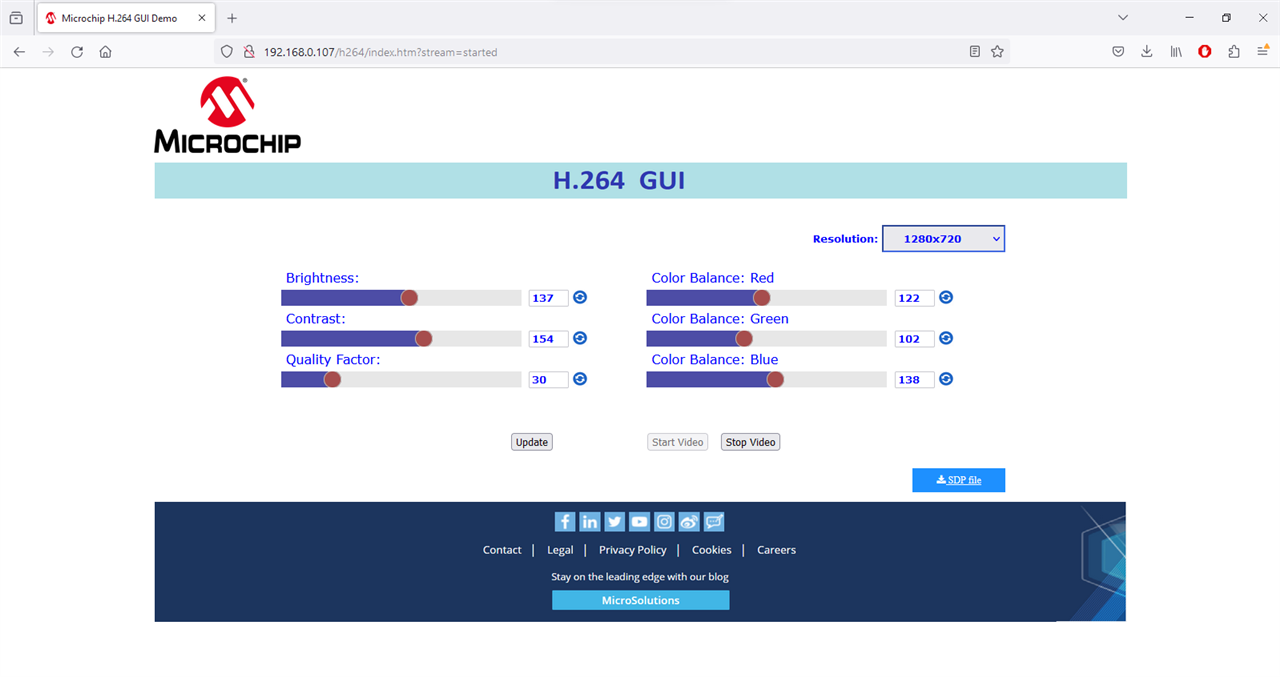
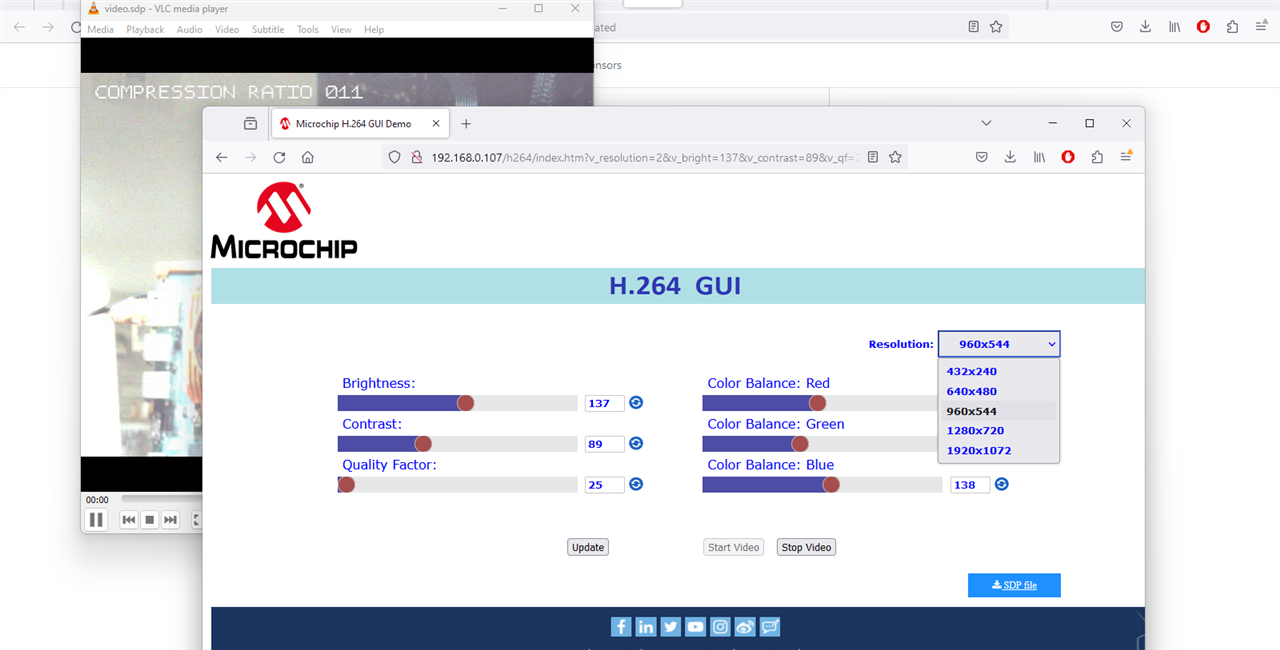
Once the FPGA fabric is programmed , a browser was used to launch the embedded webserver that contains the H264 video decoder settings. VLC was used to test the RTSP video feed.
| {gallery}H264 |
|---|
|
Embedded server |
 |
|
|
To extend this to both cameras would require a video mixer IP. There is no reference design that makes use of both cameras however.
Issues encountered
1. At this point , the Libero IDE was installed and can be used to compile and program the Polarfire video SOC. One item that remains still unresolved is that starting the Libero IDE from the desktop shortcut still fails with a license error while starting it from the terminal command line works correctly.
2. The emmc update procedure takes ~20 minutes, but failed once midway.
This concludes the first part of installing and testing the Libero environment for Polarfire Video SOC. In the next part the Vectorblox SDK will be installed and configured and the sample neural networks will be tested and run on the fabric.
References
[1] https://coredocs.s3.amazonaws.com/Libero/2023_2/Tool/Libero_Installation_Licensing_Setup_User_Guide.pdf
[2] https://github.com/polarfire-soc/polarfire-soc-documentation/blob/master/reference-designs-fpga-and-development-kits/mpfs-video-kit-user-guide.md
[3] https://github.com/polarfire-soc/polarfire-soc-documentation
[4]https://github.com/linux4microchip/buildroot-external-microchip