


Hi folks,
I completed a review of the Intel Genuino 101 as part of the element14 roadtest. My apologies that this review is coming late, the device unfortunately arrived at a pretty tough time (November) in my master's degree studies and Christmas holidays.
I am reviewing this from the perspective of someone who is fairly amateur in electronics and microcontrollers. I just got started with Arduino back in 2015 when I completed my first element14 review. At that point, I didn't even know how to program a microcontroller or hook electronics up to it. During this review and in some small subsequent projects, I learned how to work with these boards a little better.
Enter the Intel Genuino 101 board. This is a lovely little board, which is very similar to the Arduino Uno in many ways. However, it is very notably different in several key ways, including introduction of Bluetooth BLE and a 6 axis accelerometer/gyroscope. Also different, this device operates on 3.3V but is tolerant on 5V, which is something very convenient if you're finding yourself stuck between the two scenarios.
First Impressions
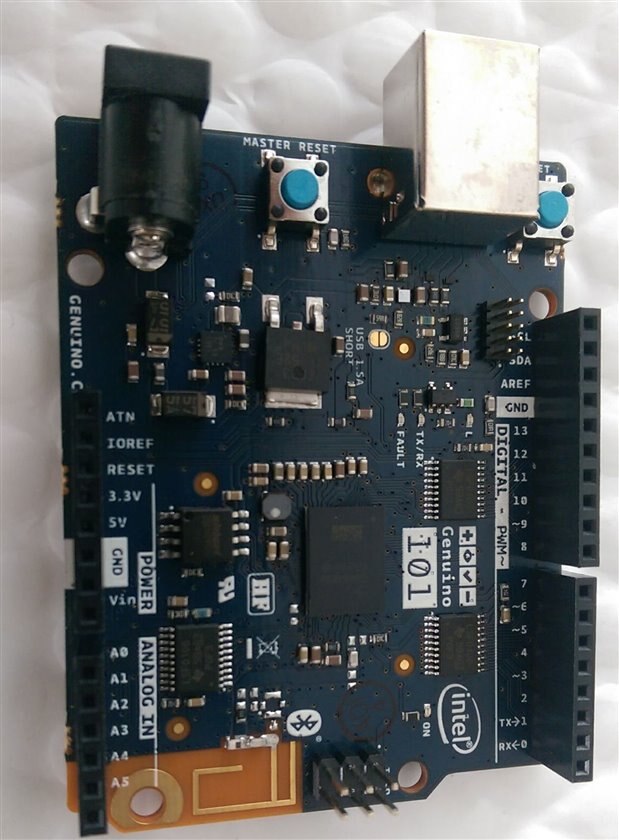
Here is the Genuino in all its newfangled glory. It arrives crisp and clean, just like the Arduino Uno and Yun did.

Notably missing when you open the box is the lovely stickers that came with the Arduino Uno model. It's rather insignificant but it always brought a bit of extra joy to opening these guys.

Let's take a look at the board itself! Honestly my first impressions on the layout were somewhat disappointing. Things I noticed:
- Header pins on the digital side do not line up well. This could be a concern if your stacking shields onto this thing. This is slightly noticeable on the analog pin header side as well, but not as bad.
Here is another shot of the header alignment being off.

On the bottom side, I see a lot of leftover gunk on this board. I assume that most of these is not super hazardous material, but the board arrives quite frankly filthy.

Some more shots of the gunky board. Not sure what it is, leftover flux material? I never thought I'd be so pick with this (especially since I received the board for a review), but I think my hang-up with the cleanliness of these electronics is that they're now being marketed and popularized to younger and younger generations as they get into the maker space. If this is something we encourage, we should ensure a standard on cleanliness and manufacturing so we know contaminates are being left on the boards.

Setup
Setting up the Genuino 101 was generally pretty straight forward, even for a newbie like me. I've documented some of the steps below. The setup for the Genuino 101 requires installing some libraries, and was well documented by Gough Lui in his setup.
Step 1: Go into Arduino IDE, and select Board Manager.

Next step: Install Intel Curie Boards package.

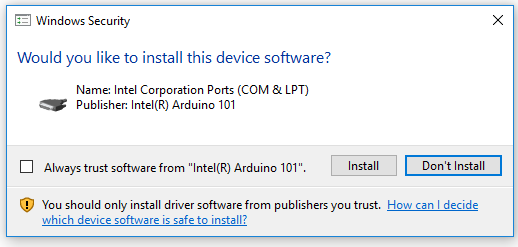
Next up, your machine prompts you to allow installation of your hardware.

After this, you should see this as a proper device in Device Manager and as a Board entry in Arduino IDE. Looks like we're good to go!

First steps
Firsts steps with this board are not too difficult because there is already a decent amount of tutorial documentation out there for this board. For a great first demo, I followed the orientation visualizer tutorial. This demo uses the data from the onboard accelerometer and gyroscope and performs some math (Madgwick filter algorithm, which was developed by Sebastian Madgwick during his PhD in 2010) to integrate this data and obtain quarternions which can represent the orientation of an object in free space. This is a pretty big deal mathematically because this is usually fairly hard to compute quickly and efficiently. With this algorithm, we can take velocity and acceleration data and integrate to obtain position data and represent this in real time. The tutorial makes it pretty easy for anyone to get started. You basically load up their Arduino script, ensure you install and include the Madgwick library, and then run some additional code in an open source software called Processing so that you can see the orientation data in real time.
The result is shown below in pictures.


I've also demonstrated the orientation visualizer in action in a video here. Note what I mention in the video is a drift in yaw orientation data. This is something that is generally unavoidable, because we are integrating acceleration data to obtain position and orientation data. The result is that when the device is in motion we really get more accurate readings. But if we keep the device essentially stationary, the double integration from acceleration to position will take the smallest noise measurements and misconstrue this into actual movement data, hence why my device is rotating in yaw axis over time. This error in integration accumulates overtime when we do dead reckoning using gyroscope.
I think this is amazing that we can so quickly get orientation visualization running on this device. This is a definite boon over something the Arduino Uno, even though it should not be so daunting to buy and connect 4 wires to an IMU to get some accelerometer and gyro data. The fact the IMU is built into the Genuino 101 enforces consistency and hence allows great example code and libraries to be put in our hands, allowing very quick learning. This makes this device a great candidate for someone who is new to microcontrollers, but quickly wants to use an Arduino type MCU for a robotics, wearables, or fashion project. No need for time to be wasted learning about, researching, and integrating an IMU if you have a school project or something to worry about. This is actually very similar to how I applied the Genuino 101 in my research, because I needed to quickly test out an IMU hypothesis for a medical device prototype I was designing, but didn't want to worry about buying an IMU and testing it out.
Other tests
Tried out a few other Arduino standard tutorials for Genuino, including the tap detector. These tutorials are great because they can really help you see into the insight of the code and also start generating ideas on how to use the Genuino 101 board. Maybe you could use it to detect if someone is knocking on your door? Or track if someone is mishandling your package using tap count or shock detection?
The step counter tutorial was also excellent because it could again help a novice user (like me) to very quickly get the footing required to design, test, and prototype a custom wearable device. I didn't end up needing step counting for my Master's thesis work so I didn't delve into this script in detail. It looks like the step detection is probably triggered by a movement exceeding a threshold g force and this could be configured by using a command like the below.
CurieIMU.setDetectionThreshold(CURIE_IMU_SHOCK, 1500);

Trying to integrate this into my research
I'm completing a master's of engineering and wanted to try integrating this into some of my hardware prototyping in place of the standard Arduino Uno. The Genuino 101 functions like the Uno in most respects but I ran into some isues when trying to run some Arduino code I built to take readings from the Omron pyroelectric sensors.

Because of the sensors create so much data, the standard Wire.h buffer is apparently not big enough for reading the sensor data via I2C, so some people have taken the approach of using a custom version library called WireExt.h. However when I tried to compile my script that contained WireExt.h, the compile would crash because it was trying to include avr/io.h but it couldn't find anything. I guess this is because Genuino 101 is Intel Curie and ARC based instead of Atmel and AVR based. I didn't really have the intuition and know where to search for a solution, but I bet if I posted in the Arduino forums, someone would likely have a pretty easy work-around that I could attempt. That said, this was where I hit a roadblock in using the Genuino, and had to put it away for the time being and switch back to Arduino for my project.

Conclusion
Overall the Genuino 101 is a delightful little board with several features that make it pack a real punch. For most people I think it's an amazing starter board to pick out and would enable several more projects than the Arduino Uno can offer out of the box. The new focus on maker culture and general plethora of good Genuino 101 tutorials allow you to really run before you walk. That said, there is still some places where the standard Arduino Uno still holds dear to my heart.
So is this an Arduino Uno replacement? To some, yes it can be. Personally, I'm divided. The Uno still holds a very useful niche. However when the Genuino 101 basically retails for the same price as the Arduino Uno now, I think it's a no-brainer on which one you should select!
Thanks for reading!
Jordan
Evaluation
Application used in:
Attempted integration into biomedical graduate research and basic Arduino tutorial completion.
Was everything in box? Yes
Comparable products: Arduino Uno
Product performed to expectations: 10
Specifications were sufficient: 10
Demo software was good quality 10
Demo was easy to use 10
Support material available 10
Price to performance was good 10
Total score 60/60
My caveat is that hardware quality is not really in this rating criteria at all. I considered the build quality to look very poor and as a result I really would wonder about the manufacturing standards and long term durability of this hardware.
Biggest problems: Some issues with library and file installs, and one of the tutorials was hard to follow and even triggered my anti-virus. Maybe a long term version of the Genuino will come with a larger software suit so we aren't installing as many random 3rd party pieces of software.
Top Comments