


I did not see this road test application until it was too late, Cool Tools 2020: USB Soldering Iron
But I have a cheap, us$8.00, USB-powered soldering iron that I bought at the Microcenter store in the US. https://www.microcenter.com/product/484630/eclipse-enterprise-portable-usb-soldering-iron My box says it is Pro's Kit brand, model # SI-168U. Microcenter lists it as Eclipse brand for some reason. It claims to reach 480 C (+/- 10% -- 10% of what? 480 C would be 48 degrees, 10% of 753 Kelvin? either way a very wide range). 480 C seems very high in any case. Tin-Lead solder melts at 170 to 190 C, and Tin-Silver melts at 210 to 240 C. https://www.kester.com/Portals/0/Documents/Knowledge%20Base/Alloy%20Temperature%20Chart.pdf Maybe they meant 480 F instead.
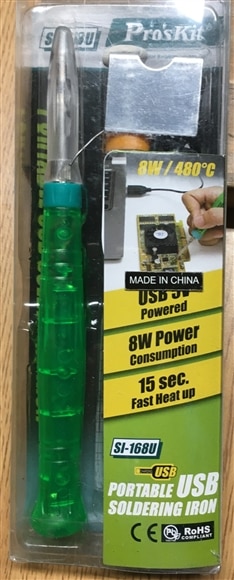

The power is listed as 8 watts, which when I bought it, I wasn't sure would be enough to do any soldering. But at $8, I thought it was worth the risk. I took it with me on a business trip, and did some light electronics soldering with Tin-Lead solder and it worked fine. It has a fine conical tip, so it's designed for small work. I powered it from my laptop's USB port. It's definitely low power, but I was just adding some pin headers to a small IoT board. The soldering iron and the box it comes in is small, making it easy to toss into a suitcase.
Unboxing
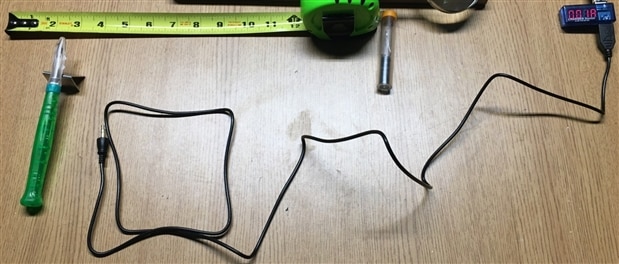
In the small box, it comes with most of what you need. Soldering Iron, USB cable, a coil of solder, and a multi-language instruction sheet. You'll have to provide your own USB power, it comes with a USB type A cable. It lists the USB cable as 1.5 meters, and I measured it at 59 inches, so that's right on. As I said, it's is rated at 8 watts, so a 2 amp USB power supply is powerful enough. I used my laptop to power it, but I also usually have a wall plug with me for general use and mobile phone charging. Here'a photo of what's in the box (oh, my tape measure and USB power meter were not included)

For the purposes of this test, I thought I should try it with lead-free solder, to make sure it did get hot enough for that use. I grabbed this small tube from my tool kit and went to work. The soldering iron end of the USB cable is a simple T-R-S connector. I measured the Tip as 5 VDC from USB, the Ring has no connection, and the Shield is the Ground.

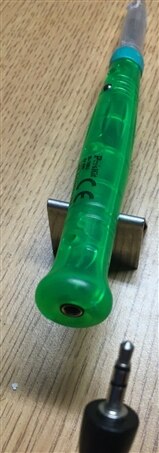
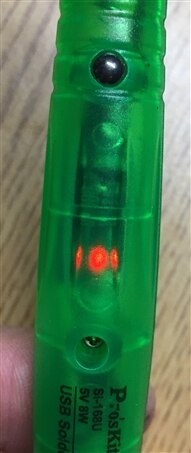

The soldering iron is small but comfortable to hold. I've seen some unhappy reviews about how it works, mainly about the "power" button. It is a small round metal knob that is a capacitive touch sensor, It is not an on/off button. In my use, I just keep my skin touching the metal knob continuously to make sure it stays hot.
The soldering tip is removable, a collar unscrews, and you can pull it out of the heating element. An internet search does turn up replacement tips, but at $3.20 plus shipping, https://totaleclipse4u.com/default/9si-b162-t.html it probably doesn't make much sense to get a replacement, unless you really like this soldering iron.
Soldering Sn-Ag Test
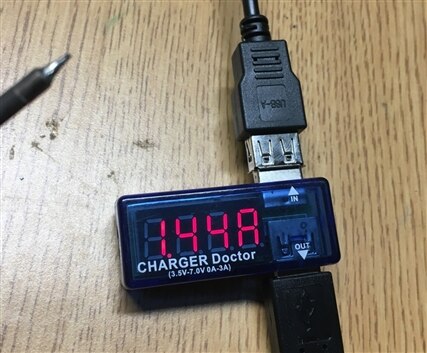
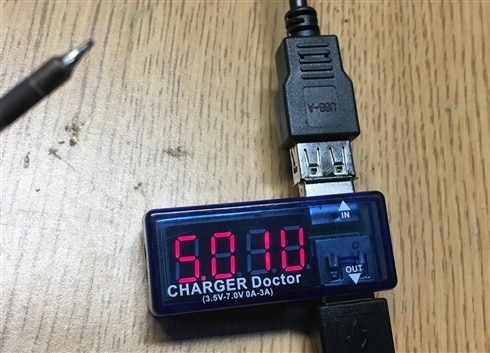
While doing some soldering I connected a USB power meter to check out the 8 watt rating. I used a 2 Amp USB wall charger for the test. After plugging it in, but before connecting the cable to the soldering iron, the volts were at 5.2. When I connected it to the soldering iron it dropped to 5.0 volts under load. The amps ranged from 1.35 to 1.45 while soldering, giving me around 7 watts (+/-) of power used.
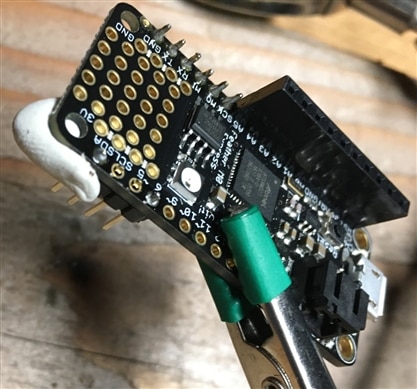
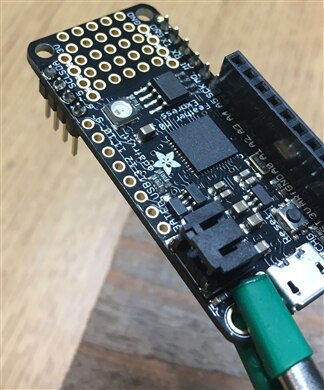
I had previously done several header pin soldering on one side of my Adafruit board, using Tin-Lead solder (the pins and the stacking header on the right side). For this test, I did the 4 pins on the left side using Tin-Silver solder. The soldering iron worked well, it was clear to me it took several more seconds of heat-up time to melt the Tin-Silver solder, but there was sufficient power and temperature to do it.
Open It Up
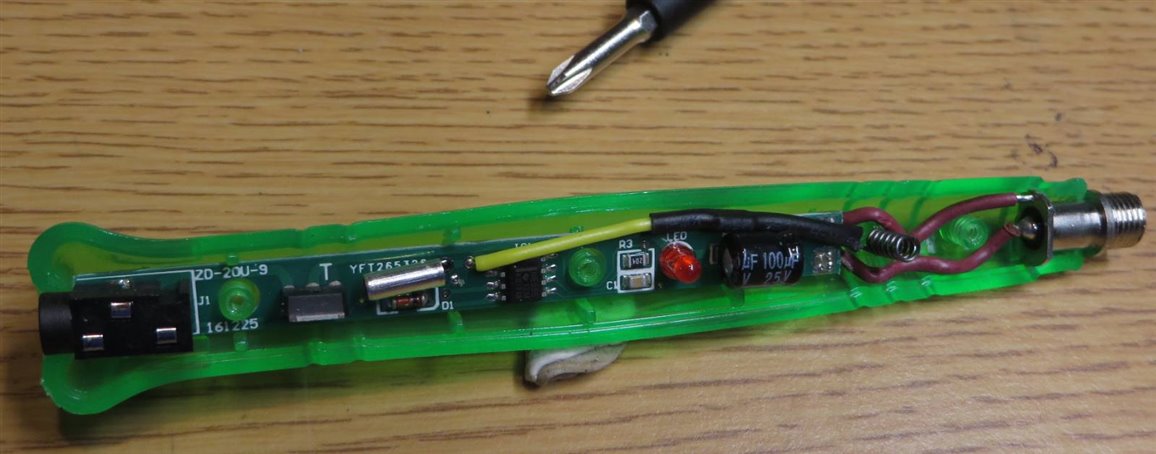
The thing to do of course was to see what's inside. The two plastic pieces that make up the case are held together with 3 small phillips screws. In the following photo, you can see most of the components. From right to left is the heating element, the spring which is what connects to the round capacitive touch switch (you can see the yellow wire leading to the circuit board connection), then a capacitor, the LED indicating the iron is powered, an SMD resistor and capacitor, and then the ever popular NE555 timer chip. Where you see the letter T on left of the circuit board is the power MOSFET. At least I assume it is a power MOSFET. It is labelled MX 35N06. Searching around for a datasheet gives me the impression it is a 60 V MOSFET, but I didn't find that exact part number.
Conclusion
I think this soldering iron is a good item for my travel kit, I think it is a useful tool to have. It's not a great soldering iron, but it is a useful one. It has worked for me, soldering several small jobs, and continues to work well.
Next Step
It occurs to me as I am writing this, I have a temperature RTD somewhere in my parts bins. Taking the idea from Gough Lui Gough Lui's Blog , I could attach that to the tip of the soldering iron to see what temperature it does achieve.
Top Comments