RoadTest: Cool Tools: CORDLESS SCREWDRIVER
Author: varpg28
Creation date:
Evaluation Type: Connectors & Cable
Did you receive all parts the manufacturer stated would be included in the package?: True
What other parts do you consider comparable to this product?: Nil
What were the biggest problems encountered?: Initial setup was a bit time consuming, but once done easy to use
Detailed Review:
Welcome to my RoadTest review about Bridgetek Embedded Video Engine ME817EV + Display.
I'll be talking about:
A] General Overview of the Kit:
In the package, I received was the Bridgetek Embedded Video Engine ME817EV Evaluation Board and a 7 inches display from Riverdi.
Here is the unboxing video of what I received in the package
Once the kit was unboxed, now it was time to go through the literature and understand the capabilities of the board.
B] Literature and Tools Required:
The ME817EV Board:
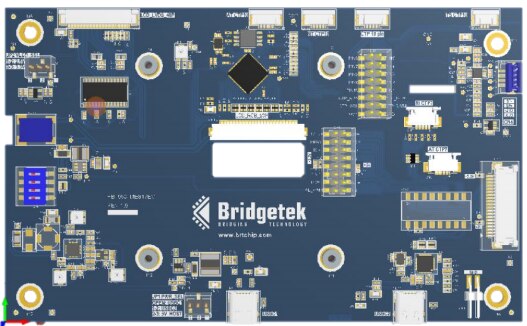
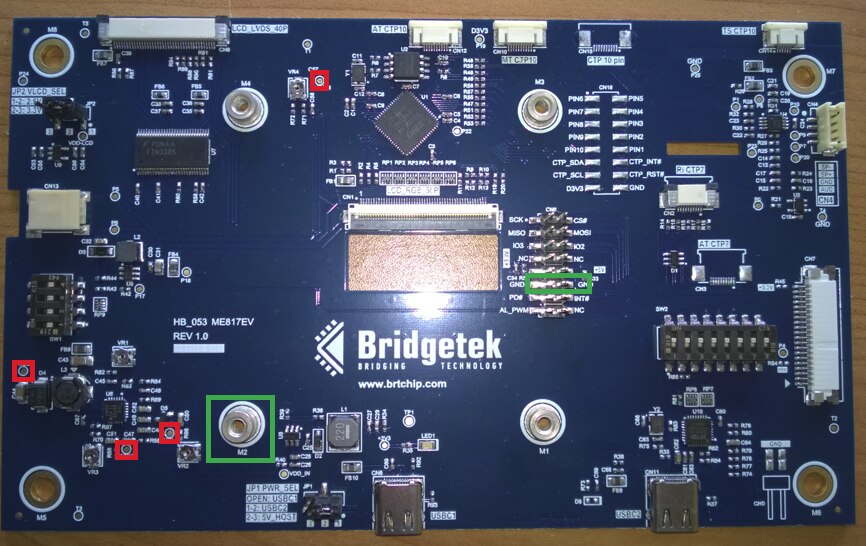
ME817EV is a customer evaluation board for Bridgetek 4th generation EVE chip, BT817. The ME817EV is used to develop and demonstrate BT817's graphics, touch and audio functionalities. The board is capable of supporting LCD panels with 40-pin LVDS interface, or 50-pin RGB interface. Backlight LED current can be adjusted using dip switches. Capacitive touch screens can be connected to the board through a 10-pin or 6-pin FPC connector. An Audio filter and amplifier are included on-board, allowing a 1/8W speaker to be driven. Audio source can be supplied from the BT817, or through a line-in connector.

The main functions of the ME817EV are as follows:
Bridgetek provides extensive demo applications for their EVE family on their website: https://brtchip.com/SoftwareExamples-eve/
BT817 (and most other chip from Bridgetek’s families) has multiple engines sharing chip infrastructure. BT817 has following engines:
Engines looks independent but they share some resources like memory. For example, configuration registers of each block are inside single shared region mapped to the same address space. You of course do not need to use all engines at all. Using BT817 without graphics engine usually does not make sense but if you do not want to use coprocessor, or touch inputs, or play music, then you do not need to configure and use them. All engines are very easy to use.
Tools Required
C] Hardware and Software Setup
Hardware Setup:


Software Setup

D] Working of the Board


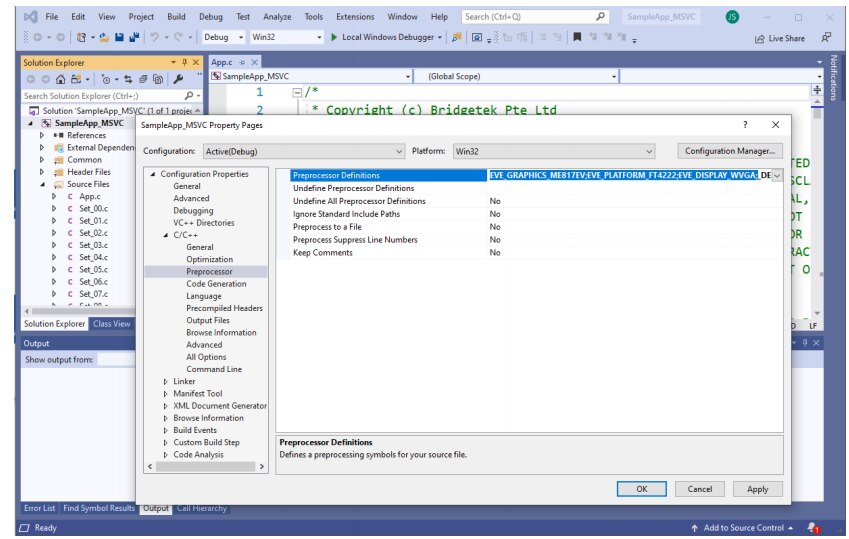
According to the preprocessor definitions in the Visual Studio project configuration, it was configured for EVE_DISPLAY_WVGA, which is 800x480. But the provided LCD has the resolution of 1024x600. I changed the preprocessor definition to EVE_DISPLAY_WSVGA. (right click project -> Properties-> C/C++ -> Preprocessor Definitions). Thanks to my fellow road testers who helped me solve this issue.
E] Testing of applications:
I tested out two applications:
1. The signal generator
You don't have permission to edit metadata of this video.
2. Whiteboard App Testing
You don't have permission to edit metadata of this video.
F] Final Review
This is my first road-test / product test review. I got to learn a lot while trying to test the board. I like the functional capabilities of the board in terms of LCDs. This kit is fabulous, but can be made even better with a few inclusions to the main kit. Addition of a speaker will help in testing out the capabilities of the speaker and also a small microcontroller or microprocessor chip can be included to test its compatibility with other I/O devices. Overall the board has worked well, had some initial setup issues, but after that everything was fine. A lot of things couldn't be tested due to delivery issues and the pandemic. Also a small suggestion, instead of providing the EVE Toolchain, the company can try providing the same services using Visual Studio code, making it user friendly.
A major application of this product would be a full fledged tab, utilizing the max of this board.