RoadTest: Panasonic Laser PM2.5 (Dust/Smoke) Sensor w/ MCU - Industrial Sensing
Author: dramoz
Creation date:
Evaluation Type: Connectors & Cable
Did you receive all parts the manufacturer stated would be included in the package?: False
What other parts do you consider comparable to this product?: NA
What were the biggest problems encountered?: Connector
Detailed Review:
Disclaimer: this repository, code, and document were done as part of the element14 road-test program, and as a part of the Panasonic-Laser-PM2.5-(Dust/Smoke)-Sensor-w/-MCU
The Panasonic SN-GCJA5 is a Particulate Matter (PM) 2.5 sensor that uses laser technology to measure air particles as small as 0.3μm with an ±10% margin from low to high concentrations (~1,000 µgm3). With the aid of an internal fan that generates an airflow, the laser diode scatters the light which is sensed by an internal photodiode. An MCU performs the control and measurements of the particles. The data sensed is available by means of an I2C interface that can be accessed on-demand, or a serial UART (output only) interface that provides the measured values every one second.
Summary of characteristics:
Auto Calibration Function: according to Panasonic, internal algorithms will prolongate the life span of the sensor by monitoring the laser diode output light, the photodiode performance, and the fan speed which have natural degradation over time.
PM10, PM2.5, and PM1.0 independent readings
Independent particle counts for the ranges:
0.3-0.5μm
0.5-1.0μm
1.0-2.5μm
2.5-5.0μm
5.0-7.5μm
7.5-10.0μm
1-second updates
Small footprint (37 x 37 x 12 mm)
Although I have never tested other PM sensors, I have seen them and the Panasonic beat them in size.
5 years expected lifespan
Overall, I liked the Panasonic sensor, and although the documentation is not the best, it was not an obstacle for doing some nice tests and R&D.
For a more in-depth theory of operation and to grasp a better understanding of how a laser scattering optical PM sensor works, I recommend reading this nice explanation of the Sensirion SPS30 sensor which uses a similar approach.
The available documentation from Panasonic is limited. The documents can be found at Panasonic laser-type-sensor website. The available documents are:
Panasonic SN-GC Series Sensors Datasheet: basic features enumeration
Panasonic Laser Type PM Sensor Product Specifications: a more detailed explanation of the sensor
IO pins connector
Wiring reference
Detailed sensor characteristics of measurement accuracy
Auto-calibration function explanation
Drawing
Panasonic Laser Type PM Sensor Communication Specifications: communication protocols
I2C communication data format
UART TTL specifications
Registers information
Overall, the documentation is poor and feels like a poor translation from another language. Although it is enough to connect and use the sensor, a proper application note is missing. Also, I was disappointed by the lack of information on the sensor connector match.
I was able to find an official ArduinoUno demo, but I was not able to find the Arduino INO file to be downloaded on the board. In any case, I did not put too much effort into running it as the demo required transceivers and extra wiring which I did not have at the moment.
As the sensor did come initially without a cable, I contacted Panasonic support - the response what OK and in a timely manner. As I got the cables later from elemen14, there was no need to contact them further.
Although there is not that much information out of Panasonic, a google search of the term SN-GCJA5 gave a Sparkfun library and some other online forums. The common denominator on the forums was the problem with the I2C interface while trying to access the sensor. The Sparkfun library is for an I2C connection.
Particulate Matter (PM) are microscopic particles floating in the air. They are classified by their size, and the classification is based upon a common understanding of human respiratory health impacts.
PM10: <10μm coarse particulate matter, can penetrate the deepest part of the lungs such as the bronchioles or alveoli. PM10 can trigger bronchoconstriction in asthmatics patients.
PM2.5: <2.5μm fine particulate matter tends to penetrate into the gas exchange regions of the lung (alveolus)
PM0.1: <0.μm1 ultrafine particulate matter may pass through the lungs to affect other organs.
Note that this classification does not necessary means a higher health risk, as this would also depends on the type of the particle.
 |
|---|
If you want to read more about PM, check the following references:
For this road test, I decide to use the TTGO-T1 (aka TTGO T-Display) which can be purchased at Aliexpress (Official LILYGO store). The TTGO-T1 is based on the ESP32 Espresiff (Wikipedia), a 32bit MCU Tensilica Xtensa LX6 with integrated WiFi, Bluetooth, and a lot of peripherals.
There were some particular reasons I selected this board for the road test:
Integrated Display + available libraries
The SN-GCJA5 requires a dual voltage operation
5V power supply
3.3V TTL logic
User buttons
As the TTGO-T1 works with 3.3V TTL and has a USB port that can provide 5Vdc it was a suitable candidate.
 |
|---|
The hardware is powered by a 10000 mAh USB power bank, which gave ~36 hours of measurement time.
 |
|---|
I decided to use the UART port to gather all the sensor information. Although I2C is nice when there are limited ports available on the system, the TTGO-T1 has an extra UART that can be assigned to any port on the board. Furthermore, the comments about the sensor I2C connection were discouraging.
The SN-GCJA5 UART outputs every second all the internal registers. The only apparent limitation is that the output range of mass concentration (μg/m^3) is limited to 2,000μg/m^3 on the UART, while it is unlimited on the I2C interface X,XXXμg/m^3. However, it should be noticed that the maximum consistency error is expressed as ±10% in the range of values between 35μg/m^3 ~ 1,000μg/m^3.
The application consists of:
TTGO-T1 and TTGO-T1 TFT_eSPI drivers wrapped on my own C++ class with some limited functions to make life easier.
panasonic_SN-GCJA5 library to connect to the UART, unpack the serial data, and store:
current measurement
average of values since last reset (#/sec)
min/max values
sum (accumulator) of measurements
GUI: the GUI (as explained below) provide a simple user interface to display current measurements (or min., max., average, ...), which can be selected with the top/right or bottom/left buttons.
The application was implemented, compiled, and tested under PlatformIO, a Visual Code plug-in that replaced my old workflow on the Arduino IDE. The App implementation followed an Arduino approach and should be easy to port if required. However, I 100% recommend switching to PlatformIO when possible.
The code can be found at https://github.com/dramoz/ttgo-t1, sub-folder panasonic_laser_PM2.5_sensor.
The GUI consists of three main pages, where the user can switch between them by single top/right button or bottom/left button clicks.
Welcome Screen: reports sensor connection status and the total of packages received
Mass Density (μg/m3): reports the current mass density measurement for PM1.0, PM2.5, and PM10
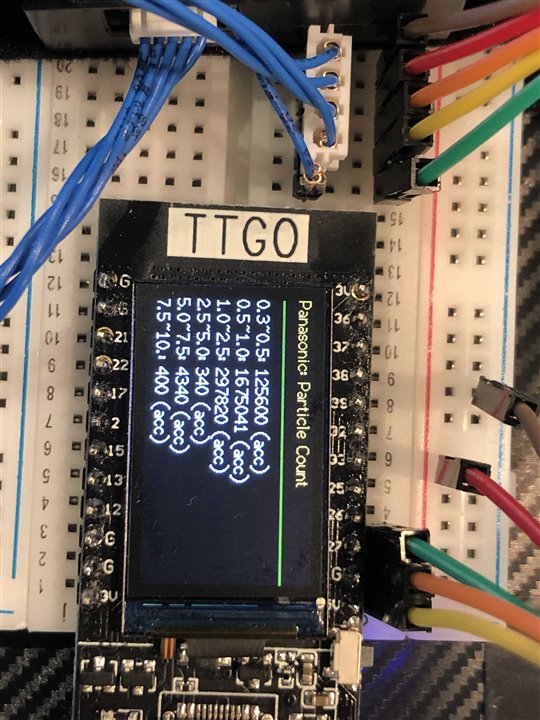
Particle Count: reports the current particle count for the given ranges
Additional, with the buttons the user can navigate/setup the GUI as:
Single clicks: Next / previous page (bottom/left, top/right buttons)
bottom/left button + double/triple clicks: next/previous shows individual measurements with all stored values
top/right button: + double/triple clicks: next/previous shows available stored values for all variables in pages (e.g. rotates between current→average→min.→max.→total/acc)
The initial testing was interesting. Early in the morning, before the furnace quick on and there is no movement around the house, the sensor registered almost negligible values. On a regular day, also the values are low as shown in the next picture.
 |
|---|
Measurements inside the house were usually low. However, one day my allergies started to go high, and the sensor registered an increase in particle counts. (Showing max. and average)
 |
 |
|---|
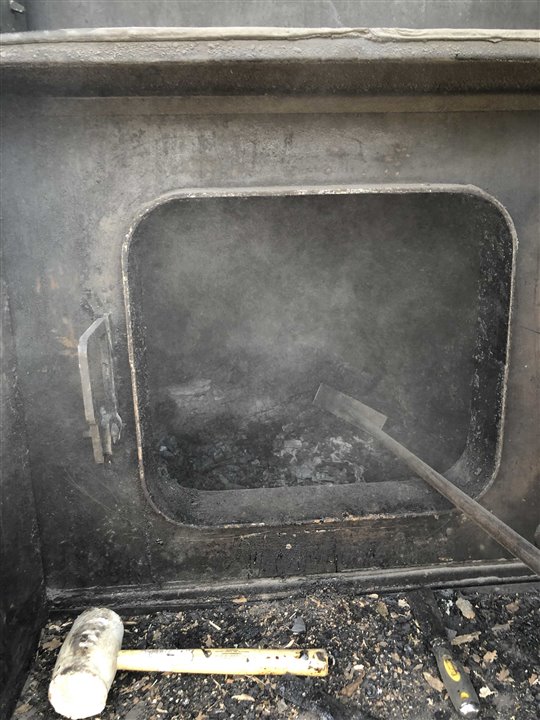
My heating needs during winters are supplied primarily by an outdoor furnace boiler. Daily, I load 1~2 logs of hardwood and I can get enough heath power during winter (-20C) at half or less the price of propane.
 |
 |
|---|
However, loading the logs and proper daily maintenance are kind of dirty. I use regularly a 3M Full Facepiece Reusable Respirator (mask) with N95 filters which I replace on weekly basis. As you can see in the pictures, they get pretty saturated. Having a way to measure the smoke was one of my motives to join this road test.
 |
 |
|---|
The measures outside before operating the boiler were nice and low.
 |
 |
|---|
The next set of pictures will speak by themselves. After opening the door, the counters started to rise.
 |
 |
|---|
Part of the daily maintenance is to shake the ashes at the bottom, which increased the counters.
 |
 |
|---|
The test duration was around five minutes. The following images show the final results.
 |
 |
|---|
A couple of videos are available in the repository where we can appreciate the sensor response:
|
You don't have permission to edit metadata of this video.
|
|
You don't have permission to edit metadata of this video.
|
Overall, I was happy with this road test. The Panasonic SN-GCJA5 PM2.5 Laser sensor is a nice small footprint sensor with real-time response, easy to connect and use. It makes you wish this sensor was incorporated in home furnaces with a nice tracking app, especially for people with seasonal allergies like pollen or dust.
In the future, I want to install it as a permanent sensor for my house and get another one for outdoor measurements. It would be nice to have it as an IoT connected to an ESP32 board.
I would also like to thank Randall for the opportunity and for the extension to complete this road test.
As always, comments are most welcome.