RoadTest: MPS MA732 MagAlpha Angle Sensor Kit with Servo Motor - Industrial Sensing
Author: me_Cris
Creation date:
Evaluation Type: Evaluation Boards
Did you receive all parts the manufacturer stated would be included in the package?: True
What other parts do you consider comparable to this product?: For this kit I would have added a set of gears, of various sizes, a belt and fixing accessories. Thus, a wheel could be connected to the motor, and the other end could be tied to another object.
What were the biggest problems encountered?: I had small problems on the software side related to the MSM library that I imported into the Arduino IDE. The problems were more of syntax, but they could be solved.
Detailed Review:
Following element14 on a social network, I saw an announcement about a RoadTest. I clicked on the ad and saw that it is about a kit, with a motor, angle sensor, an Arduino platform, and other things. I told myself to try and I signed up, and to my surprise, I was selected among the qualified ones. I would like to start by making an unboxing video, sorry for the audio/video quality, but I had no other recording method than with my mobile phone, and I can't say that I have talent for such a thing. So the unboxing looks like this:
https://drive.google.com/file/d/1A9bcso3yUE1nYwaZURjUmNRgxLIKPaFU/view?usp=sharing
Pictures of the received modules:

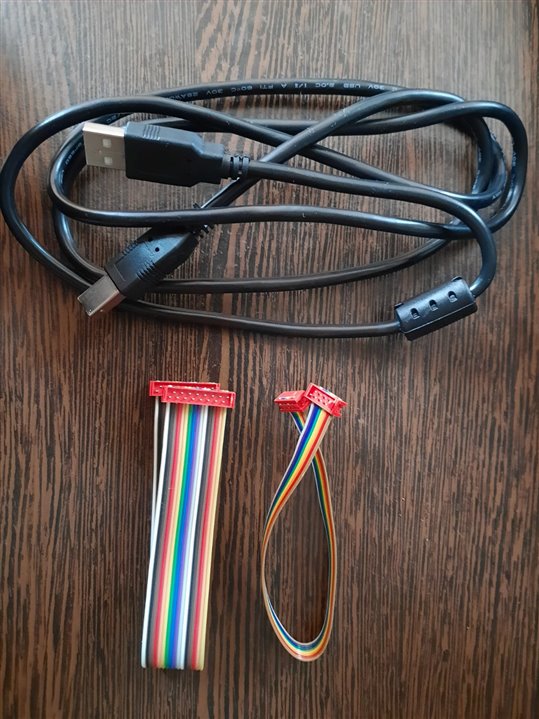

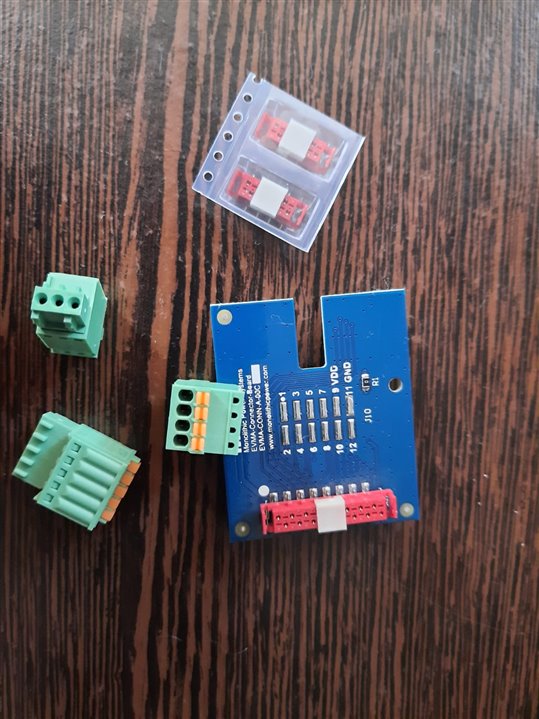
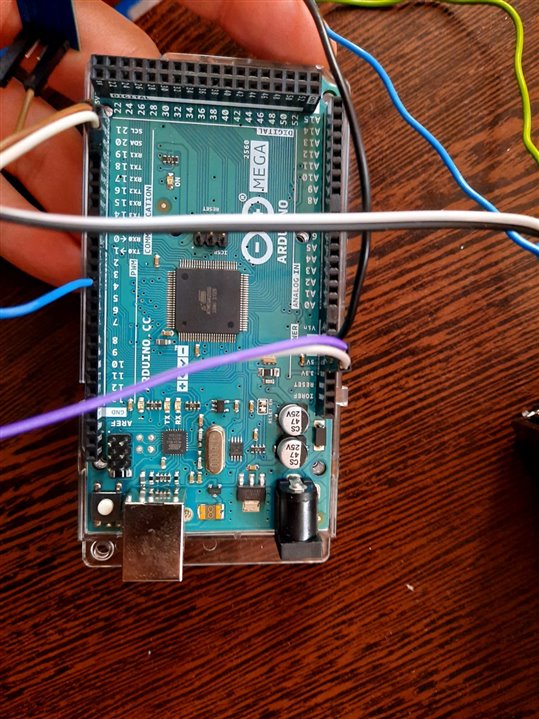
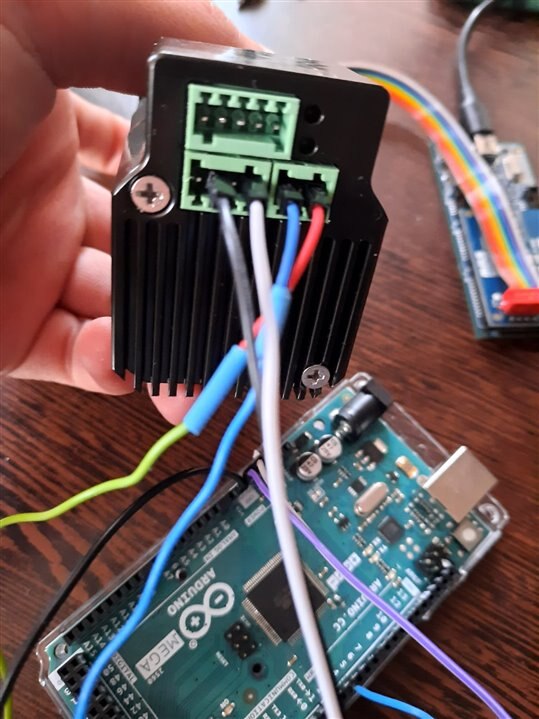
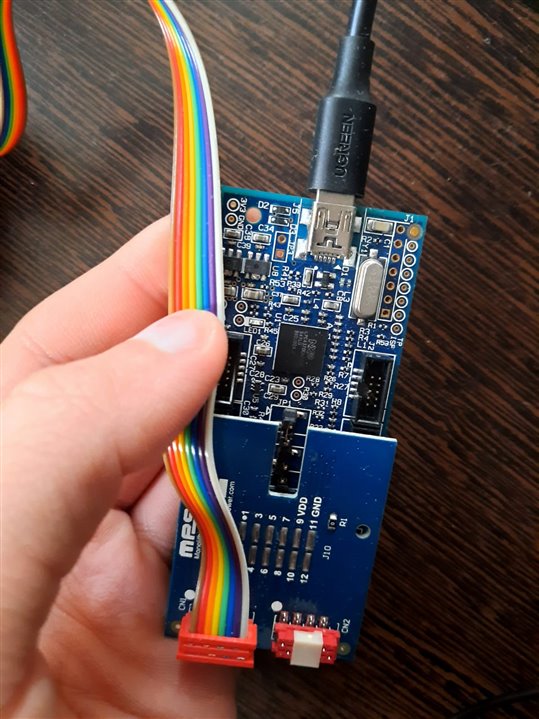

As it was presented on the element14.community.com website, the purpose of this RoadTest is to experiment with the MA732 sensor, an angular sensor that can measure without direct contact with the surface. A permanent magnet located in the head of the motor shaft is used, and the magnetic sensor is mounted on a small electronic board that is attached with two screws to two mounting brackets on the motor housing.
The most useful source of information is the Setup Guide created for using the MA732 sensor. Brushless motors are very popular these days, this is also the case with the motor received in the kit. Brushless motors are widely used in electric drills, even in electric scooters, but they can also be implemented in centralized locking systems, automatic doors of a building, electric fences for example.
We have two possibilities to control the motor: with the help of an Arduino Mega platform together with an RS485 shield, and the other method is by using an eMotion System controller. Both methods are based on the RS485 communication protocol. The Setup Guide contains information on how to power the motor, the configuration of the accessible pins and their roles. There is an Input-Output interface, an RS485 communication interface and access to the power pins.
Given these, I used the Arduino Mega platform and the RS485 shield to control the motor. Also from the Setup Guide, we can figure out the connections that must be made: the electronic circuits are powered with the corresponding voltages (common ground); the RS485 shield is connected as follows: pins A and B with pins A and B from the communication interface on the motor; and DI connections are also made on digital pin D18 (TX) on the Arduino Mega platform, DE together with RE to D4, and RO to pin D19 (RX).
Regarding the software part, the Arduino IDE programming environment is used, and we also have to manually introduce a new library, (a zip archive must be downloaded) MSM, which contains prescribed functions and programs that will facilitate the realization of the software program. We have two sketches at our disposal, a basic example of position control of the motor, and the other example shows us how we can control the motor by varying the rotation speed. There were small problems in running these sketches because there were small syntax problems in the source files of the library, but they could be solved. I did a test according to the sketch "Simple Position Mode Example" but the motor started only once or twice, then I simply did not get any results. The motor shaft does not turn at all, and when I run the sketch, there is a sound coming from the motor, but nothing else happens. I have to solve this inconvenience.
The sketch titled "Simple Speed Mode Example" looks like this:
//Simple Speed Mode Example

#include <Arduino.h>
#include "MSM.h"

MSM Motor1;         //create MSM class Motor object


void setup() {

  Motor1.Set_Slave_Address(0x00);     //Set Slave Address in Hex
  Motor1.init();                      // initialize serial com settings
  Serial.begin(9600);                 // 2nd serial com for printing data to serial monitor if needed
  Motor1.Op_mode(Speed);              // set operation mode( Speed, Position or Torque)
  Motor1.Set_Velocity(500);           // set motor speed in RPM
  Motor1.Enable_Op();                 // Enable Motor to start spinning
  delay(20000);                       // run time in ms
  Motor1.Disable_Op();                // Disable Motor to stop spinning

} // setup


void loop() {


} // loop
This contains a few lines of code, and the result obtained is starting the motor for 20 seconds, with a rotation speed of 500 RPM. And it behaves like this:
https://drive.google.com/file/d/1oKhR0NHmkmjHLX8HFUWCYSBDlOaqj_m3/view?usp=sharing
During this time, in the MACOM application we can observe:
https://drive.google.com/file/d/1Tx5MoOcSWeDfCwnU4GM05wEviTZMZofa/view?usp=sharing
Obviously, all the data in the program can be modified as we wish. What I noticed is that sometimes, when starting, the motor starts with a small shock, a stronger trepidation, but this is for a very short time, then you have no problems with it.
MagAlpha Communication Interface abbreviated as MACOM, is an application that once installed on the PC, through it, we can monitor in real time the parameters such as Angle at which the motor axis is positioned, Angle Error, Speed Ripple, and we also have the possibility to make some adjustments .
The magnetic sensor is placed on a round electronic board, and this board is mounted very close to the permanent magnet on the motor shaft. Through the communication interface, another electronic board that connects with the sensor, a connection is established through the serial port to the PC.
Now let's return to other practical tests. I ran a sketch in which I changed the RPM to only 60. In the video we can see that the signal received from the sensor is more like a saw tooth. We increase the RPM to 1500, we notice some pulses when reading the angle position of the motor shaft, also visible on the Angle Error graph.
At 60 RPM:
https://drive.google.com/file/d/1rwgShF0fA9-EqRaOKbmE_K9BkhDY-aA5/view?usp=sharing
At 1500 RPM:
https://drive.google.com/file/d/1p55VsjtgLinwrsns-VsmwjUnr1Hr5D6g/view?usp=sharing
https://drive.google.com/file/d/1tt-Bzl585JWw5iQz22Iw63MzVCwZQluU/view?usp=sharing
The MSM942038-24C-R motor has a nominal rotation speed of 3000 RPM. Let's try this too:
At 3000 RPM:
https://drive.google.com/file/d/1uzdX35CVsqGy6VkKfnS3ryPtX-uF9tHI/view?usp=sharing
https://drive.google.com/file/d/14I8TzyJTy5H0iAyu_Lm-oiGEi31t3W9R/view?usp=sharing
In the end, I would like to say that all the stuff was packed quite well, I did not discover any damages. In continuation, this RoadTest allows me to work on an Arduino Mega platform (I didn't know it until now), and a pretty good kit that will allow me to control this stepper in speed or position with the help of the sensor that can measure the angular speed. Next, I will try to implement this motor in a practical application, when I will have more free time.
For start: https://drive.google.com/file/d/1EnSaEkX3FdPFGsBRgsUbsSCS38bspKJB/view?usp=sharing
Thanks to Element14 Community!