RoadTest: Enroll to Review the Arduino Uno R4 Minima
Author: rahulkhanna
Creation date:
Evaluation Type: Development Boards & Tools
Did you receive all parts the manufacturer stated would be included in the package?: True
What other parts do you consider comparable to this product?: Arduino Uno R3
What were the biggest problems encountered?: NA
Detailed Review:
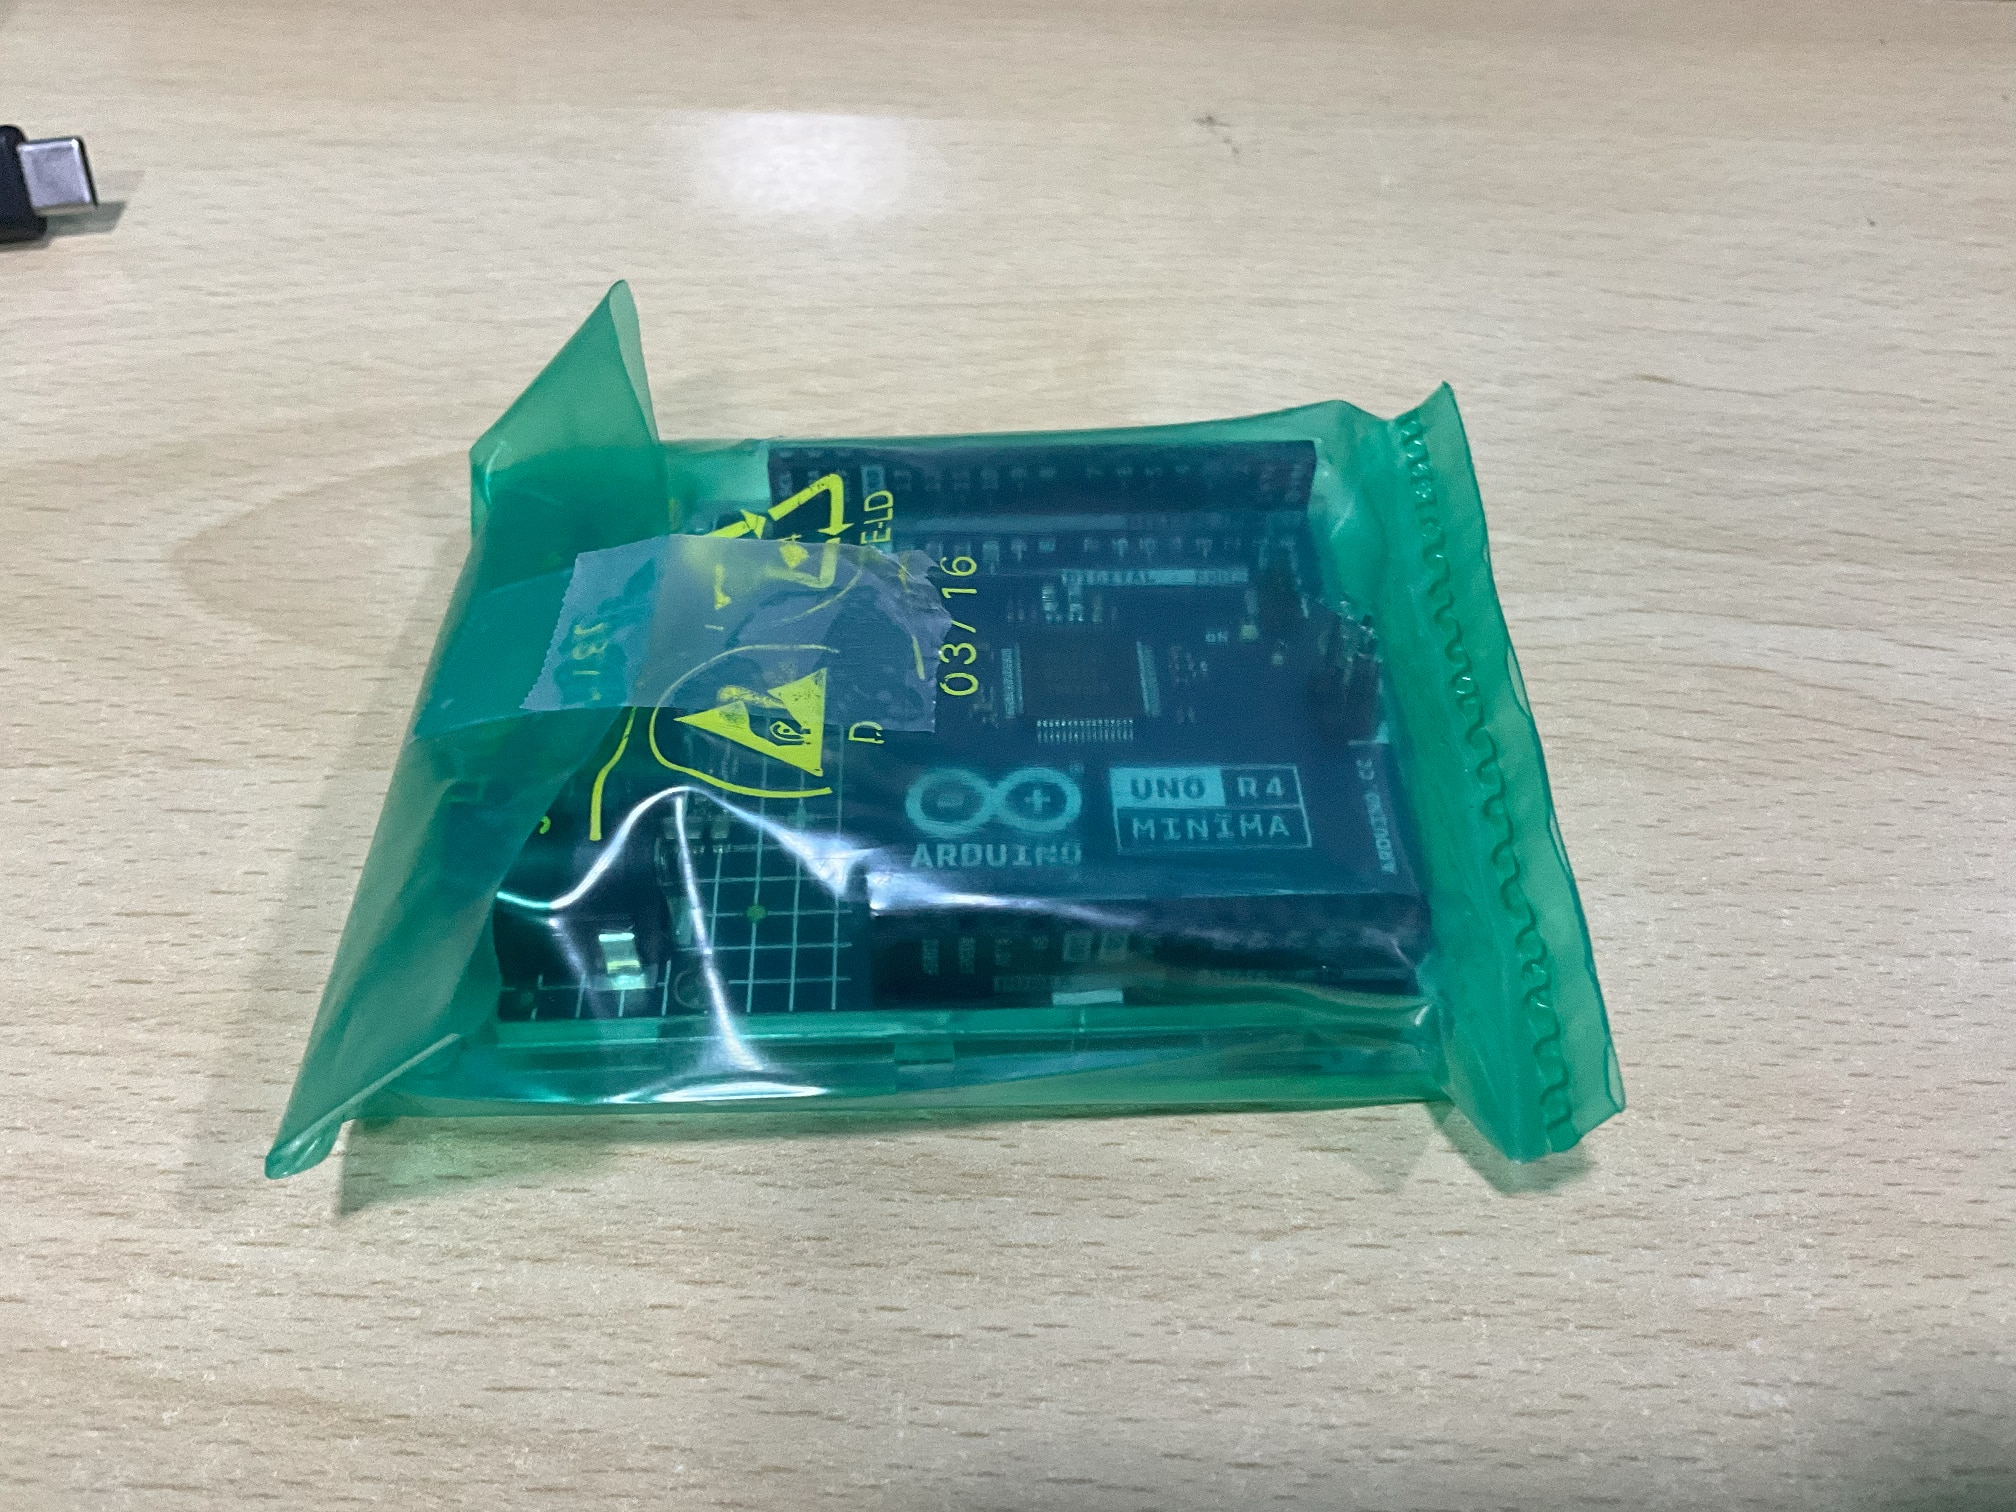
As I unboxed the Arduino Uno R4 Minima, I was immediately impressed with its compact and well-packaged design. The board itself feels robust, and it's evident that Arduino has maintained its commitment to build quality. The familiar blue color scheme and design make it instantly recognizable. Unlike the other Arduino boards, I received this board with a simple dissipative film. Also, the R4 minima comes with an acrylic bottom cover.
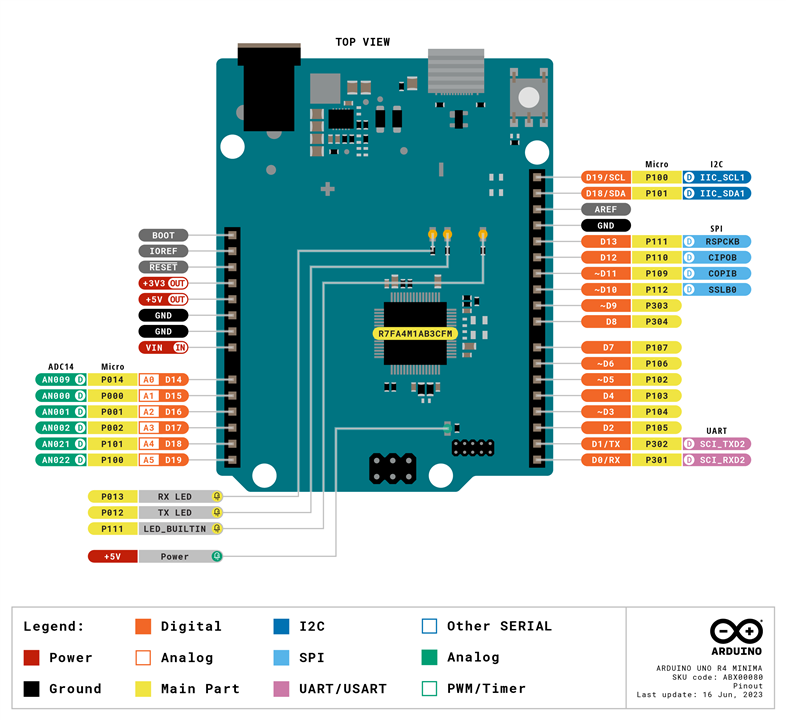
The Pinout of the Arduino Uno R4 Minima is shown below.
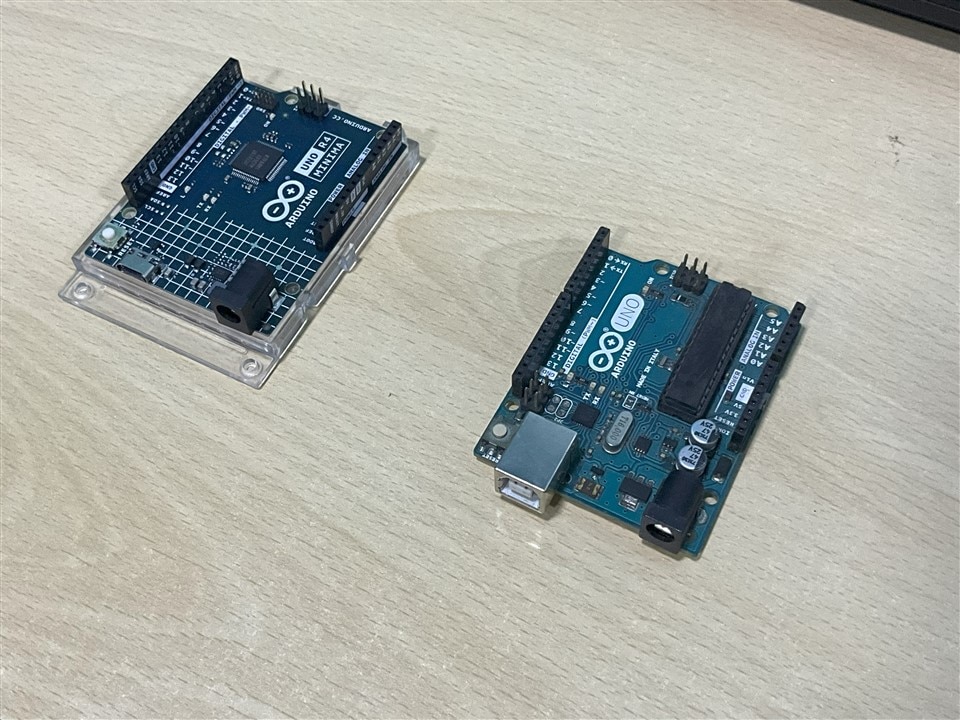
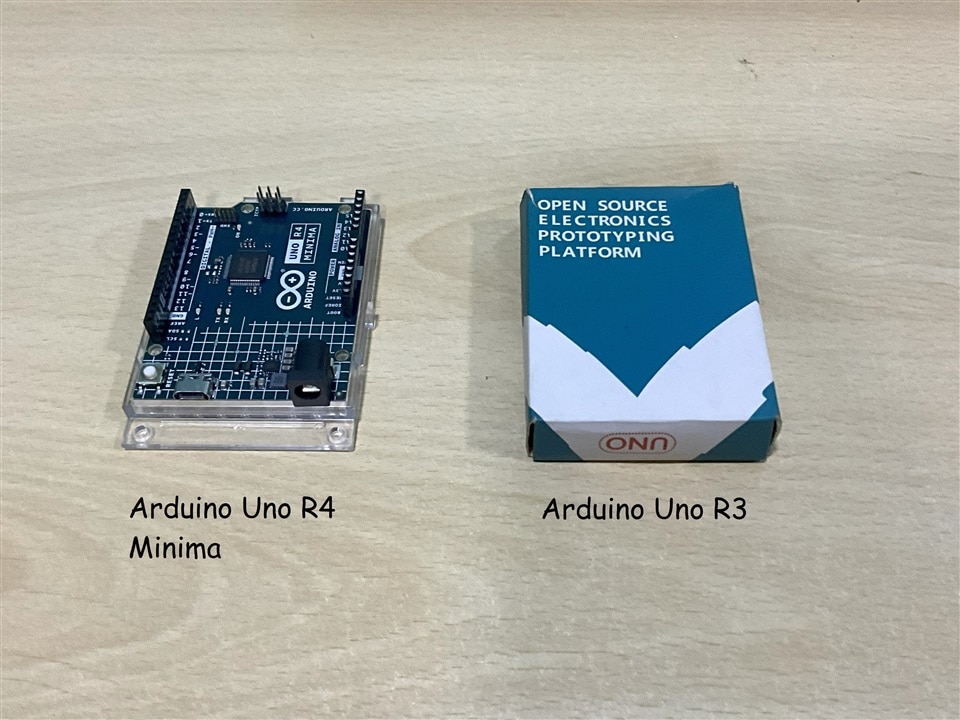
Comparing the Uno R4 Minima with the R3, it's clear that the R4 offers superior performance and features. The Renesas RA4M1 microcontroller significantly outperforms the older Atmega328P, making it an excellent choice for more demanding projects.
| Feature | Arduino Uno R3 | Arduino Uno R4 Minima |
|---|---|---|
| Microcontroller | ATmega328P | Renesas RA4M1 (Arm® Cortex®-M4) |
| Clock speed | 16 MHz | 48 MHz |
| Flash memory | 32 kB | 256 kB |
| SRAM | 2 kB | 32 kB |
| EEPROM | 1 kB | 2 kB |
| Operating voltage | 5 V | 5 V |
| Input voltage | 7-12 V | 6-24 V |
| Analog input pins | 6 | 6 |
| Digital I/O pins | 14 (of which 6 can be used as PWM outputs) | 14 (of which 6 can be used as PWM outputs) |
| Hardware serial ports | 1 | 2 |
| I2C | Yes | Yes |
| SPI | Yes | Yes |
| CAN | NA | Yes |
| USB | USB A-type | USB C-type |
| Power jack | Yes | Yes |
| Reset button | Yes | Yes |
| Form factor | Uno | Uno |
The Renesas RA4M1 stands out with its increased processing power, memory, and integrated peripherals compared to the Atmega328P. This makes the Uno R4 Minima a more versatile board for a broader range of applications.
To test the basic operation of the Arduino Uno R4 Minima, we'll run the basic blink program.
void setup() {
  // initialize digital pin LED_BUILTIN as an output.
  pinMode(LED_BUILTIN, OUTPUT);
}

// the loop function runs over and over again forever
void loop() {
  digitalWrite(LED_BUILTIN, HIGH);  // turn the LED on (HIGH is the voltage level)
  delay(100);                      // wait for a second
  digitalWrite(LED_BUILTIN, LOW);   // turn the LED off by making the voltage LOW
  delay(100);                      // wait for a second
}
A DAC is used to convert a digital signal to an analog signal. Testing the digital-to-analog converter (DAC) functionality was a breeze. The Uno R4 Minima's DAC provides smoother and more accurate analog output, which is a game-changer for projects that require precise voltage control. The UNO R4 Minima has a DAC with up to 12-bit resolution attached to the A0 analog pin.
The joystick's USB HID feature is an exciting addition. It makes interfacing with the board as simple as plugging it into your computer. This opens up a world of possibilities for creative input devices.
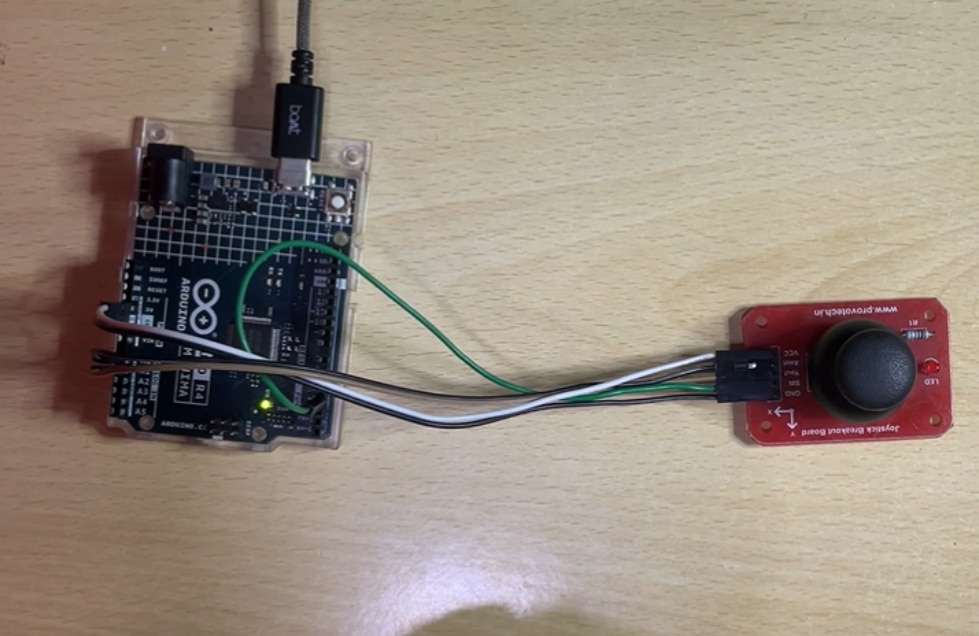
Video to be added
Programming the Uno R4 Minima on VS Code is a smooth experience. The platform's compatibility with VS Code makes coding more efficient and enhances the development workflow.
We have made a Simple Traffic Light Controller using Arduino Uno R4 Minima. The Arduino Uno R4 Minima and Arduino Cloud IDE duo made building a traffic light controller a smooth experience.
int red_led = 13;
int yellow_led = 12;
int green_led = 11;

void setup() {
  pinMode(red_led, OUTPUT);
  pinMode(yellow_led, OUTPUT);
  pinMode(green_led, OUTPUT);

  digitalWrite(red_led, LOW);
  digitalWrite(yellow_led, LOW);
  digitalWrite(green_led, LOW);
}

void loop() {
  digitalWrite(red_led, HIGH);
  delay(10000);
  digitalWrite(red_led, LOW);

  digitalWrite(yellow_led, HIGH);
  delay(3000);
  digitalWrite(yellow_led, LOW);

  digitalWrite(green_led, HIGH);
  delay(10000);
  digitalWrite(green_led, LOW);

  digitalWrite(yellow_led, HIGH);
  delay(5000);
  digitalWrite(yellow_led, LOW);
}
https://youtu.be/1vDx2Lhzp9k?si=Olc_2erKEDjLdFkW
The provided documentation and user manual were comprehensive and well-organized. Arduino's commitment to excellent documentation ensures users have the resources they need to get started and troubleshoot issues.
In conclusion, the Arduino Uno R4 Minima is a notable step forward in the Arduino lineup. Its powerful microcontroller, enhanced features, and superb software support make it a top choice for a wide array of projects. Whether you're a beginner or an experienced maker, the Uno R4 Minima offers an excellent balance of simplicity and capabilities. Its improvements over the R3 model, along with robust documentation and a user-friendly IDE, solidify its position as a remarkable addition to the Arduino family.
Watch the video review playlist for a closer look at the Uno R4 Minima's features and a demonstration of its capabilities.
Overall, the Arduino Uno R4 Minima is a remarkable board that opens up new possibilities for your creative projects. Highly recommended!