RoadTest: Seeking a Maker Engineer to Evaluate the Weller Micro Soldering Kit and Filtration Unit
Author: Jan Cumps
Creation date:
Evaluation Type: Workshop Tools
Did you receive all parts the manufacturer stated would be included in the package?: True
What other parts do you consider comparable to this product?: solder irons and stations that target SMD, all day soldering, clean work atmosphere
What were the biggest problems encountered?: The drawings based user manuals, while OK for the basic operations, don't do a good job explaining the advanced features.
Detailed Review:
This road test is the report of my experience with Weller’s WT product line. The irons and tips in the kit are for very small soldering work. SMDs down to the lowest sizes you can grip with tweezers.
Every section starts with the test approach I submitted in my road test proposal. Here’s what I suggested for the overall approach:
In the LAB:
I plan to use the kits in a real setting: Soldering small SMD discrete components and ICs. On a commercial multi-layer PCB.
I’ll use drag soldering with gullwing tips, and try to place small components (down to 0402).
At all times, lead free solder will be used.
Thank you for reading. Comment if there’s a test that I didn’t do, and you ‘d like to see covered.
Soldering:
Validate the use of the solder station:
The station is compact. It sits firm on the bench and has some heft. That, together with the rubber feet, makes that you can manipulate its buttons with one finger. A must for soldering, where you make adjustments while you have things in your hands. I regularly find myself dialing in the temperature, while I have solder or braid in one hand, and a hot iron in the other.
It uses the bench real estate efficiently, doesn’t take a lot of space. The size is approximately 15 x 15 cm. And the top is usable space. You can use it to drop hot tips, or you can stack stations.
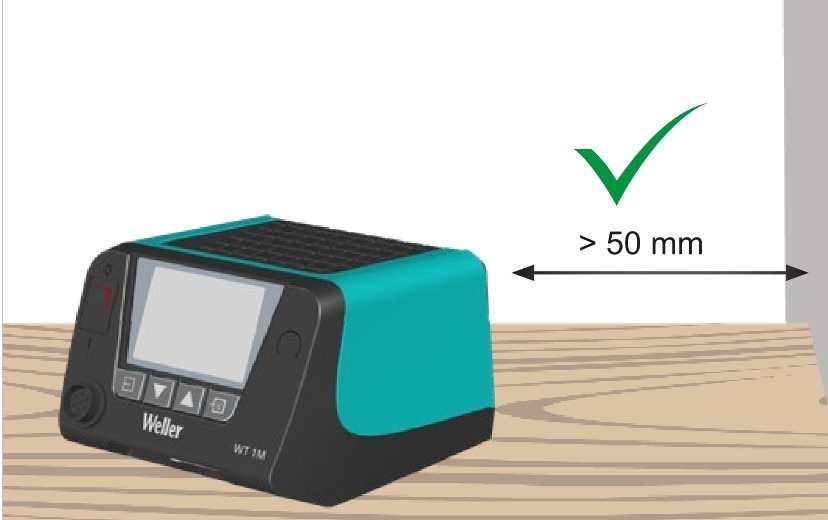
The manual asks for a 5 cm clearance from walls.
There’s no fan and it makes no beeps or noises during operation. Even the menu buttons have no click. Very silent operation.
The connector for the solder iron is easily accessible. It’s keyed, you can’t plug it in wrong. The connection is mechanically strong. Getting used to plugging in another iron, and turning its ring, takes some exercise. I got better at connecting and disconnecting after some practice.
The user interface is simple. Bright and clear screen, four buttons to navigate. The ones I use most, the temperature buttons, react well. They are big and central. Good balance between small and large temperature changes. For this kind of wick-up-and-down actions, I prefer a dial. But I don’t miss that here. Changing the setting feels natural and is done in a few seconds. Switching an iron on or off is more difficult. You push the up and down buttons at the same time, and that didn’t always work perfectly for me. (it may be me: I struggle to use that function with Weller’s WXR3 station too)
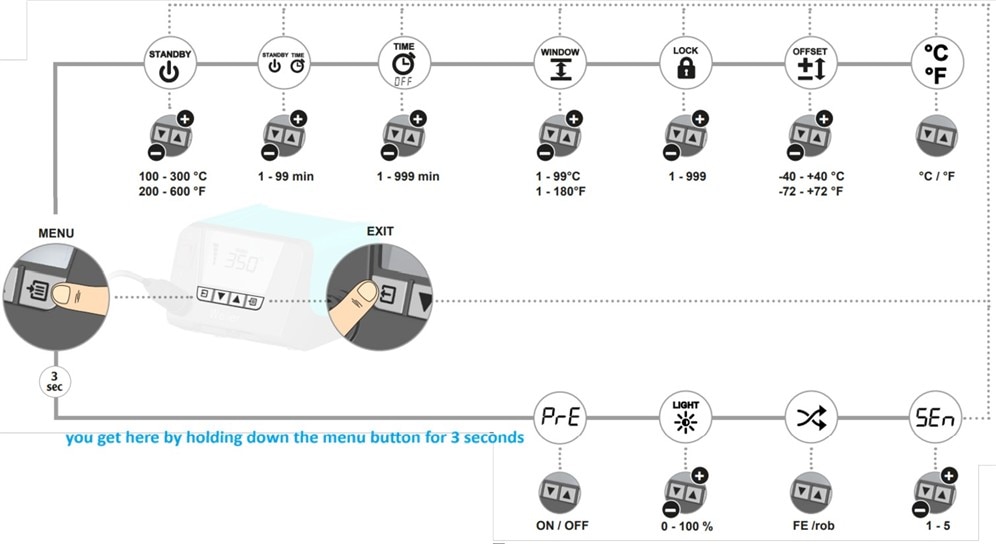
The menu itself – like the Weller user manual style – is a matter of taste. It’s icon based. In general, I managed to find and understand all settings. I don’t find the icons intuitive, but it works. Getting to the advanced menu took me a few tries. I didn’t find that explanation straightforward. But once you know, it’s obvious.
|
Support for automation: You can configure many aspects of the operation. Some settings are related to production environments and automation.
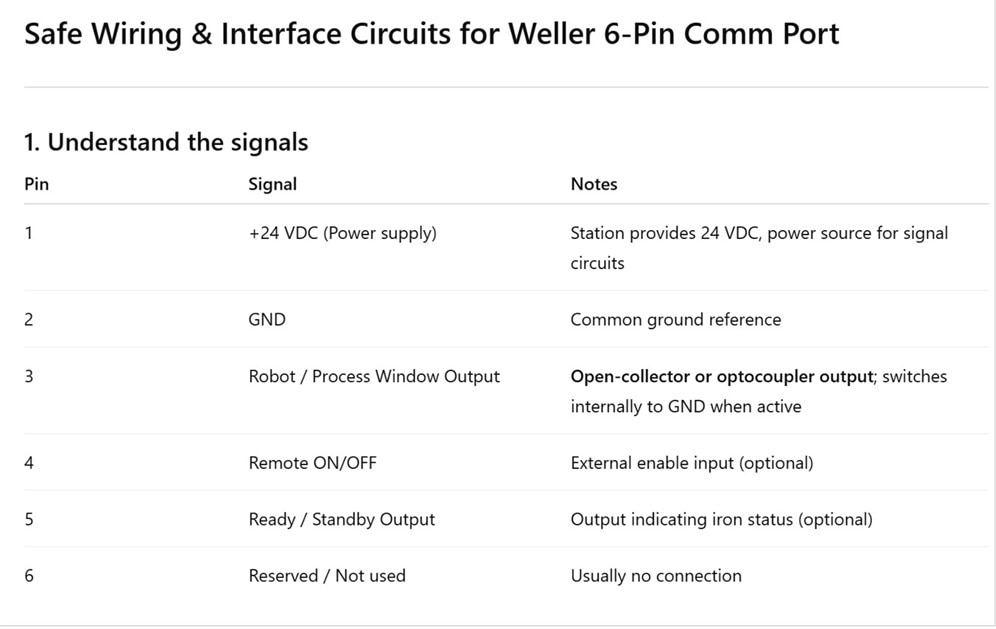
Default, the comms connector is set for fume extract. When you connect an extractor (such as the Guard of this road test kit), it ‘ll switch on when you pick up your solder iron. |
The station supports sleep mode. When an iron is in its stand, the temperature lowers to a (changeable) lower temperature. Getting from sleep to hot is fast – a few seconds - even in the high temperature ranges. You can take the iron out of its stand and start soldering right away. It ‘ll have its temperature before you hit the PCB. From room temperature to hot is fast too, with the irons that came with the kit. The smoke extractor that comes with this road test switches on when you use the iron, and switches off when you put it back in the stand.
Overall, the station is well built, and easy to use. What I’d have liked to be different: the position of the (optional) connectors for auxiliaries (smoke extractor) and grounding. If you use these, the wires come out at the front of the unit. I think they ‘d be better positioned at the back (like the WXR 3 station). There is ample space at the back of the WT 1M. The front side is also not the optimal position if you want to stack 2 stations.
The grounding options are flexible.
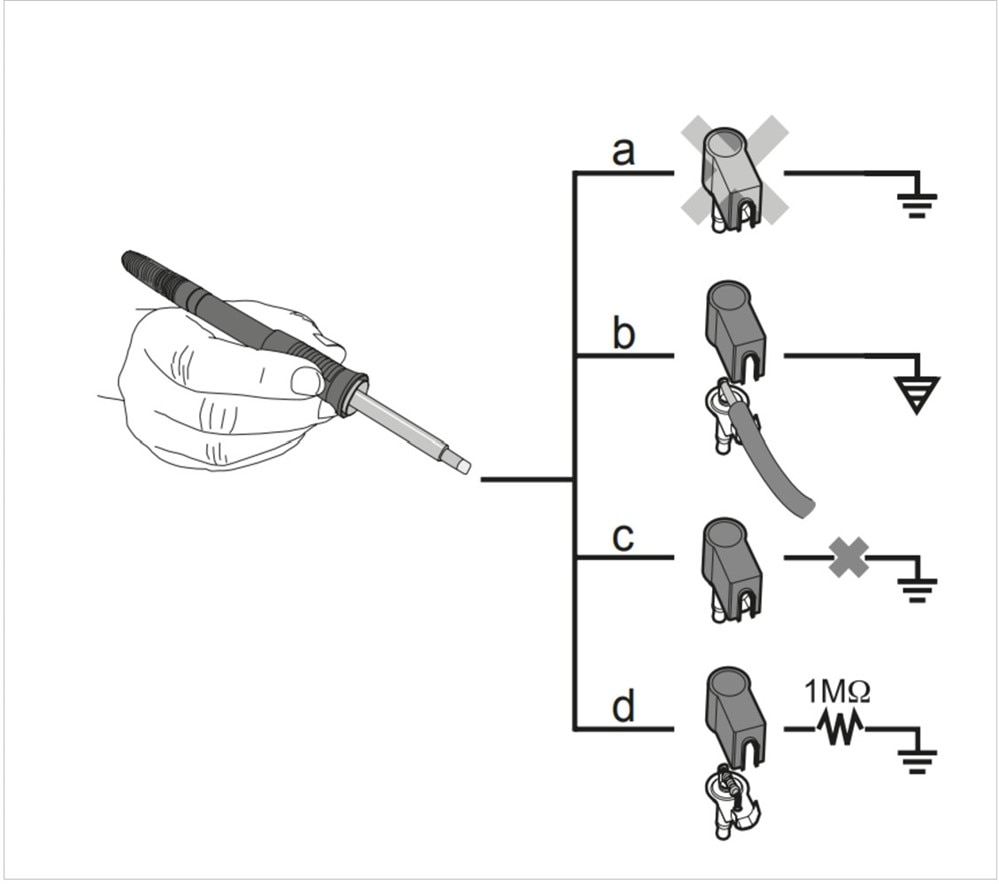
The station comes with a grounding plug. If you don’t insert it, the iron connects to your outlet’s ground (a). Option (b) allows you to connect it to another reference point (e.g., your anti-static bench mat). Option (c) isolates the tip, and option (d) connects it to the outlet ground via a resistor of your choice.
The station looks good, works good and is easy to use. It’s ready out-of-the-box.
Basic actions are intuitive. I got started in minutes. I was comfortable using it, changing temperatures, switching it on and off while soldering. It doesn’t pull my attention away from the soldering job.
| Previous experience: soldering with iron I’m soldering since 1983. Switched to lead-fee and SMD around the mid-2010’s. I’m using a Weller WX station since 2017. With irons, I’m fluent with 0805 and TSSOP packages, and larger. Reasonable with 0603 and VSSOP. I manage to solder smaller with an iron, but that’s not in my comfort zone. |
Validate the pencil, tip mount system and stand:
|
For the tests, I used a set of recent commercial multi-layer PCBs. Reworking is harder than soldering new components on new PCBs. The soldering tools have to be fit to remove items without damaging the PCB. There needs to be good temperature control, and sufficient thermal capacity, to avoid that too much heat delaminates the PCB, or that pads detach themselves. |
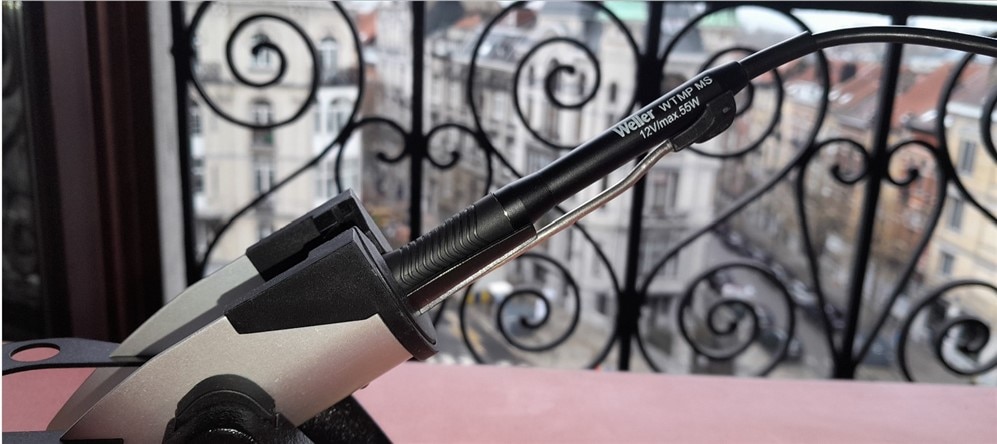
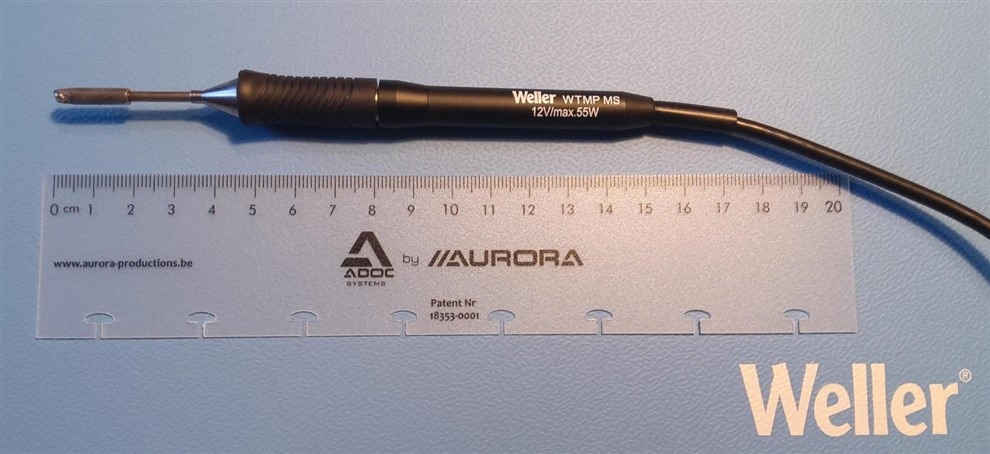
The test kit comes with 2 handles: micro and pico/nano (hereafter called nano). The name indicates the purpose. The nano iron – WTMP MS - is the smaller one, 40 W, targeting the smallest SMD components. The micro iron is somewhat longer, 55 W. Best suited for the medium and larger size SMD, components, the odd through-hole component, and situations where there are large copper areas.
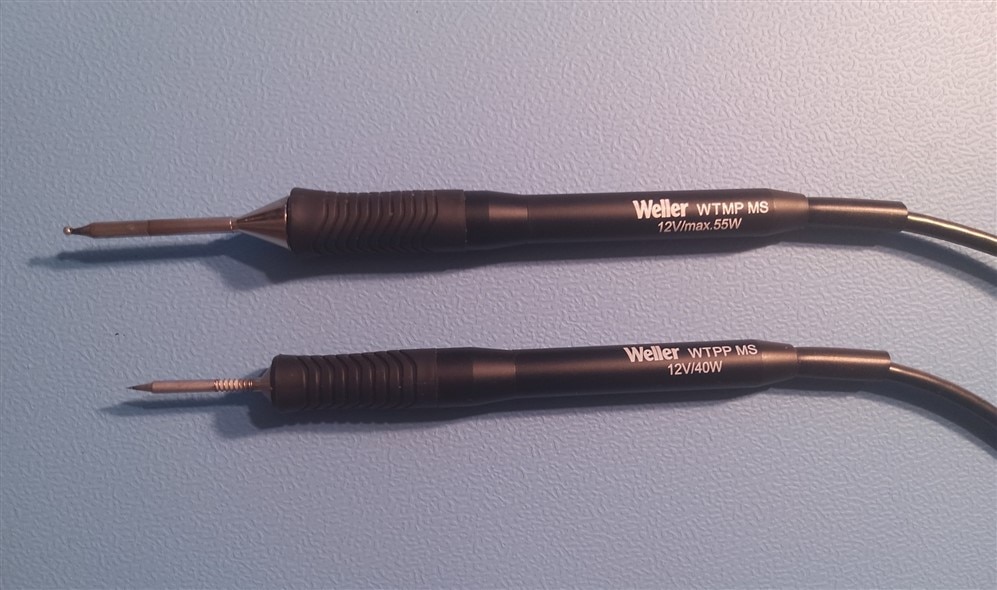
MS in the name indicates that they are MIL-SPEC compliant – when used with an MS tip.
They both use the same stand type (Weller calls them safety rests). They have a sensor to detect if the iron is present. The station will switch to sleep temperature when you place the iron in the stand. If a smoke extractor is connected, that ‘ll switch off too.
The stands have sponge and (my preference) brass tip cleaners, and there is space for 4 spare tips.
Everything sits steady on the desk. Taking the iron out of the stand, and putting it back, works well. In my opinion, this is important, because when I use magnifying glasses while soldering, the stand is often not in the best view range. Once you‘ re used to how the iron docks in the handle, it becomes a natural move to take or place
Both irons use cartridge-style tips. These plug in and out of the handle without tools or screws. Changing a tip is straightforward. Once plugged in, they sit firm. No wobble, tilting or turning.
Tips aren’t exchangeable between the micro and nano handle.
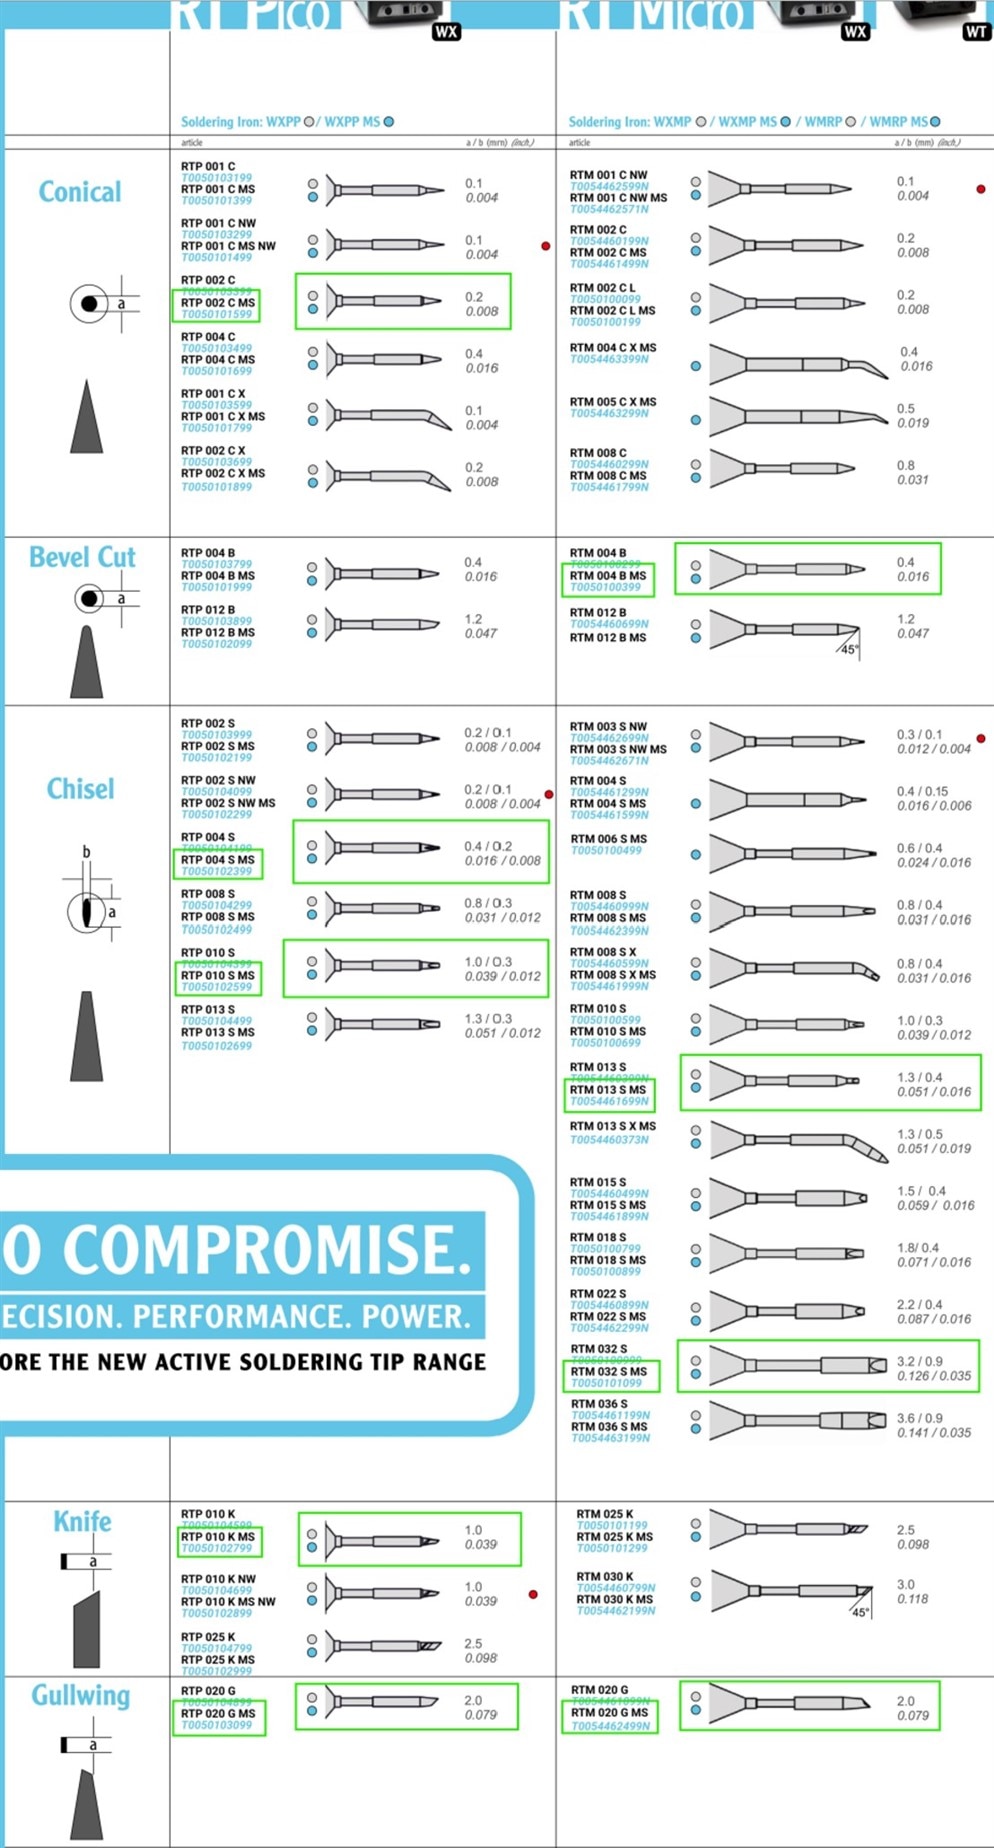
image: tips used in the road test
The kit came with a range of conical, chisel, bevel, gullwing and knife/blade style tips. All on the smaller side of the spectrum. I purchased an extra larger tip for the micro handle, to allow me to work on boards that have areas that require more capacity (a few through-hole components, larger ground areas, a FET or IC with soldered-down cooling pad, ...).
This iron, the largest of the two, is 55 Watt. It’s just a tad taller as the nano iron. Tip range goes from 0.3 to 3.6 mm. Compared to the nano iron, the tips are larger and a bit longer. Handle length and tip length together make that the working distance between your hand and the PCB is larger than with the nano version. When soldering for longer time, I like that bit of distance. It feels just right.
The handle with tip together feel light and the way it feels when you hold the iron, feels natural. The power cable behaves OK too. It’s flexible enough that it doesn’t hamper movements, and it doesn’t tangle. The handle and the part of the tip where you position your fingers don’t get hot.
Most of the time, I soldered at 350° or 380° C. With the bevel and chisel tip that are part of the test kit, I could comfortably work down to 0603 size.
Compared to a larger iron that I have (Weller WXP 65), it’s easier to get at items that are close to edges or plastic connectors. Also a bit easier to get at components that have their pads close to each other. The iron heats up real fast, in just a few seconds.
I noticed the difference in capacity of these smaller mass soldering irons, compared to larger irons. When a pad (e.g., a decouple capacitor ground pad) is on a larger copper area, you notice that the solder stays sticky a little longer. I also notice that when using desolder braid. With these smaller capacity combinations, soldering becomes significantly easier when using a pre-heater.
The RTM tips in the road test kit are on the smaller side of the range. I ordered a larger chisel tip to test if the iron can be used for SMD work where a little more buffer heat makes the work easier.
The RTM 032 S, a chisel model with a width of 3.2 mm, is the second largest option for the micro solder handle. Ideal if you work on a PCB where the majority of the components are SMD, but there are some through-hole components. Or when you need some extra mass to drop heat in a larger copper area. The tip is obviously heavier than the smaller ones. And I feel that when working. But the balance of the handle in my hand is still good.
The advantage of having this larger tip option with a micro solder set is that you don’t have to set up a different soldering solution, when your PCB has the occasional FET, transformer or electrolytic capacitor. For those situations where the smaller tips don’t have enough mass.
I wouldn’t use this as my everyday solution for full through-hole designs though. For working longer time on such PCBs, a full-sized iron is more comfortable.
In my tests, I used it to solder header pins and through-hole capacitors. With SMDs, it was the better option to tag a FET fin to its copper area on the PCB. And for inductors and larger decoupling capacitors.
The micro set is the most flexible of the two irons. Good for anything above 0402 with the smaller tips, and up to some heftier work with the largest tip. The available range of options makes it possible to do most of the work on a PCB with different types of components. The easy tip switching mechanism takes care that setting up a different combination is fast and doesn’t break the workflow. You remove the tip and you can safely put it on the top of the station – even when hot. You plug in the new tip, and it gets to temperature in a few seconds.
Because the handle and tips are a bit longer than the nano handle, I could solder with the micro iron for longer time without getting discomfort in my fingers or hand.
Weller calls the smaller choice of the two the pico / nano iron. According to the product page, it’s suited for 0402 and smaller components. And that matches my road test experience. The handle with tip is significantly shorter than the micro iron. It’s lower power and it’s lighter.
With this iron, you work very close to the PCB. And that helps when dealing with these very small component sizes. For that kind of work I use glasses with higher magnification, and they have a very short focus range. All action is in focus: the business end of the iron,the tip, the component and the board.
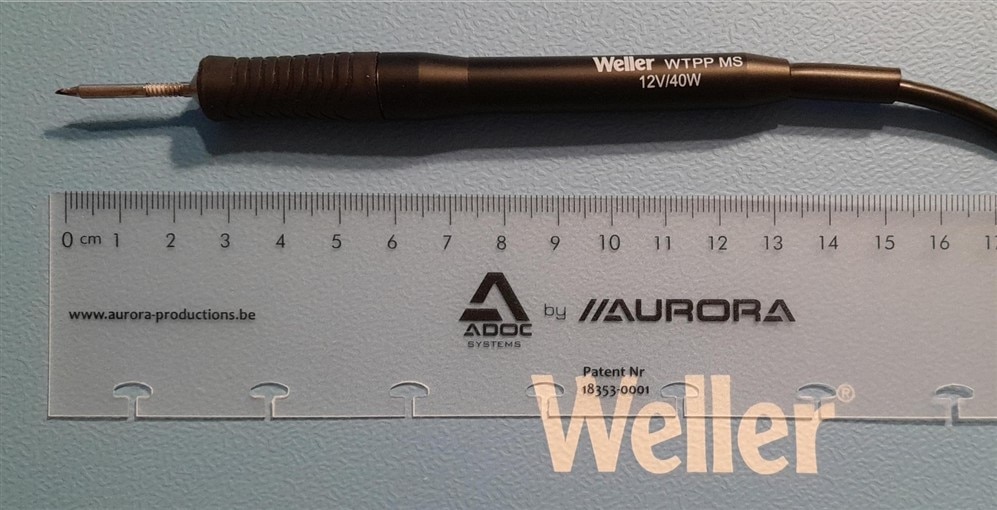
The small size is ideal for tiny designs. You can work in crowded PCB areas without bouncing into neighbour components or pads.
The selection of tip forms is comparable to the micro iron’s. Chisel, bevel, knife, conical, gullwing. But all is in the smaller range. And shorter. The thermal mass of the combination is low. There’s enough buffer to work on the components this iron is intended for. If you use the smallest tips and multi-layer boards, a pre-heater makes work easier. So does using small diameter solder wire, like the 0.3 mm spool that came with the road test kit. I also have 0.6 mm lead-free wire at home, that works well with the gullwing tip.
The smallest conical nano tip I have, 0.2 mm, is the best option to solder components on pads that aren’t designed for hand soldering. When a copper pad is intentionally designed for hand soldering, I prefer the 0.4 and 1.0 mm chisels.
The nano set is very good at the smallest range of SMD components. Where the pads are small and the components are lowest mass. Its shorter length helps to steady your hand, and to maneuver in confined areas. This family performs better when the PCB is pre-heated.
Ideal environment: low copper mass PCBs, tiny components, thin solder wire..
The third handle in the road test kit are 80 watt tweezers, also with exchangeable tips. This set is formed to rest on your hand, with the business ends fitting between thumb and index finger.
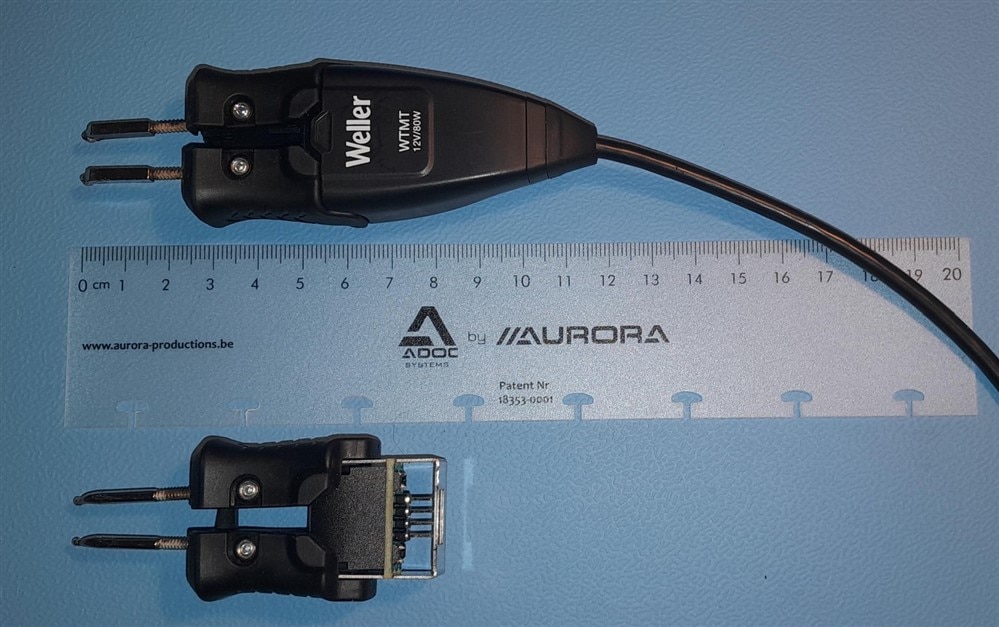
I have 2 tweezer cartridges. One is a pair of bent conical ones. The other one has knife / blade tips. Grab action is good for both tips. There is a difference in use case, and how easy they are to use.
The knife pair are 3 mm wide. They are ideal to pick up larger than 0805 sized passives. They also work remarkably well for inductors, power transistors and low-pin-count SOT type ICs. Even through-hole electrolytic capacitors, if the pins are close enough together.

Work is easiest if the points of the both tips are well aligned. These are tiny, and you want to have them perfectly right. There’s a hex key included with the stand for the tweezers, for this purpose.
With both cartridges, the most difficult part of the action is to drop the part when it’s desoldered. Because of the solder and flux, parts tend to stick to one of the two pins. I use small tweezers to fetch the removed parts.
I used both to remove an array of component from multi-layer PCBs. After some practice, I got a steady work rhythm. Clamp, lift, pick component from tweezers, store… The handle didn’t get hot.
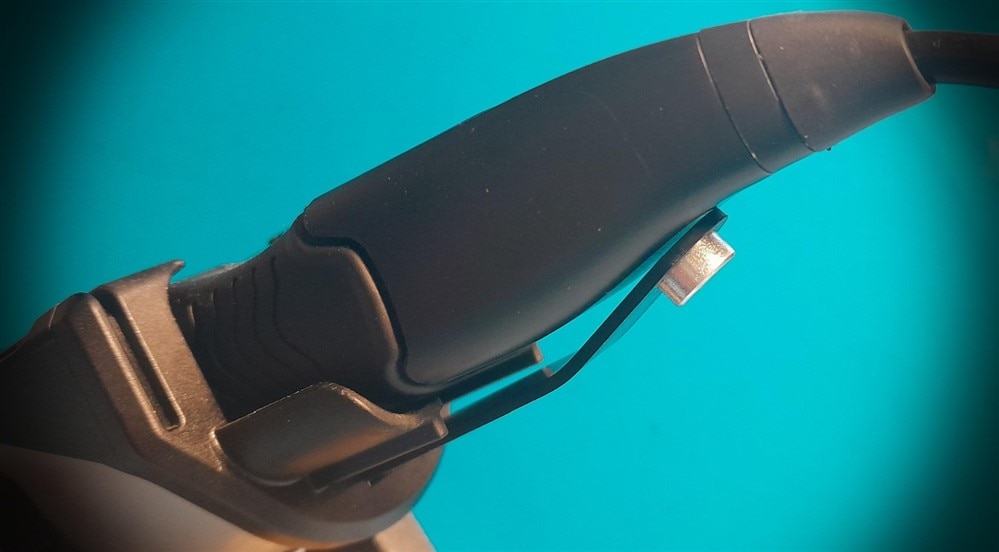
The stand for the tweezers is different than those for the irons. It fits the form factor of the WTMT (tweezers) . The area where you store cartridges is also different. It’s adapted to take tweezers. Placing and taking the handle works well. The stand also has a sensor to detect if the tweezers are placed in the rest. Functionality is exact the same as for the irons.
Validate the tips
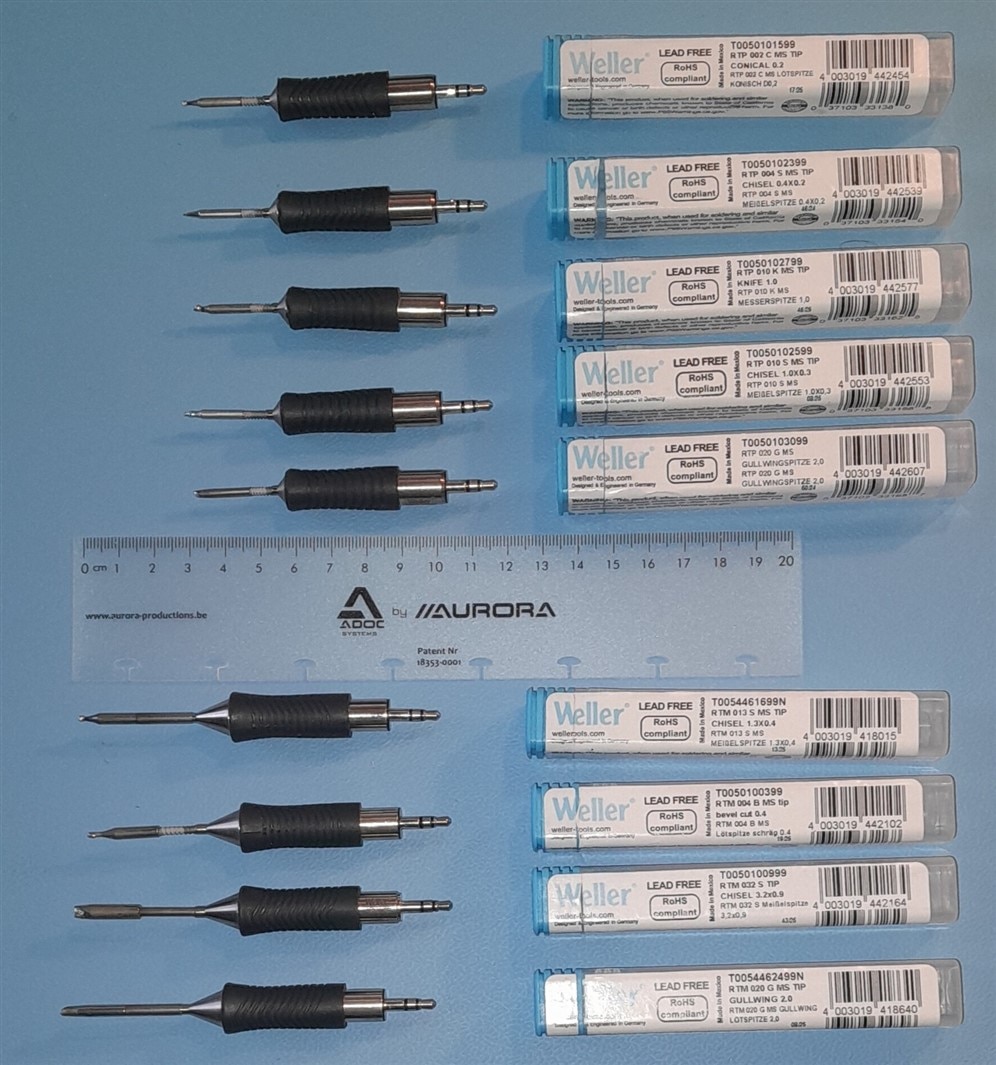
The set contains a mix of traditional and specialised tips. The bevel, chisel and conical ones behave as expected. For daily work, I prefer them in reverse order. Chisel where possible, then bevel, then conical (when needed). For the rather demanding multi layer-boards I used for the test (Cisco router PCBs), work with the small tips was more comfortable with a pre-heated board. Definitely better than turning the heat too high, because that increases the risk for PCBs getting damaged. The chisel designs have it way easier with their larger mass.
I have a gullwing for both irons. I have prior experience with that type. I preferred to use the micro one where possible. It has enough mass to glide over all pins, even those attached to copper ground planes. The nano gullwing is OK for tiny ICs, or areas where the micro gullwing won’t fit. That one tended to stick to some pins (typical those attached to power planes). When used with the smaller ICs, and in combination with the pre-heater, the nano one also performed flawless.
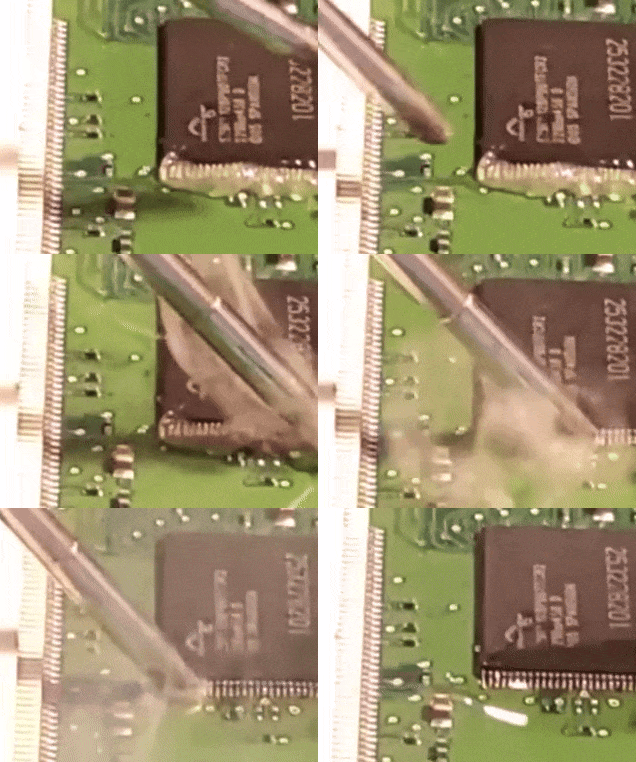
One of the tips I received, is a blade / knife type for the nano (RTP 010 K MS).
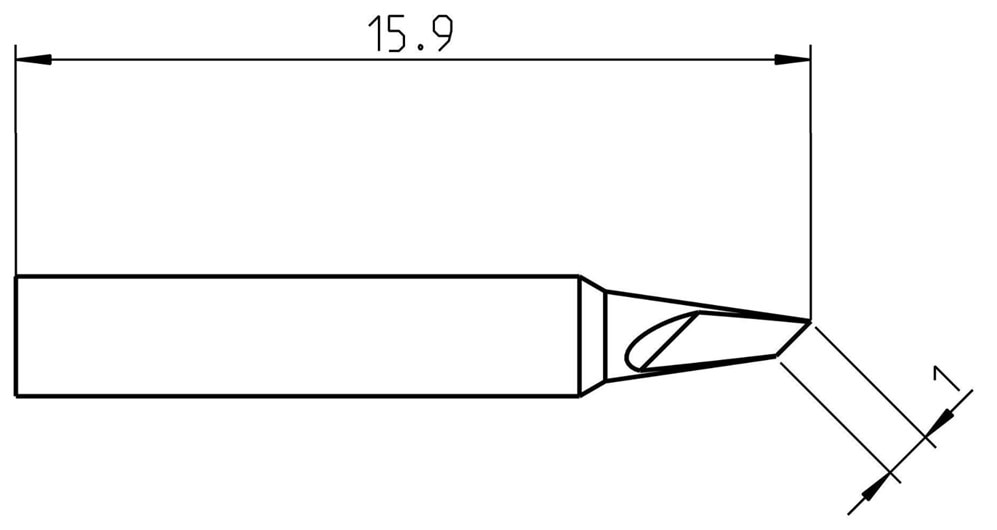
This is an interesting tip, one I’ve never used before. It’s tiny, thin as a blade, with a slanted 1mm wide edge. I like working with this one. You can use the point as if it is a conical tip, but with some extra mass attached to it. Or use the edge to touch more of the SMD contacts. It’s also a decent drag solder tip, and a good one for cleaning up tiny pads during rework. For situations where you can use a little scraping action.
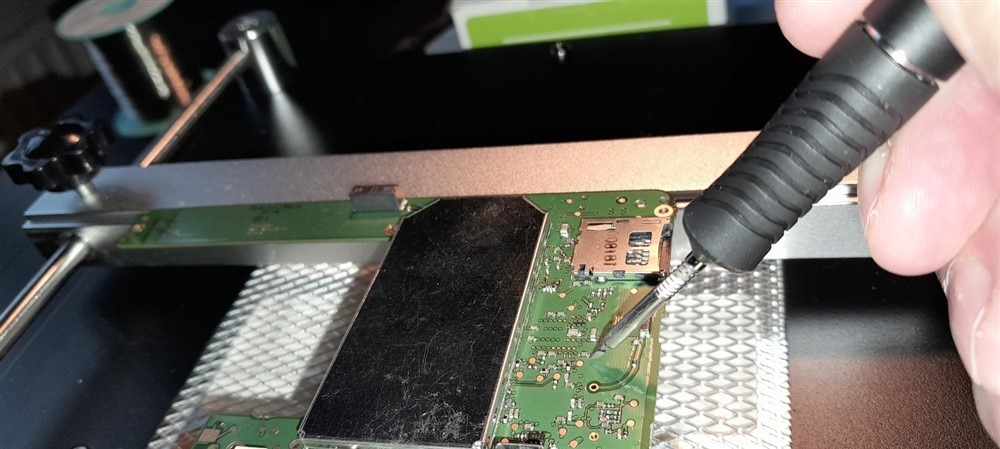
I like to use it like a chisel too. With the advantage that – because of the angle - I don’t have to hold the iron vertical for ideal heat transfer. That angle is handy and makes this a versatile worker tip.
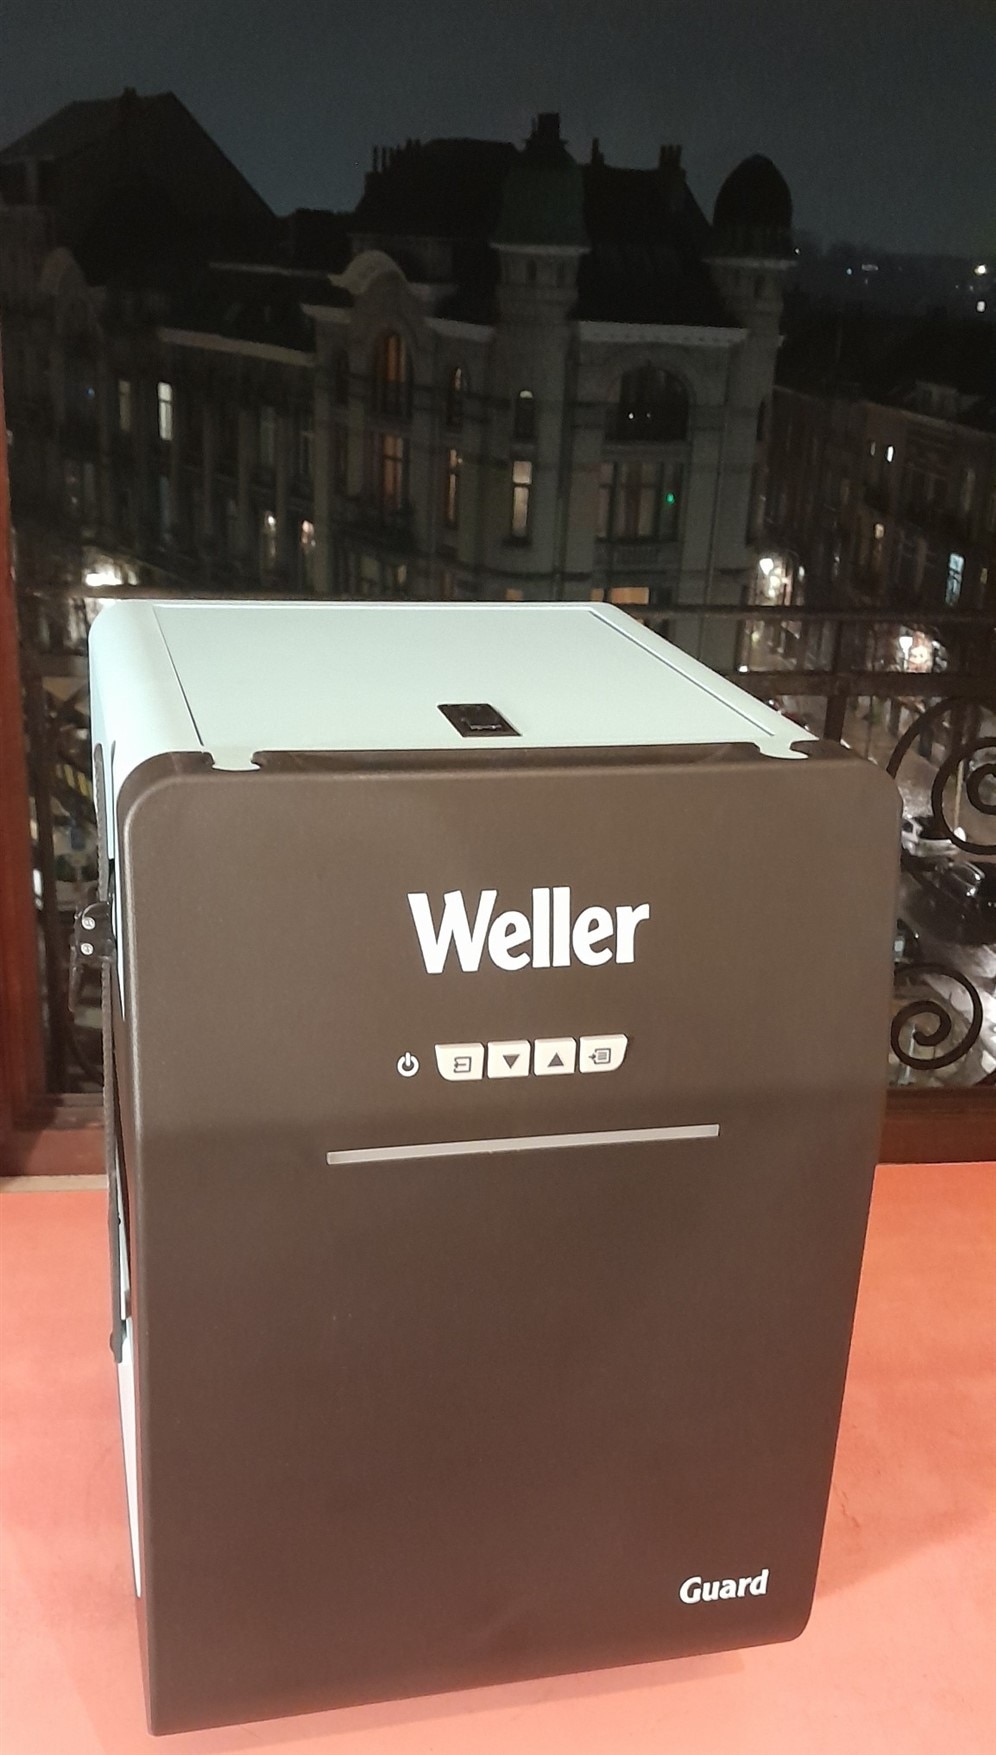
Validate the filtration unit
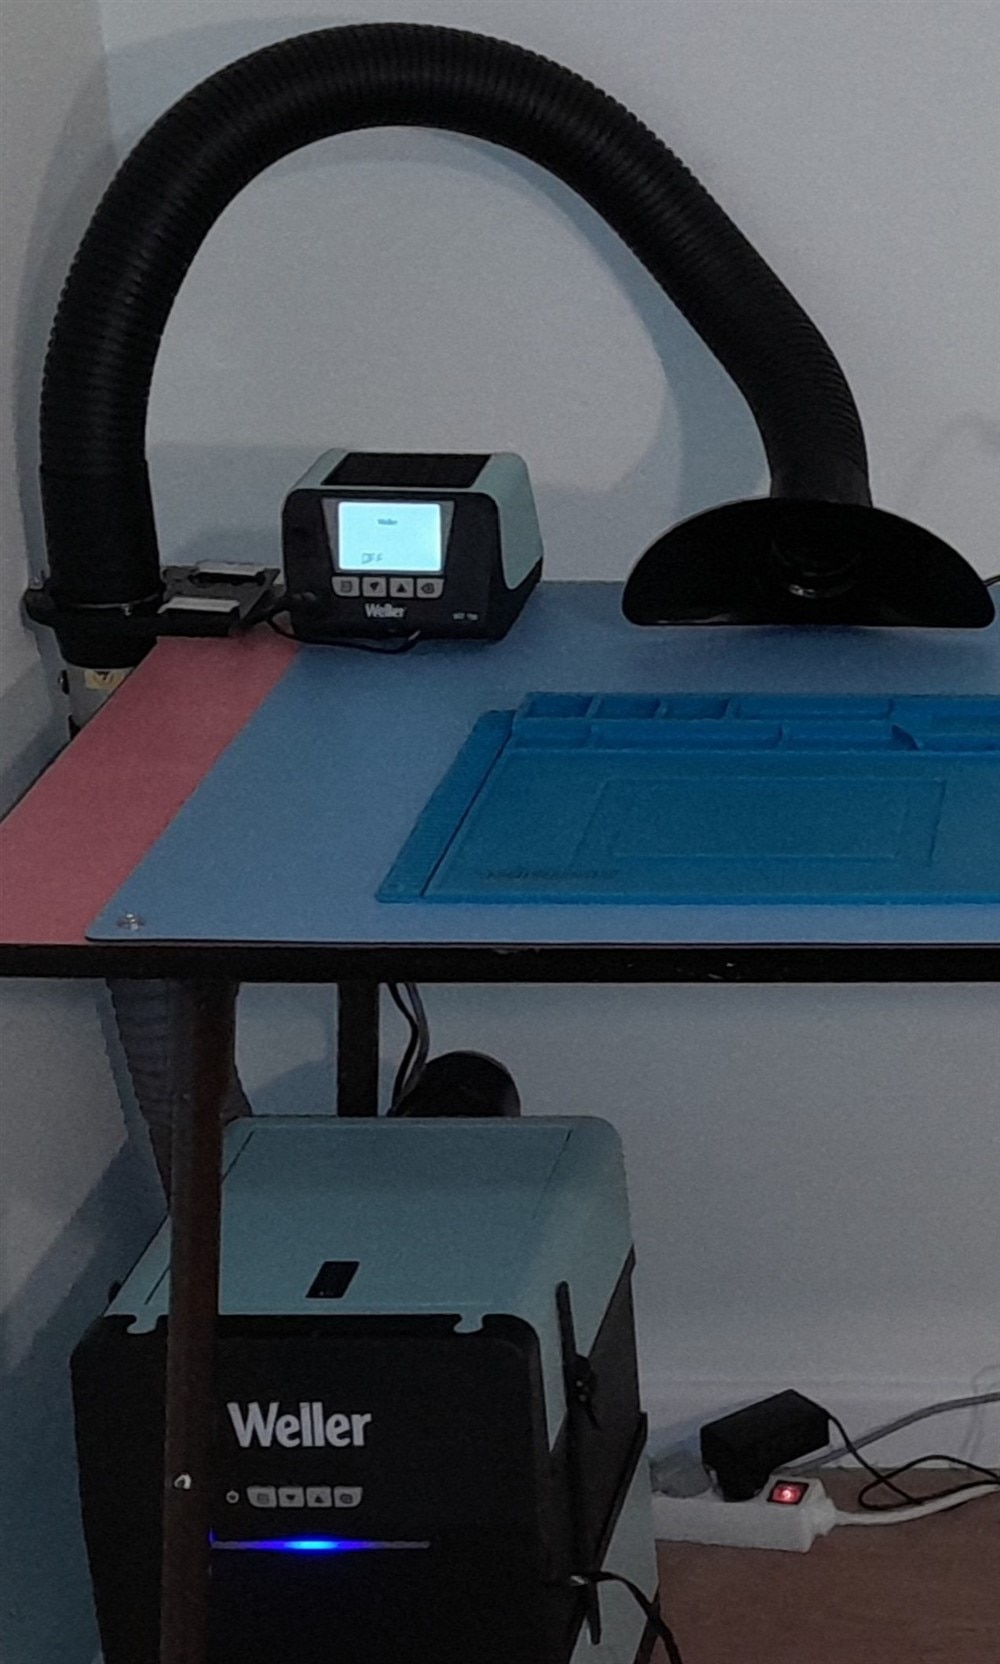
The Zero Guard smoke extractor is a sizable component. There’s a big box that houses the filter and fan. That part belongs on the ground, under the bench. You place the flex pipe with funnel on your bench top. The arm is flexible, and that allows you to place the funnel close to the work area.
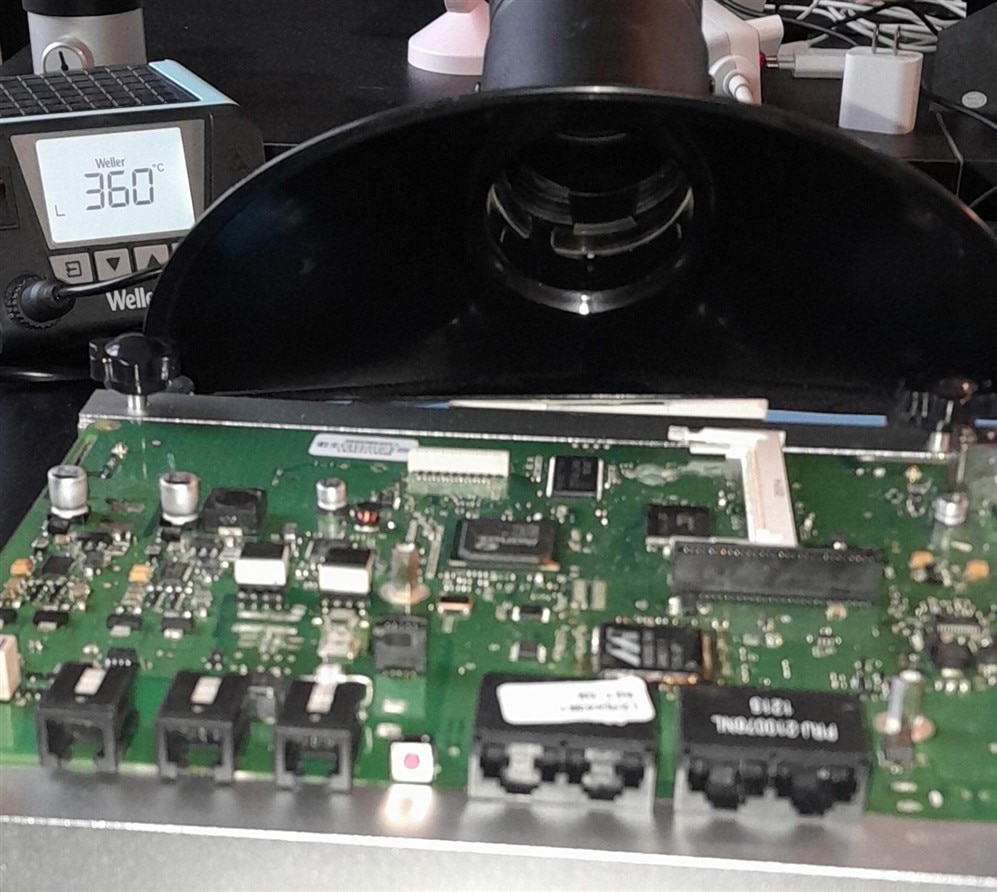
Once you place the extractor under your bench, and set up the pipes and funnel, the unit doesn’t need much attention. It interfaces with the WT solder system, so you can switch it on and forget about it. If you take your iron out of its rest, the extractor fan starts spinning. When you place the iron back after soldering, the fan stops.
The Zero Guard is only on while you work, and the most noisy part of sits under your desk. That makes this extractor dead silent when not working, and not disturbingly load while active.
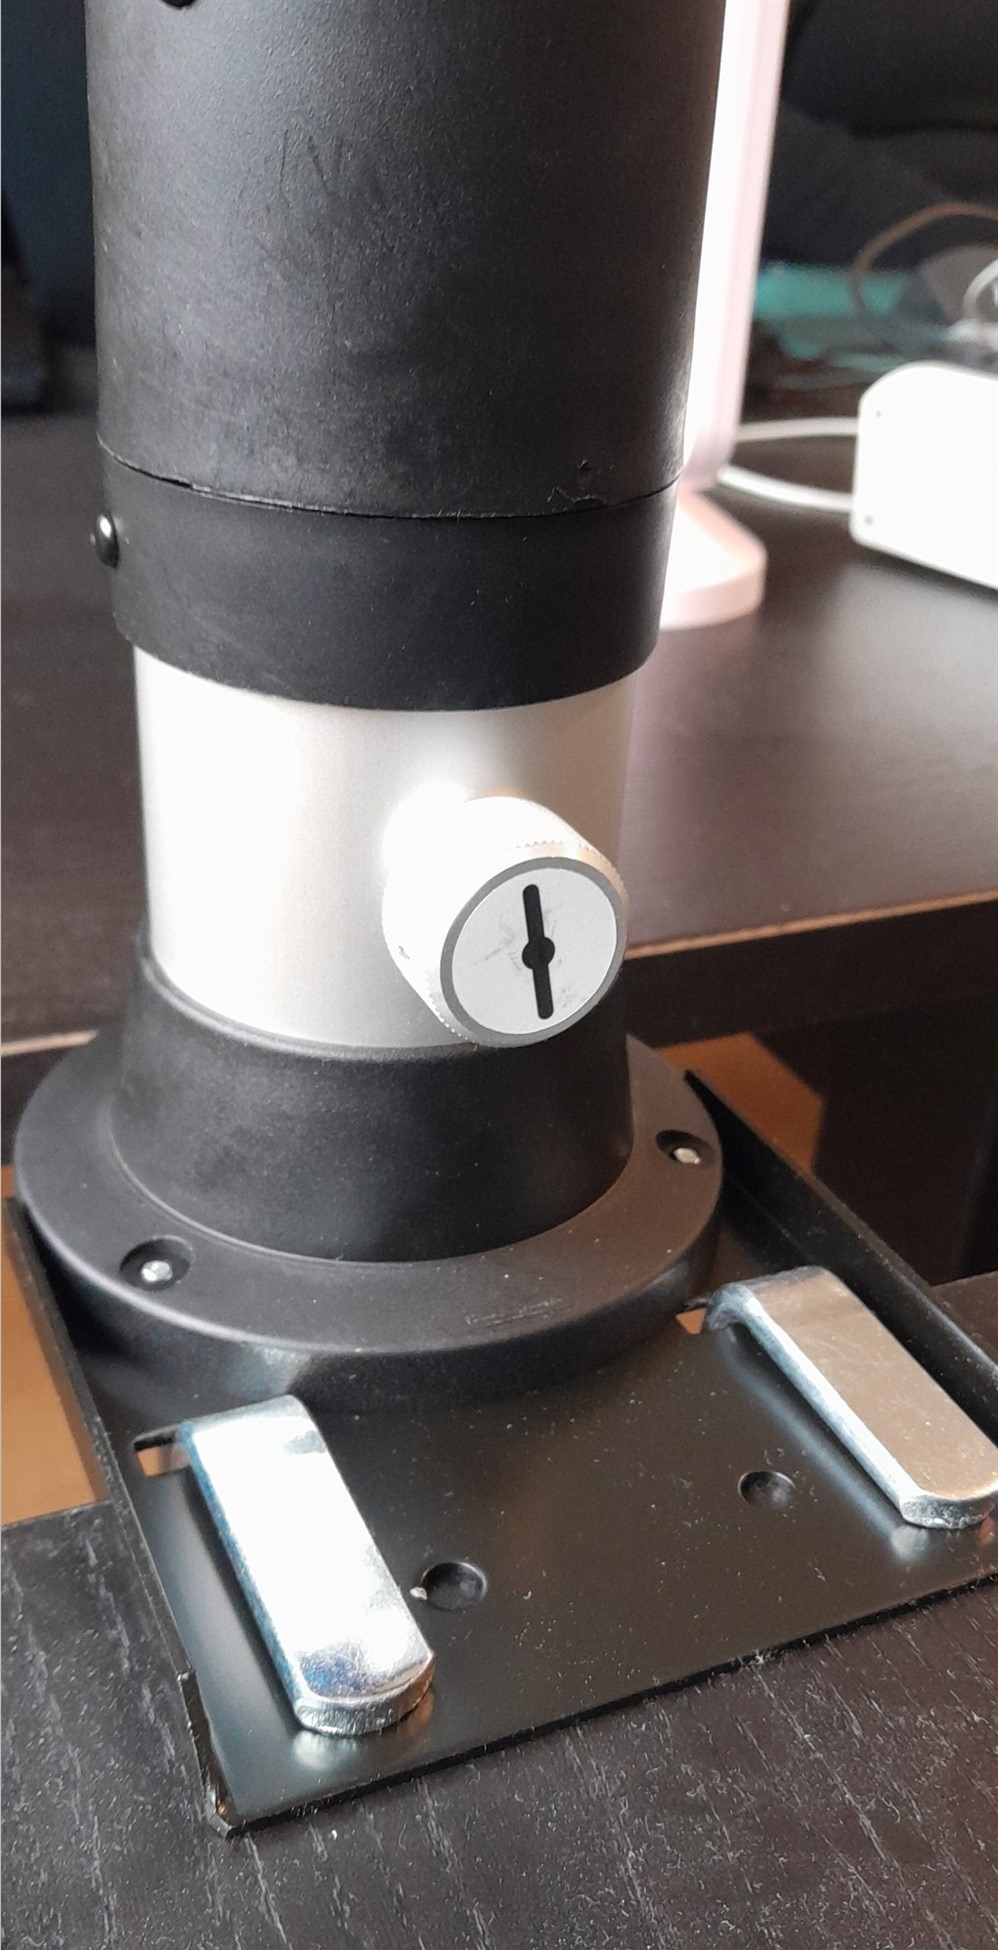
The hose system attaches to your bench with a clamp. The setup is sturdy.
On the underside of your bench, a hose connects the unit to the clamp. This hose is very flexible, and that allows you to move the unit around (it has wheels) while it’s connected.
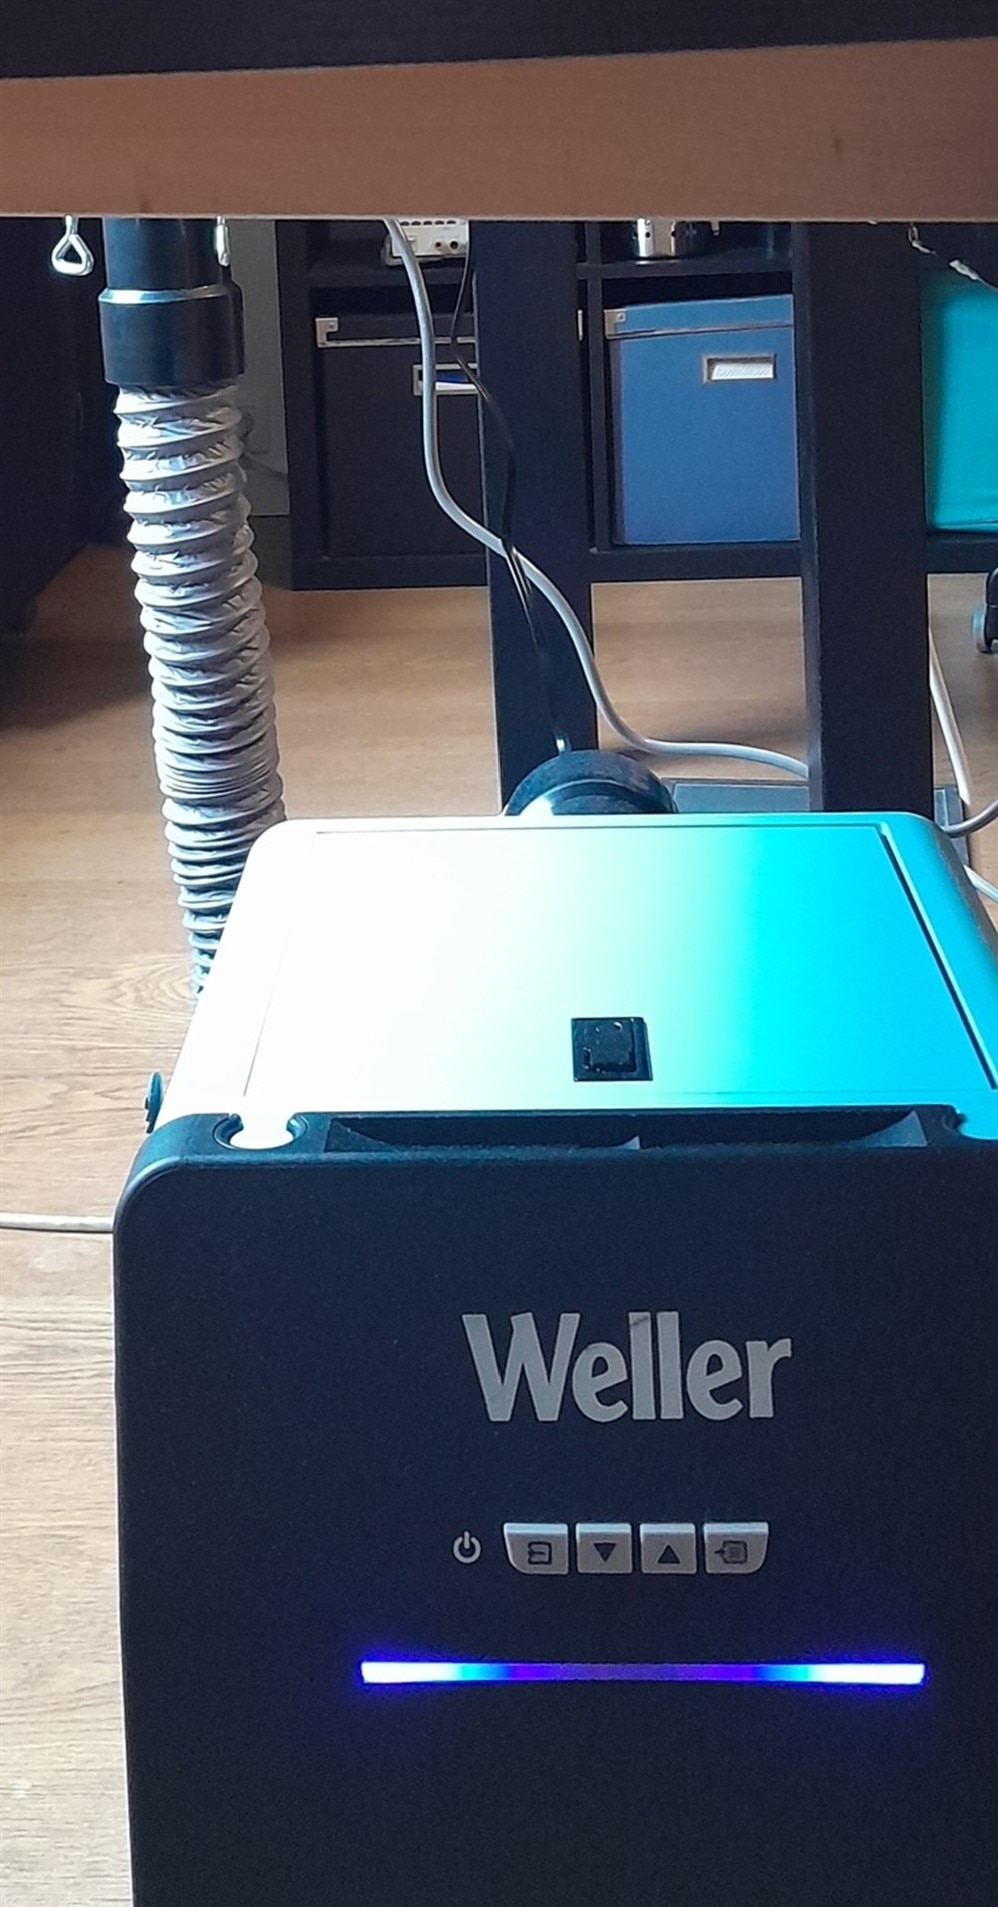
On the top side of the bench, you fit a retractable flexible hose with funnel. This serves as the extractor.
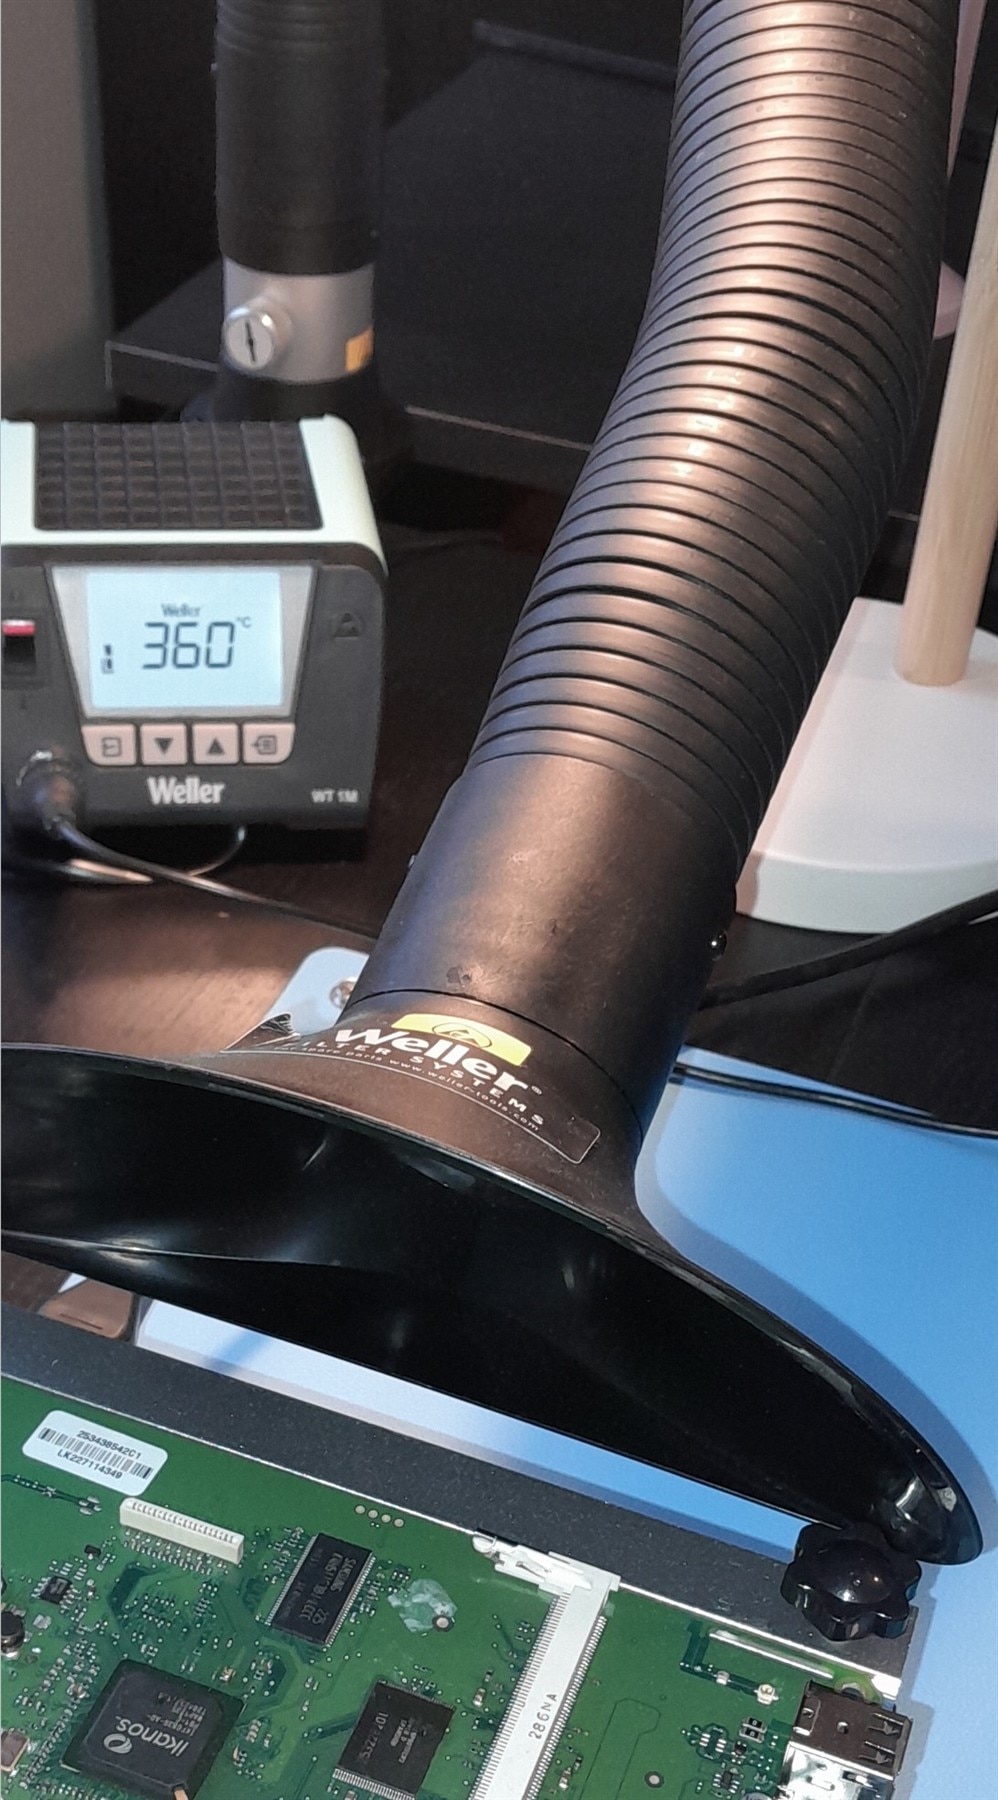
Fix the clamp at a position that allows you to bring the funnel close to where you are soldering. The closer you can get the extractor to the action, the lower you can set the fan. And that keeps the noise down. I had the best results when the funnel was about the same height as the PCB. When soldering on a mat, I leave the funnel sitting on the bench top. With a pre-heater, I bring the bottom of the funnel up by putting a box under it. When I’m not soldering, I place the funnel at the end of the bench, out of the way.
There are three presets. I prefer to use the lowest setting whenever I can get away with it. For soldering lead-free using some flux from a pen, the lowest preset is enough. When I flood the PCB with a large amount of paste, I use a higher setting.
With the up and down button, you can dial in the suction power you need. I tried that out, but in practice I always used the presets.
The Guard is not only an extractor. It’s also an air filter unit. The filter in my unit captures particles and gasses. Most work is done by the main filter. The duty of pre-filter is to extend the life of that more expensive main filter.
Guidelines from Weller: check the pre-filter visually every 10 days. Replace when dirty.
Replace main filter after 5 pre-filter exchanges, or at least once per year. For intensive soldering, they advise to swap every 6 months. A set of main filter + 5 replacement filters costs €140 at the time of writing.
Placing a new pre-filter is very easy. You remove the top lid of the unit and swap out the old filter with a new one. Replacing the main filter isn’t hard either: you release two handles, take out the old filter, shift in the new one. Then push the top of the unit down and lock the two handles again.
The extractor makes a difference to the air in the workplace. No fumes wrinkle to your face, and the filters take care that the smoke is cleared, not just dispersed around the room. Comfort after an hour of working with flux is way better. At low preset, the noise is definitely not disturbing. In combination with the auto switch on and off, you barely notice it.
It is not cheap, and there is a yearly cost for the filters. If your job only involves occasional soldering, there are different solutions. If you solder a lot, or if you share your lab with colleagues, the ZeroSmog Guard improves working conditions.
from my road test proposal:
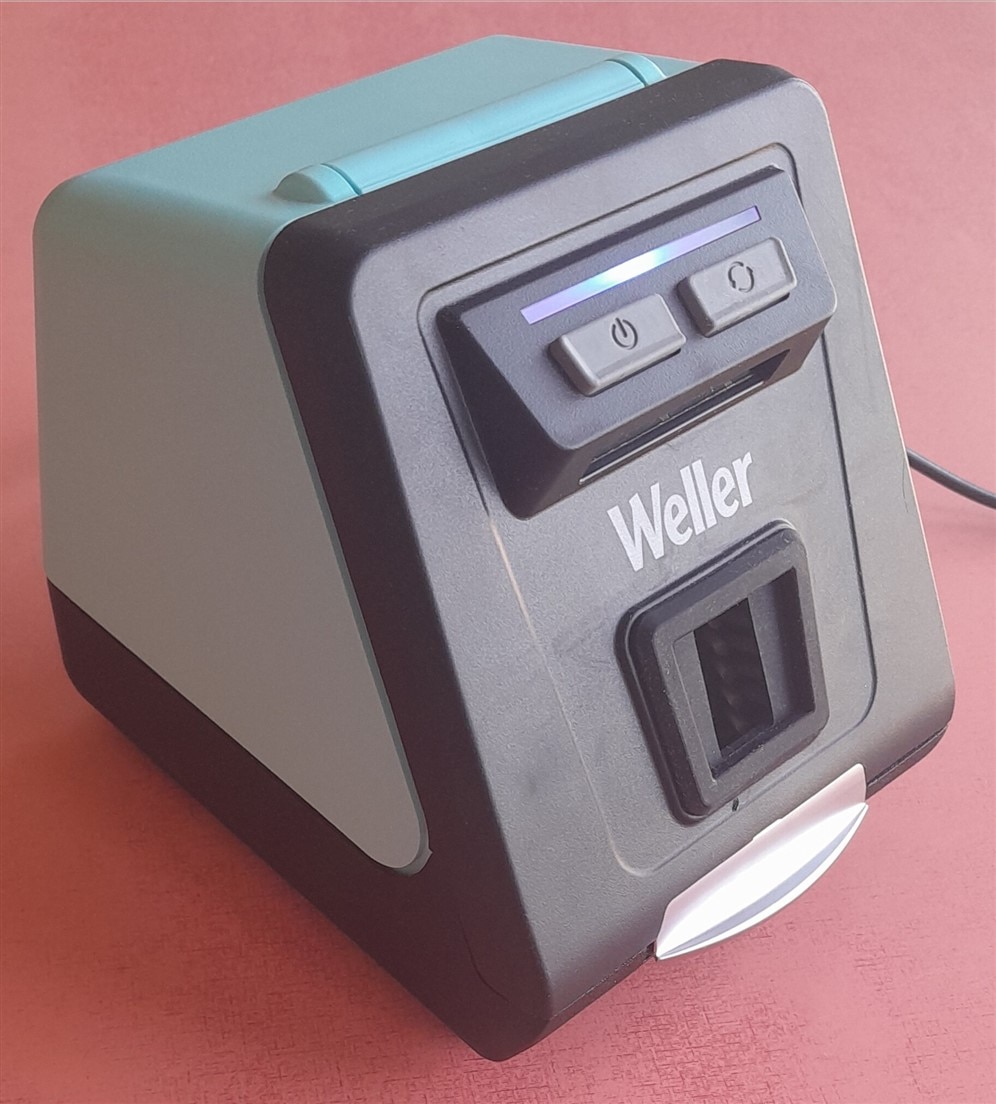
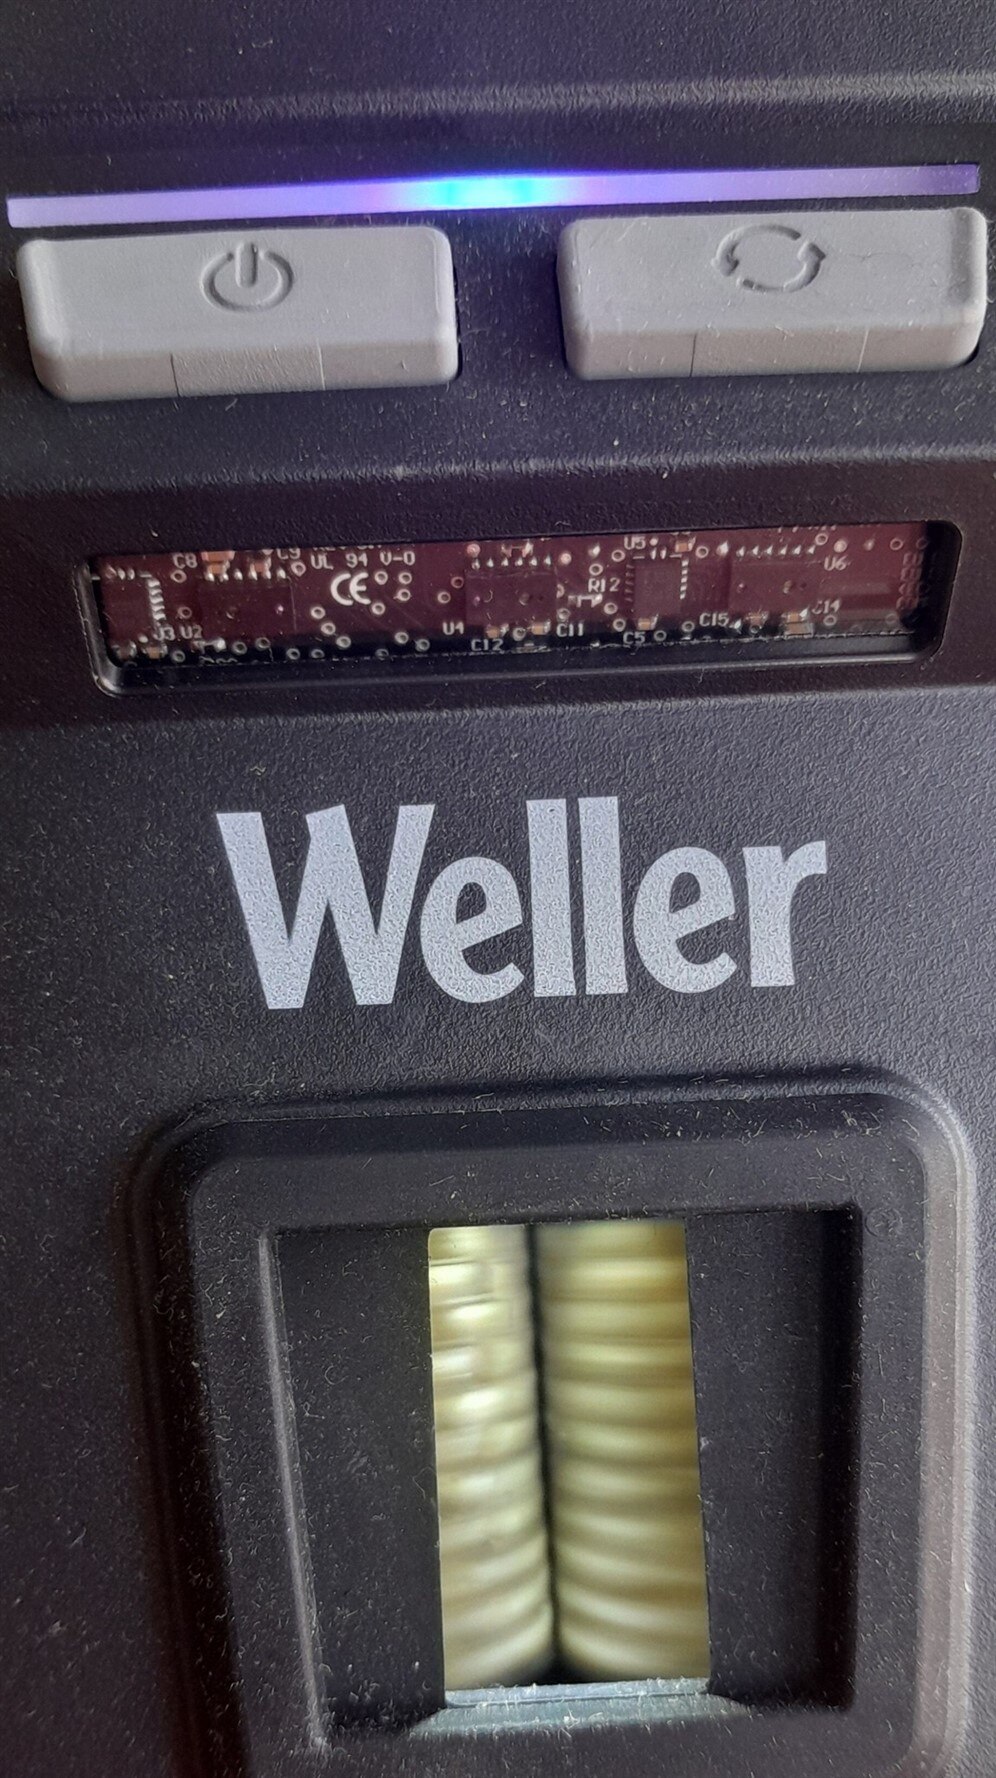
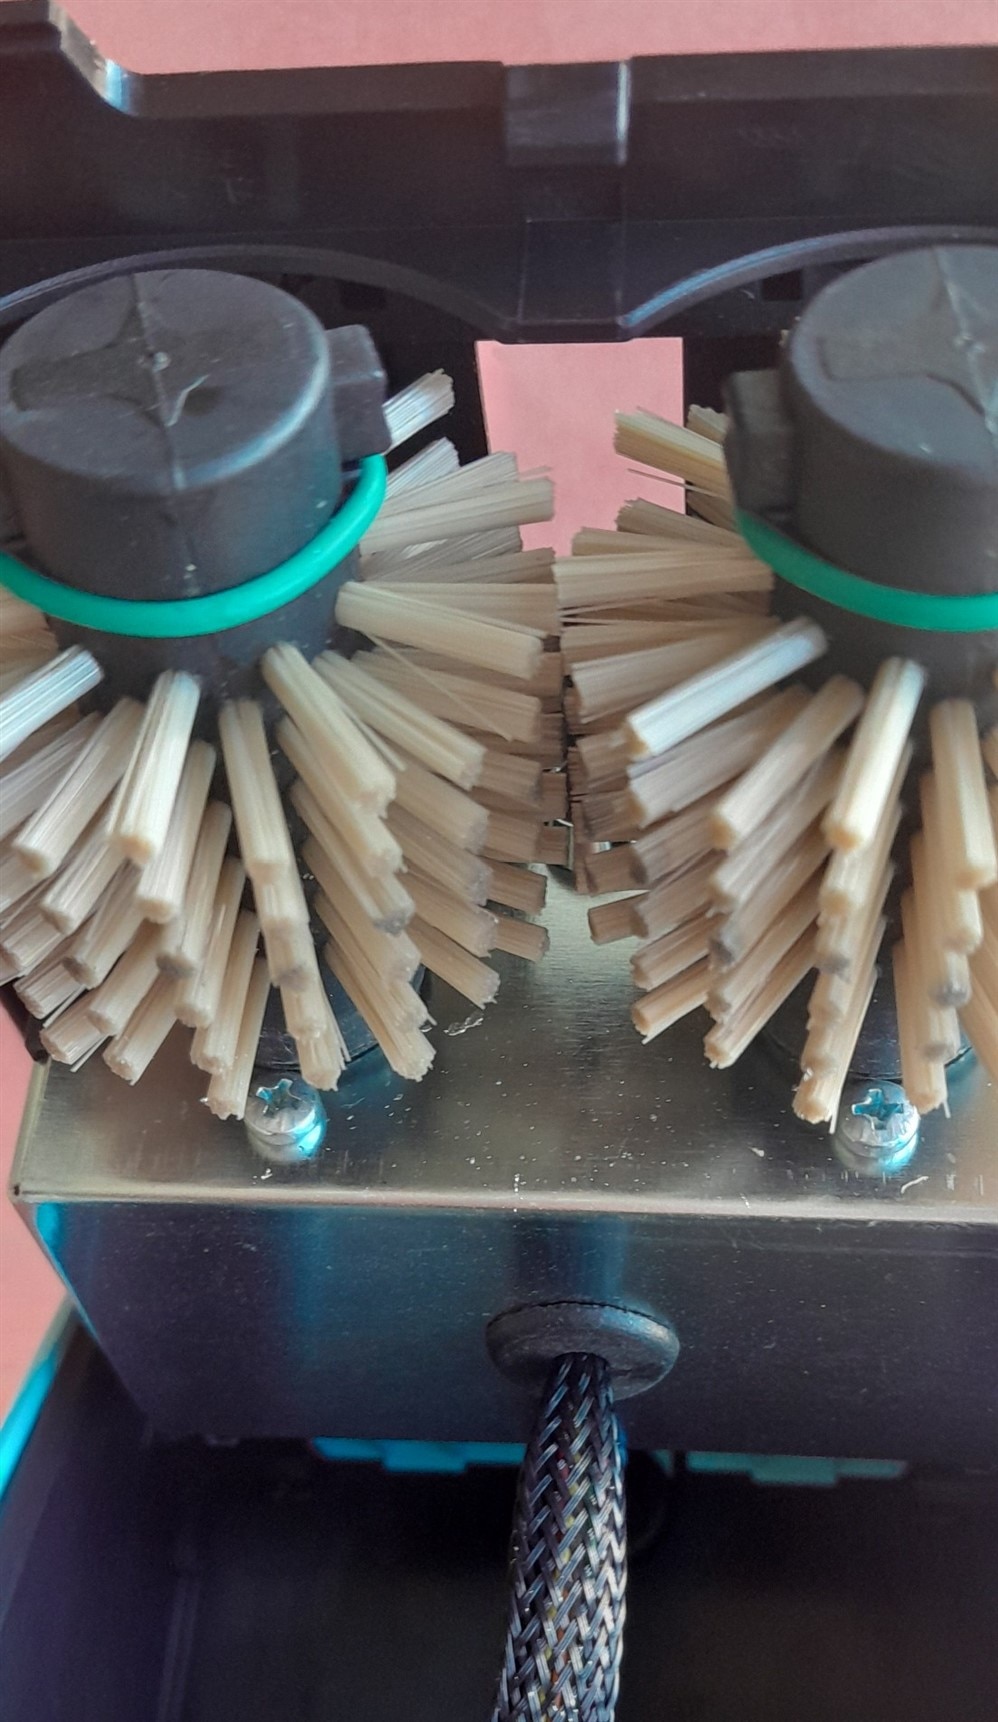
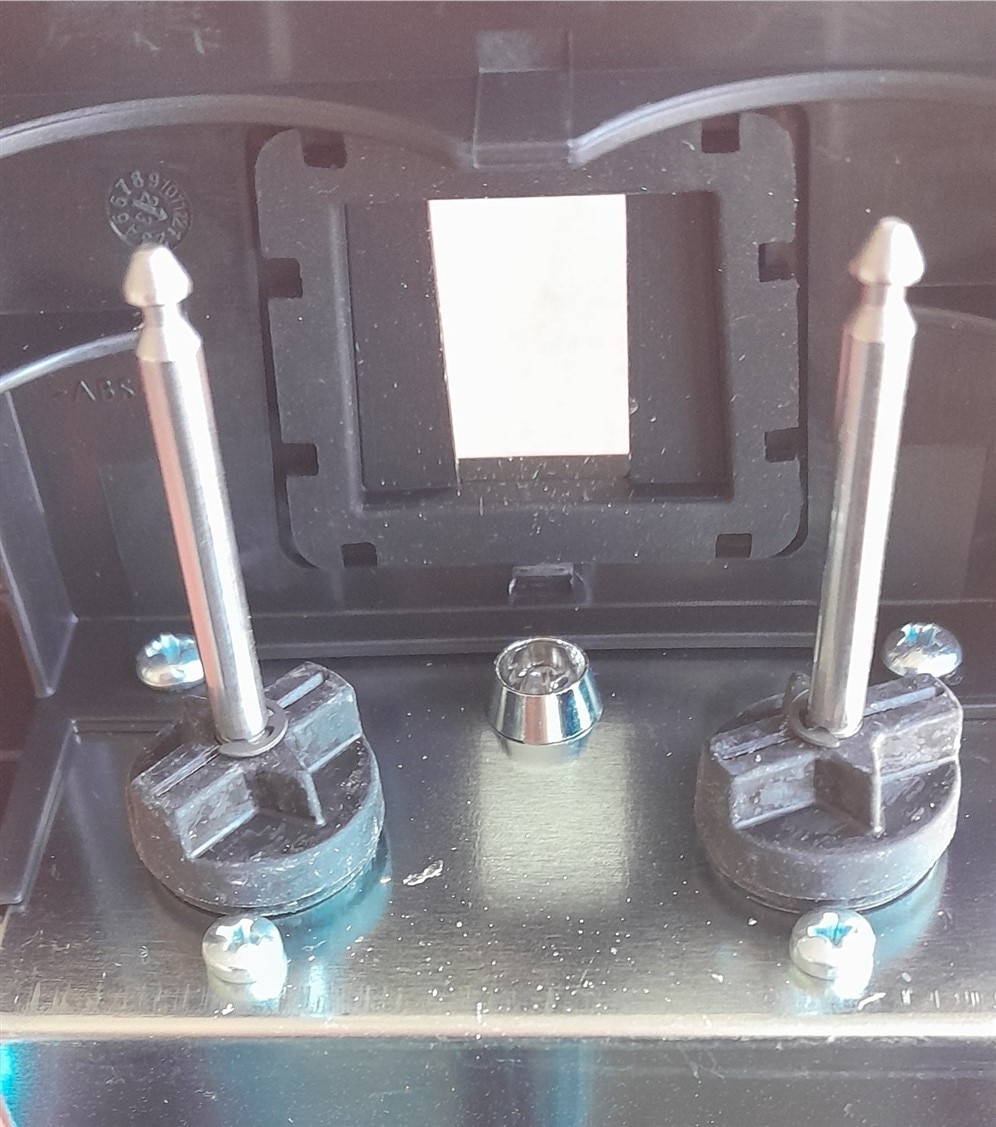
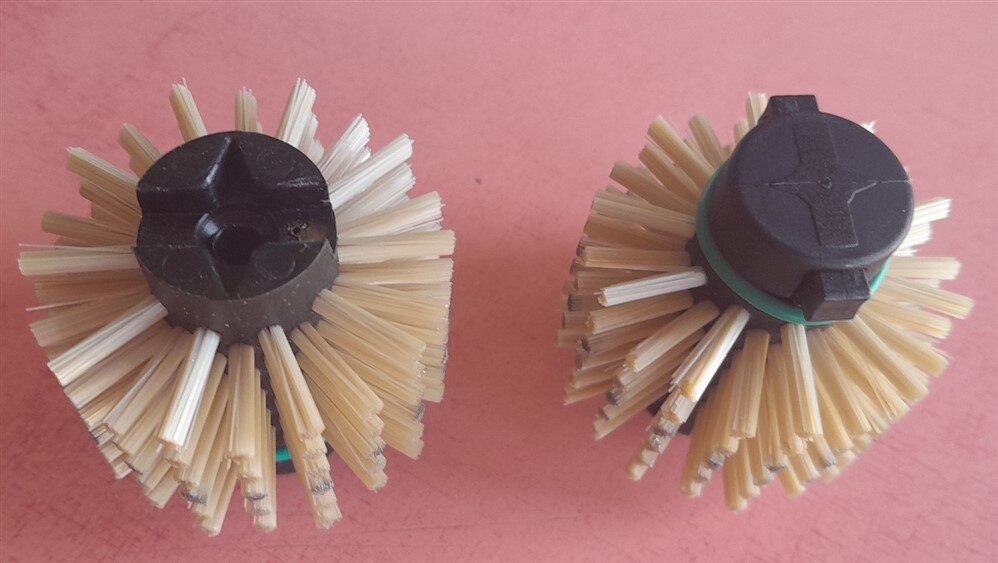
This motorized tip cleaner uses two fast spinning fiber brushes to remove solder from the iron. In auto mode, the brushes spin when you move the tip close to the cleaner. At the same time, the cleaner area lights up.
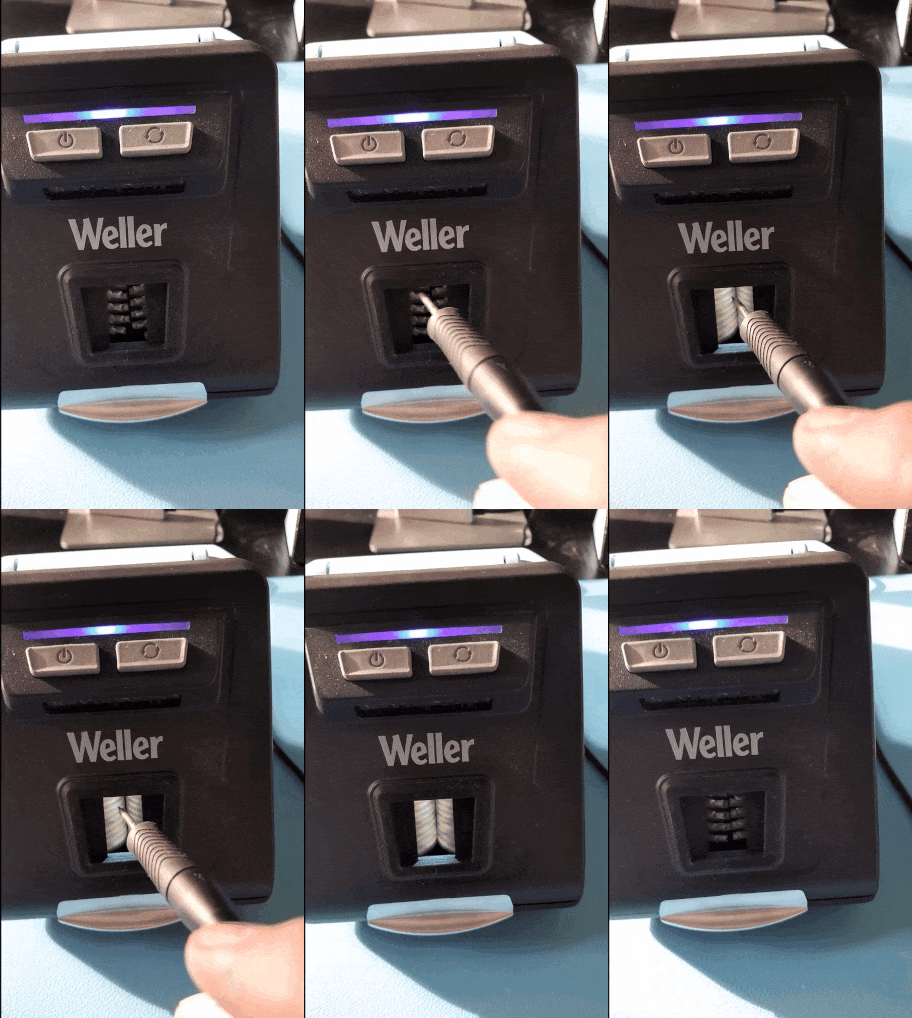
The opening is covered by a rubber curtain. This keeps any solder inside the unit.
The auto mode makes it possible to place the cleaner near the end of the table, out of the way. And when you poke the iron into the cleaner, it activates and cleans the tip.
The cleaning action is good. A brief dip gets the solder off.

Options and remarks:
Varia
I’ve been using Weller’s larger WXR3 station for many years now, with a 65 W soldering iron. That family has tips for very small rework too. I manage to do 0402 with that iron. But the micro and nano iron make working on small size SMDs easier. They are scaled better for that kind ow work.
When working on boards that require more thermal mass, I prefer to have a heftier iron, like the WX one.
The WT1M solder station of the road test is lighter than my WXR3 station. On many levels: less power, less outputs, smaller, less weight, no air or vacuum options. The WT1M station is easier to operate though. A simpler user interface, larger buttons, way larger display. For daily use, the combination of one output, big display with large indicators, and just 4 push buttons is ideal. In this comparison, simplicity in design leads to simple and comfortable operation.
Preferred use:
My preferred WT setup is: the station with one iron on the bench. I learned that I swap tips regularly, but don’t switch between handles that often. Three irons on the bench at the same time looks impressive, but bench space is at a prime, and the leads of the irons can get tangle at times.
Most often it’s the micro iron with the default 1.3 mm chisel tip that comes with Weller’s micro solder kit. I switch to the nano iron when it’s a better fit – tiny work where there are no large copper areas.
In my test, I found that the small components range of work, SMD designs (with maybe a few larger components), is the best fit for this family. The handles and tips are sized for small and smaller. With all soldering that I did in this spectrum, the kit performed very well. I’ve only used lead-free solder. The irons had no difficulty operating at the high temperatures required for that alloy.
The tip family has good options for specific soldering techniques. The (versatile) knife and (niche) gullwing ones perform well. And there’s a good range in sizes of the traditional tip forms.
This was my first experience with cartridge style tips. They make switching while working straightforward. The heat resistant mat on top of the station and the short heat-up time help to keep changing cartridges efficient.
The motorised tip cleaner is a welcome addition. It doesn’t take a lot of space and is only active when you insert the tip. I use it most when a dip in the brass doesn’t do a good job. The fume extractor, on the other hand, claims decent space, under and on the bench. Luckily, the unit can be rolled out of the way and you don’t need to interact with it.
Bench layout and my way of working:
I placed the station and fume extractor hose in the far left corner of the bench. The extractor unit underneath the bench. I turn station and extractor on, check the set temperature and rarely touch them during the day.
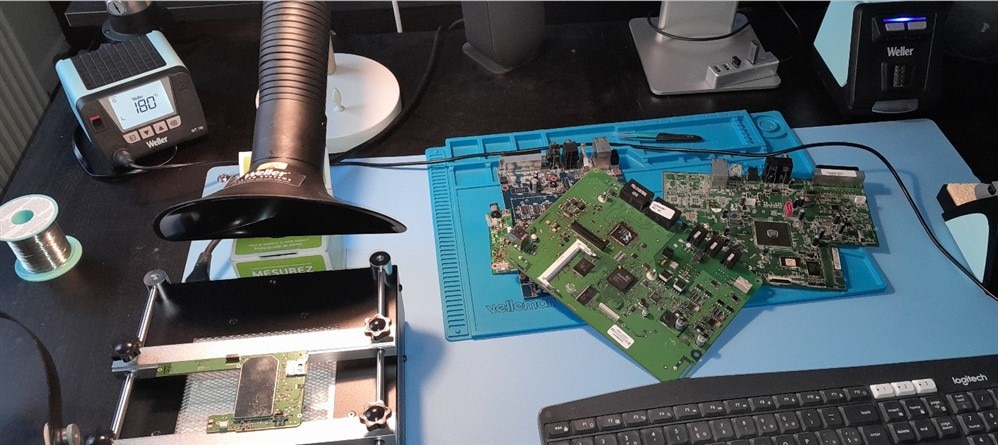
The iron with rest and tip cleaner sit on the right side. The iron within easy reach, the tip cleaner near the end, but close enough so that I can poke the iron in it without reaching.
Inbetween is my work area, where I have a solder mat - and a pre-heater when needed. I place the extractor funel in a position where it makes sense for the work I’m doing. The different tips not too far away.
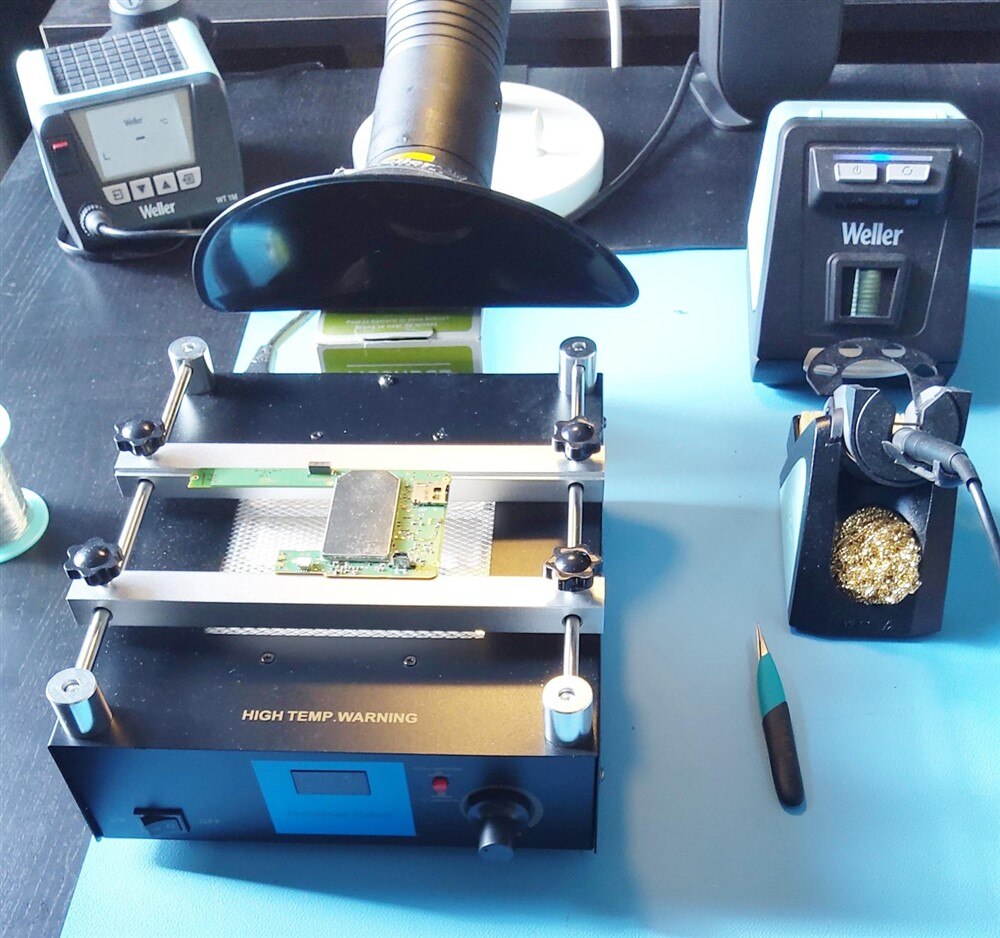
Then I solder. I rely on the sleep and switch-off automations to keep the units under control for me. I ignore the solder control units, and focus on the PCB, the componenst, the iron.
For SMD and small size soldering, the Weller WT kit allows me to do just that. Set up and get soldering. Concentrate on the work, not on the tools.
One of the road test scores is for demo software. Because there is no software, I gave it the average of all other scores, to not impact the overall outcome.
All in all, a setup that allows for comfortable soldering. Good ergonomics, low noise, clean air, clean tips, clean bench. The only other thing needed to build good boards, is your soldering skills.