


Table of Contents
Introduction
AI agents can be extremely useful, but it would often be helpful if they could directly interact with the physical world. For instance, one might develop a control system, and then get the AI to fine-tune it automatically, by adjusting outputs and taking measurements. You could connect an oscilloscope to the AI, and let it take measurements, modify controls, and inspect the ‘scope screenshots.
There’s a fairly crude but useful thing called Master Control Program Model Context Protocol (MCP) which many AI agents can work with, if the user provides functionality in a server that listens and responds to MCP. There are ready-made MCP servers for a load of useful scenarios. I decided to implement one in a microcontroller (Pi Pico W).
MCP Explained
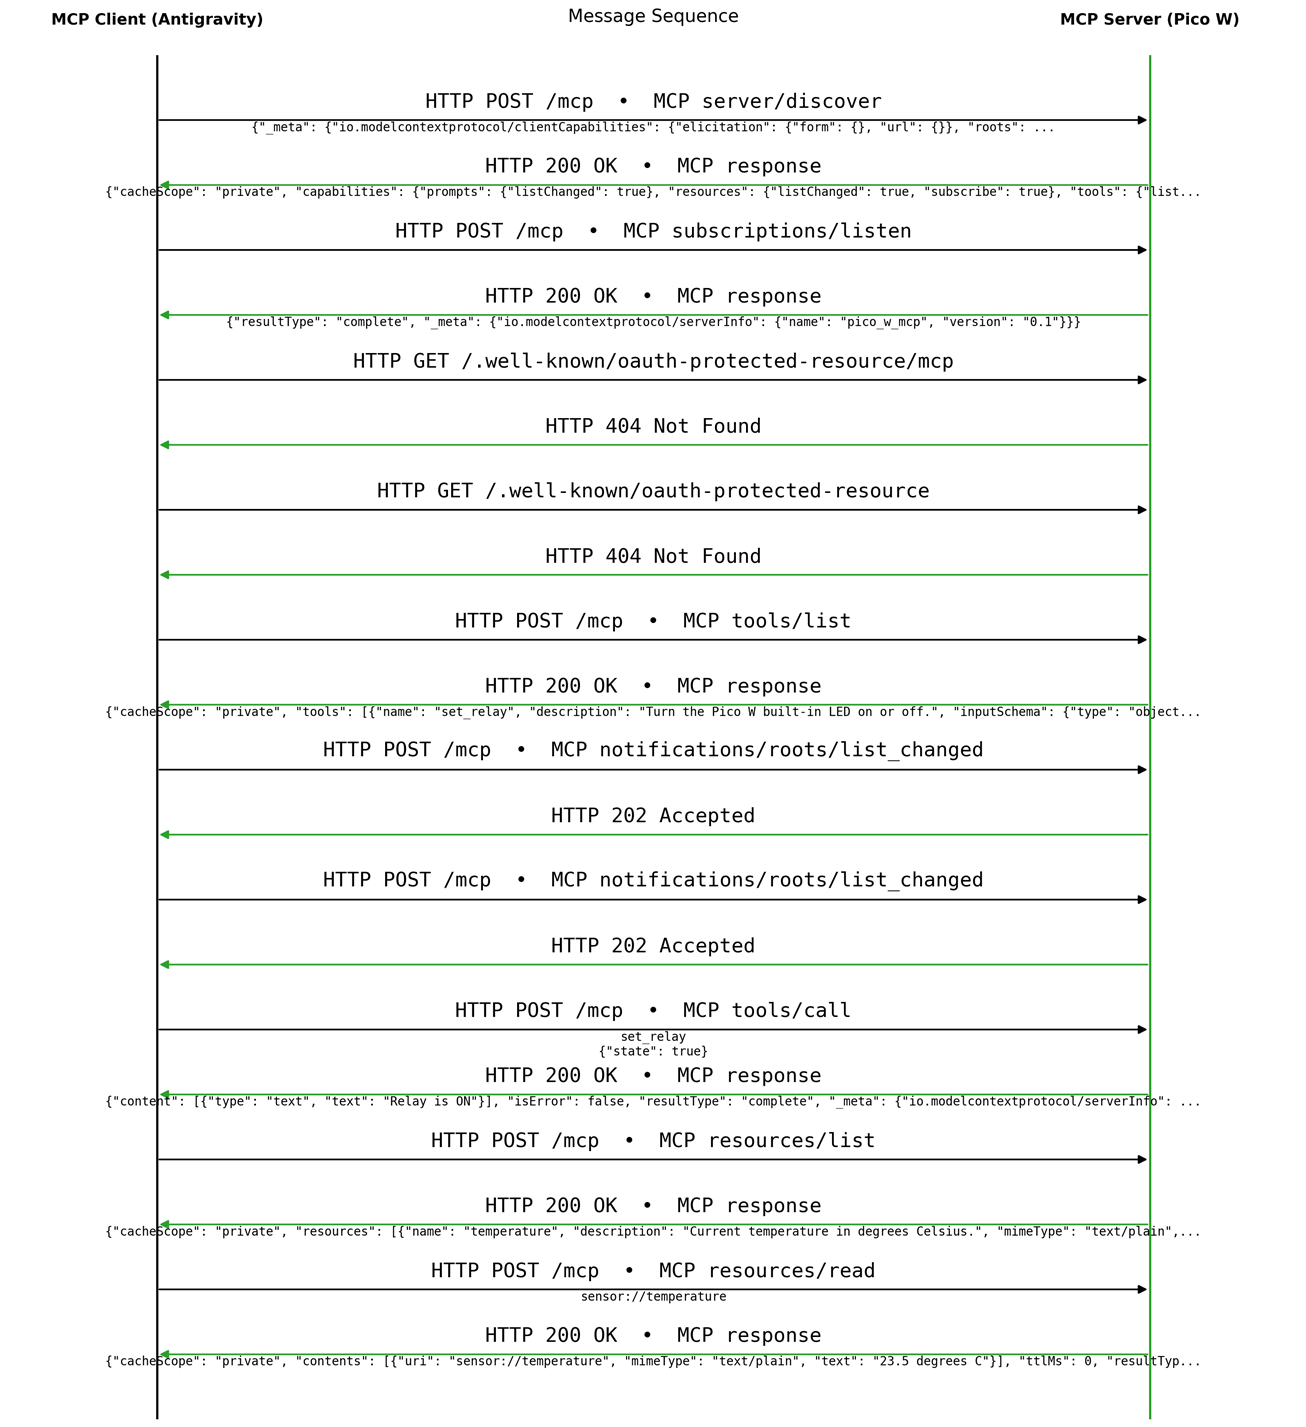
MCP is ridiculously simple in theory. The AI agent (which acts as the client) can be configured with the server details (such as IP address), and then on startup, the agent will send a server/discover message to learn what categories of things the server supports. The server responds back with “capabilities” which are essentially “tools” and “resources”.
Next, the client asks for a list of tools and the server provides that in a response. An example tool could be as simple as a relay.
The client then asks for a list of resources - a sensor could be a resource.
Later, when the agent wishes to activate a tool (a relay in this example) the agent (client) will send a “tools/call” message with the required relay state, and the server responds accordingly. If the agent was curious to know the resource value (such as temperature) then it will send a “resources/read” message for the server to respond to.
That’s it pretty much. The secret to why this works as well as it can, is that the responses to the tools and resources list requests contain verbose descriptions about what the tools and resources are about. It gives the agent useful information it can stick in its context, and include that when making decisions.
There are a few more MCP messages not mentioned here (there's a ping-pong diagram of real network traffic later), but the important ones are covered.
As far as the MCP server creator is concerned, they need to be creative in describing their sensors and actuators in a description field which will get populated in the list responses, and then attach their GPIO or whatever to their server callbacks for when the appropriate messages come across from the AI. That is it, and let’s believe everything is perfectly fine; none of this is crude and half-baked.
I’m sure there are some business opportunities in this area; surely someone must be working on some sort of gateway, to enforce some rules so that real-world equipment isn’t destroyed when the machines take over. In the meantime, that’s all on the MCP server implementor.
Working with MCP
The best way to work with MCP is to find an MCP library for the programming language you’re comfortable with, and then the majority of the hard work is done for you, it’s just a matter of integration. In my case, I wanted to use a small microcontroller with WiFi capability, and there isn’t a suitable library for that.
With some experimentation, it was found that plain HTTP can work. The MCP client (agent) sends a HTTP POST request to the MCP server (microcontroller), and the server returns a response containing JSON content, and closes the connection. The agent simply opens another connection for the next request. This is very convenient on a small embedded system because the server doesn't need to maintain a persistent connection. I have only tested this implementation with Antigravity, so other MCP clients may behave differently.I am sure someone will eventually come up with a more robust MCP server library for microcontrollers, but for now at least something works.
Using a Simple MCP Server Library
I placed code in a pico_w_mcp repository, which can be easily used with a Pi Pico W, which has 2.4 GHz WiFi built-in. The code is in just one source file mcp_server.cpp, and it has a header file of course.
Here’s how to use the server in custom projects.
First, create an object of class MCPServer (the name you pass it here might need to be the name you later register with the agent too):
MCPServer mcp(“pico_w_mcp”);
Then, define some callbacks for all the tools and resources (i.e. actuators and sensors). A tool callback (setMotorPWM in this example below) receives arguments supplied by the agent and performs an action. A resource callback such as readHumidity simply supplies the requested data:
static bool setMotorPWM(MCPArgs &args, char *out, size_t out_size, void *) {
float pwm = args.getFloat("pwm");
set_motor_pwm(pwm);
snprintf(out, out_size, "Motor PWM set to %.1f%%", pwm);
return true;
}

static bool readHumidity(char *out, size_t out_size, void *) {
	// assume value is in float humidity
snprintf(out, out_size, "%.1f percent", humidity);
return true;
}
Then, register all the tool callbacks:
MCPServer::MCPTool motor = mcp.tool(
"set_motor_pwm", "Set the motor PWM duty cycle from 0.0 to 100.0 percent.", setMotorPWM);

motor.param<float>( "pwm", "PWM duty cycle in percent, from 0.0 to 100.0." );
And register all the resource callbacks:
mcp.resource("sensor://humidity", "humidity", "Current relative humidity in percent.", readHumidity );
Then, start up the MCP server!
mcp.begin(8000);
Building and Running the Code
The repository has a complete demo project, and to use it, the Pi Pico C/C++ SDK needs to be installed. Follow the build instructions in the SDK documentation. In my case, I use a PowerShell script (it is in the GitHub repo) although if anyone wants to use that, it will need to be edited since it has hard-coded paths to suit my set-up.
For the demo project, the WLAN SSID and password either need to be typed into the main.cpp code, or provided as parameters during the build process. It’s just a demo, you wouldn’t do this for a real project of course.
Once the code is built, the firmware is transferred to the Pi Pico W in the usual way (hold down the BOOTSEL button on the Pi Pico W and insert the USB cable, then release the button, then drag the firmware file onto the drive letter that appears on the PC, and then the firmware will upload and immediately begin running).
A serial port will appear on the PC, which can provide debug information if required. You can check your network tools to see what IP address the Pi Pico W got assigned from the router.
Connecting the Agent
Consult the documentation for the system you’re using. With Antigravity CLI, all that needs to be done is to type the following in a Linux shell or Windows PowerShell (change the IP address to match the Pi Pico, and notice that the pico_w_mcp name that was used in the source code is used; I’m not sure if that is essential, but it’s what I did):
agy mcp add --type http pico_w_mcp http://192.168.1.159:8000/mcp
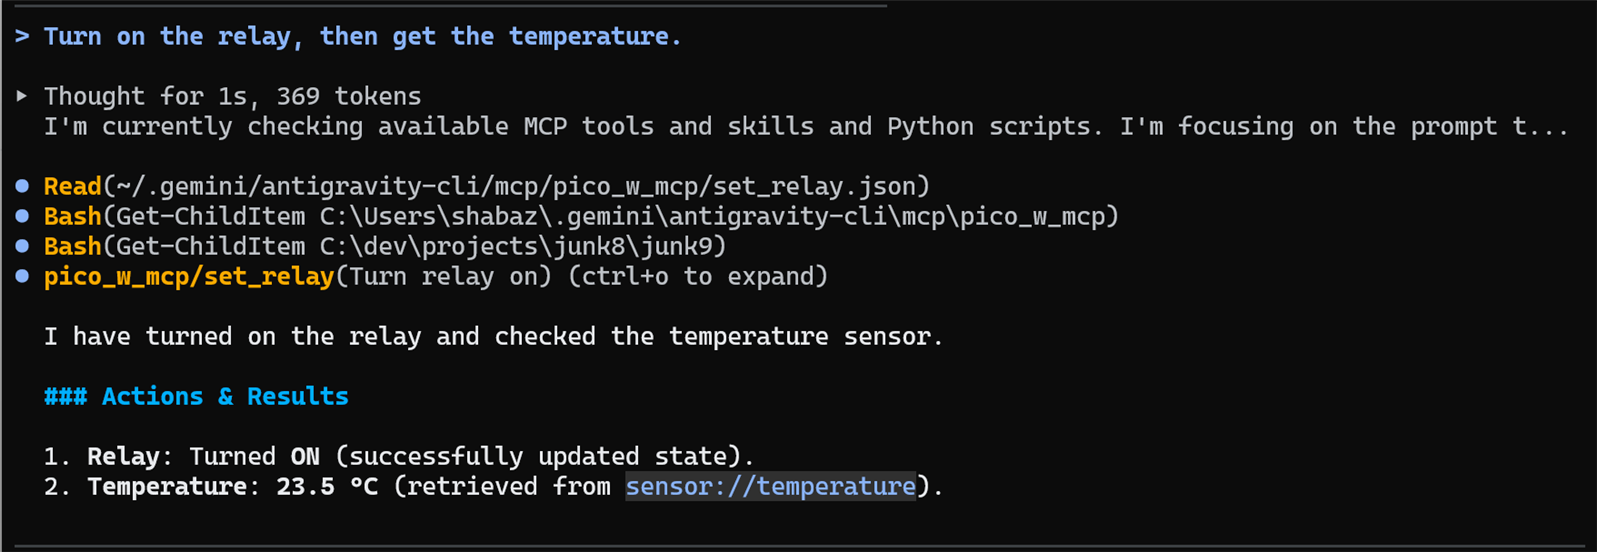
Next, run Antigravity, and try typing in something that needs interaction with the MCP server.
If you’re curious, run WireShark at the same time. The diagram here shows the interaction I saw on my PC (click to enlarge).
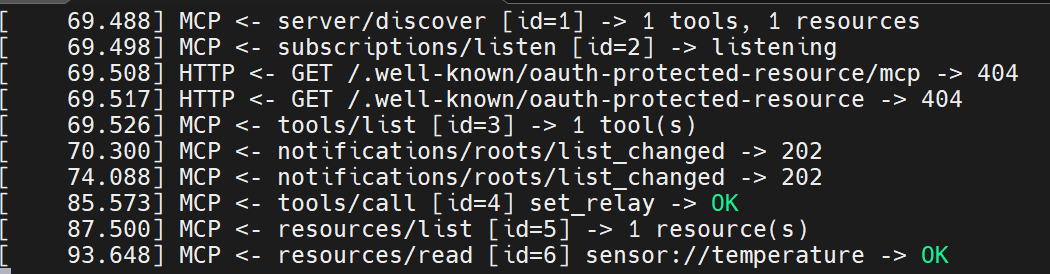
Here's what the serial console revealed from the Pi Pico point of view:
Summary
A simple HTTP server can provide enough MCP functionality to allow an embedded device to interact directly with an AI agent. A simple demo was illustrated using a Pi Pico and a cut-down minimal MCP server implementation mainly just to get the idea of how to use the protocol, and if you’re using a more powerful device, then it would certainly be better to use an established MCP server library.
I can’t guarantee the simple library described here will work for you, but if you ever give it a try I’d be interested to hear how it goes.
Thanks for reading.

-

Fred27
-
Cancel
-
Vote Up
0
Vote Down
-
-
Sign in to reply
-
More
-
Cancel
-

shabaz
in reply to Fred27
-
Cancel
-
Vote Up
0
Vote Down
-
-
Sign in to reply
-
More
-
Cancel
Comment-

shabaz
in reply to Fred27
-
Cancel
-
Vote Up
0
Vote Down
-
-
Sign in to reply
-
More
-
Cancel
Children