


There are times when a big project just doesn't seem feasible in your schedule yet you desperately seek a way to expel some electronics energy. Whether it's the time you unexpectedly lost running errands or the space constraints on your workbench that necessitate different project requirements, this quick tutorial is geared to give you that electronics outlet you desire! In this blog post I will detail the quick and easy way to develop a stopwatch using the Digilent Cmod A7 (now available in two FPGA options: Cmod A7-15TCmod A7-15T and Cmod A7-35TCmod A7-35T) and a seven-segment display, helping you countdown time between electronics projects or whatever else you desire to track!
This tutorial assumes that you will have a basic familiarity with Vivado and programming the general purpose input/output (GPIO) of the Cmod A7 (a tutorial for which can be found here). Beginning with either option of the Cmod A7 (listed above), you will also need a four digit seven-segment display, breadboard, and jumper wires to assemble your project hardware and components.
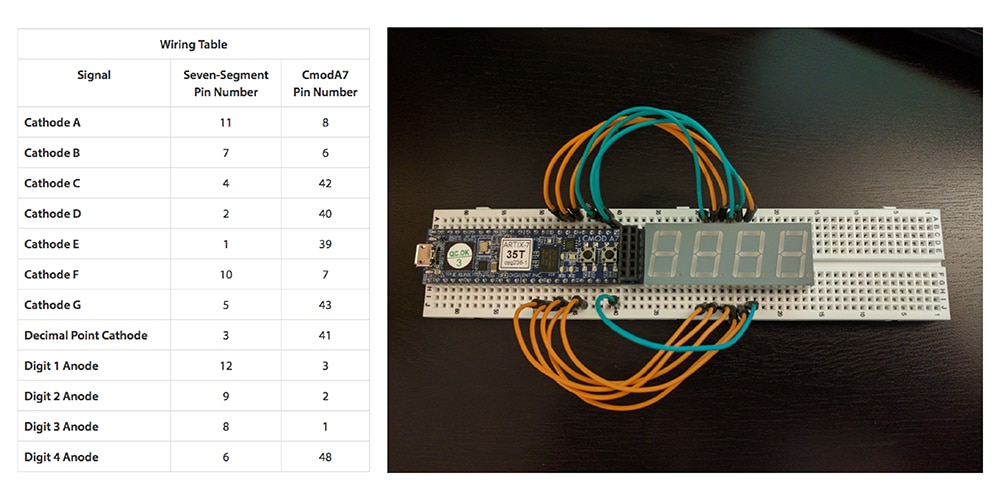
Step 1: Connecting the Project Components
Without specifying the exact four digit seven-segment display, step one of this tutorial may vary by user but focuses on connecting the project components. Below you can find the pinout for the seven-segment display used by our team, with important pins called out for quick connection reference.

Reading from your seven-segment display reference sheet, use the jumper wires to begin connecting your Cmod A7 and display as illustrated alongside the connection table below.
Step 2: Programming the Cmod A7
Following successful connection of all project components we will begin programming our FPGA in Vivado. You can find detailed instructions on how to start programming your device in Vivado in this Cmod A7 tutorial. Once you have connected your Cmod A7 to Vivado, you have two possible programming options. The first option is using JTAG to program the Cmod A7 directly in a two step process outlined here. The second option is with Quad-SPI, which effectively programs the Cmod A7's on-board flash memory and allows for future runs (following a power cycle). Find the concise details for this programming method here.
Step 3: Pressing Play
After a few easy programming steps you will be rewarded with a fully functional stopwatch that can be started by pressing BTN0. Stopping and restarting your stopwatch is just as easy and can be accomplished by pressing BTN1. Read the original tutorial complete with programming instructions here then visit the Digilent Wiki for additional tutorials, community projects, and more to support your FPGA development!

Top Comments