


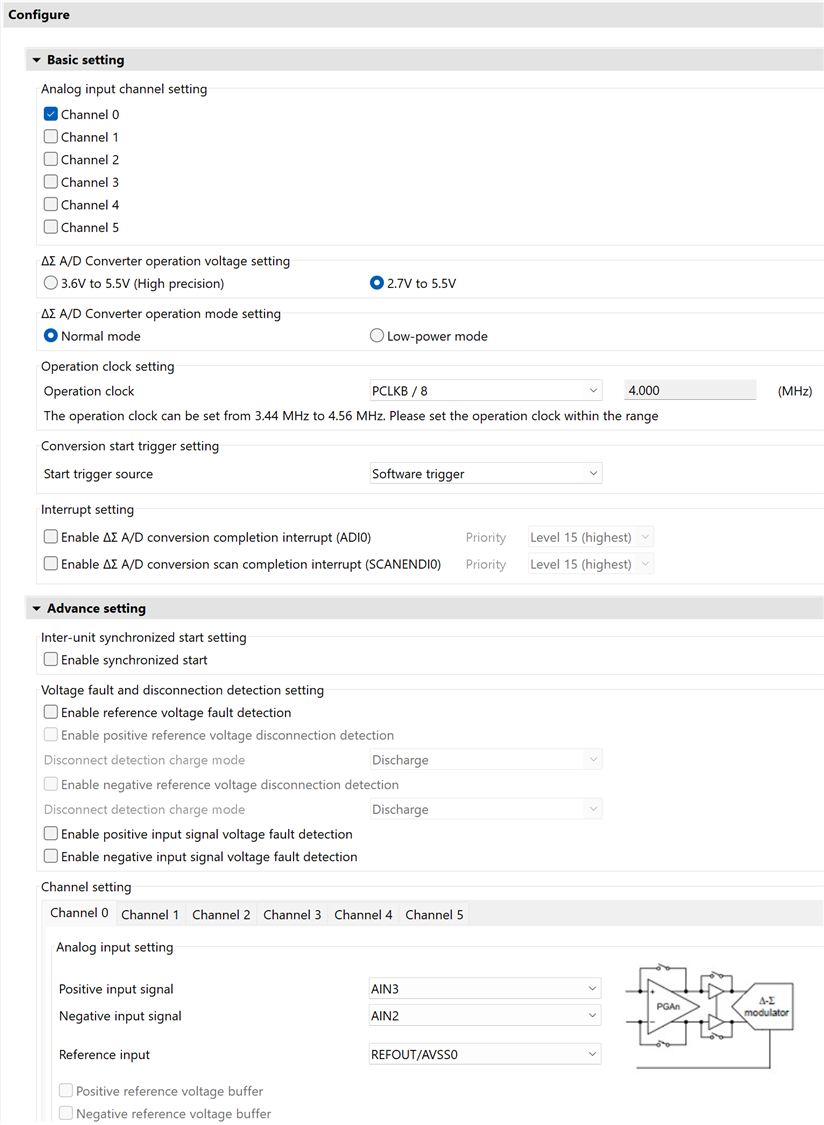
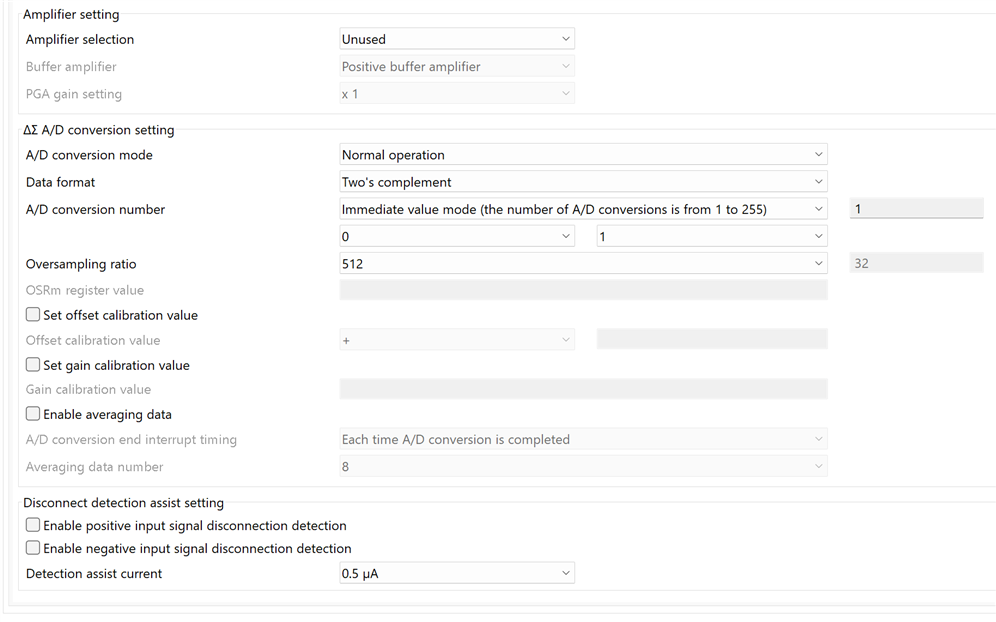
I'm closing the Road test: Renesas Solution Starter Kit for RX23E-A with a little project: a 0 - 3.3V 24 bit volt meter with 512x oversampling. It's the most simple example possible, with just 1 channel on one ADC configured, and no input processing (nor protection !!).
The ADC 0 is configured exactly as the out-of-box firmware startup conditions. I tested that in Renesas Solution Starter Kit for RX23E-A: ADC Measurement . I added the code to convert the raw DAC measurement into its voltage representation.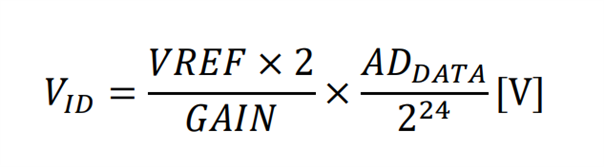
inline float DsadToVoltage (int32_t dsad) {
	// VID = (2.5 * 2) / 1 * dsad / 2^24 (V)
	return (5) * (((float)dsad)/16777216);

}
Project
I only used one module: DSAD0:
I used the same user extensions for the ADC trigger as all the Renesas examples:
Config_DSAD0.h
/* Start user code for function. Do not edit comment generated here */
/**********************************************************************************************************************
 * Function Name: R_DSAD0_IsConversionEnd
 * Description  : This function returns the Conversion status of DSAD0.
 * Arguments    : None
 * Return Value : bool
 *                    false:Conversion, true:Conversion end
 *********************************************************************************************************************/
bool R_DSAD0_IsConversionEnd (void);

/**********************************************************************************************************************
 * Function Name: R_DSAD0_ClearIrFlag
 * Description  : This function clears the IR flag
 * Arguments    : None
 * Return Value : None
 *********************************************************************************************************************/
void R_DSAD0_ClearIrFlag (void);

/* End user code. Do not edit comment generated here */
Config_DSAD0.cpp
/* Start user code for adding. Do not edit comment generated here */

/**********************************************************************************************************************
 * Function Name: R_DSAD0_IsConversionEnd
 * Description  : This function returns the Conversion status of DSAD0.
 * Arguments    : None
 * Return Value : bool
 *                    false:Conversion, true:Conversion end
 *********************************************************************************************************************/
bool R_DSAD0_IsConversionEnd (void)
{
    return (bool) ((1U == IR(DSAD0, ADI0)) ? true : false);
}
/**********************************************************************************************************************
 End of function R_DSAD0_IsConversionEnd
 *********************************************************************************************************************/

/**********************************************************************************************************************
 * Function Name: R_DSAD0_ClearIrFlag
 * Description  : This function clears the IR flag
 * Arguments    : None
 * Return Value : None
 *********************************************************************************************************************/
void R_DSAD0_ClearIrFlag (void)
{
    IR(DSAD0, ADI0)= 0U;
}
/**********************************************************************************************************************
 End of function R_DSAD0_ClearIrFlag
 *********************************************************************************************************************/
/* End user code. Do not edit comment generated here */
The main code is just sampling and converting the result into the voltage:.
/***********************************************************************
*
*  FILE        : rx23ea_dsad0_gcc.c
*  DATE        : 2023-07-23
*  DESCRIPTION : Main Program
*
*  NOTE:THIS IS A TYPICAL EXAMPLE.
*
***********************************************************************/
#include "r_smc_entry.h"

/** Monitor variable definition (reference only) */
static volatile float   s_volt = 0.0F;                  /** Measured voltage [V]                            */
static volatile int32_t s_dsad0_value;                  /** DSAD0 24bit A/D value storage variable          */

float DsadToVoltage (int32_t dsad);

void main(void);

void main(void)
{

    /** A/D conversion start */
    R_Config_DSAD0_Start();
    R_Config_DSAD0_Set_SoftwareTrigger();

    while (1)
    {
        /** A/D conversion complete for DSAD0? */
        if (true == R_DSAD0_IsConversionEnd())
        {
            int32_t dsad0_value;        /** Signed 24-bit DSAD0 value                                   */
            float   volt_value;         /** Measured voltage                                            */

            R_DSAD0_ClearIrFlag();      /** clear DSAD0 IR flag                                         */

            /** Get A/D value */
            {
                uint32_t dsad0_reg;     /** DSAD0.DR register storage variable                          */
                R_Config_DSAD0_Get_ValueResult( &dsad0_reg);

                /** Flag mask, Sign extension */
                dsad0_value = (int32_t) ((dsad0_reg & 0x00FFFFFFU) << 8) >> 8;
                volt_value = DsadToVoltage(dsad0_value);
            }


            /** debug monitor */
            s_dsad0_value = dsad0_value;
            s_volt      = volt_value;
        }

    }

}


inline float DsadToVoltage (int32_t dsad) {
	// VID = (2.5 * 2) / 1 * dsad / 2^24 (V)
	return (5) * (((float)dsad)/16777216);

}
Test
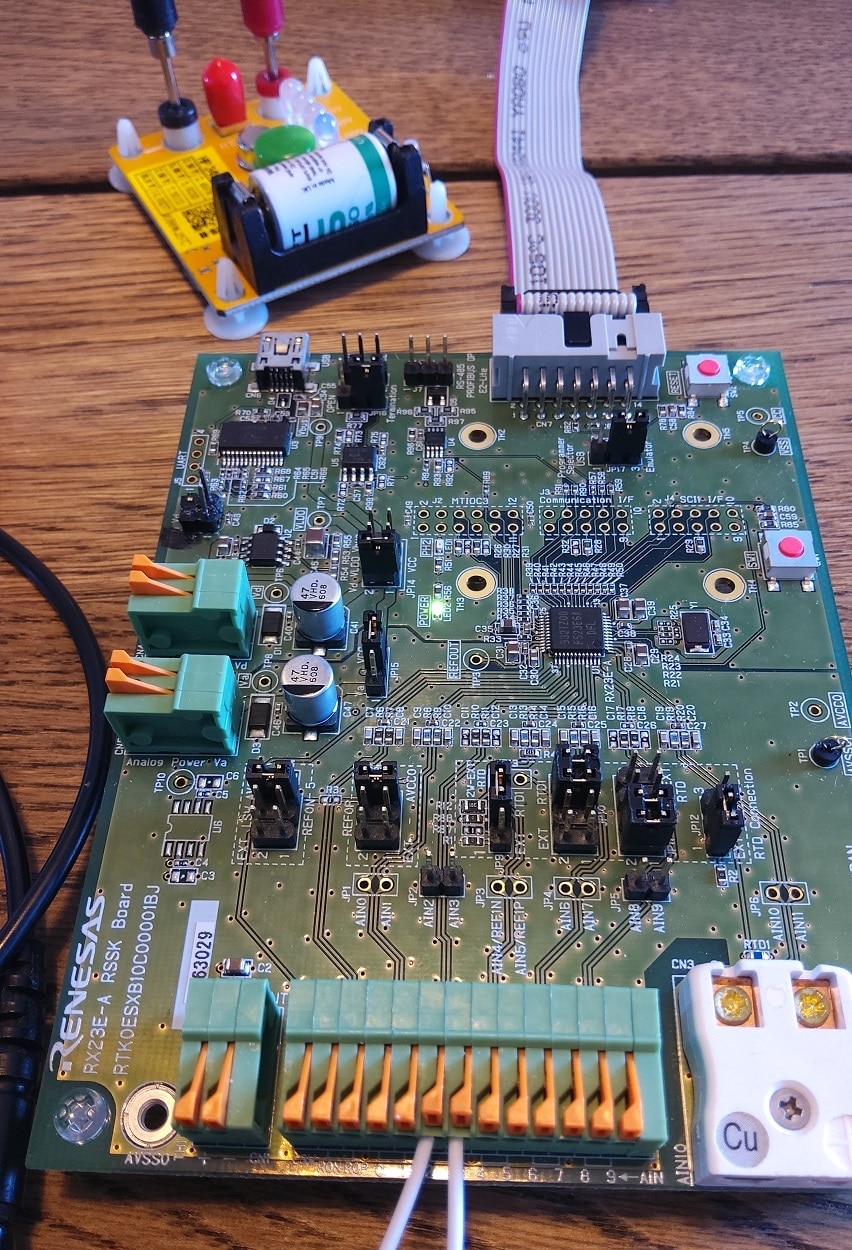
This design can only accept voltages between 0 V and VCC (AVCC0 actually, but read the datasheet and board schematic). 3.3 V with a debugger, 5 V when USB power (VBus) is selected. Just be careful and keep it under 3 V. Only connect the voltage when the controller is powered, and disconnect it before power is lost. If you are using a debugger, the power is lost when you stop debugging. There is no input protection and the inputs can only take –0.3 to AVCC0 + 0.3. If the device is not powered, this means a hard -0.3 to +0.3 V limit. Be careful please. When in doubt, look at the price of the evaluation kit and re-evaluate your position. AIN2 is the negative input, AIN3 positive. No analogue side jumpers need to be changed for this project.
I used an Analog Devices 2.5 Voltage reference as input. The result in the debugger:

I deliberately did not implement the PC Tool interface, although that is straightforward. I tried to create a high precision sample design with as little distraction as possible. If you want PC Tool integration, download the example projects of one of my previous blogs and port it. Renesas has used the exact same approach for all examples. It isn't hard.
Closing the Road Test
What I learned from doing this project is that it isn't difficult to use the analogue features of the controller. The configurator helps you to set up (or in this blog: bypass) the front end, ADC and filter. An electronic engineer will have to use the same care as when designing a low noise / precision discrete design. Except that the design of front-end (amplifier, buffer, mux, current/voltage exciters, references) and ADC components can be skipped.
That is also the main focus of the controller. The other peripherals are focusing on giving that data efficiently to something else.
It has nice sleep + DMA options to keep the energy footprint low. It fits well in the segment where you need high analogue precision and no crazy calculation power. Not a lot of controllers have a 24 bit ADC with a good programmable front-end (let alone 2). And as an engineer, you have to love the appnote examples. They are gems.
The e² studio projects with pre-compiled firmware
gcc toolchain version: rx23ea_dsad0_gcc.zip
cc-rx toolchain version: rx23ea_dsad0.zip


