


Earlier this year I released the design for my laser tripwire doorbell. A handy device that does a great job of letting me know when someone arrives at the house. It’s been wonderful because it trips even if the doorbell is not pressed (e.g. for the mail) and it swaps an annoying tone for a pleasantly silent blue LED. While accumulated snow will render it useless, it has been working really well!
As a businessman I finalize designs and release them so they can be trusted by others and I can be seen at the finish line. But in reality I share the notion of every engineer that a design is never truly done. My doorbell project is no different. Sure, I get an LED notification in my lab when someone approaches my door. But what if I’m not around? What if I’m at the gym and I don’t want to come home until I get the mail/package that I’m expecting? Clearly, this device is perfectly positioned to become another Internet of Things product. Maybe I’ll be able to sell it to some Wall Street speculator that can’t find enough ‘hype investments’ to buy! Ha!
Before I get started on this mod to my design, I’ll say that if I was to design everything from scratch, I’d buy an Electric Imp , set it up with the same laser circuitry, and push data to the cloud all with one device. But since I’ve already got my current Xbee/Arduino system tested and running on my desk, I’m going to use my Raspberry Pi with Xively to serve my data. My favorite feature about companies like Xively and Electric Imp is that they take care of the server for me which allows me to maintain the security of my network by not requiring any special ports opened or forwarded. That was a real problem with my Rpi sever setup that I used for my dog kennel status sensor.
This project will take us through 4 steps:
- Setup the Pi to communicate with Xively using their Tutorial.
- Modify the standard python script to read the IO signal from the Arduino
- Modify the Arduino code to pulse an IO pin on a laser trip event
- Determine a way to get the Xively information easily on my smartphone
Step 1: Setup the Pi to communicate with Xively
There is nothing I have to add to Xively’s tutorial, so I suggest following what they’ve got with a fresh Raspian SD card in the Pi which I link to at the end. However if you are planning on dedicating the Pi to this project (as most people do), I would (and did) skip the following two steps that create a dedicated environment. It will still work in the environment, however it has to be activated before the application can run.
$ virtualenv .envs/venv %I wouldn't bother creating an environment
$ source .envs/venv/bin/activate %If the environment isn't created, it doesn't have to be activated.
Step 2: Modify the standard Xively python script to read the IO signal from the Arduino
Thankfully, reading an IO pin on a Rpi is pretty straightforward. However the RPIO library needs to be installed to the environment that will run the program (The Xively tutorial has you install it to a specific environment, so either the Xively program needs to be setup in the home environment with RPIO, or RPIO needs to be installed into the specific environment with Xively).
$ sudo easy_install -U RPIO
I have uploaded my python script in this article for anyone to use. Basically,it is a modification of the Xively tutorial script where I monitor GPIO 17, and when that pin goes HI I update the datastream with 'TRUE' and then 5 seconds later I read the GPIO pin again and update the stream with the value (which should be 0 if the person has left). It then sleeps for another 10 seconds and goes back to watching.
Note that because the Pi runs on 3.3V and the Arduino outputs 5V, I had to add a resistor divider to be sure the Pi's GPIO won't fry. Check out the schematic attached to this article to see exactly how I connected it.
In order to run my script, I enter the following over SSH to my Pi:
$ sudo FEED_ID=<my Feed ID> API_KEY=<my API key> DEBUG=true python dyoung.py
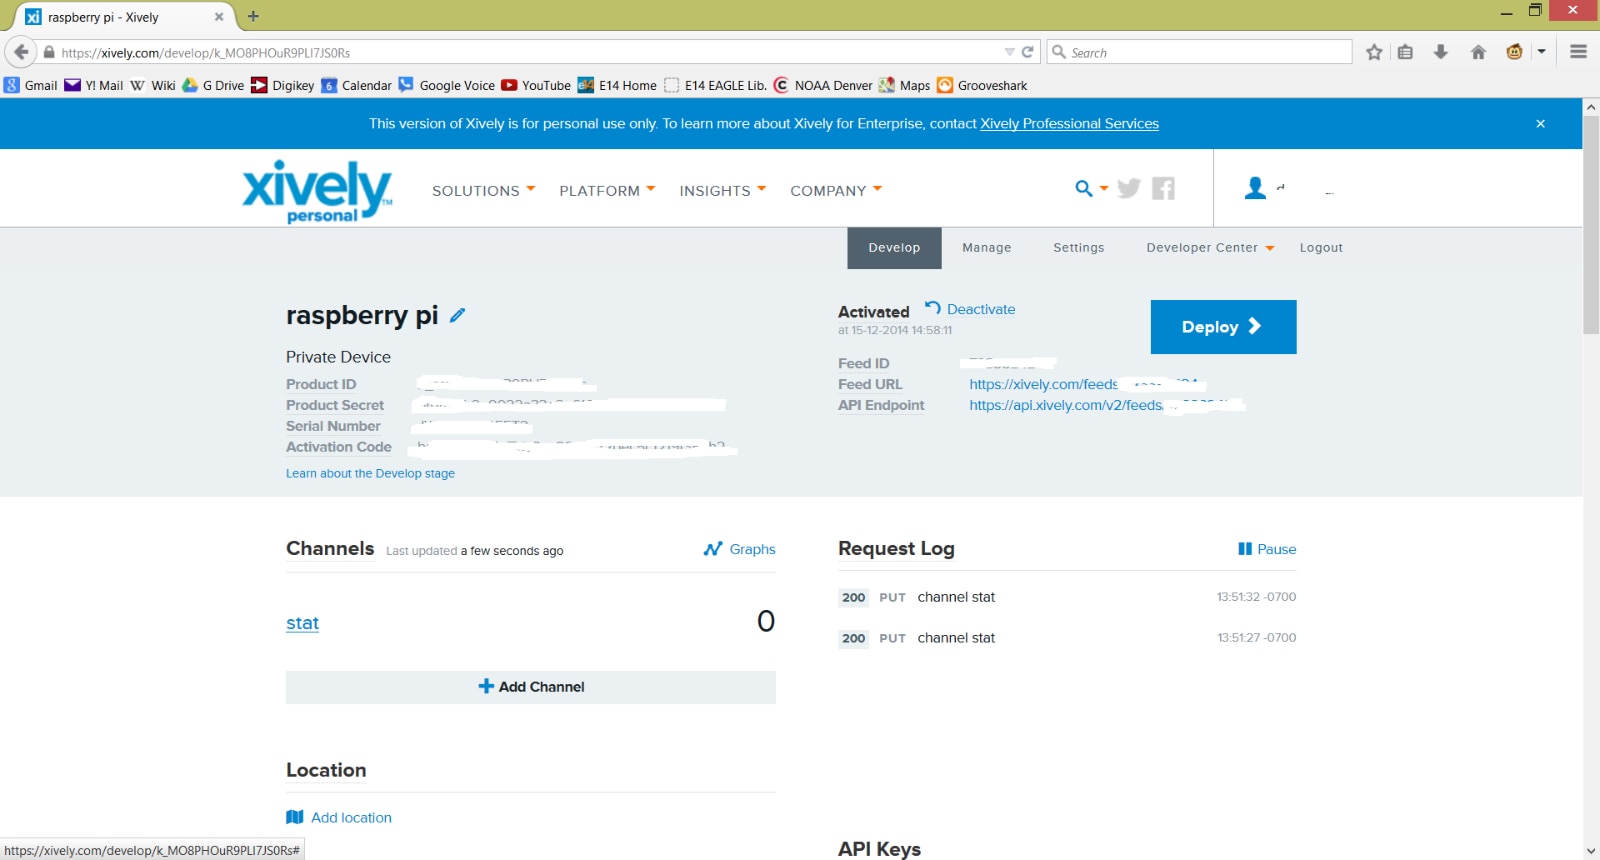
Here is a screen shot of my Xively dashboard for this project, where the 'stat' variable is TRUE for 5 seconds when the laser tripwire is triggered:
I also suggest using FileZilla to send files to the pi over the network in case you’d like to update the python script multiple times for debugging. There’s a great resource linked below that shows how to get that set up.
Step 3: Modify the previous Arduino code to communicate with the Rpi
This is a remarkably easy step since the program is already written to respond to the laser trip event and let the Rpi take it from there. All we have to do is:
- Create an additional I/O pin variable (in my case, pin 8) by declaring the ‘rpiPin’ variable
- Create an additional variable ‘RpiTime’ to set the number of milliseconds that pin 8 should remain hi on a laser trip event.
- Configure pin 8 to be a digital output pin
- Add a line of code to make pin 8 hi in the if statement that handles the laser trip event.
- Add a line of code to delay for ‘RpiTime’ ms after pin 8 goes hi
- Add a line of code to turn off pin 8 after the delay is complete.
Step 4: Determine a way to get the Xively information on my smartphone
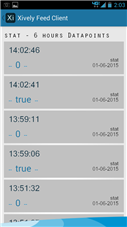
I thought that I was going to have to login to the Xively website using my phone’s browser, but I found a Xively Feed Client app for Android which only cost $1.60. Once I set all of my project’s Xively parameters, I was up and running! It would be nice to be able to set Android notifications if the variable changed states, but for $1.60 I can’t complain. Here is a screenshot of the app which shows 'true' each time the laser is tripped, as well as the reset to '0' 5 seconds later.
Conclusion:
That’s everything it takes to get your very own cloud-enabled doorbell! I’ve got a little bit of usage under the keel, and it has been a real improvement! It’s a pretty snazzy setup. Let us know in the comments if you build one yourself.
Full Project Documentation Attached to This Article:
ZIP file of all documentation: 'Full Cloud Laser Doorbell Documentation.zip'
Schematic (EAGLE and PDF format): 'Cloud Laser Doorbell Schematic.zip'
Cloud Laser Doorbell Arduino Source Code: 'DY_Doorbell_Code_xi.ino'
Python script for the Raspberry Pi: 'dyoung.py'
Helpful Resources and Links:
Nice description of RPIO library
Top Comments