element14 Community
element14 Community
    Register Log In
  • Site
  • Search
  • Log In Register
  • Community Hub
    Community Hub
    • What's New on element14
    • Feedback and Support
    • Benefits of Membership
    • Personal Blogs
    • Members Area
    • Achievement Levels
  • Learn
    Learn
    • Ask an Expert
    • eBooks
    • element14 presents
    • Learning Center
    • Tech Spotlight
    • STEM Academy
    • Webinars, Training and Events
    • Learning Groups
  • Technologies
    Technologies
    • 3D Printing
    • FPGA
    • Industrial Automation
    • Internet of Things
    • Power & Energy
    • Sensors
    • Technology Groups
  • Challenges & Projects
    Challenges & Projects
    • Design Challenges
    • element14 presents Projects
    • Project14
    • Arduino Projects
    • Raspberry Pi Projects
    • Project Groups
  • Products
    Products
    • Arduino
    • Avnet Boards Community
    • Dev Tools
    • Manufacturers
    • Multicomp Pro
    • Product Groups
    • Raspberry Pi
    • RoadTests & Reviews
  • Store
    Store
    • Visit Your Store
    • Choose another store...
      • Europe
      •  Austria (German)
      •  Belgium (Dutch, French)
      •  Bulgaria (Bulgarian)
      •  Czech Republic (Czech)
      •  Denmark (Danish)
      •  Estonia (Estonian)
      •  Finland (Finnish)
      •  France (French)
      •  Germany (German)
      •  Hungary (Hungarian)
      •  Ireland
      •  Israel
      •  Italy (Italian)
      •  Latvia (Latvian)
      •  
      •  Lithuania (Lithuanian)
      •  Netherlands (Dutch)
      •  Norway (Norwegian)
      •  Poland (Polish)
      •  Portugal (Portuguese)
      •  Romania (Romanian)
      •  Russia (Russian)
      •  Slovakia (Slovak)
      •  Slovenia (Slovenian)
      •  Spain (Spanish)
      •  Sweden (Swedish)
      •  Switzerland(German, French)
      •  Turkey (Turkish)
      •  United Kingdom
      • Asia Pacific
      •  Australia
      •  China
      •  Hong Kong
      •  India
      •  Korea (Korean)
      •  Malaysia
      •  New Zealand
      •  Philippines
      •  Singapore
      •  Taiwan
      •  Thailand (Thai)
      • Americas
      •  Brazil (Portuguese)
      •  Canada
      •  Mexico (Spanish)
      •  United States
      Can't find the country/region you're looking for? Visit our export site or find a local distributor.
  • Translate
  • Profile
  • Settings
Internet of Things
  • Technologies
  • More
Internet of Things
Blog Reflow Soldering - Baby Steps # 1
  • Blog
  • Forum
  • Documents
  • Quiz
  • Events
  • Polls
  • Members
  • Mentions
  • Sub-Groups
  • Tags
  • More
  • Cancel
  • New
Join Internet of Things to participate - click to join for free!
  • Share
  • More
  • Cancel
Group Actions
  • Group RSS
  • More
  • Cancel
Engagement
  • Author Author: shabaz
  • Date Created: 31 Dec 2014 4:18 AM Date Created
  • Views 1379 views
  • Likes 5 likes
  • Comments 2 comments
  • reflow
  • surface_mount
  • smd
  • solder
  • soldering
  • solder_paste
Related
Recommended

Reflow Soldering - Baby Steps # 1

shabaz
shabaz
31 Dec 2014

For a recent project it was decided to try to use hot air to solder just a part to a PCB. This is a quick post just to document how it was attempted - it is not "best practice".


Although reflow soldering was not really mandatory for the particular PCB, it was decided to try to attempt it for the large TO-263 device that needed heat sinking. This is non-trivial due to the amount of metal that needs heating, and the holes which will enable capillary action to occur for flux and solder. This was my first attempt at such a procedure, which was to heat from the underside using a preheater, and heat from the top using a hot air tool.


The strategy was not completely successful (I suspect the part works, but the whole procedure could have been executed much better – it is not hard to melt solder, but far harder to do it at the correct profile) and the three main lessons learnt were (a) to practice more, (b) perhaps use heat sink compound with the thermocouple, and (c) to set the preheater to a much higher setting to get it to heat the board quicker.

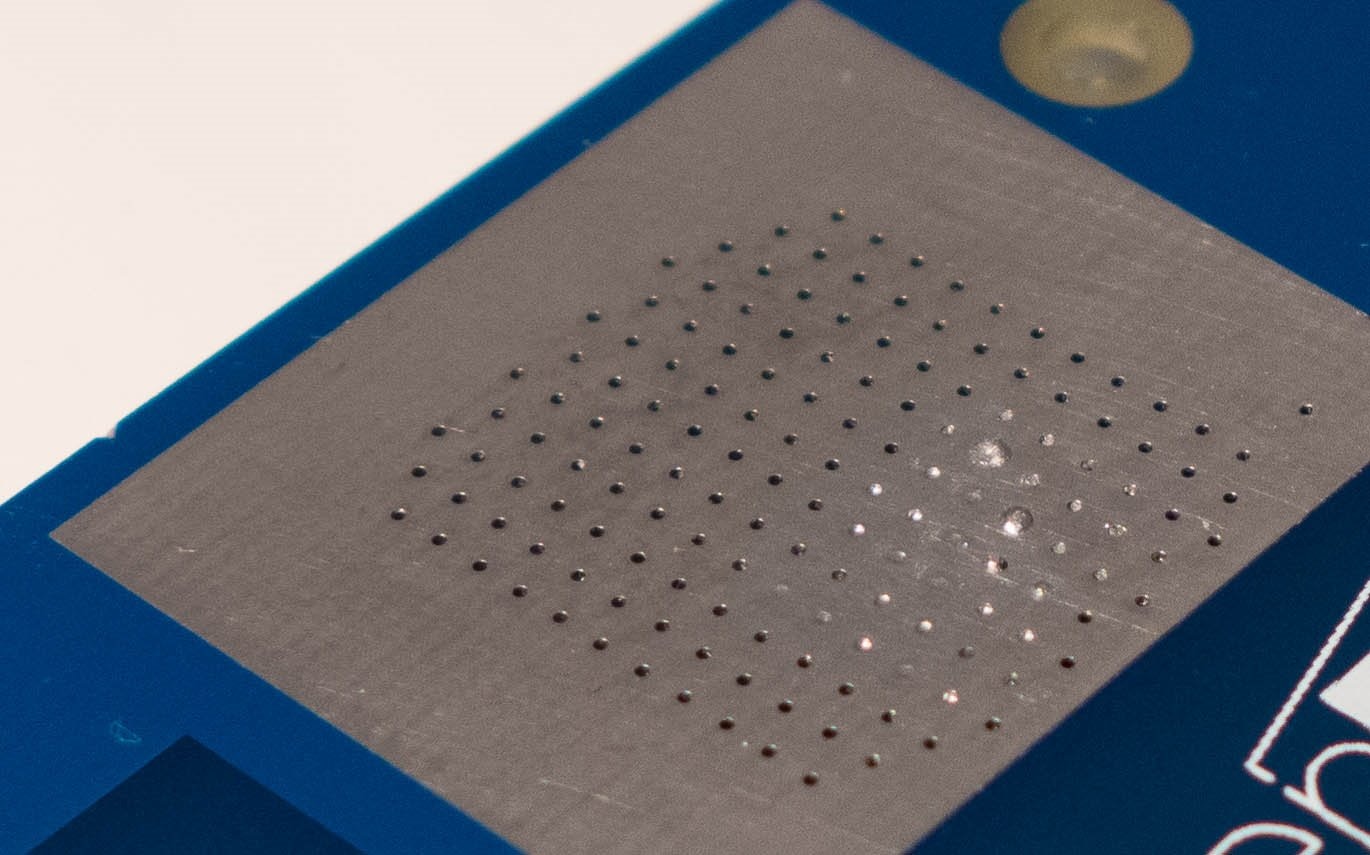
The setup is shown here (you can see the amount of solder paste that was used; due to lack of stencil, it was directly placed on the large pad of the TO-263 device):

image


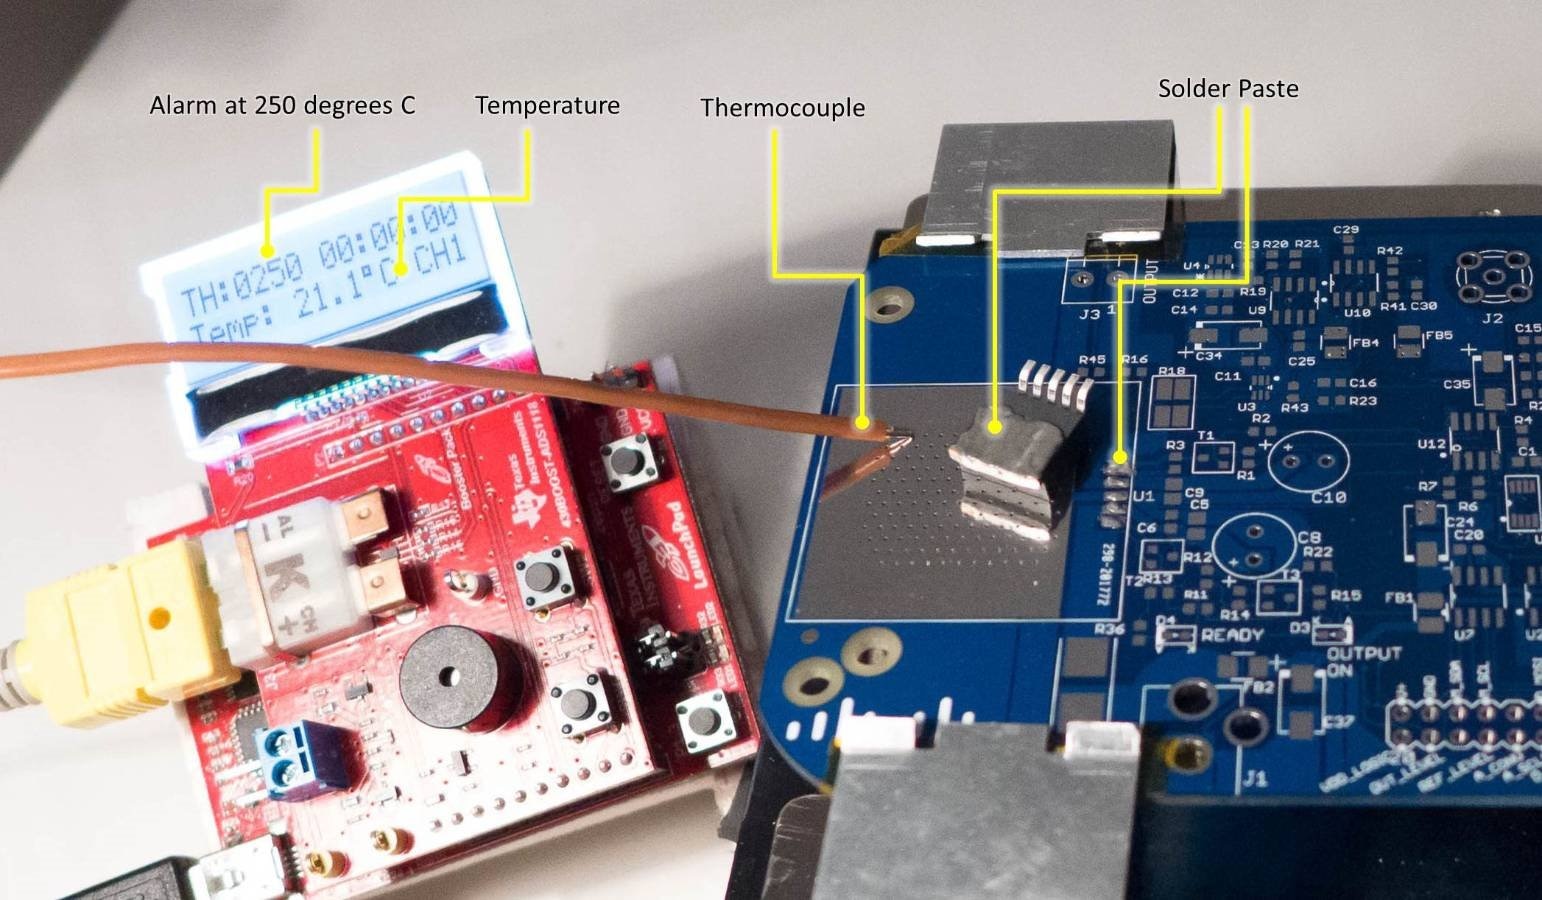
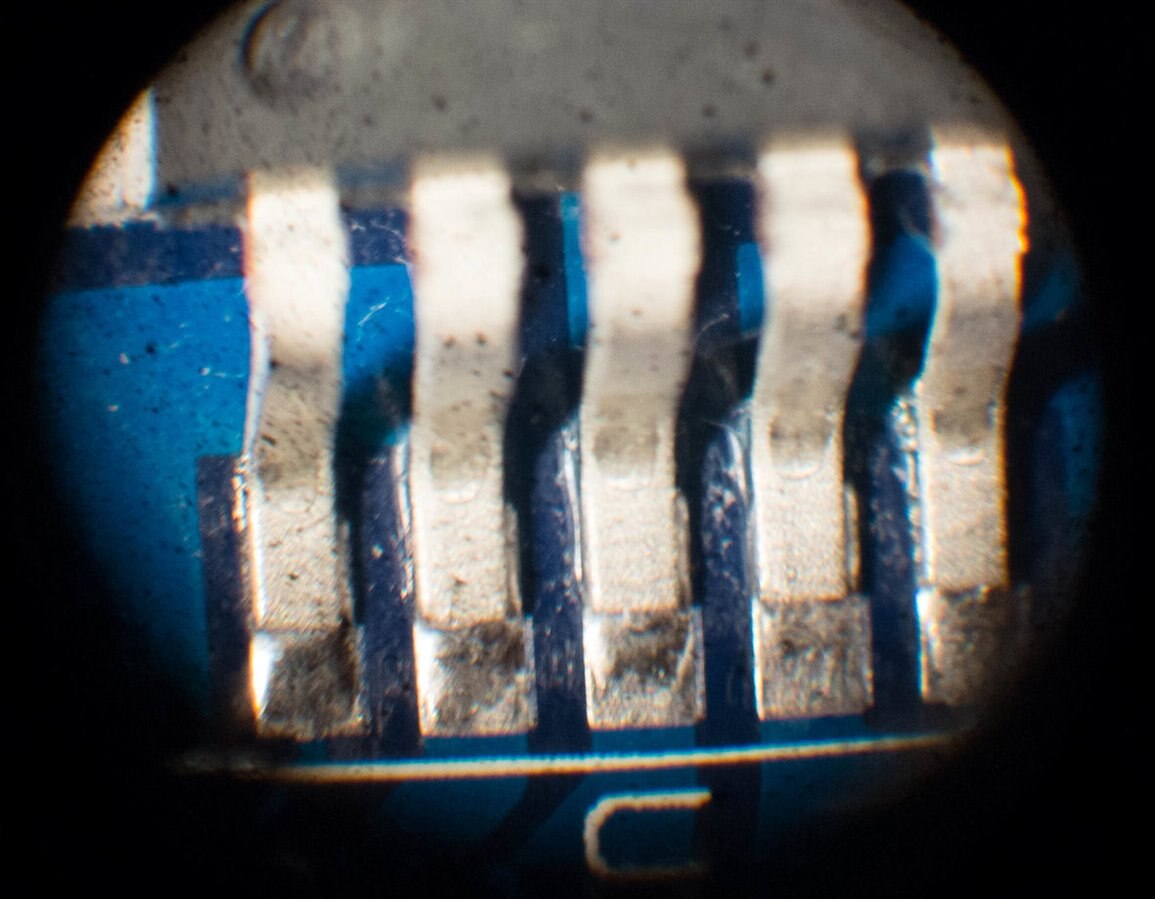
The thermocouple was pressed against the board (using a ‘helping hands’ tool) but sadly didn’t play a useful role during this attempt due to the single point of contact. I had initially pressed it into a hole but it had moved. Kapton tape and heat sink compound will be attempted next time. The final result is shown here:

image

A bit more detail:

image


Underside (cleaned of flux):

image


Here is a short (70 second) video showing the steps taken:

You don't have permission to edit metadata of this video.
Edit media
x
image
Upload Preview
image


So, although the part is soldered down and may work, the next attempt will try to correct the procedure!

  • Sign in to reply

Top Comments

  • jw0752
    jw0752 over 10 years ago +1
    Sorry I am too fast. I just saw the video before. This is a much clearer explanation of what you did. Nice close ups of the solder work too. In the video it looked like the tab on the IC stuck out further…
  • shabaz
    shabaz over 10 years ago in reply to jw0752

    I'm convinced they are TO-220 types of devices and the machines just chop off the end ; )

    I've not used a solder gun before, but there may be enough room, the tab sticks out a couple of mm.

    Or another approach is to just dispense with the pre-heater, tape the part down, turn the board over and heat with the iron from the solder side of the board.

    I tried a variant of that a while back where I didn't turn the board over, but still soldered from the other side, where I needed to solder the pad of a QFP chip

    to a copper heat sink through the board, although the procedure was more complicated due to the need to level the copper part just right. This was a part that

    would have benefited from a reflow oven though:

    image

    • Cancel
    • Vote Up 0 Vote Down
    • Sign in to reply
    • More
    • Cancel
  • jw0752
    jw0752 over 10 years ago

    Sorry I am too fast. I just saw the video before. This is a much clearer explanation of what you did. Nice close ups of the solder work too. In the video it looked like the tab on the IC stuck out further from the epoxy. My solder gun trick would not have worked in this case.

    John

    • Cancel
    • Vote Up +1 Vote Down
    • Sign in to reply
    • More
    • Cancel
element14 Community

element14 is the first online community specifically for engineers. Connect with your peers and get expert answers to your questions.

  • Members
  • Learn
  • Technologies
  • Challenges & Projects
  • Products
  • Store
  • About Us
  • Feedback & Support
  • FAQs
  • Terms of Use
  • Privacy Policy
  • Legal and Copyright Notices
  • Sitemap
  • Cookies

An Avnet Company © 2025 Premier Farnell Limited. All Rights Reserved.

Premier Farnell Ltd, registered in England and Wales (no 00876412), registered office: Farnell House, Forge Lane, Leeds LS12 2NE.

ICP 备案号 10220084.

Follow element14

  • X
  • Facebook
  • linkedin
  • YouTube