Introduction
The LimeSDR board is a CrowdSupply project that I was curious to try out. It was priced extremely well for a very high bandwidth (60MHz) software defined radio board with a usable frequency range from around 30MHz (or lower with some mods) to more than 3GHz (the precise range depends on the filter components on the board and these can be modified). It's a beast : ) In comparison, similar functionality off-the-shelf SDRs can cost $1000+. And this one is open source.
The LimeSDR comes as a single board and to be useful it needs to be attached to RF connectors and to the PC using USB 3.0. It runs quite hot! So some cooling strategy is also needed. This project aimed to get the LimeSDR into a usable enclosure with cooling.
Heat Sinks
I decided to go with ceramic heat sinks, and to use them on the parts which get hottest; these are the radio IC, the FPGA and the USB interface. Some of the other parts get hot too, and I may add more heat sinks if required. The ceramic heat sinks come supplied with peelable tape, so it is a simple matter to attach them to the ICs.
The three that I used were part codes MPC101020TMPC101020T, MPC151525TMPC151525T and MPC222225TMPC222225T and they fitted great.
Fan
I used what I had, and in this case it was a Multicomp MC32897 blowerMulticomp MC32897 blower that is designed for 6-13.8V, but happily it worked at 5V too. The current consumption is about 100mA at 5V. Note that ordinarily the visible fin side ought to face up, but due to an early design decision (basically I didn't trust my hole-drilling capability so I wanted the air inlet holes on the underside, but in hindsight I should have just made them on the top side) I could only fit it upside down. It seems to work fine for now, and it is surprisingly quiet at 5V, but gives a noticeable air flow. The blower is 15mm thick and takes up 51.6x51.6mm of area. To reduce noise, I used a FT-50-43 ferrite toroid, but any suppression toroid could be usable. That and twisting the wires reduced any observable noise.

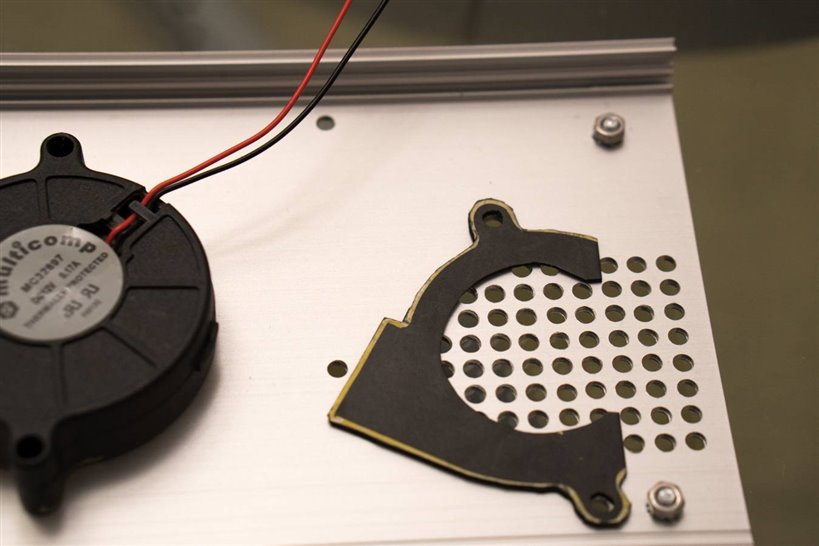
To secure the fan to the enclosure, I made a thin gasket (about 1mm thick) I had a sheet of rubber but any material even cardboard would be fine, and used a couple of Akasa AK-MX003 rubber fan mounts from Amazon - they were pulled through the hole with a lot of force, and then trimmed afterwards.
LEDs
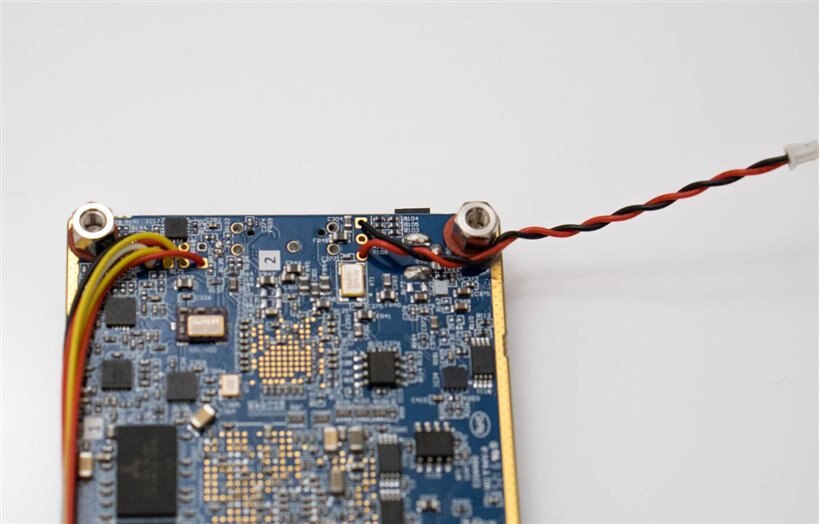
The LimeSDR has four surface-mount bi-color LEDs (one LED is the power one and will only light in one color). They are at the end of the board (near the USB connector) so I wanted to move them to the front panel. Since it is hard remembering what each LED does when there are many, I decided to only have three on the front panel, and leave the USB-related LED alone. To do this, I needed to remove the surface-mount LEDs and wire in 3mm diameter wire-ended bi-color LEDswire-ended bi-color LEDs instead (there are through-hole pads on the board designed for this, which is great!). Removing the three surface-mount LEDs was surprisingly hard! In the end I just heated the plastic until it disintegrated, and then the soldering iron tip managed to get enough heat onto the internal LED structure to melt off the soldered connections. Desoldering braid and isopropanol wipes helped clean up. I used superglue to permanently hold all the wires together at the edge of the board, so that air-flow from the fan could still reach parts on the underside, like the DRAM chips. I used pre-made wires with connectors, they are available from ebay, I keep a few different sizes handy, it saves a lot of effort for prototypes.
Front Panel
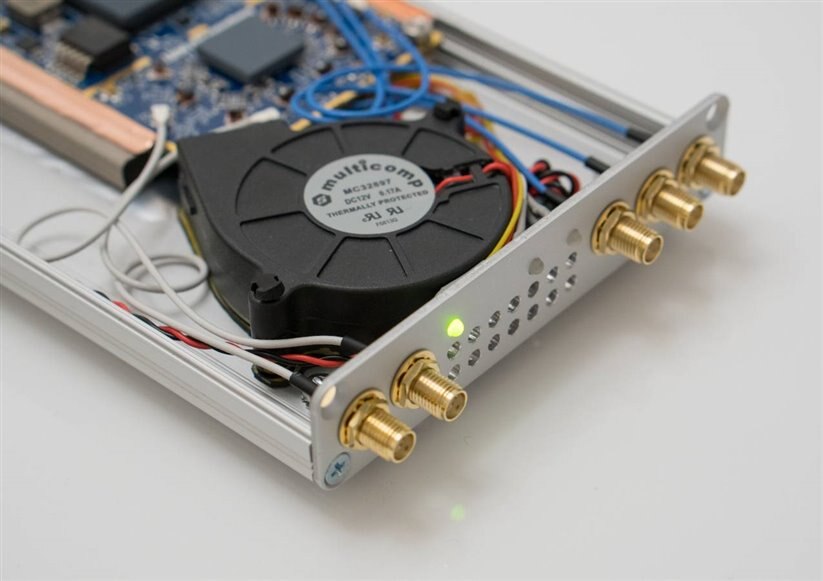
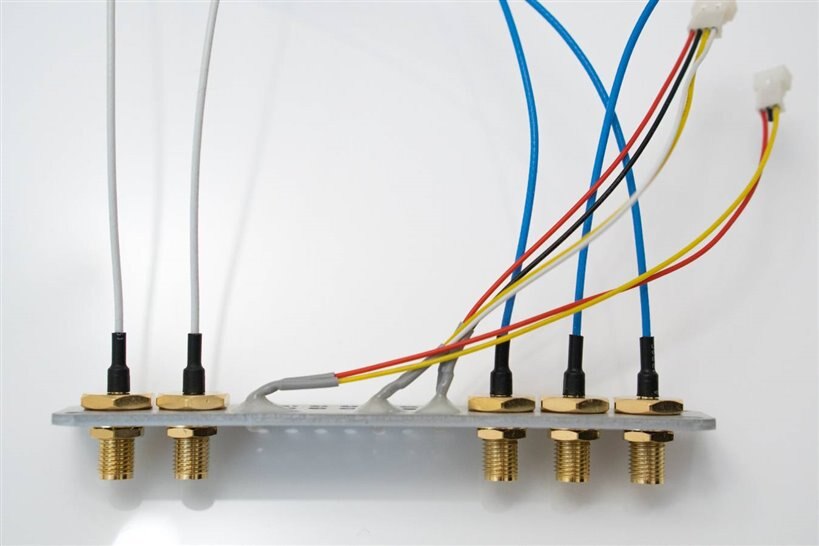
The front panel has holes for the three LEDs, and five RF connectors. I also created some generic holes for ventilation, but they were unnecessary since I later drilled holes on the underside for the blower. I spaced the RF connectors 12mm center-to-center so that some antennas might be able to directly fit.
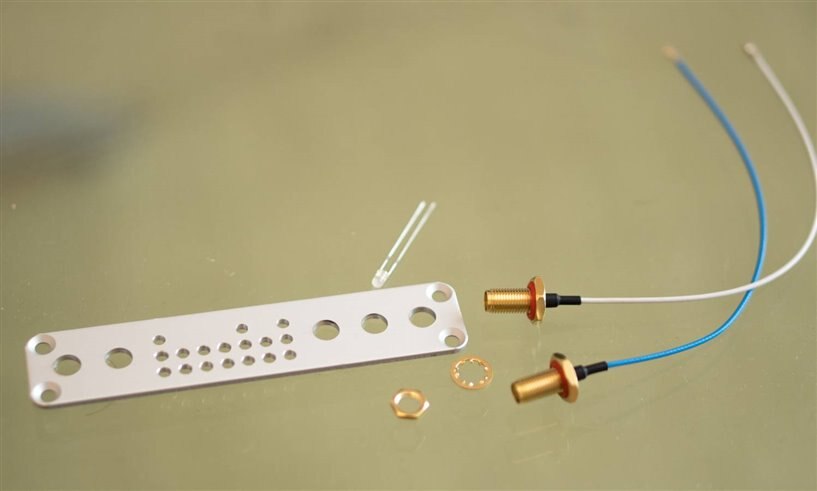
RF Connections
The LimeSDR uses tiny U.FL connections. I used blueblue and white pre-made 150mm cableswhite pre-made 150mm cables to bring out the connections to the front panel. I used a bit of thread-lock glue to stop them loosening and spinning in future, because I can only drill round holes (6.5mm dia drill bit). The LimeSDR has a lot of connections (it has two transmit and two receive channels, and different filters), and it gets difficult to bring out all dozen or so connections in a small enclosure. I only connected the ones I was interested in (two transmit channels, and one receive channel with high, low and wideband characteristics). If I need different ones if the future I'll either open the case and re-patch, or make some additional holes for connectors on the other end of the case.
Enclosure
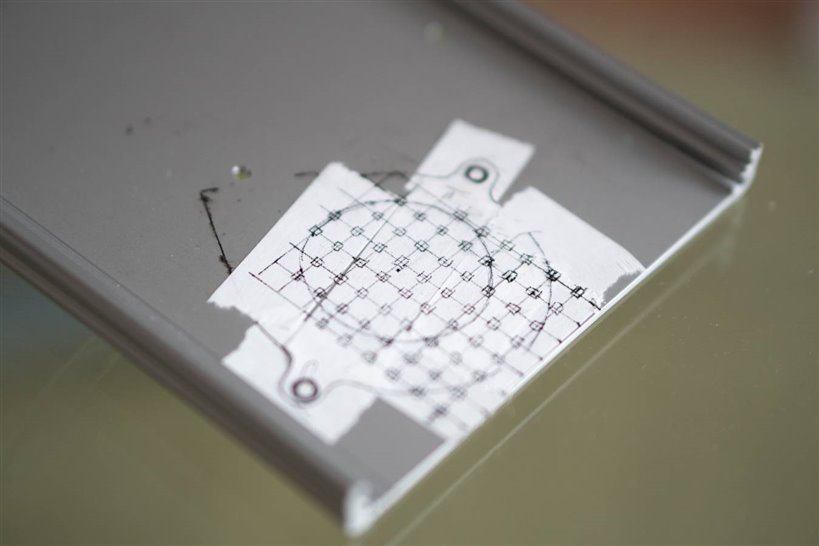
I used a 160x105x22mm enclosure160x105x22mm enclosure. It is all aluminium and therefore easy to drill. The underside needs 10 holes for screws (four for the rubber feetrubber feet, four to hold the LimeSDR board, and two for the fan. All were 3.2mm diameter. Also, the underside needs holes for the fan's air inlet. I drilled more 3.2mm holes (62!) on a 5x5mm grid. It took a long time : ) A really useful tool is a spot drill bit, and also a countersink bitcountersink bit for de-burring by just spinning by hand. The process is long!.
RF Shielding
I only partially shielded the LimeSDR. I may revisit it! Although the enclosure is metal, it is not surface-conductive due to anodizing, so any part that is to be used for connections has to have the surface taken off. This entails dremel or access to a machine shop. Afterwards it was tested with a multimeter set to ohms.
I had some conductive adhesive copper tape, so I used that with some Wurth 3020707 shielding gasketWurth 3020707 shielding gasket which is basically 7x7mm section foam with a metalized fiber on the outside and a thin non-conductive strip on one side. I used the copper tape to attach it to the LimeSDR board and to the enclosure. Two lengths of the shielding gasket (one stacked to the other length-ways) were attached to the inside of the top lid of the enclosure, to form a springy foam seal for shielding, to electrically connect the bottom half of the enclosure to the top half of the enclosure.

Summary
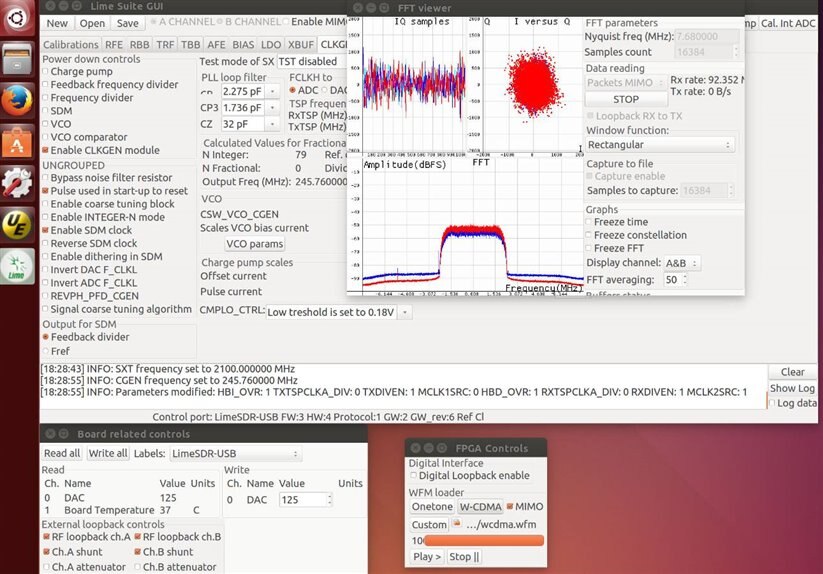
It was a lot of effort (an entire weekend) but at least I can easily use it now (screenshot below of a test file that was run) without damaging the bare board. From what little experimentation I have done with it (I attended half of an excellent course in London to learn a bit about the board from Lime Microsystems and make some friends) I think it will serve me well as a tool for examining and generating signals, and hopefully some fun receiving radio broadcasts too when I learn how to do that!