


Table of Contents
Introduction
One of the great advantages of KiCad is that it supports a decent language for scripts – Python!
Python can be used within the PCB editor, to extract information from or to modify the printed circuit board (PCB).
I recently (today) had a problem that needed fixing; I had a legacy PCB layout (from a different CAD package, EAGLE) that I needed to modify. The trouble was, all the footprints would move whenever I tried to import the latest schematic changes. It might be a bug, or it might be something I was doing wrong. In any case, I wanted to quickly solve this problem, without waiting for a bug report to be examined.
One solution would be to manually write down a note of the position of each component, and then after a schematic update, move the components back to where they ought to go.
However, I decided to see if KiCad’s Python capability could help me instead.
The information here may be useful if you need to retrieve data from a PCB or to modify certain attributes, such as the location of component footprints. An example of this could be if you wish to move LEDs into a special geometric arrangement programmatically, for instance.
The holes in the PCB render below could be used as speaker holes; the holes were implemented using the method described in this blog post.

Python Console
With the PCB file open, Tools->Scripting Console brings up the Python command prompt.

First off, I set up the path so that KiCad could see any code that I wrote, by typing the following:
import syssys.path.insert(1, "c:/development/kicad_python")
The path C:/development/kicad_python is where I intended to place my code (note: use forward-slashes!).
Next, a KiCad PCB module needs to be loaded:
import pcbnew
Now the pcbnew documentation can be used to explore!
Getting Footprint Information
Exploring the pcbnew documentation, it was possible to come up with the following code:
brd = pcbnew.GetBoard()fp_list = brd.GetFootprints()
fp_list is simply a list of all the footprints on the board!
You can view the details of each one, by typing instructions such as:
fp_list[0].GetReference()
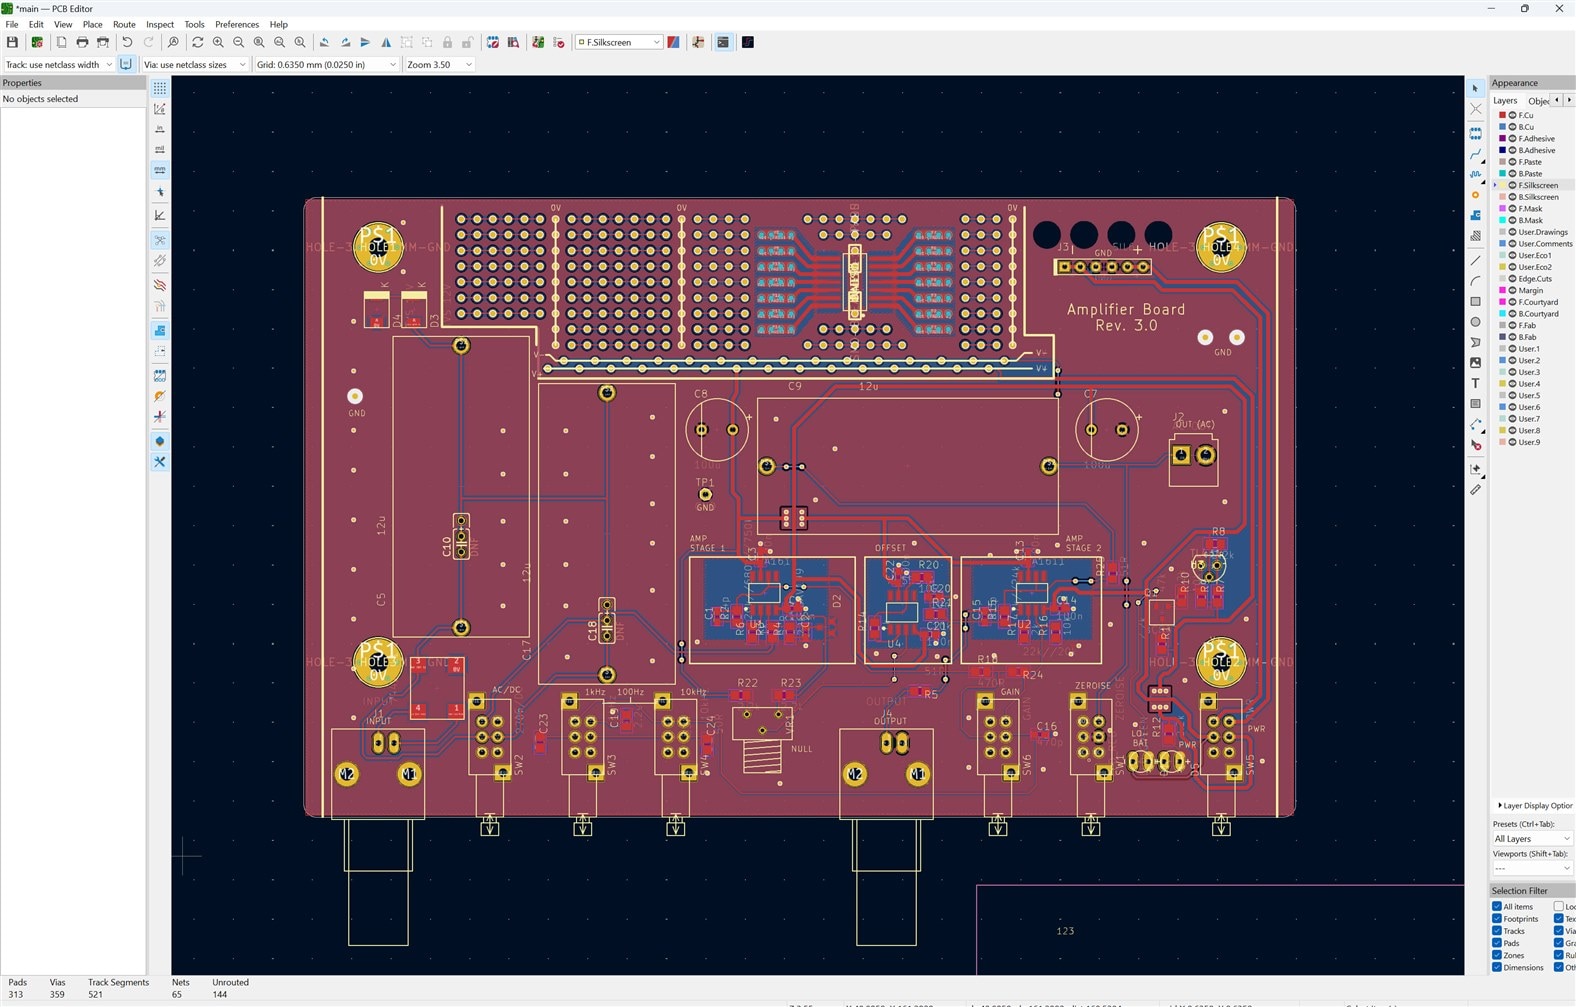
In my case, for the PCB in the screenshot below, the output was ‘R7’, i.e. the first item in the list was a footprint for a resistor with reference R7. In a similar vein, the coordinates and the rotational angle of any footprint can be obtained as well.

Now it was easy to get the footprint information for every component on the PCB:
for fp in fp_list:
    vect = fp.GetPosition()
    orient = fp.GetOrientation()
    print(fp.GetReference(), fp.GetValue(), vect.x/1e6, vect.y/1e6, orient.AsDegrees())
The output looked like this, where the third, fourth, and fifth items in each row are the X- and Y-co-ordinates (in millimeters), and the angle, respectively:
R7 10k 215.8211 119.4436 -90.0C8 100u 135.1761 92.4561 0.0C1 2.4p 135.1761 122.6186 90.0C5 12u 93.9011 101.6636 90.0D5 LED_GREEN 208.5011 146.0036 90.0C20 10n 170.1011 119.4436 0.0D1 LED_RED 203.5011 146.0036 90.0R5 51R 167.8786 134.6836 180.0
Python writing Python
The information provided by the the program output so far was extremely useful. I now knew the precise locations of each component.
However, I wanted to automate the task of re-positioning every component to the same location, if the components moved. To do that, I’d need to write a Python function that could create Python code to do that for me:
The final code is shown here:
# Lists all footprint references, and the component value and co-ordinates
# if format is "python" then a Python script is generated to move footprints to the current co-ordinates
def list_coords(format = ""):
    brd = pcbnew.GetBoard()
    fp_list = brd.GetFootprints()
    if format == "python":
        print("import pcbnew")
        print("brd = pcbnew.GetBoard()")
        print("def move_items():")
    for fp in fp_list:
        vect = fp.GetPosition()
        orient = fp.GetOrientation()
        if format == "":
            print(fp.GetReference(), fp.GetValue(), vect.x/1e6, vect.y/1e6, orient.AsDegrees())
        elif format == "python":
            print(f'    fx = brd.FindFootprintByReference("{fp.GetReference()}")')
            print("    if fx is not None:")
            print(f'        fx.SetPosition(pcbnew.VECTOR2I(pcbnew.wxPoint({vect.x}, {vect.y})))')
            print(f'        fx.SetOrientation(pcbnew.EDA_ANGLE({orient.AsDegrees()}, pcbnew.DEGREES_T))')
    if format == "python":
        print('    pcbnew.Refresh()')
I saved everything to a file called ktools.py (attached) and placed it in the C:/development/kicad_python folder.
To run it, I typed:
import ktools as kk.list_coords(format='python')
The output was a complete Python program:
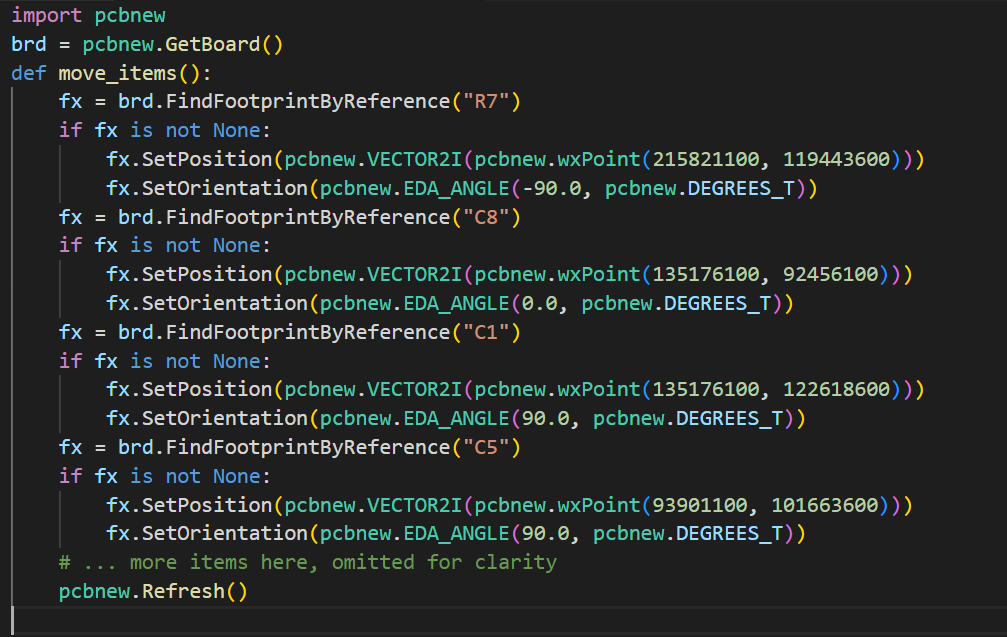
I saved that off to another file (called myfix.py). Now, whenever I want the components to be reset to the positions that they were at, I can run the myfix code!
Trying it Out
I updated the PCB from the schematic, and saw that all the components had moved:

No problem; I can now solve it using the myfix.py file!
I typed the following in the Python console:
import myfixmyfix.move_items()
And voila, problem solved!
After running the Design Rule Check (DRC), I have a few minor issues to fix, but all-in-all, the EAGLE import went well, and I was able to solve my footprint-moving problem after the PCB was updated with schematic changes.
Holes in a Geometric Pattern
Just for fun, I put 36 holes in a schematic (obviously, using copy-paste to speed things up!):

Next, I opened up the PCB view, updated the PCB (based on that schematic), and then opened up the Python console as before.
I wrote up the following code (I took the PointsInCircum function from the Internet just to save a little time), and saved it to a file called pattern.py (the file is attached to the blog post):

Next, I typed the following in the Python console:
import pattern
pattern.move_all()
This was the result:

This is, of course, a trivial example, but you could (for instance) retrieve points from a list containing a more complex pattern.
Summary
Things might not always go to plan when trying unusual things, and it’s good to know that Python is available for accessing the PCB data and performing modifications if desired.
It is fairly straightforward to invoke a Python console, and then retrieve footprint positions, component references, and their orientation, and make modifications to it.
With the techniques discussed, another example use-case could be to (say) programmatically place components in a geometric layout, for instance, LEDs in a spiral, and so on. Alternatively, button and connector and LED component coordinates could be retrieved in order for enclosure hole-drilling operations to be spot-on.
Thanks for reading!
Zip file containing the Python code:
-

genebren
-
Cancel
-
Vote Up
0
Vote Down
-
-
Sign in to reply
-
More
-
Cancel
Comment-

genebren
-
Cancel
-
Vote Up
0
Vote Down
-
-
Sign in to reply
-
More
-
Cancel
Children