

DIY Hydrogen Generator
Table of contents
- Introduction
- Parts list
- Tools
- Preparations
- Let's build it !
- Precautions
- Summary
Introduction
Hey everyone, you might know that our earth's surface is about 70% water but do you know what water is made up of ? The chemical formula of water is H2O, it means that water is two parts hydrogen and one part oxygen. If you know the characteristics of two elements then you might have figured out what our today's project is all about. Hydrogen is the most flammable substance on earth and oxygen supports its burning and water is made up of these two elements. It means that water has an immense amount of energy in it. But the problem is we can't set water on fire. To harness the energy of water we must separate the elements in it by breaking the bonds. To break the bonds between hydrogen and oxygen we have to split water with electricity. After splitting water with electricity we get two gases which are oxygen and hydrogen, this combination is highly flammable and it can be used to power various applications. That's actually what we are going to do with this project. Let us see how to build a hydrogen generator step-by-step in this tutorial.
Parts list
- Transparent Plastic Container with airtight lid (~900ml approx)
- Transparent Plastic Container (~100ml approx)
- Hex Bolt 2.5 /6 Soot 2 nos.
- Hex Nut 6 mm 24 nos.
- Washer M6 18 nos.
- Plastic tubing 1 meter
- Plastic pipe (size of your Plastic tube) 15 cm
- Hose barb (size of your Plastic tube)
- 9V battery and connector
- DC Switch
- Wires
- Rubber/foam sheet
- Potassium hydroxide (KOH) or Baking soda (NaHCO3)
- Distilled Water
Tools
- Epoxy glue
- Super glue
- Cellophane tape
- Electrical tape
- Cutter
- Plier
- Wrench
- Sandpaper
Preparations
Clean both the large and small plastic containers with dishwashing liquid and water and dry it in and out.
If the nuts, bolts and washers have rust on them, clean them with rust remover or just sand it using the sandpape. The nuts, bolts and washers must be free from rust.
Let's build it !
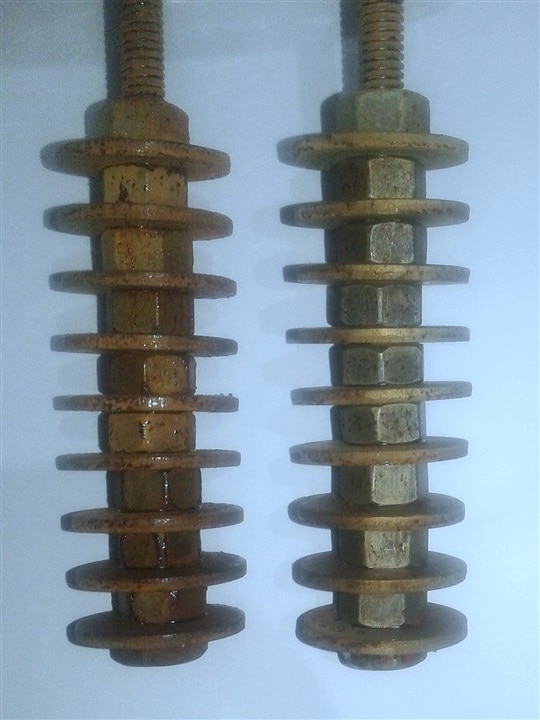
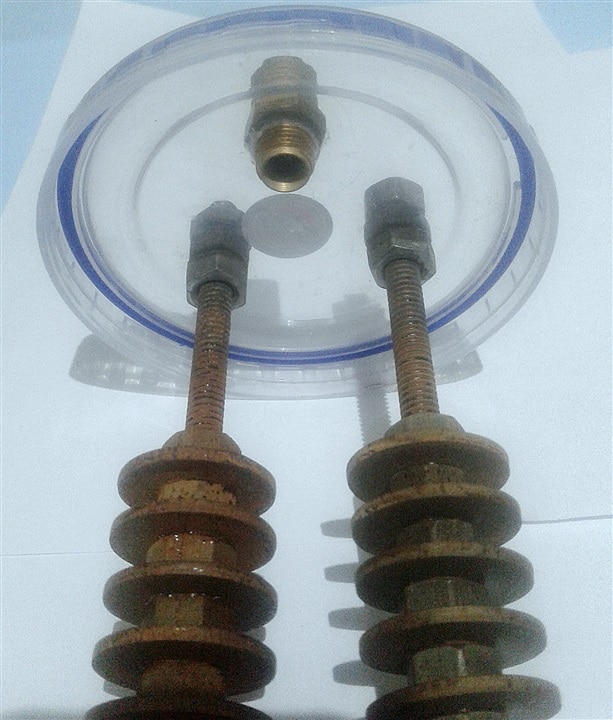
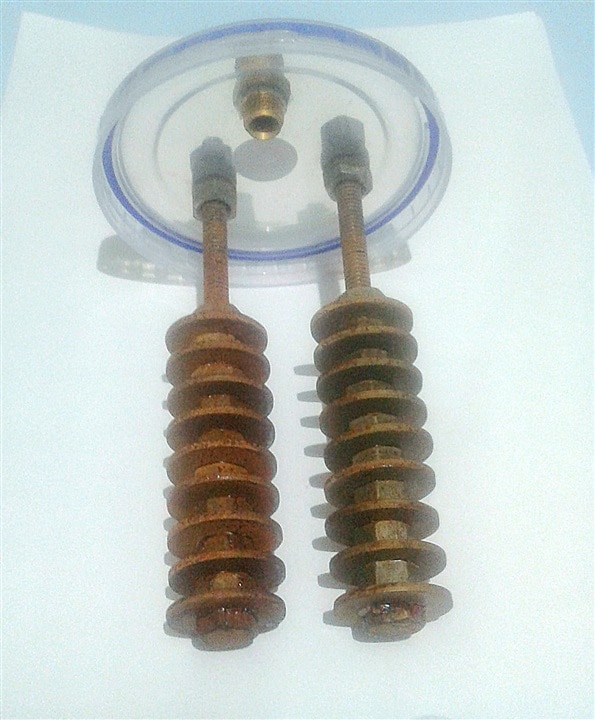
Step 1: Takeone of the bolts, put washer on it and a nut on the washer. Fasten the nut with a wrench or plier. Repeat this procedure 9 times. Repeat the same procedure for the other bolt, nuts and washers. This way you have your electrodes for the hydrogen generator.
Step 2: Take the lid of the smaller plastic container and mark a circle with it on the rubber/foam sheet. Cut a ring of the size a bit smaller so that it will fit snugly under the cap. Fix the ring under the cap. This will make the container airtight. My larger plastic container already had airtight sealing so I did this procedure only for the smaller one, you can repeat it for the larger one also if it isn't airtight or you can skip this step if both of your containers are already airtight ones.
Step 3: take the lid of the large container and make 3 holes in it with any pointed object. Make sure not to crack the lid as we want it to be air tight. One of the holes will be the size of the hose and the other two will be the size of the two bolts. Make sure the holes for the bolt are well positioned so that the nut, bolts and washers assembly can fit perfectly. The hose and the bolts must tightly fit in the holes and must not be loose. Now take the lid of the smaller plastic container and make two holes in it the size of a plastic pipe. The plastic pipe should fit tight in the holes and must not be loose.
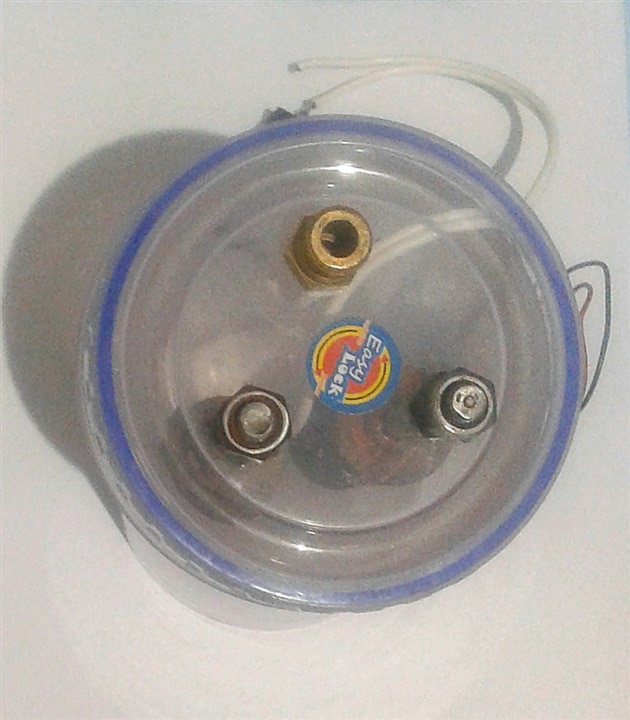
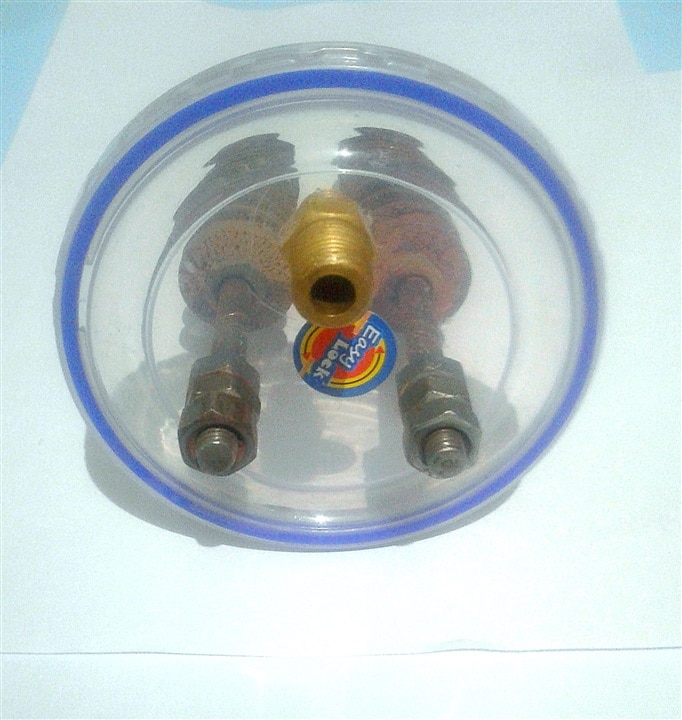
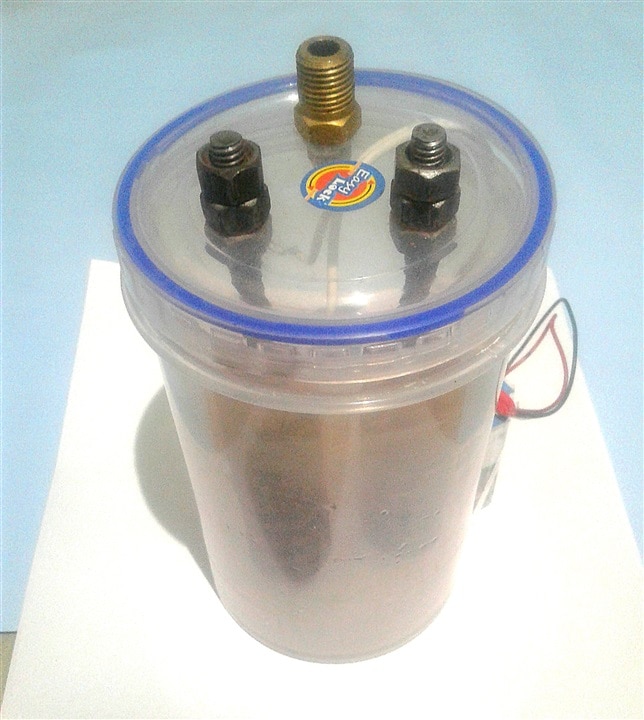
Step 4: Take the lid of the larger plastic container, apply epoxy glue to the holes on the lid. assemble the hose on the larger plastic container lid in its respective hole. Take the two electrode assemblies and fit it in their holes with a nut under the lid and a nut above. Leave the space to fit another nut on each electrode above the lid. Fasten the nuts with a wrench or pliers. This is your fuel cell assembly.
| {gallery}My Gallery Title |
|---|
|
IMAGE TITLE: THEN IMAGE DESCRIPTION |
|
IMAGE TITLE: THEN IMAGE DESCRIPTION |
|
IMAGE TITLE: THEN IMAGE DESCRIPTION |
|
IMAGE TITLE: THEN IMAGE DESCRIPTION |
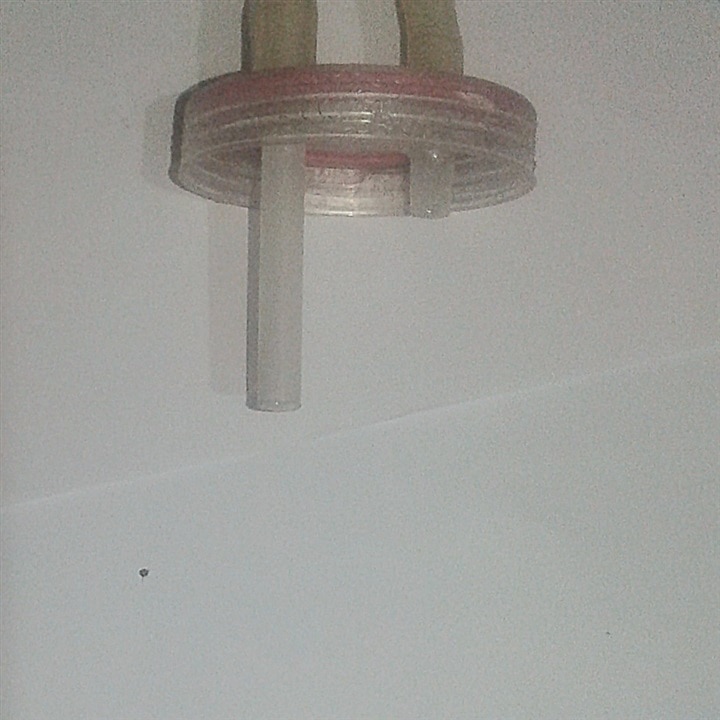
Step 5: Take the plastic pipe and cut it in two pieces. Length of one piece will be from a centimeter above the lid till it remains a bit above the bottom of the container. Length of the other piece will be a centimeter above and below the lead.
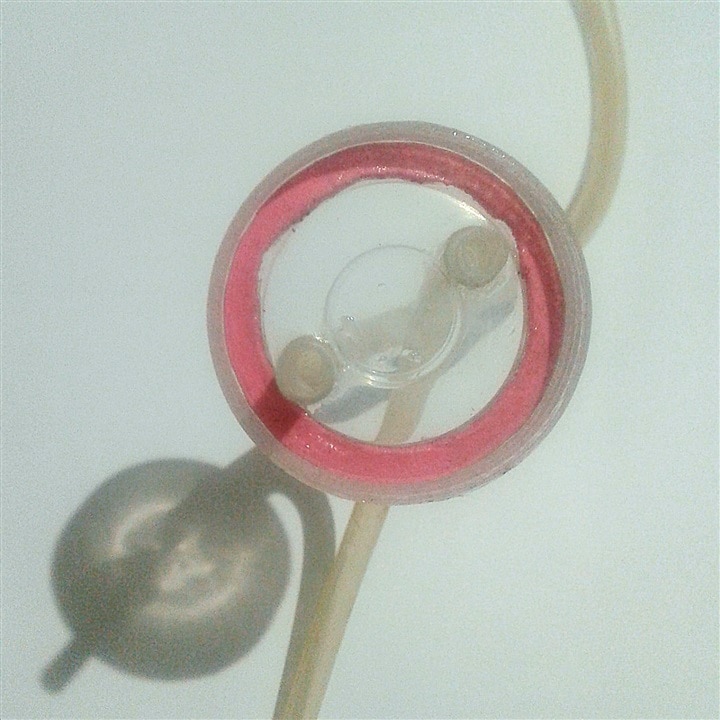
Step 6: Apply epoxy glue to the holes of the smaller plastic container lid and fix both the plastic pipes such that they remain a centimeter above the lid.
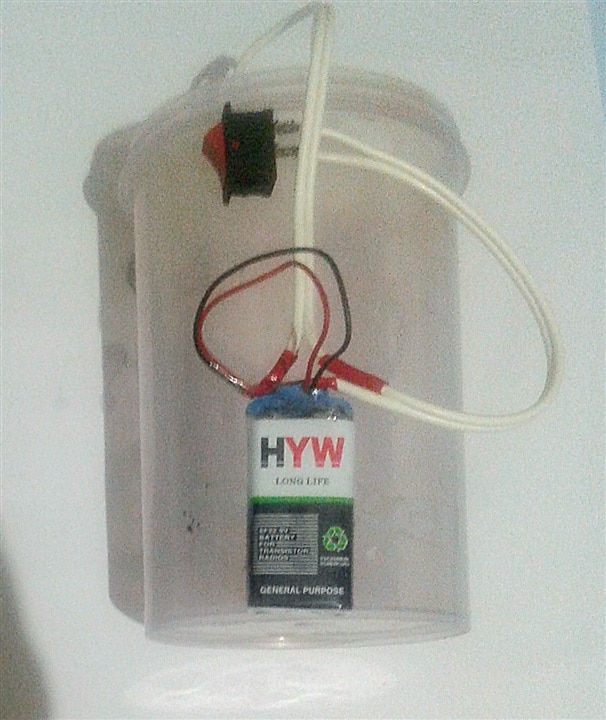
Step 7: Take Battery, attach the battery connector to it and connect battery to any one of its wires, the polarity does not matter. Connect two wires, one to the switch and another to the remaining battery terminal. Apply electric tape to all the open connections. Stick this assembly to the larger container with superglue and cellophane tape.
Step 8: Add water and a teaspoon of potassium hydroxide (KOH) or Baking soda (NaHCO3) to the larger plastic container, mix it and close the lid tightly. Add normal water to the smaller container, the water level should remain below the smaller pipe. Close the lid of the smaller plastic container tightly.
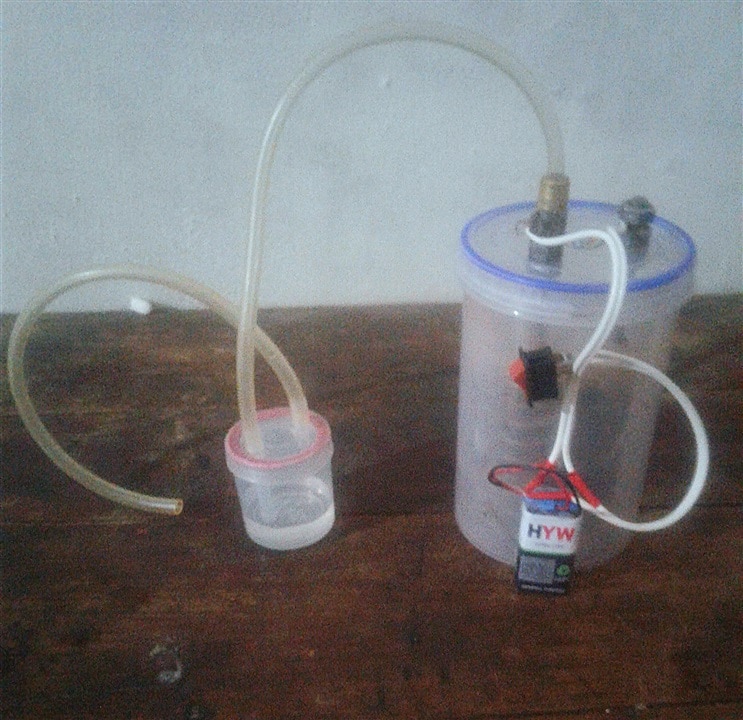
Step 9: Connect the wires from the switch and battery to the electrodes. The polarity doesn't matter here but make sure the switch is open (OFF). Put a nut on after connecting the wires. The wires must be removable and not soldered to the electrodes!We will need to remove it to refill water. Cut the plastic tubing in two equal parts. Connect one plastic tube from the hose to the larger plastic pipe and another to the shorter plastic pipe with one end open, here you will get the hydrogen gas.
And that's it, your hydrogen generator is ready !
Precautions
- The gas coming out of it is extremely flammable, do not take it near any flame, fire or spark.
- Do not collect the gas in large amounts or do not try to store it in any quantity.
- Disconnect the battery and wires after using it, so that someone cannot turn it on without knowledge.
- Discard the water after every use safely.
- Wear eye protection and gloves.
- Do not turn it on indoors.
Summary
Hey, you have created a hydrogen generator. It can be used to generate hydrogen. Turn on the switch and you will see small bubbles forming on the electrodes and after some time in the smaller plastic container, this is the indication that the gas is being generated. Even Though the quantity is very less to power any real life applications, but you can have some fun with it. You can use soap water to create bubbles of hydrogen gas and they burst when you light it with a matchstick or lighter. As the gas is extremely flammable, be cautious while experimenting with it and follow the necessary precautions.

