element14 Community
element14 Community
    Register Log In
  • Site
  • Search
  • Log In Register
  • Community Hub
    Community Hub
    • What's New on element14
    • Feedback and Support
    • Benefits of Membership
    • Personal Blogs
    • Members Area
    • Achievement Levels
  • Learn
    Learn
    • Ask an Expert
    • eBooks
    • element14 presents
    • Learning Center
    • Tech Spotlight
    • STEM Academy
    • Webinars, Training and Events
    • Learning Groups
  • Technologies
    Technologies
    • 3D Printing
    • FPGA
    • Industrial Automation
    • Internet of Things
    • Power & Energy
    • Sensors
    • Technology Groups
  • Challenges & Projects
    Challenges & Projects
    • Design Challenges
    • element14 presents Projects
    • Project14
    • Arduino Projects
    • Raspberry Pi Projects
    • Project Groups
  • Products
    Products
    • Arduino
    • Avnet Boards Community
    • Dev Tools
    • Manufacturers
    • Multicomp Pro
    • Product Groups
    • Raspberry Pi
    • RoadTests & Reviews
  • Store
    Store
    • Visit Your Store
    • Choose another store...
      • Europe
      •  Austria (German)
      •  Belgium (Dutch, French)
      •  Bulgaria (Bulgarian)
      •  Czech Republic (Czech)
      •  Denmark (Danish)
      •  Estonia (Estonian)
      •  Finland (Finnish)
      •  France (French)
      •  Germany (German)
      •  Hungary (Hungarian)
      •  Ireland
      •  Israel
      •  Italy (Italian)
      •  Latvia (Latvian)
      •  
      •  Lithuania (Lithuanian)
      •  Netherlands (Dutch)
      •  Norway (Norwegian)
      •  Poland (Polish)
      •  Portugal (Portuguese)
      •  Romania (Romanian)
      •  Russia (Russian)
      •  Slovakia (Slovak)
      •  Slovenia (Slovenian)
      •  Spain (Spanish)
      •  Sweden (Swedish)
      •  Switzerland(German, French)
      •  Turkey (Turkish)
      •  United Kingdom
      • Asia Pacific
      •  Australia
      •  China
      •  Hong Kong
      •  India
      •  Korea (Korean)
      •  Malaysia
      •  New Zealand
      •  Philippines
      •  Singapore
      •  Taiwan
      •  Thailand (Thai)
      • Americas
      •  Brazil (Portuguese)
      •  Canada
      •  Mexico (Spanish)
      •  United States
      Can't find the country/region you're looking for? Visit our export site or find a local distributor.
  • Translate
  • Profile
  • Settings
Test & Tools
  • Technologies
  • More
Test & Tools
Blog Fluke 190 Scopemeter repair
  • Blog
  • Forum
  • Documents
  • Files
  • Members
  • Mentions
  • Sub-Groups
  • Tags
  • More
  • Cancel
  • New
Join Test & Tools to participate - click to join for free!
  • Share
  • More
  • Cancel
Group Actions
  • Group RSS
  • More
  • Cancel
Engagement
  • Author Author: aspork42
  • Date Created: 27 Feb 2019 3:43 AM Date Created
  • Views 2879 views
  • Likes 9 likes
  • Comments 4 comments
  • lcd
  • fluke scopemeter
  • fluke 190 series
  • repair
  • battery
Related
Recommended

Fluke 190 Scopemeter repair

aspork42
aspork42
27 Feb 2019

Late last week at work, our head of Maintenance at work had an older Fluke 190 Scopemeter at his desk. He said that something was wrong with it and he wasn't sure what to do with it - send it in for repair, or get rid of it and get a new one. At almost $5,000 however, he said his department didn't have it in the budget for this year for a new one. The scope was clearly beat up and showing its age. He said it wasn't powering up anymore and probably has a bad battery.


I told him I could take a look, but no guarantees.


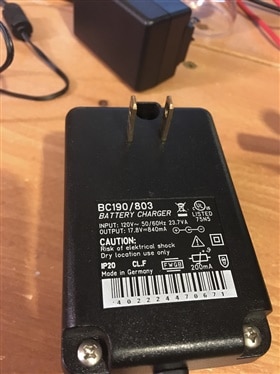
I took it home over the weekend and started poking around. Upon plugging the scope in, sure enough nothing happened. I started with the power supply - 17.5V with center negative. The supply seemed fine - measured good voltage and when I opened it up, it was very basic - transformer, four diodes, and a capacitor (which looked good).

imageimage


So then I opened up the scope itself. The battery voltage measure around 7.4V which was in line with the 7.2V rating. When I powered up the scope, the charging voltage was over 10V which seemed a bit high. I unplugged the battery and the scope powered right up. So it was drawing too much current to allow the rest of the device to run. I found the new battery on Amazon for $35, so ordered one.


image


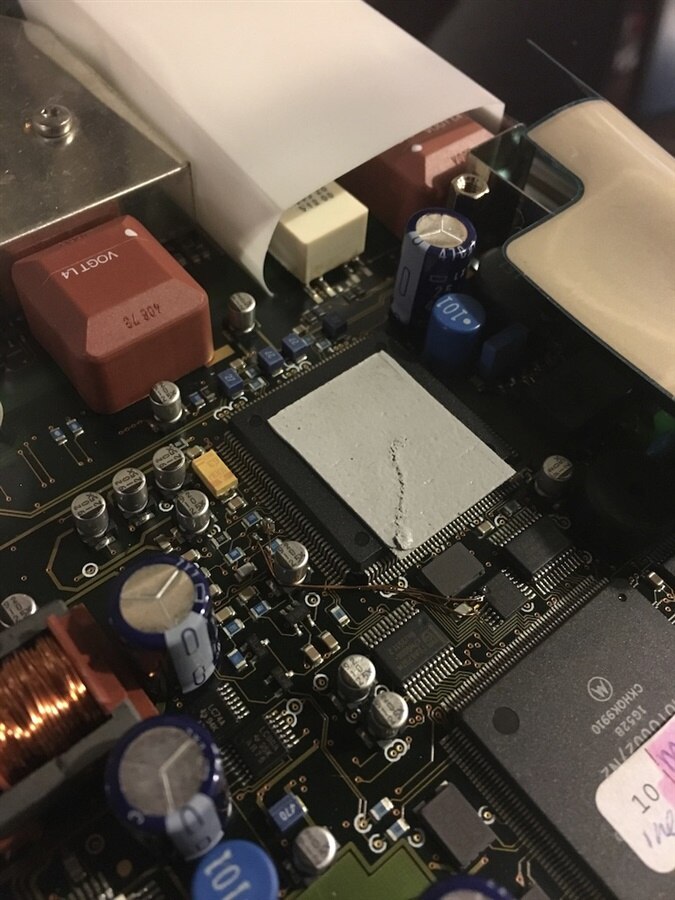
Note - the bodge wires that were found on the PCB here:

image


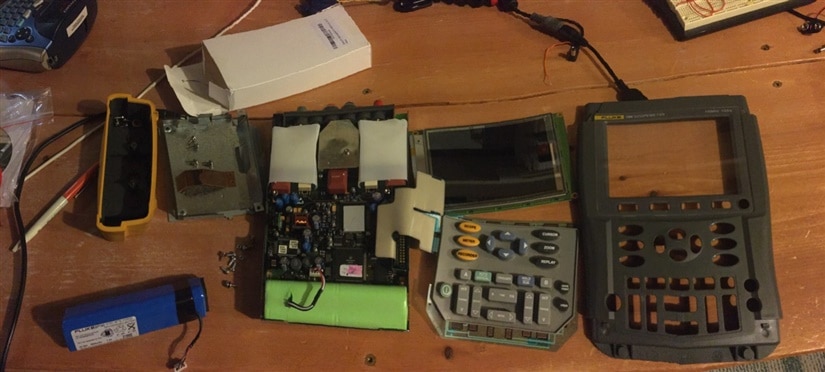
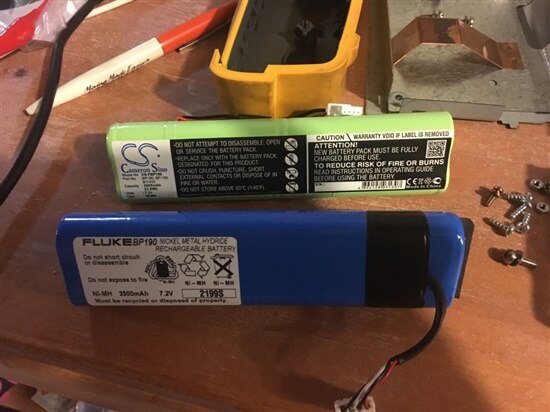
Old and new triangular batteries -

image

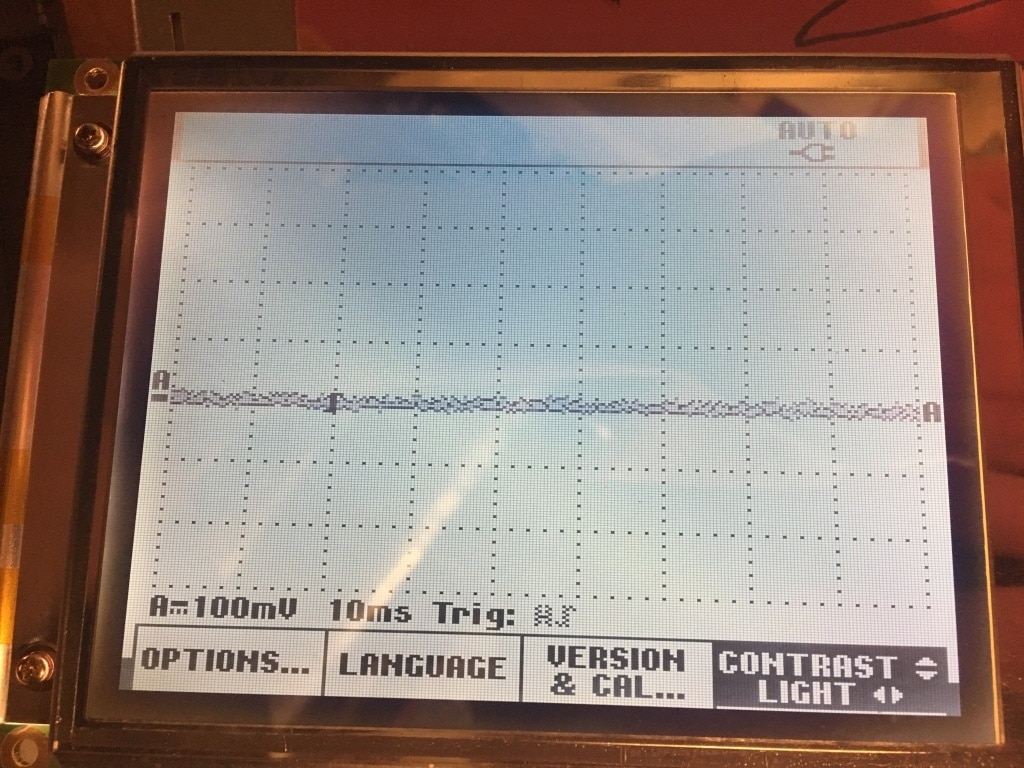
The battery arrived on Monday and I was able to power it up. The charging voltage was now about 8V instead of over 10. But then I found another problem - and probably why the Maintenance department wasn't so sure if it was worth keeping around - the screen was messed up.

image


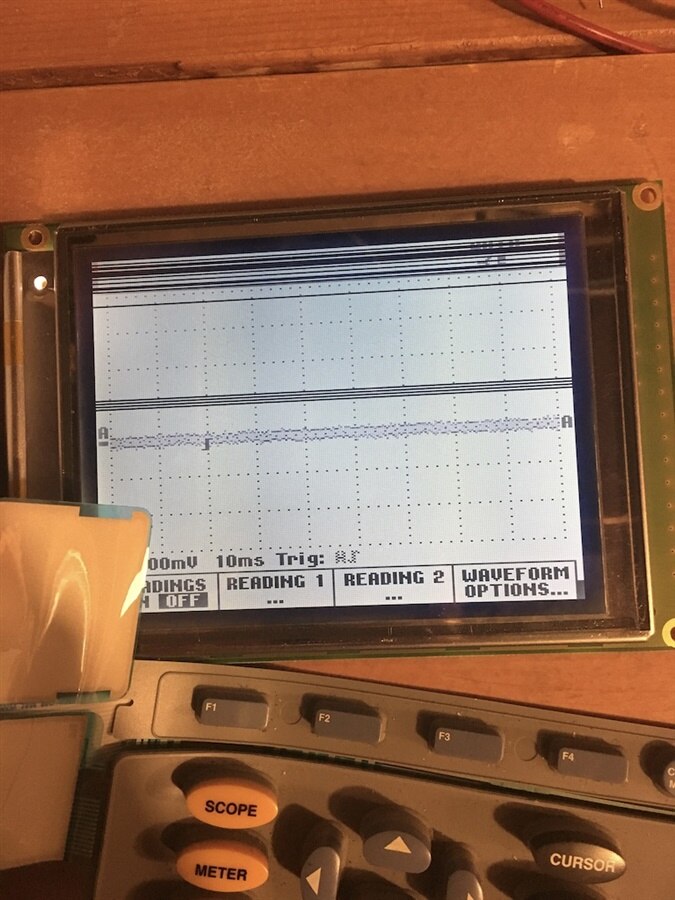
Here is the scope running while torn apart on the bench - image


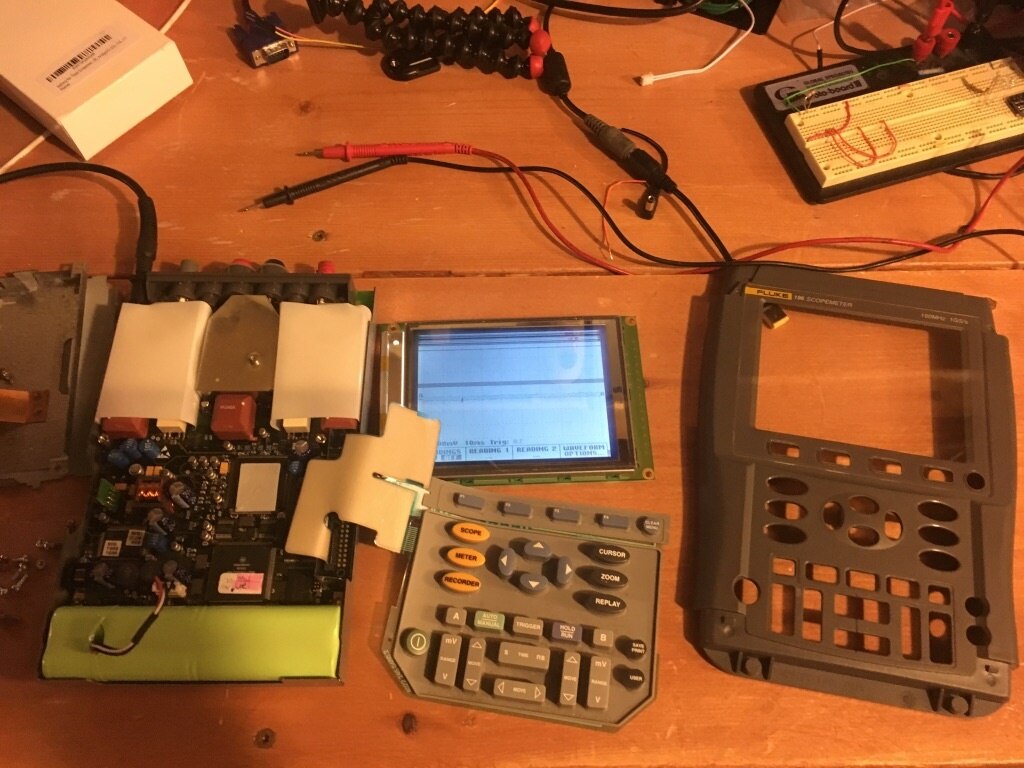
In looking for a battery, I actually came across an EEVBlog video of this exact scope with the same screen problem.


You don't have permission to edit metadata of this video.
Edit media
x
image
Upload Preview
image


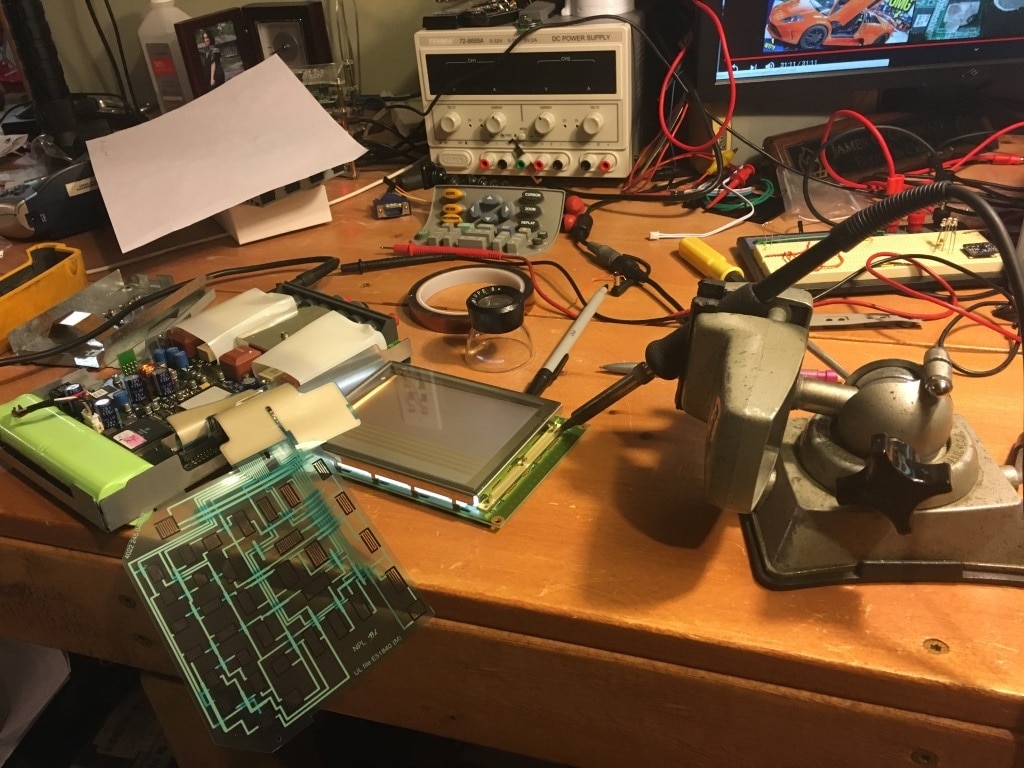
Since I was feeling brave, I decided that I should go ahead and attempt cleaning up the lines on the screen. The general idea is that the ribbon cable for the LCD is adhered to the PCB and over time the connection weakens. If reheated properly, the connection can be restored. I don't have a hot air reworking station (or a hot bar) so started by trying to hold a hot soldering iron just above the ribbon cable like shown below, then rolling a pencil eraser on the ribbon to press it back down.

imageimage

This didn't work because I couldn't get enough heat into the ribbon to reflow the solder. My next attempt was to put a layer of kapton tape on the ribbon to protect it, set the soldering iron to a low 220 degrees, and press it on the kapton tape and roll it around.image


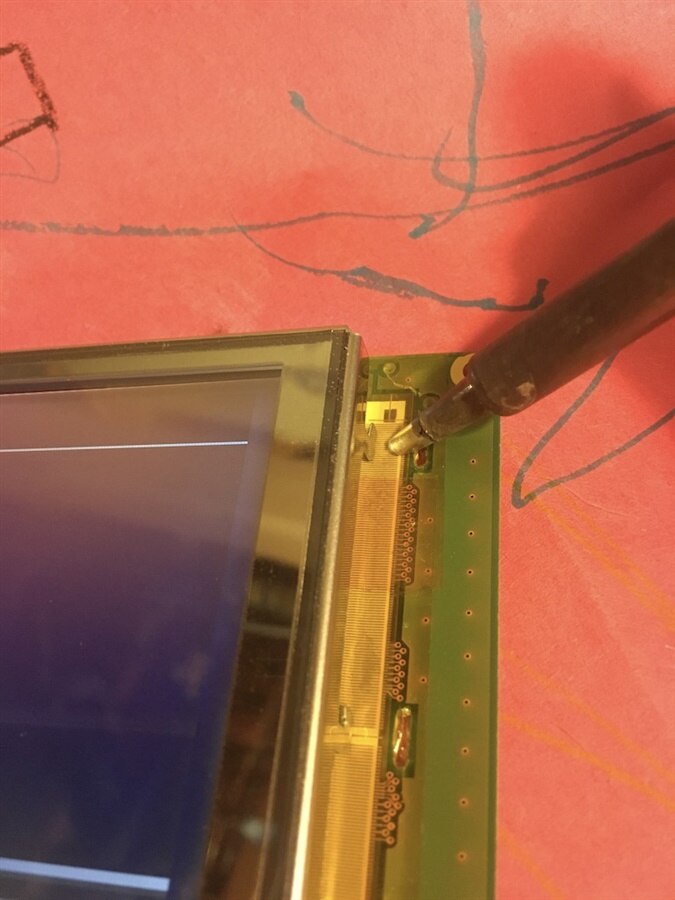
It took quite a few tries and I ended up with a few vertical lines as well during the process; but after about 30 minutes, I was able to succeed! So it actually worked!


image


The scope went back together and powered right up; although the metal frame was tricky to re-secure to the PCB via the bending of tabs while keeping alignment of the LCD to the PCB.
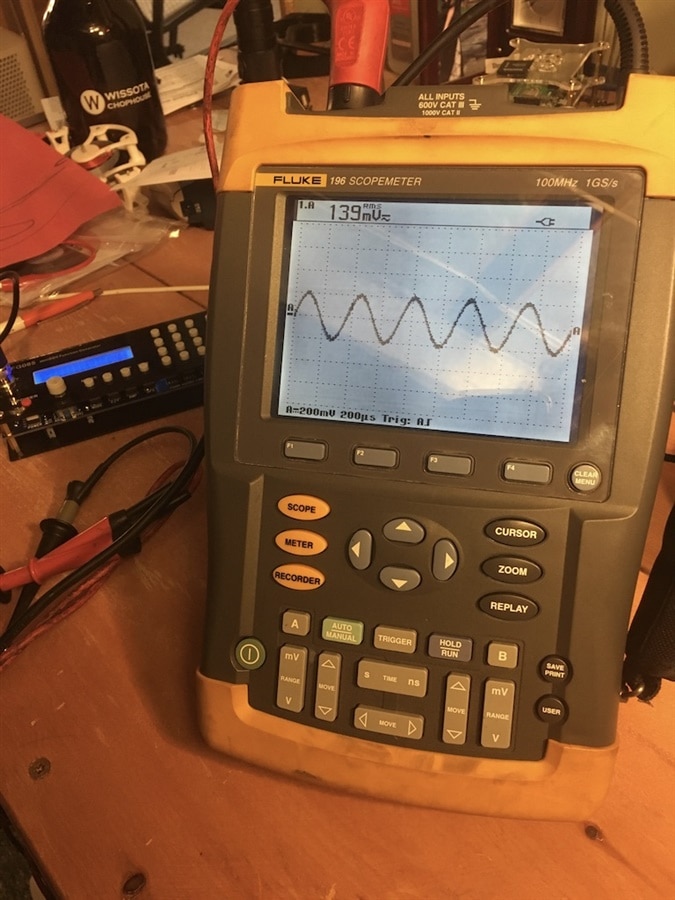
 

image


Great success!

  • Sign in to reply

Top Comments

  • jw0752
    jw0752 over 6 years ago +5
    Hi James, A very impressive troubleshooting and repair sequence. Thanks for sharing your thought process and technique with us. I bet it felt pretty good to beat a problem that most would have rated as…
  • aspork42
    aspork42 over 6 years ago in reply to jw0752 +1
    Thanks John! It did feel a bit like cheating to find a video of the exact problem, but that’s what the internet is for it was still a great feeling to take a “throw away” scope that doesn’t power on and…
  • geralds
    geralds over 6 years ago +1
    Great! Congratulations! Yes it's a bit tricky soldering the ribbon. Such a problem was every time if i had to repair the bench top calculators if such display contacts where broken. Mostly problem was…
  • aspork42
    aspork42 over 6 years ago in reply to geralds

    What method did you use to resolder the ribbons?

    • Cancel
    • Vote Up 0 Vote Down
    • Sign in to reply
    • More
    • Cancel
  • geralds
    geralds over 6 years ago

    Great!

    Congratulations!

    Yes it's a bit tricky soldering the ribbon.

    Such a problem was every time if i had to repair the bench top calculators if such display contacts where broken.

    Mostly problem was the manufacturer specific differences between the unknown ribbon contacts, flex PCBs.


    Gerald

    ---

    • Cancel
    • Vote Up +1 Vote Down
    • Sign in to reply
    • More
    • Cancel
  • aspork42
    aspork42 over 6 years ago in reply to jw0752

    Thanks John! It did feel a bit like cheating to find a video of the exact problem, but that’s what the internet is for image it was still a great feeling to take a “throw away” scope that doesn’t power on and get it back in good operational order. And it saved us from having to spend a lot of money on a new one.

    • Cancel
    • Vote Up +1 Vote Down
    • Sign in to reply
    • More
    • Cancel
  • jw0752
    jw0752 over 6 years ago

    Hi James,


    A very impressive troubleshooting and repair sequence. Thanks for sharing your thought process and technique with us. I bet it felt pretty good to beat a problem that most would have rated as unfixable.


    John

    • Cancel
    • Vote Up +5 Vote Down
    • Sign in to reply
    • More
    • Cancel
element14 Community

element14 is the first online community specifically for engineers. Connect with your peers and get expert answers to your questions.

  • Members
  • Learn
  • Technologies
  • Challenges & Projects
  • Products
  • Store
  • About Us
  • Feedback & Support
  • FAQs
  • Terms of Use
  • Privacy Policy
  • Legal and Copyright Notices
  • Sitemap
  • Cookies

An Avnet Company © 2025 Premier Farnell Limited. All Rights Reserved.

Premier Farnell Ltd, registered in England and Wales (no 00876412), registered office: Farnell House, Forge Lane, Leeds LS12 2NE.

ICP 备案号 10220084.

Follow element14

  • X
  • Facebook
  • linkedin
  • YouTube