element14 Community
element14 Community
    Register Log In
  • Site
  • Search
  • Log In Register
  • Community Hub
    Community Hub
    • What's New on element14
    • Feedback and Support
    • Benefits of Membership
    • Personal Blogs
    • Members Area
    • Achievement Levels
  • Learn
    Learn
    • Ask an Expert
    • eBooks
    • element14 presents
    • Learning Center
    • Tech Spotlight
    • STEM Academy
    • Webinars, Training and Events
    • Learning Groups
  • Technologies
    Technologies
    • 3D Printing
    • FPGA
    • Industrial Automation
    • Internet of Things
    • Power & Energy
    • Sensors
    • Technology Groups
  • Challenges & Projects
    Challenges & Projects
    • Design Challenges
    • element14 presents Projects
    • Project14
    • Arduino Projects
    • Raspberry Pi Projects
    • Project Groups
  • Products
    Products
    • Arduino
    • Avnet & Tria Boards Community
    • Dev Tools
    • Manufacturers
    • Multicomp Pro
    • Product Groups
    • Raspberry Pi
    • RoadTests & Reviews
  • About Us
  • Store
    Store
    • Visit Your Store
    • Choose another store...
      • Europe
      •  Austria (German)
      •  Belgium (Dutch, French)
      •  Bulgaria (Bulgarian)
      •  Czech Republic (Czech)
      •  Denmark (Danish)
      •  Estonia (Estonian)
      •  Finland (Finnish)
      •  France (French)
      •  Germany (German)
      •  Hungary (Hungarian)
      •  Ireland
      •  Israel
      •  Italy (Italian)
      •  Latvia (Latvian)
      •  
      •  Lithuania (Lithuanian)
      •  Netherlands (Dutch)
      •  Norway (Norwegian)
      •  Poland (Polish)
      •  Portugal (Portuguese)
      •  Romania (Romanian)
      •  Russia (Russian)
      •  Slovakia (Slovak)
      •  Slovenia (Slovenian)
      •  Spain (Spanish)
      •  Sweden (Swedish)
      •  Switzerland(German, French)
      •  Turkey (Turkish)
      •  United Kingdom
      • Asia Pacific
      •  Australia
      •  China
      •  Hong Kong
      •  India
      •  Korea (Korean)
      •  Malaysia
      •  New Zealand
      •  Philippines
      •  Singapore
      •  Taiwan
      •  Thailand (Thai)
      • Americas
      •  Brazil (Portuguese)
      •  Canada
      •  Mexico (Spanish)
      •  United States
      Can't find the country/region you're looking for? Visit our export site or find a local distributor.
  • Translate
  • Profile
  • Settings
Test & Tools
  • Technologies
  • More
Test & Tools
Blog Ideas on Building a Shielded Test Enclosure
  • Blog
  • Forum
  • Documents
  • Files
  • Members
  • Mentions
  • Sub-Groups
  • Tags
  • More
  • Cancel
  • New
Join Test & Tools to participate - click to join for free!
  • Share
  • More
  • Cancel
Group Actions
  • Group RSS
  • More
  • Cancel
Engagement
  • Author Author: shabaz
  • Date Created: 8 Sep 2023 4:38 PM Date Created
  • Views 2507 views
  • Likes 15 likes
  • Comments 24 comments
  • bnc
  • shielded
  • ferrite
  • enclosure
  • shielding
  • cookies and biscuits
  • sma
Related
Recommended

Ideas on Building a Shielded Test Enclosure

shabaz
shabaz
8 Sep 2023

Introduction

When measuring low-noise circuits, it can become necessary to shield the circuit boards! Otherwise, nearby electric fields or electromagnetic radiation could affect the measurements.

A cheap way that many engineers use is to repurpose any old biscuit/cookie tin! After having done this a few times in the past, I wanted to share some suggestions.

image

Choosing a Box

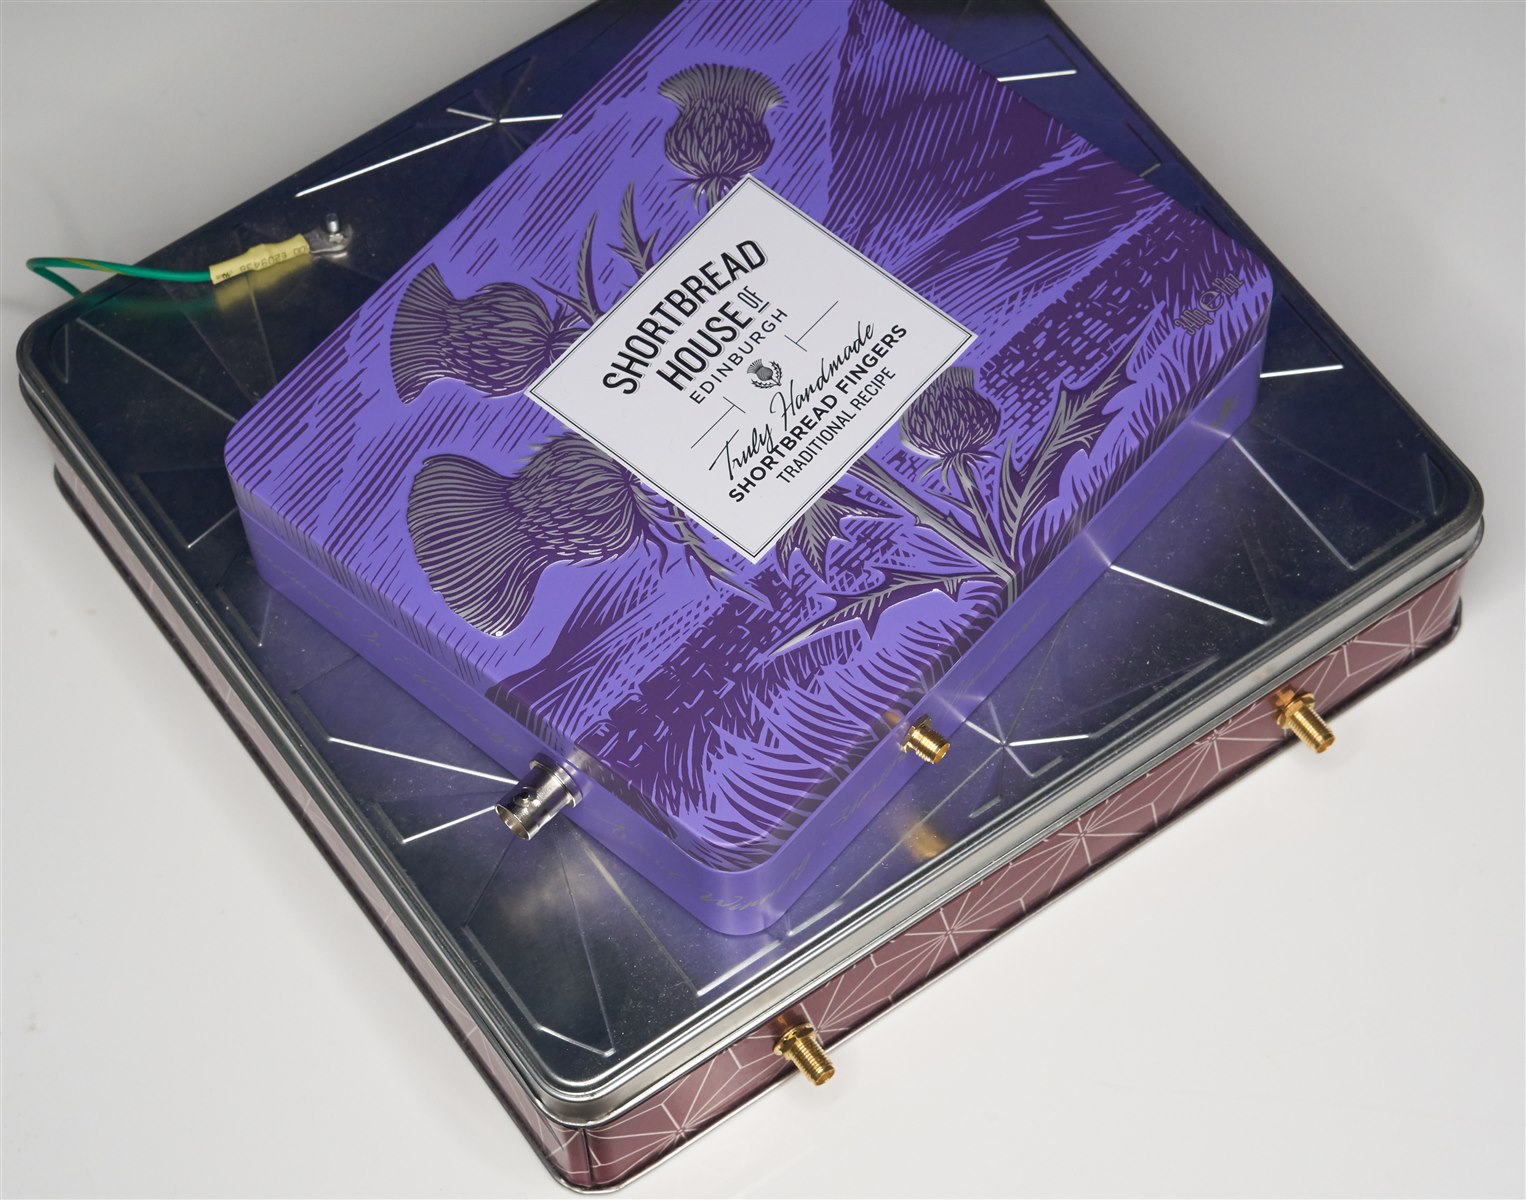
Ideally the box should be large, since it is very easy to run out of space with boards and cabling inside there.

The photo above shows two boxes; the one at the bottom is a better size.

Choosing Connectors

BNC and SMA connectors can be convenient to use. It’s personal preference mainly. I have a lot more SMA cables than BNC, so I tend to use more SMA connectors! They can be cheaper too.

image

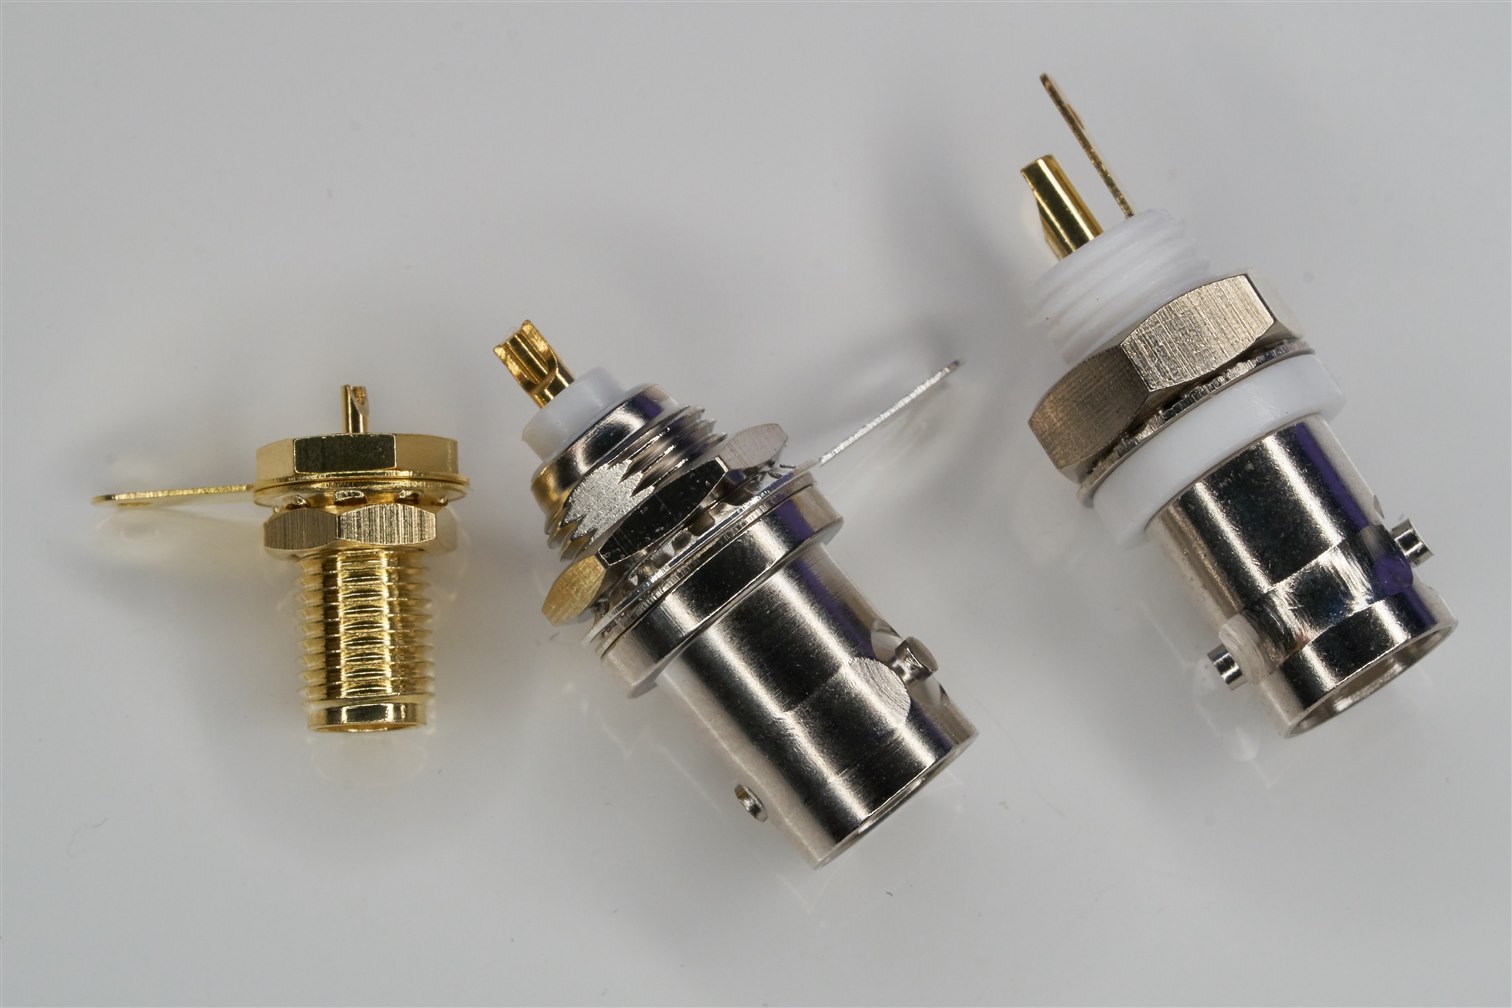
The photo above shows some example chassis-mount SMA and BNC connectors. The one on the right is isolated from the chassis which may be occasionally required. The one more likely to be used is shown in the center of the photos. You could also use chassis-mount back-to-back SMA or BNC adapters if desired.

For power entry, a very decent way is to use a component called a ‘Feed-Thru’, which is a cylindrical capacitor with one conductor being the cylinder, and the other conductor egressing axially from both ends.

image 
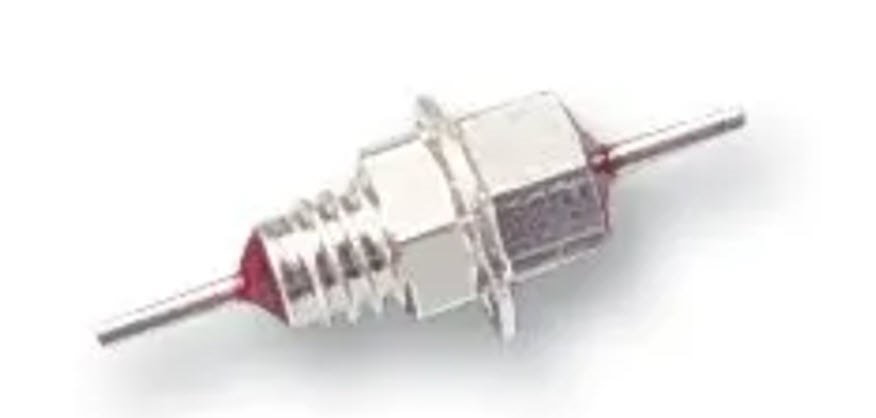
(Image source: cpc.farnell.com)

Preparing the Enclosure

Holes

One technique is to use small quick-clamps to place a block of wood on the inside of the box, carefully of course while avoiding damaging to the lip of the box in the process. Then, a drill can be used without deforming the enclosure too much. The large box in the photo above used that technique. For the smaller box in the photo, I used hole punches. For standard chassis-mount BNC connectors, a Q-Max 10mm Hole Punch works great.

image
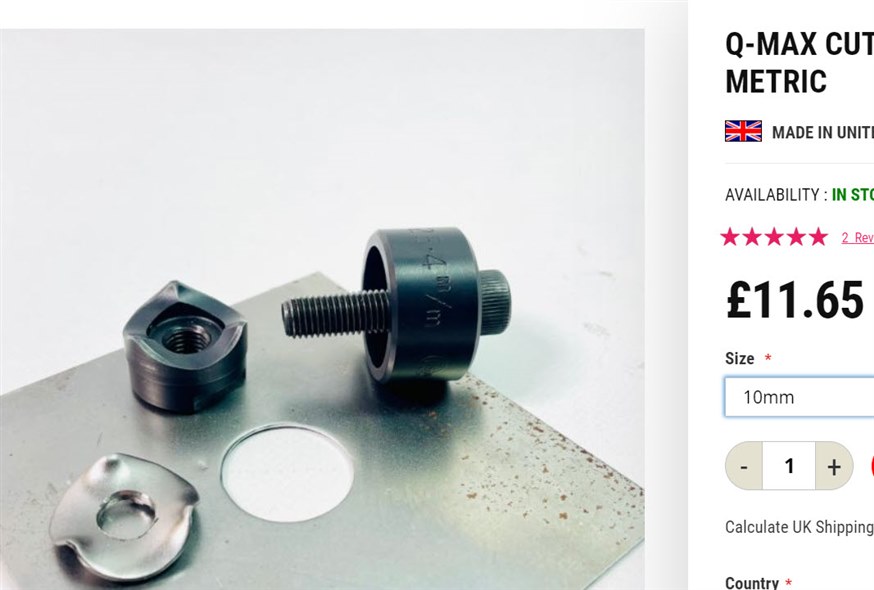
(Image source: stakesys.co.uk)

For most standard SMA chassis-mount connectors, a 6.4 mm punch is desired. The hand punch kit in the photo below works fine; it comes with a range of punches, and there is a 6.35 mm one which is suitable.

image(Image source: zoro.co.uk)

An advantage of the punches is that you can rapidly make a 'hole' load of shielded test boxes for all your work colleagues.

Dealing with Coatings

Metal biscuit/cookie tins usually have paint on the outside, and also a thin non-conductive coating on the inside. That means that the lid won’t be electrically connected to the box, and connectors won’t be electrically connected to the box either : (

The technique which worked well for me was the following. Using a high-speed tool (e.g. Dremel) and a wire brush on the end, it is possible to easily remove paint. You’ll definitely need eyewear and a mask, because of all the dust. The photo here shows where the paint was required to be removed, in order for the lid to make electrical contact.

image

Similarly, the coating on the inside of the box needs removing too, in the areas where the holes were made.

image

The lid needs a bit of work too on the inner part of the lip. The wire brush method was difficult here. Sandpaper is easier for this part.

image

That is it pretty much..You’ll need 12mm and 8mm spanner/wrench for tightening the BNC and SMA connectors. I used a dab of glue as well to prevent them from rotating.

Using It

Here’s a photo of it in use. Although the base has a thin insulated coating, this is clearly insufficient, so a piece of card or other material is required.

image

Although not ideal, I used the BNC connector for power entry in this case. Ferrite cores are handy to have around as well (either like the ones in the photo below, or the clip-on variety [known as ‘Split Core’]), since they will help reduce high-frequency noise entering the enclosure. Twisted wiring is also extremely useful, so that any noise that does get picked up from the environment is common-mode (i.e. near-identical on both wires).

image


Useful Parts

BNC chassis socket MP-13-25-12 TGN

SMA chassis socket 132291

Steel brush attachment Dremel 530

Ferrite cores: 2631665702 and 742701703

Ferrite Split Core: 431164951.    

Feed-Thru: 2499-003-X5U0-102PLF

Feedback!

It would be great to see other people’s test enclosures since it is possible to glean many ideas from them. If you don’t mind taking a photo, it would be awesome if you could show it!

Thanks for reading!

  • Sign in to reply
Parents
  • Andrew J
    Andrew J over 2 years ago

    I’d be interested in seeing more detail about the hole punches you’ve used.  I have a Bosch pillar drill and a stepper bit which works reasonably well but the working area can be small, because of the space between the bit centre and the pillar - it’s a small scale, home use one rather than a bigger workshop one.

    • Cancel
    • Vote Up 0 Vote Down
    • Sign in to reply
    • More
    • Cancel
  • shabaz
    shabaz over 2 years ago in reply to Andrew J

    Sorry for the poor quality (taken with mobile phone) but hopefully this helps; there are replaceable punches and dies, that fit the tool.

    Then the tin can be inserted in, and the levers pushed to apply the force.

    image

    The depth stop is useful to make the holes approximately level.

    All-in-all, it seems like a very good quality tool. I've bought a few Kennedy items in the past, and they have all been good. It is made of thick cast metal, and even the side metal plates are very thick. 

    Also, spare punches and dies are available too, for when they wear out. For instance this one: https://www.zoro.co.uk/shop/tools-and-machining/punches-wad-and-hole/replacement-hole-punch-dies/f/6596

    The Q-Max tools operate differently. Instead of a lever, the force is applied using a screw thread. They need a pilot hole drilled(or punched) first, to pass the thread through, and then the die and nut are fitted on the other side.

    image

    The benefit of the Q-max tools are that they can make quite large holes (the photo above shows the 10mm version, but they are available to an inch diameter or more). The disadvantage is that the smallest version is the 10mm one as shown. The 10mm one is most useful for BNC connectors. 

    • Cancel
    • Vote Up 0 Vote Down
    • Sign in to reply
    • More
    • Cancel
  • Andrew J
    Andrew J over 2 years ago in reply to shabaz

    Thanks Shabaz.  I did wonder if that was just a screw type.  Never used one before but I'm amazed it punches a clean hole through.  I reckon it could be worth investing in; biscuit/sweet tins are quite thing - would these work cleanly through 1mm Alu?  2mm?

    • Cancel
    • Vote Up 0 Vote Down
    • Sign in to reply
    • More
    • Cancel
  • beacon_dave
    beacon_dave over 2 years ago in reply to Andrew J

    The Q-Max type tend to work better with metals than plastic as the deformed metal stays bent and drops out of the cutter die whereas plastic tends to spring back and get stuck.

    You get thrust bearings for working with thicker/harder materials and there is a hydraulic option if you have to cut harder materials or a lot of holes.

    • Cancel
    • Vote Up 0 Vote Down
    • Sign in to reply
    • More
    • Cancel
  • shabaz
    shabaz over 2 years ago in reply to Andrew J

    It works great with alu, although I've only tried typical front panel thickness. It can occasionally be a struggle getting the waste out of the die as Dave mentions! probably some oil inside the die would help.

    The cut is always clean, faultless really. I don't know if it is necessary, but I use a little spray-can of cutting fluid, and spray a tiny bit on the alu surface before using it. 

    image

    • Cancel
    • Vote Up 0 Vote Down
    • Sign in to reply
    • More
    • Cancel
Comment
  • shabaz
    shabaz over 2 years ago in reply to Andrew J

    It works great with alu, although I've only tried typical front panel thickness. It can occasionally be a struggle getting the waste out of the die as Dave mentions! probably some oil inside the die would help.

    The cut is always clean, faultless really. I don't know if it is necessary, but I use a little spray-can of cutting fluid, and spray a tiny bit on the alu surface before using it. 

    image

    • Cancel
    • Vote Up 0 Vote Down
    • Sign in to reply
    • More
    • Cancel
Children
  • Andrew J
    Andrew J over 2 years ago in reply to shabaz

    The panels I've created have been in 1.6mm or 2mm alu but not thicker.  I know we have an approach using JLCPCB to create front panels but this is a great for when simple panels, or prototype panels need creating - you know, when you're messing around and you have some perfboard with dangling pots, LEDs, buttons etc intended for a panel.  You could knock one of these up quickly to make it easier to work with.  Mind you, they are quite expensive!!

    • Cancel
    • Vote Up 0 Vote Down
    • Sign in to reply
    • More
    • Cancel
  • shabaz
    shabaz over 2 years ago in reply to Andrew J

    That's true, although out of the range, probably the 10mm one is the most useful size one. As well as being handy for BNC, it's also possible to get push-button caps that fit through the 10 mm hole nicely. The pillar drill is a lot more versatile!

    • Cancel
    • Vote Up 0 Vote Down
    • Sign in to reply
    • More
    • Cancel
  • beacon_dave
    beacon_dave over 2 years ago in reply to Andrew J

    Greenlee do some that will punch through 3.5mm stainless.

    https://youtu.be/JiH45GuwbPc?t=53

    Nice 11-ton battery-hydraulic driver available these days. The youth of today have it easy... Slight smile

    Now, what was that you were saying about expensive... ?

    • Cancel
    • Vote Up 0 Vote Down
    • Sign in to reply
    • More
    • Cancel
  • Andrew J
    Andrew J over 2 years ago in reply to beacon_dave

    I used to work for a company called Nacanco - no longer around, just co-incidence - that made beverage cans and the tops that go on top.  This reminds me of the steel punchers that created the first cup or disc, although they were absolutely massive, factory floor jobbies.

    • Cancel
    • Vote Up 0 Vote Down
    • Sign in to reply
    • More
    • Cancel
element14 Community

element14 is the first online community specifically for engineers. Connect with your peers and get expert answers to your questions.

  • Members
  • Learn
  • Technologies
  • Challenges & Projects
  • Products
  • Store
  • About Us
  • Feedback & Support
  • FAQs
  • Terms of Use
  • Privacy Policy
  • Legal and Copyright Notices
  • Sitemap
  • Cookies

An Avnet Company © 2025 Premier Farnell Limited. All Rights Reserved.

Premier Farnell Ltd, registered in England and Wales (no 00876412), registered office: Farnell House, Forge Lane, Leeds LS12 2NE.

ICP 备案号 10220084.

Follow element14

  • X
  • Facebook
  • linkedin
  • YouTube