element14 Community
element14 Community
    Register Log In
  • Site
  • Search
  • Log In Register
  • Community Hub
    Community Hub
    • What's New on element14
    • Feedback and Support
    • Benefits of Membership
    • Personal Blogs
    • Members Area
    • Achievement Levels
  • Learn
    Learn
    • Ask an Expert
    • eBooks
    • element14 presents
    • Learning Center
    • Tech Spotlight
    • STEM Academy
    • Webinars, Training and Events
    • Learning Groups
  • Technologies
    Technologies
    • 3D Printing
    • FPGA
    • Industrial Automation
    • Internet of Things
    • Power & Energy
    • Sensors
    • Technology Groups
  • Challenges & Projects
    Challenges & Projects
    • Design Challenges
    • element14 presents Projects
    • Project14
    • Arduino Projects
    • Raspberry Pi Projects
    • Project Groups
  • Products
    Products
    • Arduino
    • Avnet Boards Community
    • Dev Tools
    • Manufacturers
    • Multicomp Pro
    • Product Groups
    • Raspberry Pi
    • RoadTests & Reviews
  • Store
    Store
    • Visit Your Store
    • Choose another store...
      • Europe
      •  Austria (German)
      •  Belgium (Dutch, French)
      •  Bulgaria (Bulgarian)
      •  Czech Republic (Czech)
      •  Denmark (Danish)
      •  Estonia (Estonian)
      •  Finland (Finnish)
      •  France (French)
      •  Germany (German)
      •  Hungary (Hungarian)
      •  Ireland
      •  Israel
      •  Italy (Italian)
      •  Latvia (Latvian)
      •  
      •  Lithuania (Lithuanian)
      •  Netherlands (Dutch)
      •  Norway (Norwegian)
      •  Poland (Polish)
      •  Portugal (Portuguese)
      •  Romania (Romanian)
      •  Russia (Russian)
      •  Slovakia (Slovak)
      •  Slovenia (Slovenian)
      •  Spain (Spanish)
      •  Sweden (Swedish)
      •  Switzerland(German, French)
      •  Turkey (Turkish)
      •  United Kingdom
      • Asia Pacific
      •  Australia
      •  China
      •  Hong Kong
      •  India
      •  Korea (Korean)
      •  Malaysia
      •  New Zealand
      •  Philippines
      •  Singapore
      •  Taiwan
      •  Thailand (Thai)
      • Americas
      •  Brazil (Portuguese)
      •  Canada
      •  Mexico (Spanish)
      •  United States
      Can't find the country/region you're looking for? Visit our export site or find a local distributor.
  • Translate
  • Profile
  • Settings
Test & Tools
  • Technologies
  • More
Test & Tools
Blog Quick hot-air soldering video
  • Blog
  • Forum
  • Documents
  • Files
  • Members
  • Mentions
  • Sub-Groups
  • Tags
  • More
  • Cancel
  • New
Join Test & Tools to participate - click to join for free!
  • Share
  • More
  • Cancel
Group Actions
  • Group RSS
  • More
  • Cancel
Engagement
  • Author Author: shabaz
  • Date Created: 5 Mar 2023 1:55 PM Date Created
  • Views 34091 views
  • Likes 13 likes
  • Comments 5 comments
  • hot-air
  • soldering
Related
Recommended

Quick hot-air soldering video

shabaz
shabaz
5 Mar 2023

Very bad and shaky video quality, but I've decided to upload this 2-minute video anyway, in case it helps anyone, because I struggled for years with hot air tools, and it only slowly dawned on me the issues I'd had were related to things like no pre-heating and severely underpowered (300W from memory) hot-air tool. 

Any tips will be gratefully appreciated! Nothing in this video is best practice; I'm just a beginner. It's definitely not normal to apply paste on a pre-heated board for instance, but it seems to prevent the paste from drying up rapidly (and I am using several-year-expired paste).

The video shows capacitors being soldered using the hot-air tool, to a thick copper 4-layer PCB. The soldering iron struggled with it, so I decided to use the hot air tool instead. The video doesn't actually show the placement of the capacitors, but that was just done with tweezers, placed on top and lightly tapped to make sure they were sitting in the solder. I needed two hands for that, and I was shooting video handheld.

Whether the capacitors work or not I have no idea! : ) That's yet to be seen. I was trying to heat evenly, because they can very easily crack and go open- or short-circuit. 

Direct video link

You don't have permission to edit metadata of this video.
Edit media
x
image
Upload Preview
image

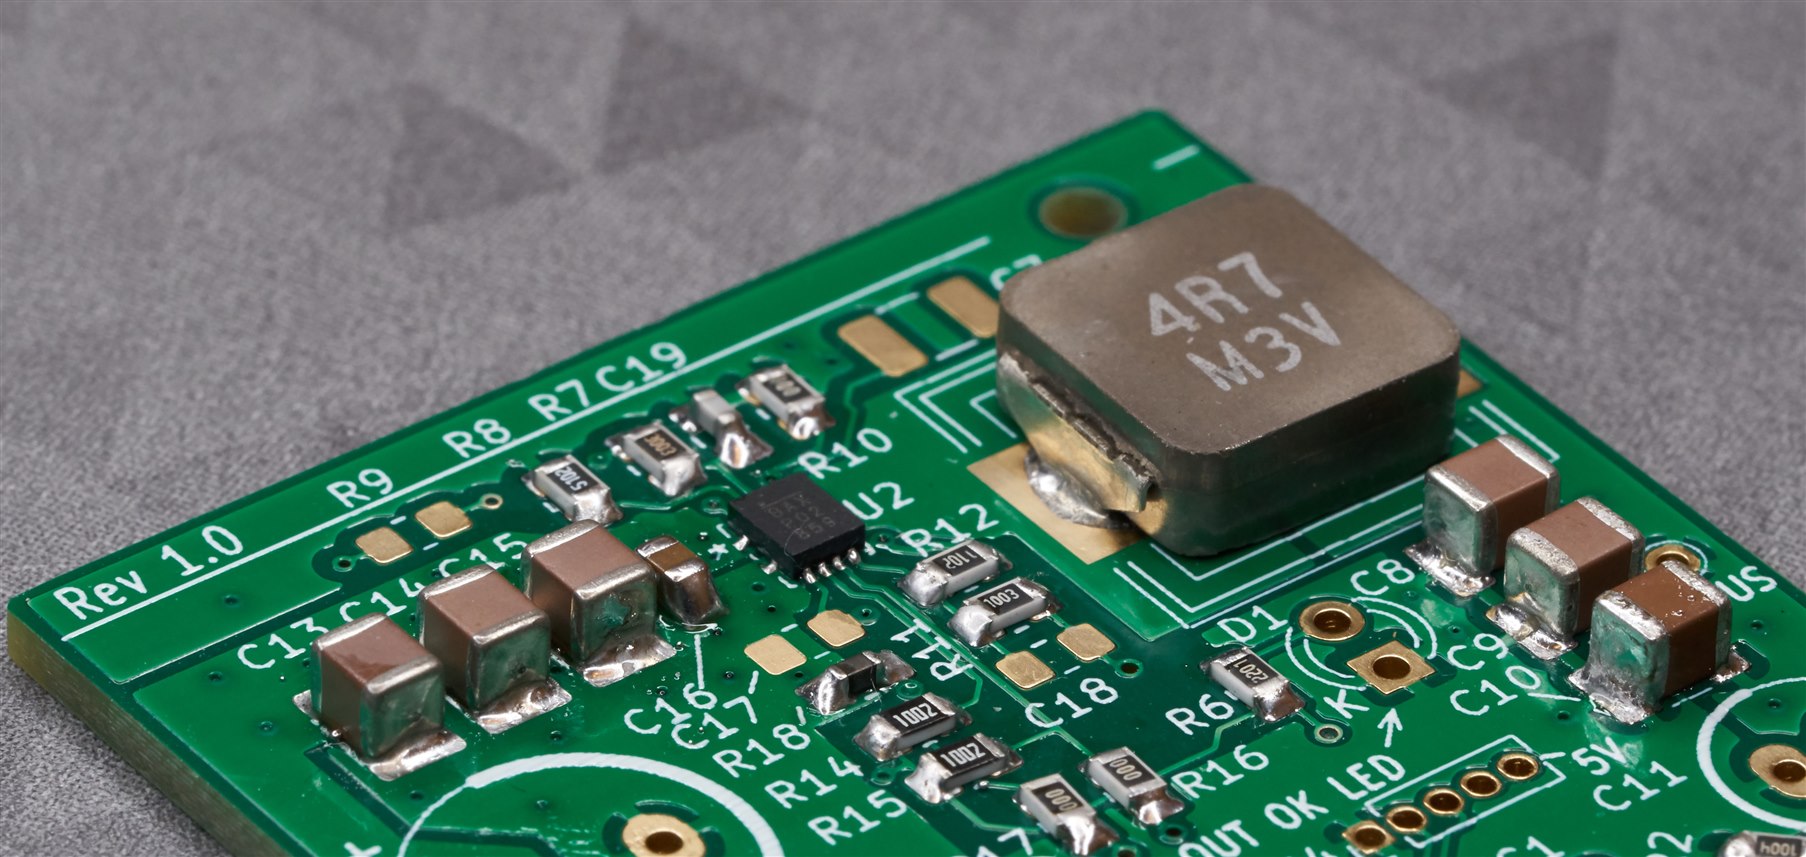
Photos of the board:

image

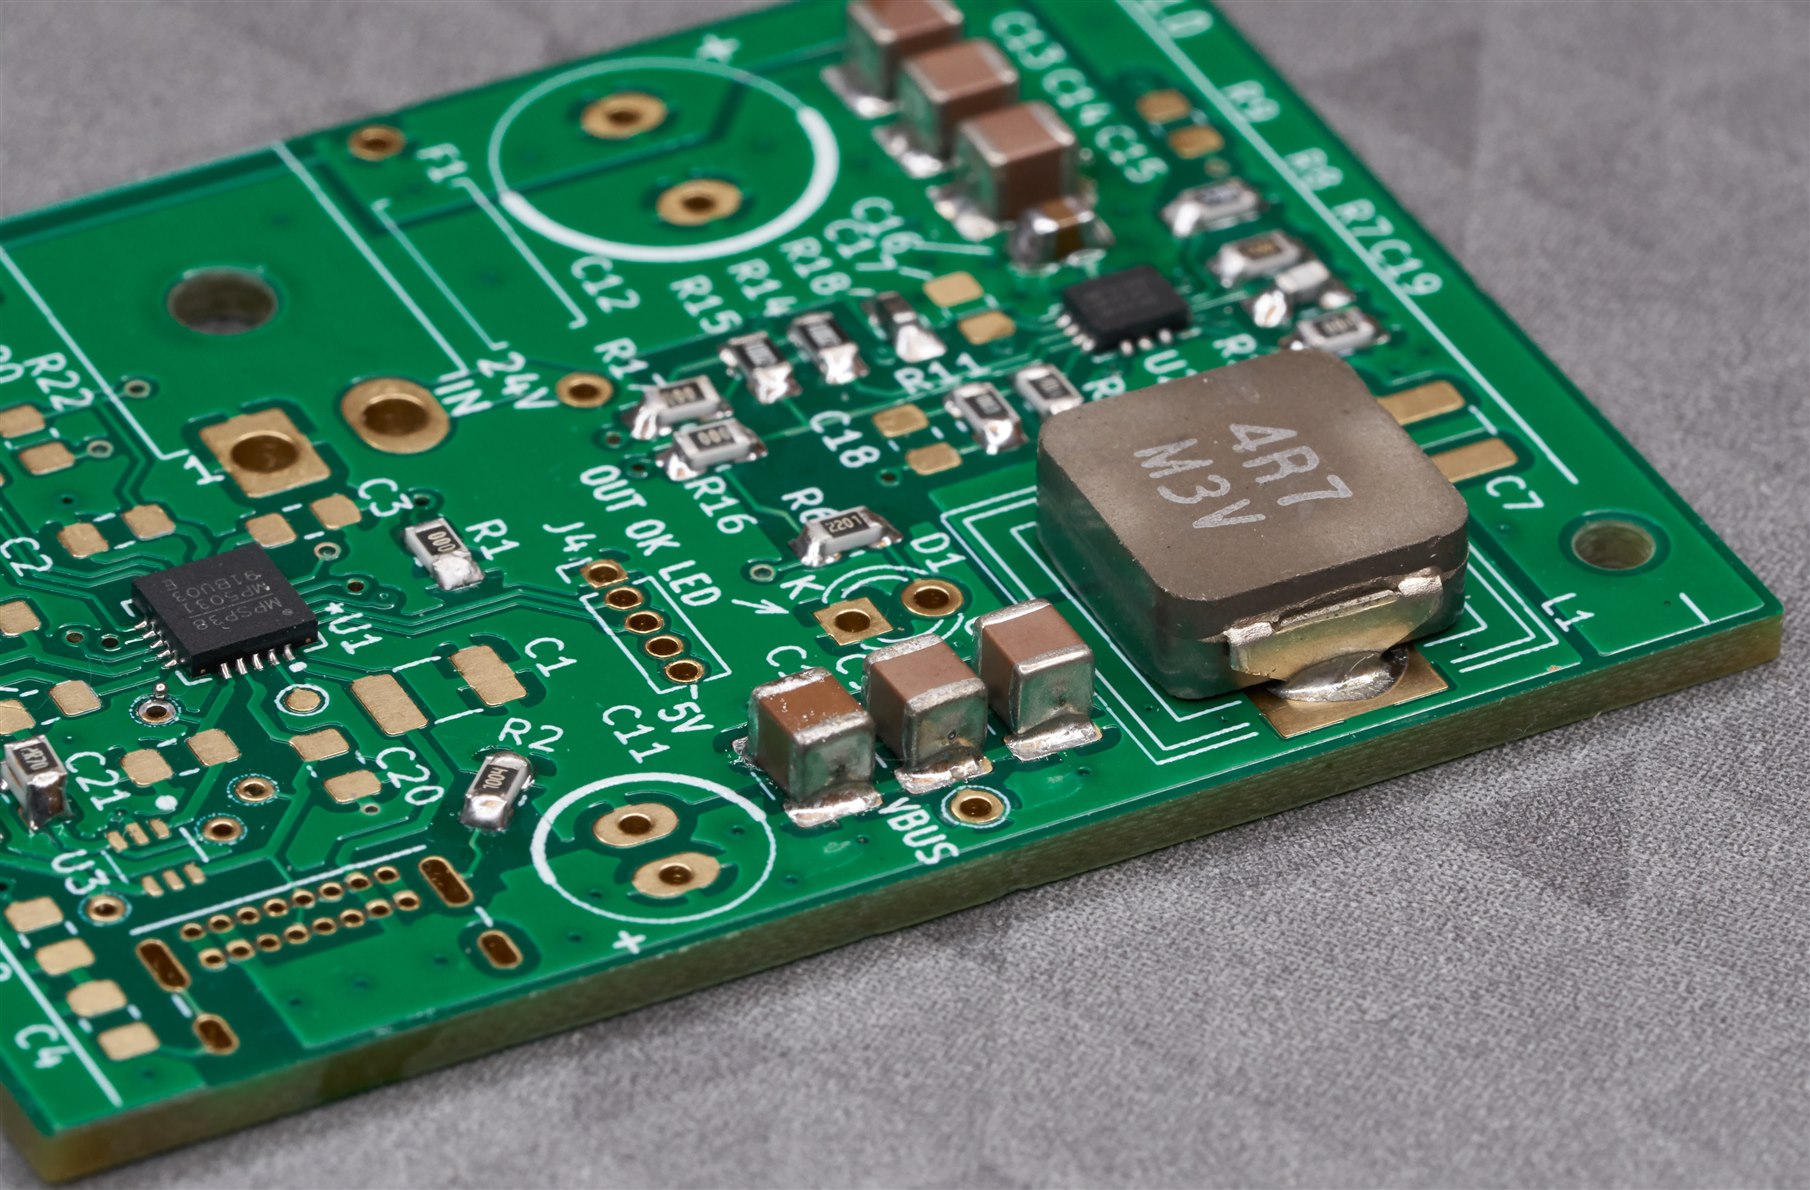
View from a different angle; the board is still a work-in-progress, still things to solder, but the rest can mostly be done with a soldering iron.

  • Sign in to reply

Top Comments

  • baldengineer
    baldengineer over 2 years ago +2
    First, I don't think they look THAT bad. With those BACs, after they reflow, I will sometimes go back and flood them with flux, then hit them again with the hot air. My working idea is that parts like…
  • Andrew J
    Andrew J over 2 years ago +1
    It might be worth getting new paste. I can paste up a multi-part board (say 50 parts) and then place the parts without the solder drying out. Also, I’ve heard that solder paste can be “revived” by mixing…
  • shabaz
    shabaz over 2 years ago in reply to Andrew J +1
    Hi Andrew, Thanks for the response! Using a stencil with a hot-air tool is a paradigm shift for me, since ordinarily I'd expect to use to stencil with a reflow oven. I guess I still want to partially…
  • Andrew J
    Andrew J over 2 years ago in reply to shabaz

    Interesting - I’d never thought of a stencil as anything but a means to lay down a correct amount of solder accurately.  Using a blob-it-out syringe often ended up with bridges across small pin clearances that were difficult/impossible to remove because the solder flowed under the chip.  Clearly there’s a technique problem there as well! I can hand solder SOICs and even TSSOP but my eyesight is poor and hands shakes that I find it quite stressful - with a stencil, the only stress I have is placing the ICs accurately enough given my shakey hands.  Again, the small amount of solder used with a stencil helps here because it does help the piece move into place.

    With the large inductors and oversized pads, I’ve always gone back to manually add more solder to them once the hot air has mechanically secured it - I sometimes do thst with 0805 parts as well if they look a bit dodgy.  

    I do wish someone would invent a PCB finish that had more friction on the pads!

    • Cancel
    • Vote Up 0 Vote Down
    • Sign in to reply
    • More
    • Cancel
  • shabaz
    shabaz over 2 years ago in reply to baldengineer

    Hi James,

    Thanks for the info! Hehe yes the B.A.C.s suck up all the heat, they were problematic with a soldering iron on a scrap board before I decided to hit them with hot air. I too was concerned about cracking. Does it affect smaller capacitors more than BA ones? I've had capacitors go short-circuit when they were 0402-sized, but I have not done enough reflow to know if larger capacitors would be less at risk, or higher risk.

    Also, nice tip to re-flux, the quick drying up of flux made me uncomfortable, so that sounds like a workable approach.

    I'll crank up to 350 deg C in future. I was using this stuff, Qualitek 818, Sn62Pb36Ag2:

    image(Image source: Somerset Solders).

    • Cancel
    • Vote Up 0 Vote Down
    • Sign in to reply
    • More
    • Cancel
  • baldengineer
    baldengineer over 2 years ago

    First, I don't think they look THAT bad. With those BACs, after they reflow, I will sometimes go back and flood them with flux, then hit them again with the hot air. My working idea is that parts like high-layer count MLCCs are pretty effective heat sinks, so all of the flux in the paste burns up before the alloy melts, which prevents a clean reflow. By hitting them again with a bunch of flux, you're giving the added flux a chance to break down oxides that started to build up from the (relatively) long period of time you soaked them with the heat gun.

    Maybe my explanation is wrong, but I have found flooding with flux and reflowing again really cleans them up.

    One trick I've been trying recently is setting my air to 150C and giving the board a chance to soak up some heat. Then after about 2 minutes, I crack up the air to my intended temperature. So, basically, minimally activate the flux and pre-heat the FR4, copper, and components. I really think a downside to hot air soldering is that the flux burns off faster (and is less effective overall.) Also, I really worry about thermal stresses on MLCCs. My experience at the capacitor company taught me how frustrating thermal cracking can be (and how easy it is to do.)

    I didn't catch which paste you're using, but 300C sounds low to me. When I solder with BiSnAg, I run my air between 225 and 250C, depending on the area, even though it reflows around 140-145C. When using SnPb, I set the air to at least 350C. And when using SAC, I just throw everything away and pour a stiff drink. (j/k, at least 450C).

    • Cancel
    • Vote Up +2 Vote Down
    • Sign in to reply
    • More
    • Cancel
  • shabaz
    shabaz over 2 years ago in reply to Andrew J

    Hi Andrew,

    Thanks for the response!

    Using a stencil with a hot-air tool is a paradigm shift for me, since ordinarily I'd expect to use to stencil with a reflow oven. I guess I still want to partially assemble with a normal soldering iron, but I have no logical reason for it, and I should just do it all with a stencil. I was planning to get one for this board incidentally, since it would especially have helped with the ICs, but I forgot to order it.

    Good point with the amount of solder. It's less than I would have wanted too. I've got a few problems there; if the board was cold, then I could more easily judge the amount of solder without it immediately becoming runny, however the reason I'm not doing it cold is because my pre-heater takes about 10 minutes to raise the temperature of the board, it is very underpowered, and by that time, the paste becomes runny and then dries. I'm also using incorrect footprints, mainly hand-solderable sizes, and the inductor ones are very oversized to try to fit different inductor dimensions.

    • Cancel
    • Vote Up +1 Vote Down
    • Sign in to reply
    • More
    • Cancel
  • Andrew J
    Andrew J over 2 years ago

    It might be worth getting new paste.  I can paste up a multi-part board (say 50 parts) and then place the parts without the solder drying out.  Also, I’ve heard that solder paste can be “revived” by mixing some flux in with it - never tried it though.  What I have found the most easiest way in a million miles is to use a stencil to lay on the paste - it is so worth the £5 to get made with the PCB that it’s a no-brainier.  It makes laying on the paste way quicker so even less time to dry out.  I’ve also found the second most easiest thing to do is pre-heat the board - again, it makes the job so much easier than hot air alone.  I should add, I’m no expert either!

    Your board looks fine to me - I would probably have more solder on the inductor terminals (less now I use templates) but I don’t know if that is necessary if it is mechanically sound.  Besides, those things are a nightmare to get off if needed to be replaced and more solder doesn’t help that.

    • Cancel
    • Vote Up +1 Vote Down
    • Sign in to reply
    • More
    • Cancel
element14 Community

element14 is the first online community specifically for engineers. Connect with your peers and get expert answers to your questions.

  • Members
  • Learn
  • Technologies
  • Challenges & Projects
  • Products
  • Store
  • About Us
  • Feedback & Support
  • FAQs
  • Terms of Use
  • Privacy Policy
  • Legal and Copyright Notices
  • Sitemap
  • Cookies

An Avnet Company © 2025 Premier Farnell Limited. All Rights Reserved.

Premier Farnell Ltd, registered in England and Wales (no 00876412), registered office: Farnell House, Forge Lane, Leeds LS12 2NE.

ICP 备案号 10220084.

Follow element14

  • X
  • Facebook
  • linkedin
  • YouTube