


Title: Neonatal Jaundice Phototherapy
By: sunnyiut
Design Challenge: Bluetooth Unleashed
Blog number: 03
| Blog List | |
|---|---|
| 01 : Introduction | 02 : Project Plan |
| 03 : BLE try-out_CC2640R2 |
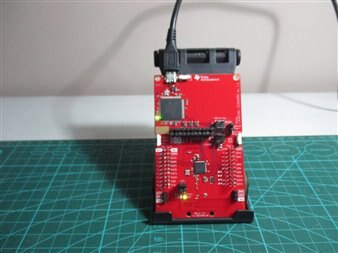
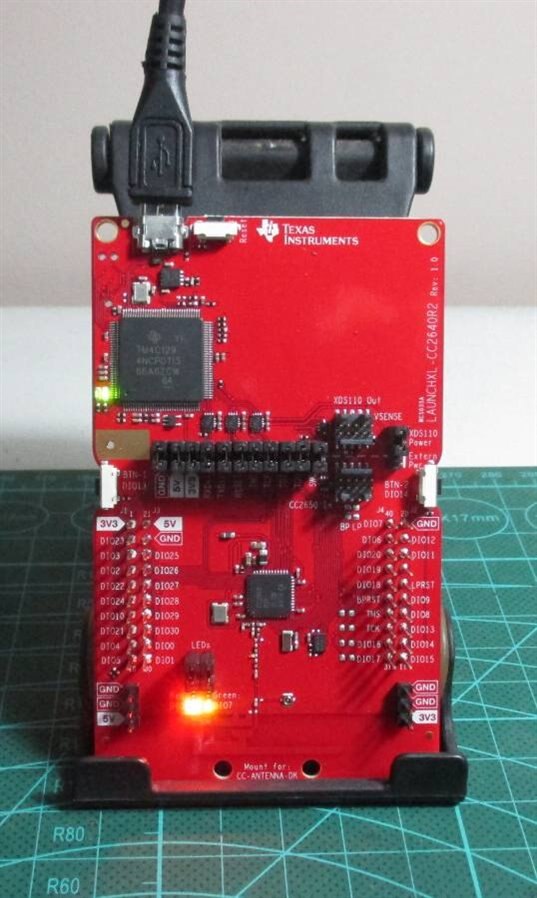
It's been a while since I have received the 'HERO board' [CC2640R2 Launchpad]. I checked it with a couple of demo sample programs provided by TI. One is the "out of the box" demo and other one is the "project zero" example. In this blog I'll share my experience of getting started.
CC2640R2 Launchpad
Category: Wireless MCU
Protocol: BLE 5
Processors: Main - ARM Cortex M3 [48 MHz, 61 uA per MHz]
RF - ARM Cortex M0
Sensor - unknown [ low power - a few uA], operates autonomously while the system is in sleep mode
RF: Bluetooth Low Energy 4.2 and 5 specifications
OTA: Supports over the air firmware update [using app]
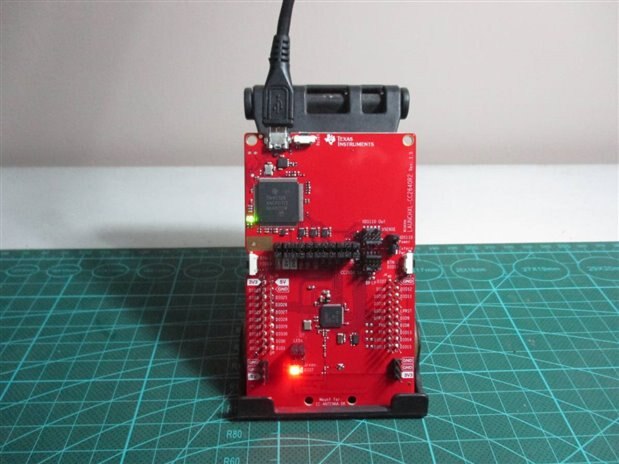
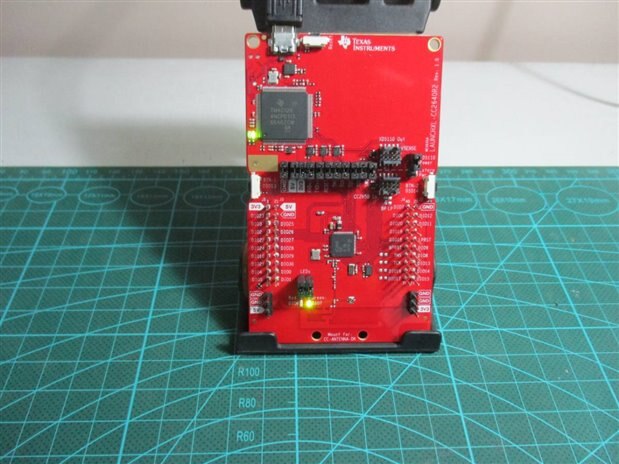
The Launchpad consists of XDS1110 debugger, which can be separated by removing jumpers.
It has builtin PCB antenna, however there is a tiny connector for external antenna.
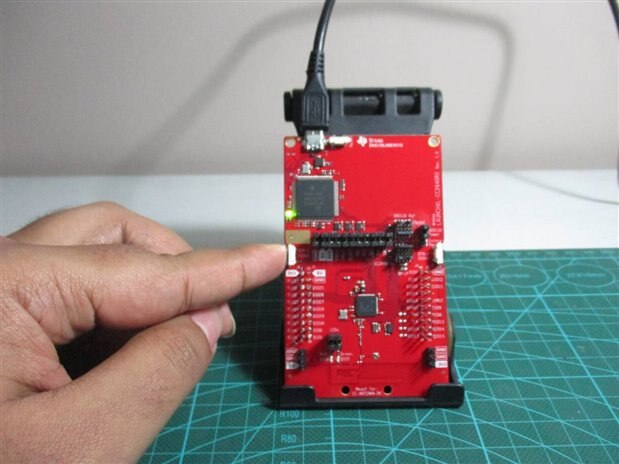
There are two LEDs on board. RED and GREEN at DI06 and DI07.

However, the 10pin XDS programmer connector has a component reference of "CC2650 in"!!!
Out of the Box Demo
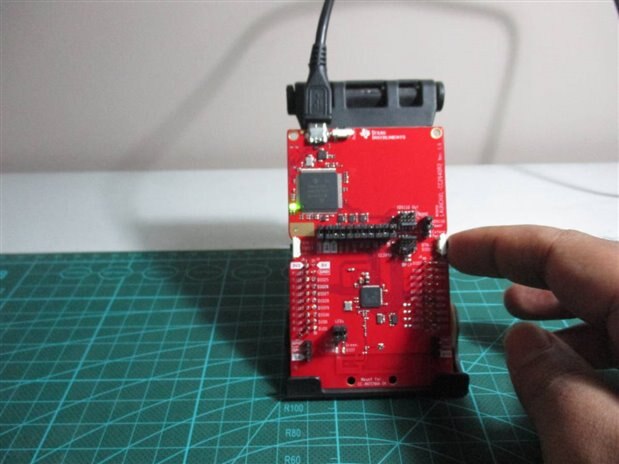
When I powered the board up, I found that the Green LED was flashing. Which indicated that the board was already pre-programmed with a sample code.
There was a Out of the Box demo where the flashing LED indicated that the CC2640R2 was already active and started advertising.
However, I found that the compiled build file is readily available at TI Resource Explorer , to flash the launchpad directly online. But there is no source code available.
At power-up, I saw the green LED flashed several times rapidly indicating a power-on-self-test to check the 'serial flash'.
At successful power-up, LED continued to blink periodically indicating active advertising.
It was a demo code for 'peripheral' function.
The APP:
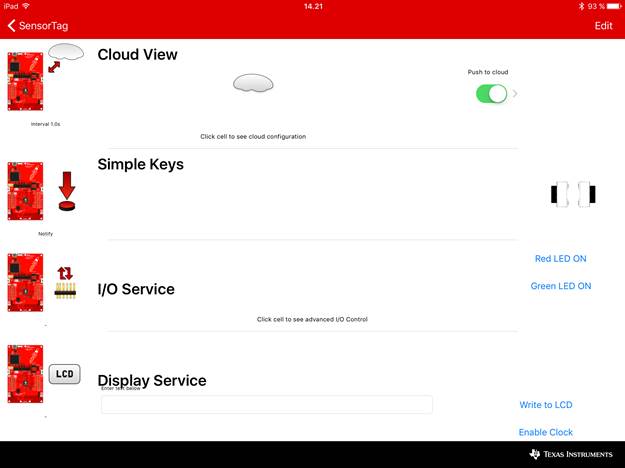
There is an official APP for the out of the box demo - Simplelink Starter App which can be downloaded from App Store. This app contains the GUI to control LEDs, take button inputs and a display service.
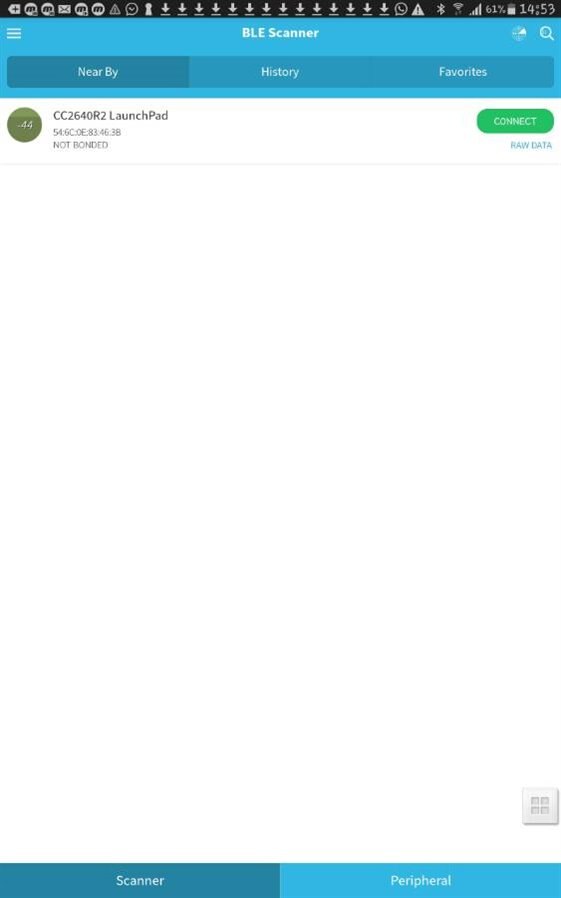
Unfortunately, I don't have iphone, so I had to look for android app and I went for "BLE Scanner" from Bluepixel Technologies LLP.
Services:
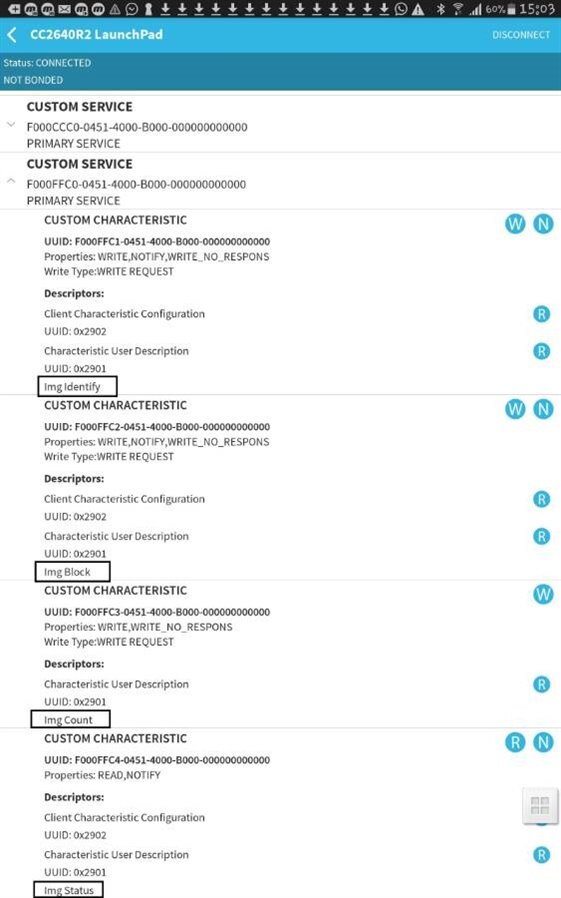
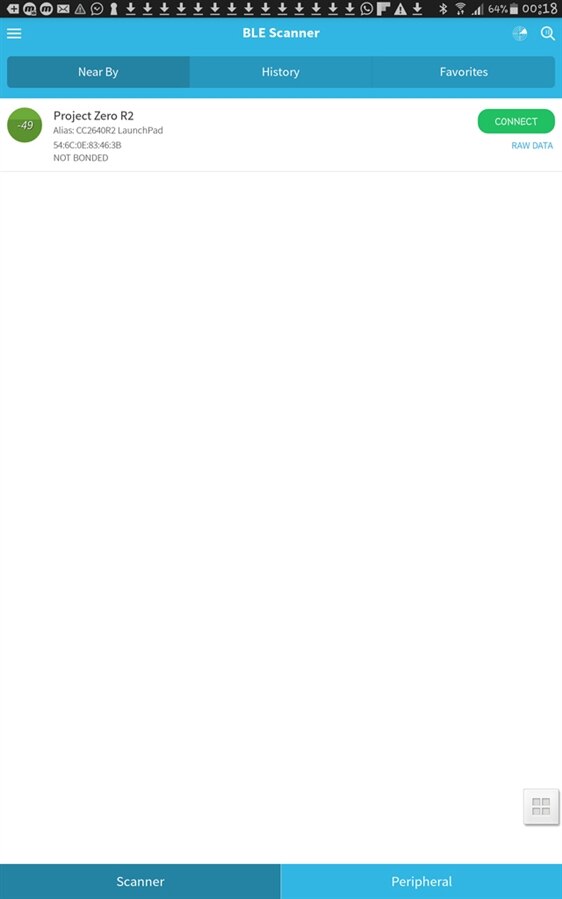
The BLE Scanner found the device with the name of "CC2640R2 LaunchPad". After connecting, there were five custom services.
| {gallery} Device Scanning and Services |
|---|
Scanned device: CC2640R2 LAunchPad found |
Custom services: 5 different custom services with a battery service |
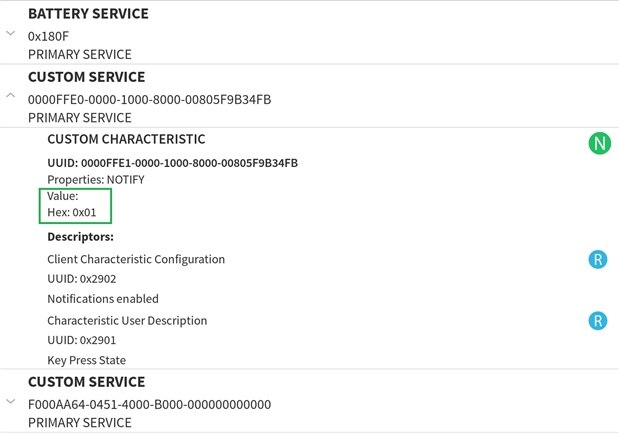
S1 Button press: Sends notification and updates the value of custom characteristics |
S1 Button pressed: Notification received with a value of 0x01 |
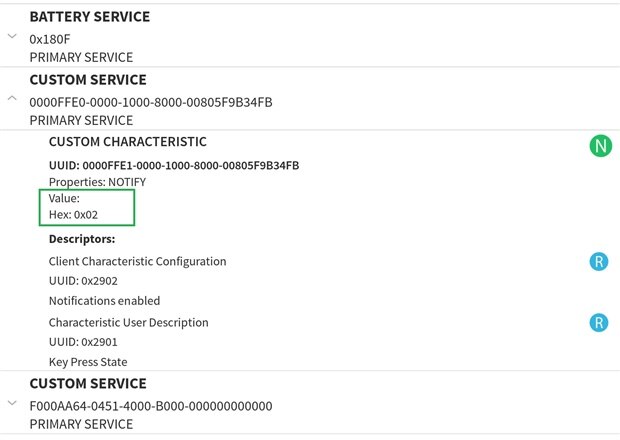
S2 Button press: Sends notification and updates the value of custom characteristics |
S2 Button pressed: Notification received with a value of 0x02 |
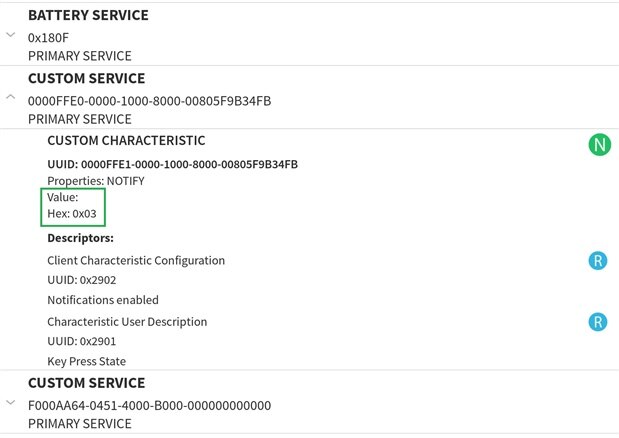
S1 and S2 Button pressed: Notification received with a value of 0x03 |
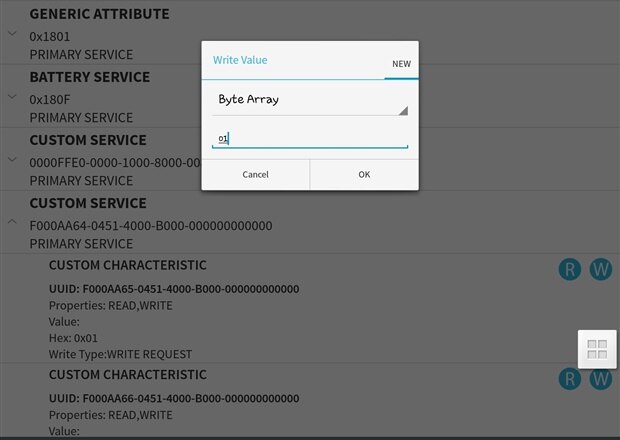
Red LED on: writing 0x01 to characteristics [UUID: F000AA65-xxxxx....] value |
Red LED on: DI06 red LED turned on |
Green LED on: writing 0x02 to characteristics [UUID: F000AA65-xxxxx....] value |
Green LED on: DI07 green LED turned on |
LED off: writing 0x00 to characteristics [UUID: F000AA66-xxxxx....] value |
Display service: output Cannot be observed using BLE Scanner |


Custom Service - 0000FFE0-xxxxx......
It takes notification [if enabled] from the BLE device when any of the S1 and S2 button is pressed.
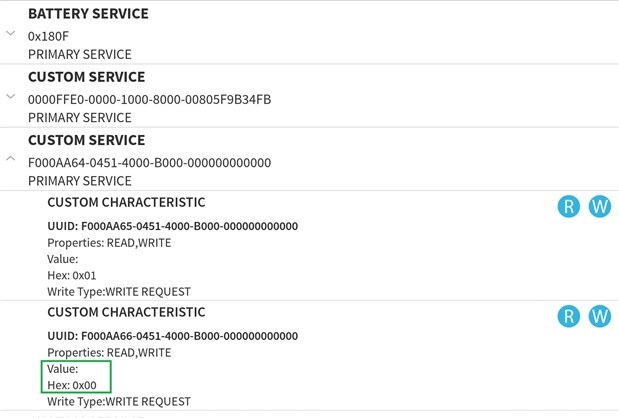
Custom Service - F000AA64-xxxxx......
It controls the on board LEDs. Value can be read to get the status of the LED whether it is at on or off state.
Writing value 0x01 [to F0000AA65-xxxx...] turns the RED LED on
Writing value 0x02 [to F0000AA65-xxxx...] turns the GREEN LED on
However, despite of the LED status, they will turn on only if the F0000AA66-xxxx..... has a value of 0x01. by writing 0x00 LEDs can be turned off.
The other three custom services could not be demonstrated by BLE Scanner. However, from the image of the official app, it seemed to be Display service to view some sort of image may be.
Project Zero Demo
I tried another sample program, Project Zero on the CC2640R2 LaunchPad.
It's a simple peripheral example almost similar to the "out of the box" demo. The on board LEDs can be controlled and there is button press notification. However, the custom characteristics are little bit different than the out of the box demo. Also, there is a custom service of receiving and transmitting long string message. A 'log of actions' is available through the XDS110 User UART at 115200 baud.
I am sharing the output from the serial UART and mobile device end. However, this time i'll be using 'BLE Scanner' again for my Android TAB, because I found that the official android app from TI does not support my TAB specs. I am using putty as serial terminal to see the log messages.
Startup:
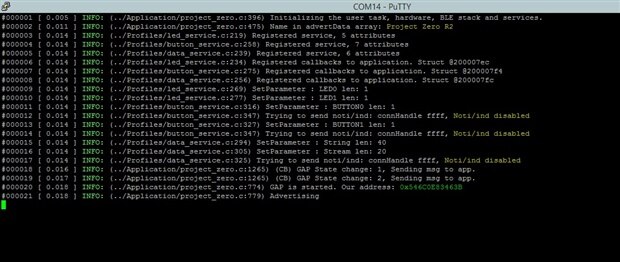
I faced no difficulty on downloading the program into the launchpad [good for me!!]. it starts advertising immediately and sends the parameters to the serial terminal.
It also sends the address of the peer to the serial terminal after a successful connection.
| {gallery} Project0 startup |
|---|
Device Scanning: Project Zero R2 found |
Serial Terminal: Shows the parameters and starts advertising |
Device Connected: Shows three custom services |
Serial Terminal: connection status and peer address |


Custom Services:
UUID - F000XXXX-0451-4000-B000-000000000000
128 bit namespace for demo applications.
16bit parts ID -
F0001110-0451-xxxx.... for LED control
F0001120-0451-xxxx.... for button press notifications
F0001130-0451-xxxx.... for string message data service
LED Control:
Unlike the 'out of the box' demo which had one characteristics to control LED, 'project zero' has two.
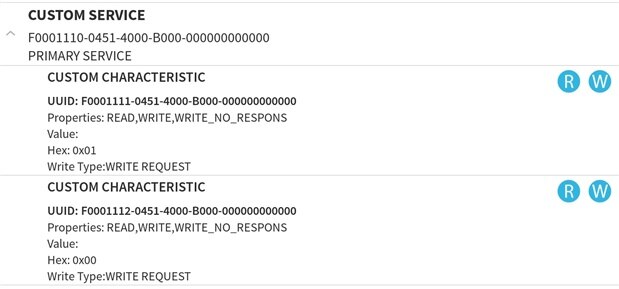
F0001110-0451-xxxx... has two different custom characteristics -
- F0001111-xxxx..... controls LED0 - on board RED LED
- F0001112-xxxx..... controls LED1 - on board GREEN LED
Values can be read from the board to get the current status. Or write values to control LEDs
0x00 represents off condition
0x01 represents on condition.
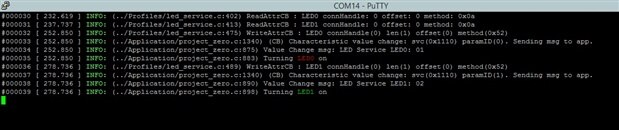
The serial terminal displays the status and activity.
| {gallery} LED control |
|---|
LED state: F0001111.... for RED LED, F0001112... for GREEN LED |
Both LED on: writing 0x01 to both the characteristics turns on both the RED and GREEN LED |
Serial Terminal: Displays the LED status and log the activity |
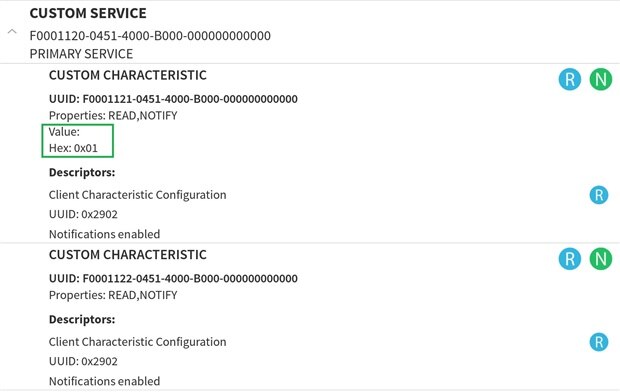
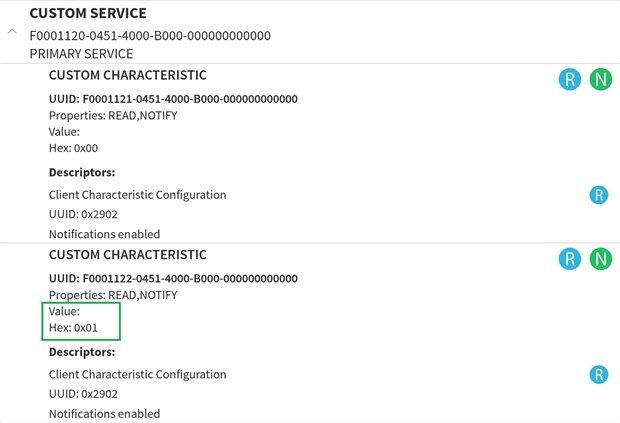
Button Press Notification:
F0001120-0451-xxxx... has two different custom characteristics -
- F0001121-xxxx..... Button0 - on board button S1
- F0001122-xxxx..... Button1 - on board button S2
Values can be read from the board to get the button state. Or subscribe to get notified when button is pressed.
0x00 represents open condition
0x01 represents short/button pressed condition.
The serial terminal displays the status and activity.
| {gallery} project zero button service |
|---|
Button Service: S1 button is pressed |
Button Service: S2 button is pressed |
Serial Terminal: displays state and logs activity |
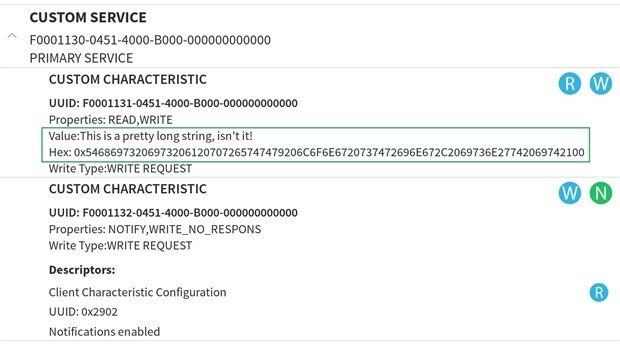
Data Service:
F0001130-0451-xxxx... has two different custom characteristics -
- F0001131-xxxx..... String Char - Receive/Transmit a String Message
- F0001132-xxxx..... Stream Char - Receive/Transmit a String Message without response feedback or notification
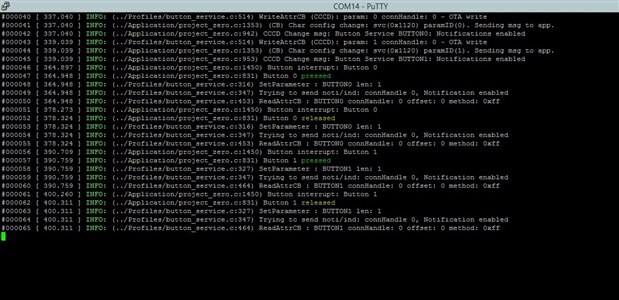
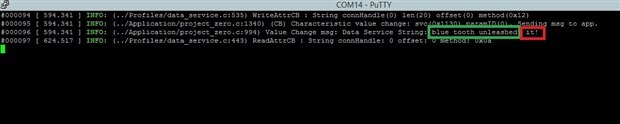
| {gallery} project 0 - data service |
|---|
Data Service: Reading String char |
Serial Terminal: logs activity |
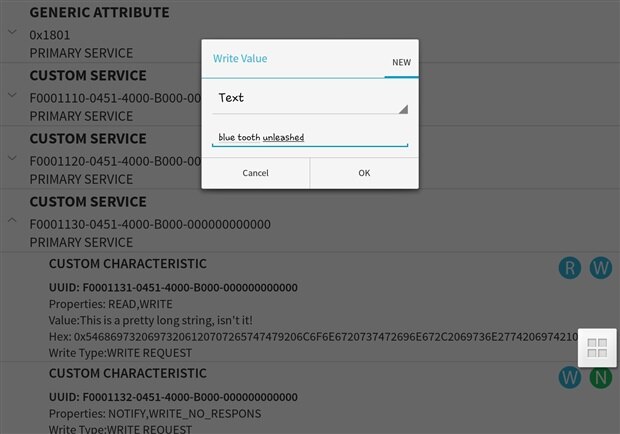
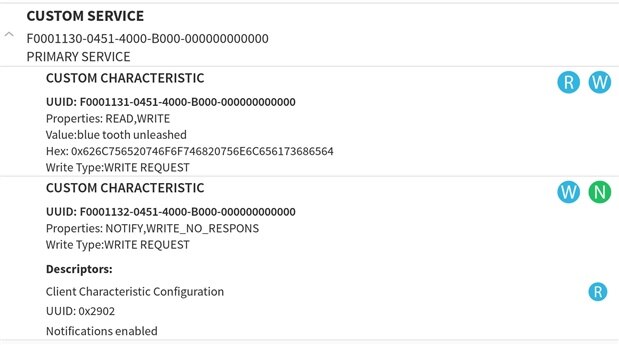
Data Service: Writing string char - bluetooth unleashed |
Data Service: Reading it back - bluetooth unleashed |
Serial Terminal: Displays activity and the changed string... but there is "t it!" at the end of "bluetooth unleashed" - comes from previous string |

Ok, this is my first experience with CC2640R2. It demonstrates a simple peripheral example which gives me the basic concept of the working principal.
In my next blog, I'll try to interface the Sensor Booster Pack module with the MSP432 MCU and use the CC2650MA BLE module to send data.
Top Comments