element14 Community
element14 Community
    Register Log In
  • Site
  • Search
  • Log In Register
  • About Us
  • Community Hub
    Community Hub
    • What's New on element14
    • Feedback and Support
    • Benefits of Membership
    • Personal Blogs
    • Members Area
    • Achievement Levels
  • Learn
    Learn
    • Ask an Expert
    • eBooks
    • element14 presents
    • Learning Center
    • Tech Spotlight
    • STEM Academy
    • Webinars, Training and Events
    • Learning Groups
  • Technologies
    Technologies
    • 3D Printing
    • FPGA
    • Industrial Automation
    • Internet of Things
    • Power & Energy
    • Sensors
    • Technology Groups
  • Challenges & Projects
    Challenges & Projects
    • Design Challenges
    • element14 presents Projects
    • Project14
    • Arduino Projects
    • Raspberry Pi Projects
    • Project Groups
  • Products
    Products
    • Arduino
    • Avnet Boards Community
    • Dev Tools
    • Manufacturers
    • Multicomp Pro
    • Product Groups
    • Raspberry Pi
    • RoadTests & Reviews
  • Store
    Store
    • Visit Your Store
    • Choose another store...
      • Europe
      •  Austria (German)
      •  Belgium (Dutch, French)
      •  Bulgaria (Bulgarian)
      •  Czech Republic (Czech)
      •  Denmark (Danish)
      •  Estonia (Estonian)
      •  Finland (Finnish)
      •  France (French)
      •  Germany (German)
      •  Hungary (Hungarian)
      •  Ireland
      •  Israel
      •  Italy (Italian)
      •  Latvia (Latvian)
      •  
      •  Lithuania (Lithuanian)
      •  Netherlands (Dutch)
      •  Norway (Norwegian)
      •  Poland (Polish)
      •  Portugal (Portuguese)
      •  Romania (Romanian)
      •  Russia (Russian)
      •  Slovakia (Slovak)
      •  Slovenia (Slovenian)
      •  Spain (Spanish)
      •  Sweden (Swedish)
      •  Switzerland(German, French)
      •  Turkey (Turkish)
      •  United Kingdom
      • Asia Pacific
      •  Australia
      •  China
      •  Hong Kong
      •  India
      •  Korea (Korean)
      •  Malaysia
      •  New Zealand
      •  Philippines
      •  Singapore
      •  Taiwan
      •  Thailand (Thai)
      • Americas
      •  Brazil (Portuguese)
      •  Canada
      •  Mexico (Spanish)
      •  United States
      Can't find the country/region you're looking for? Visit our export site or find a local distributor.
  • Translate
  • Profile
  • Settings
Enchanted Objects
  • Challenges & Projects
  • Design Challenges
  • Enchanted Objects
  • More
  • Cancel
Enchanted Objects
Blog A bit of 3D Printing
  • Blog
  • Forum
  • Documents
  • Polls
  • Files
  • Events
  • Mentions
  • Sub-Groups
  • Tags
  • More
  • Cancel
  • New
  • Share
  • More
  • Cancel
Group Actions
  • Group RSS
  • More
  • Cancel
Engagement
  • Author Author: Workshopshed
  • Date Created: 21 Jun 2015 11:54 AM Date Created
  • Views 2252 views
  • Likes 5 likes
  • Comments 7 comments
  • enchanted_cottage
  • enchanted_objects
  • 3d_printing
Related
Recommended

A bit of 3D Printing

Workshopshed
Workshopshed
21 Jun 2015

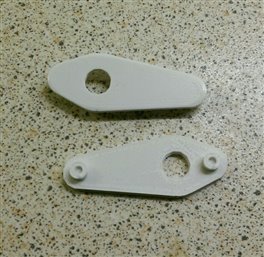
Whilst Hans was coding Matilda was fine tuning the mechanism and finishing the housing. When the magnet housings had been tested their positions had put Hans and Matilda a bit far back into the cottage. The magnet carriers were redesigned so that the holes were towards one end, that would move the positions forward by about 7mm and the coverings for the holes turned out not to be needed so those were removed to reduce printing time.

imageimage

Due to their simple design and shape they printed first time with no issues.

image

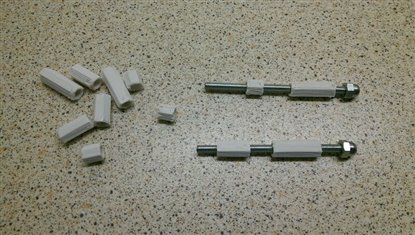
However not everything was so simple. After quite a few failures the spacers for supporting the Yún and shields were printed successfully by lying the models down, reducing the printing speed and printing at 1/2 speed for the first few layers. Also a brim was added as the footprint was quite small.

image

image

The final challenge for the printing was two buttons for the top panel. These went through several iterations and failed prints but eventually a design was created that fitted the panel and printed successfully. The small bobble on the stalk stops the buttons falling out when you turn the panel upside down.

image

image

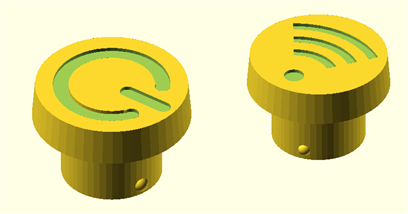
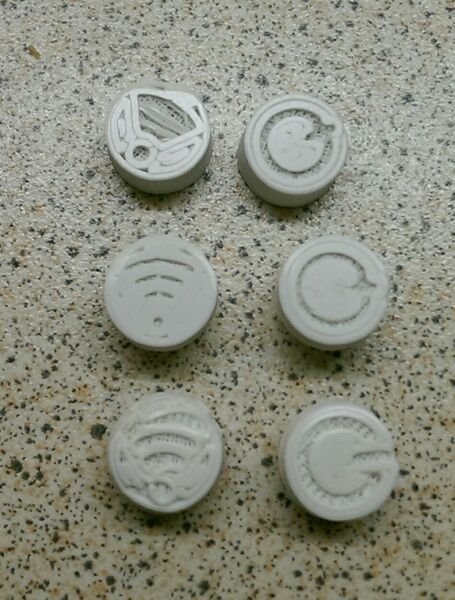
The key lessons learnt here were not to have features too close to the edge, the printer can handle thin slots but not thin solid, adding a brim helps give a crisp edge and when printing the first layer don't make it too thin and print it slowly.

image

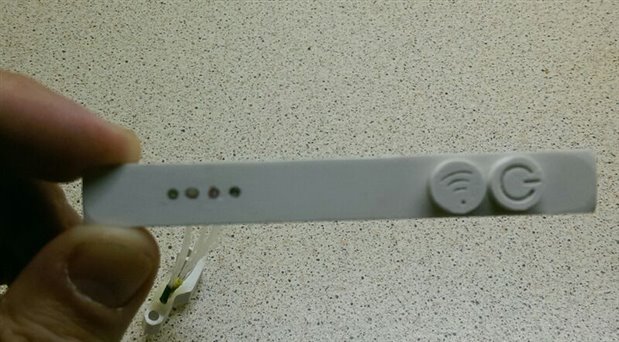
There was a little clean up of the wifi logo needed but the power button was simply a case of removing the brim.


Source code and models: https://github.com/Workshopshed/EnchantedObjects/tree/master/Mechanics


Next: Enchanted Objects Design Challenge - Locking the doors

  • Sign in to reply

Top Comments

  • balearicdynamics
    balearicdynamics over 10 years ago +1
    Good lesson, Andy. This is one of the rare cases where the (real) things are shown in 3D printing. Thinking comparing to the mill machine, the top of the buttons will be very simple to do reaching exactly…
  • balearicdynamics
    balearicdynamics over 10 years ago in reply to Workshopshed +1
    Sure, but I was just thinking on the differences (I am trying to discover if it is the worth to "find" one somewhere ) Lathe + engraving (also with a mill machine) implies two tools. Also the alternative…
  • balearicdynamics
    balearicdynamics over 10 years ago in reply to Workshopshed +1
    Andy, we should exclude the point relative to the quantities. This is another song and need a totally different approach but we are living in the world of "one single signed piece" (aka prototypes, or…
Parents
  • Workshopshed
    Workshopshed over 10 years ago

    I'm pretty sure that all of the 3D printed parts in the project could be made without a printer. For example the linkage for the movement could have been cut from wood and screwed together with hardwood, metal or plastic bushes. The only one that would require a rethink to make a different way would be the fibre housing.

    • Cancel
    • Vote Up 0 Vote Down
    • Sign in to reply
    • More
    • Cancel
Comment
  • Workshopshed
    Workshopshed over 10 years ago

    I'm pretty sure that all of the 3D printed parts in the project could be made without a printer. For example the linkage for the movement could have been cut from wood and screwed together with hardwood, metal or plastic bushes. The only one that would require a rethink to make a different way would be the fibre housing.

    • Cancel
    • Vote Up 0 Vote Down
    • Sign in to reply
    • More
    • Cancel
Children
  • balearicdynamics
    balearicdynamics over 10 years ago in reply to Workshopshed

    Andy, with a 3-axis mill machine - always remaining in the prototyping domain - the 3D printing make really more simple many parts, that instead need be created with separated pieces then assembled, screwed etc. as you say. The only real thing that at the moment in my analysis makes the difference vs the mill machine is the ability to make PCB too, that are an essential part of every prototype.

    • Cancel
    • Vote Up 0 Vote Down
    • Sign in to reply
    • More
    • Cancel
element14 Community

element14 is the first online community specifically for engineers. Connect with your peers and get expert answers to your questions.

  • Members
  • Learn
  • Technologies
  • Challenges & Projects
  • Products
  • Store
  • About Us
  • Feedback & Support
  • FAQs
  • Terms of Use
  • Privacy Policy
  • Legal and Copyright Notices
  • Sitemap
  • Cookies

An Avnet Company © 2025 Premier Farnell Limited. All Rights Reserved.

Premier Farnell Ltd, registered in England and Wales (no 00876412), registered office: Farnell House, Forge Lane, Leeds LS12 2NE.

ICP 备案号 10220084.

Follow element14

  • X
  • Facebook
  • linkedin
  • YouTube