


1. INTRODUCTION

Below I will expose my project that I proposed to do according to my first post: Noise and Vibration Impact on Aquarium Sea-life - Blog Post #1
As you can see, my ideas were changed due to hardware and software issues that I will detail in the following sections.
I'm the author, creator and owner of this end Project: idea, electrical diagram, and code.
2. HARDWARE
In the electronic diagram below I show the connections of the electronic components that I use:

List of parts:
- NUCLEO-H743ZI
- Vibration Sensor (KEMET)
- 12C LCD 20x4
- LED diode
- Battery 5V
- Micro USB to USB cable
- Air pump
Tools:
- Soldering iron
- Double-sided adhesive tape
3. ASSEMBLING THE DEVICE
Step 1.- Unpack the NUCLEO-H743ZI2 board.
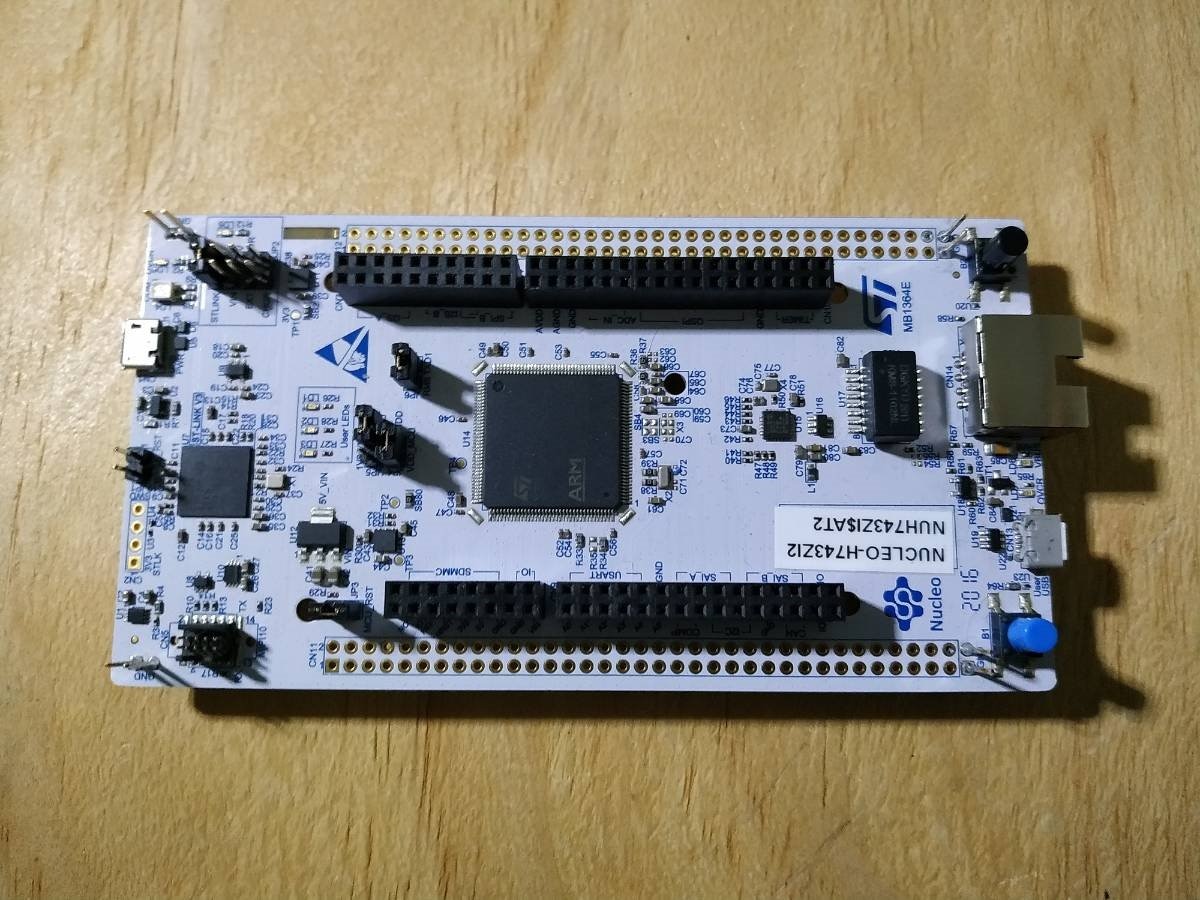
Features:
- STM32 microcontroller in LQFP144 package
- 3 user LEDs
- 2 user and reset push-buttons
- 32.768 kHz crystal oscillator
- Board connectors:SWDST Zio expansion connector including ARDUINO
 Uno V3ST morpho expansion connector
 - Flexible power-supply options: ST-LINK, USB VBUS or external sources
- On-board ST-LINK debugger/programmer with USB re-enumeration capability: mass storage, Virtual COM port, and debug port
Step 2.- Identify the pins that we are going to use on the board and that we identify according to the figure below. In my case I'm going to use the included mapping for Arduino UNO V3.

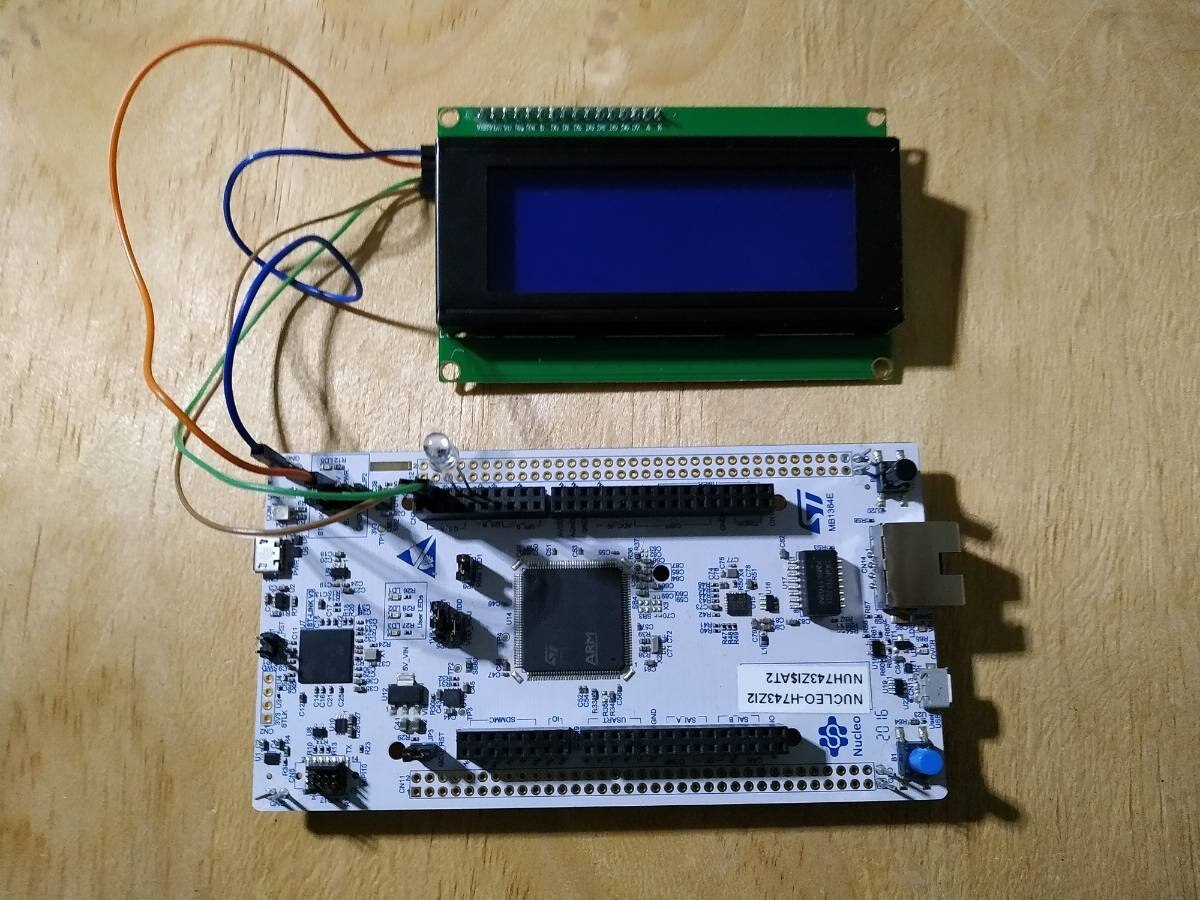
Step 3.- Inserting the LED diode between pins D13 and ground.

Step 4.- Wiring 12C LCD display: SDA pin is connected to D14 and SCL pin to D15.of the NUCLEO board respectively. VCC is 5V.
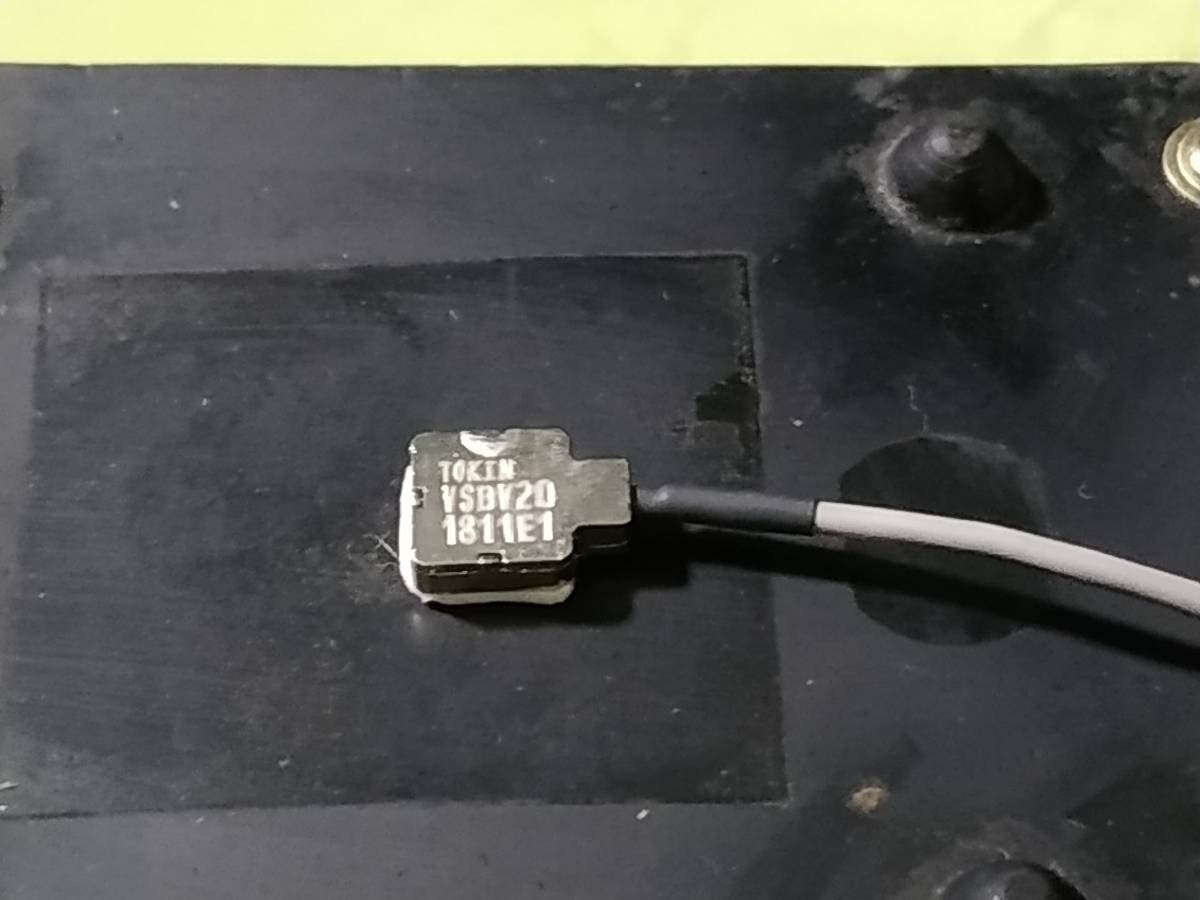
Step 5.- Cut the vibration sensor connector, and solder the straight pins as shown in the figure below:

Specifications:
- Temperature Range: -25/+75°C
- Power Supply Voltage: 3 - 5.5 VDC
- Sensitivity: 20 mV/m/s²
- Frequency Range: 10 - 15,000 Hz
- Measuring Range: +/-50 m/s
Step 6.- Connect the KEMET vibration sensor. The white wire (Vout pin) connects to pin D2 on the NUCLEO board. VCC is 5V.

Step 7.- Stick double-sided tape on the bottom of the air pump.
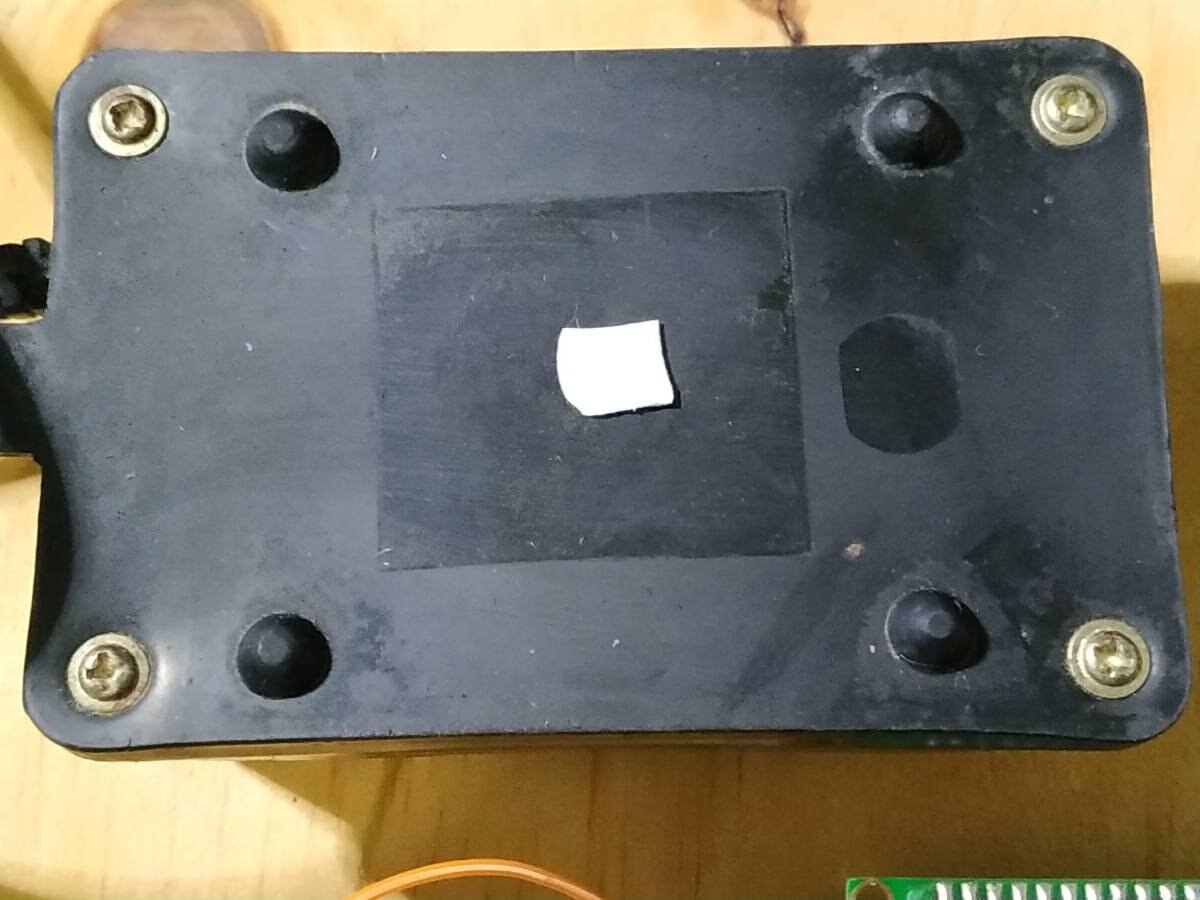
Step 8.- The vibration sensor thinly spread on the adhesive surface.
Step 9.- Check if everything is OK. Now our device is ready to upload the code to the NUCLEO board and do tests. Now our device is ready to upload the code to the NUCLEO board and do tests.

4. SOFTWARE
Step 1.- I'm going to use the Arduino IDE to make the code, so we have to download the most recent version from the official site: https://www.arduino.cc/en/software
Step 2.- Launch Arduino IDE.
Click on File menu and then Preferences
The Preferences dialog will open, then add the following link to the Additional Boards Managers URLs field:
https://github.com/stm32duino/BoardManagerFiles/raw/master/STM32/package_stm_index.json

Step3.- Click OK,. Now, click on Tools menu and then “Boards > Boards Manager”
Next in the box type: stm32
and install the boards: STM32 Cores

Step 4.- There're different types and versions of libraries to work with the LCD to I2C Adapter module, more complete information can be found at: http://playground.arduino.cc/Code/LCDi2c, we will use the LiquidCrystal_I2C library: https://github.com/johnrickman/LiquidCrystal_I2C
Step 5.- Select the NUCLEO board:
clicking on Tools> Board: "Nucleo-144"
Click on Tools> Board part number: "Nucleo H743ZI2"
and Click on Tools > Port

Step 6.- Upload the aquarium_vibration_sensor.ino code (comments guide us).
// AUTHOR: GUILLERMO PEREZ GUILLEN
#include <Wire.h> // Library for I2C communication
#include <LiquidCrystal_I2C.h> // Library for LCD
// Wiring 12C LCD: SDA pin is connected to D14 and SCL pin to D15.
// Connect to LCD via I2C, default address 0x27 (A0-A2 not jumpered)
LiquidCrystal_I2C lcd = LiquidCrystal_I2C(0x27, 20, 4); // Change to (0x27,16,2) for 16x2 LCD.
int LED_Pin = D13; // LED diode
int vibr_Pin =D2; // Vout of the vibration sensor
int vibr_max = -100;
void setup() {
// Initiate the LCD:
lcd.init();
lcd.backlight();
pinMode(LED_Pin, OUTPUT);
pinMode(vibr_Pin, INPUT); //set vibr_Pin input for measurment
Serial.begin(9600); //init serial 9600
}
void loop() {
long measurement =TP_init();
delay(50);
Serial.println(measurement);
// DETECTING VIBRATION MAXIMUM
if (measurement > vibr_max){
vibr_max = measurement;
}
// DETECTING VIBRATIONS ABOVE 1000 MICROSECONDS
if (measurement > 1000){ //
digitalWrite(LED_Pin, HIGH);
}
else{
digitalWrite(LED_Pin, LOW);
}
// PRINTING VALUES
lcd.setCursor(0, 0); // Set the cursor on the 1st column and 1st row.
lcd.print(" VIBRATION SENSOR"); // Print the string "VIBRATION SENSOR"
lcd.setCursor(0, 2); //Set the cursor on the 1st column and the 3rd row.
lcd.print("Measurment = ");
lcd.setCursor(13, 2); //Set the cursor on the 13th column and the 3rd row.
lcd.print(measurement);
lcd.print(" ");
lcd.setCursor(0, 3); //Set the cursor on the 1st column and the 4th row.
lcd.print("Maximum = ");
lcd.setCursor(10, 3); //Set the cursor on the 10th column and the 4th row.
lcd.print(vibr_max);
lcd.print(" ");
}
// DETECTING MESUREMENTS
long TP_init(){
delay(20);
long measurement=pulseIn (vibr_Pin, HIGH); //wait for the pin to get HIGH and returns measurement
return measurement;
}
NOTE: You can download it on github: https://github.com/guillengap/aquarium-vibration-sensor
Step 7.- How does it work?
- I use the pulseIn function to measure the time of each pulse;
// DETECTING MESUREMENTS
long TP_init(){
delay(20);
long measurement=pulseIn (vibr_Pin, HIGH); //wait for the pin to get HIGH and returns measurement
return measurement;
}
- Now we can calculate the vibration frequency using the formula f = 1 / t;
- I have created a routine to calculate the maximum vibration;
// DETECTING VIBRATION MAXIMUM
if (measurement > vibr_max){
vibr_max = measurement;
}
- If the vibrations are above 1000 microseconds then the LED diode lights up; and
// DETECTING VIBRATIONS ABOVE 1000 MICROSECONDS
if (measurement > 1000){ //
digitalWrite(LED_Pin, HIGH);
}
- We print the pulse time values and the maximum value on the display;
// PRINTING VALUES
lcd.setCursor(0, 0); // Set the cursor on the 1st column and 1st row.
lcd.print(" VIBRATION SENSOR"); // Print the string "VIBRATION SENSOR"
lcd.setCursor(0, 2); //Set the cursor on the 1st column and the 3rd row.
lcd.print("Measurment = ");
lcd.setCursor(13, 2); //Set the cursor on the 13th column and the 3rd row.
lcd.print(measurement);
lcd.print(" ");
lcd.setCursor(0, 3); //Set the cursor on the 1st column and the 4th row.
lcd.print("Maximum = ");
lcd.setCursor(10, 3); //Set the cursor on the 10th column and the 4th row.
lcd.print(vibr_max);
lcd.print(" ");
}
5. TEST
Due to the pandemic situation around the world, at the moment I did the tests in my private turtle aquarium.

Now I did a first initial test with the air pump to see the maximum readings of time in microseconds, the LED diode turned on/off, check the vibration frequency in Hertz and use the reset button. You can see all this in the video below.
Everything is fine, now we do the final test with the aquarium as shown below.
Observtions:
- In this video we can see a journey through this project;
- Then we start with the lowest power level of the air pump;
- The first reading is 9124 microseconds per cycle, that is 109 Hertz;
- The LED diode is on since the reading is above 1000 microseconds;
- The aquarium is fine, and it seems that the noise of the air pump doesn't cause annoyance to the turtles that enjoy their sunbath;
- The time is now 10146 microseconds, that is 98 Hertz;
- But when we increase the power of the air pump, then the pump is more unstable, as we can see below;
- The time starts with 9256 microseconds, or 108 Hertz;
- In a few seconds the time shoots up to 456488 microseconds, that is 2 Hertz;
- The air pump is moving from its initial position and I have to hold it.
6. CONCLUSION
This first approach has allowed me to conclude that:
- The vibration sensor can be useful to measure and control annoying vibrations in aquariums, especially in aquatic species that are sensitive such as turtles;
- My test let me know that when I use full power from the air pump, its produces undesirable noises and more force is needed to keep it fixed in its original position;
- In the case of the air pump, I need to fix it in a safe place and use a low power; and
- There is no point in listing the hardware and software difficulties that I've encountered. so I will update this tutorial until the deadline.
Top Comments
-

mcfryday
-
Cancel
-
Vote Up
+1
Vote Down
-
-
Sign in to reply
-
More
-
Cancel
-

guillengap
in reply to mcfryday
-
Cancel
-
Vote Up
0
Vote Down
-
-
Sign in to reply
-
More
-
Cancel
Comment-

guillengap
in reply to mcfryday
-
Cancel
-
Vote Up
0
Vote Down
-
-
Sign in to reply
-
More
-
Cancel
Children