element14 Community
element14 Community
    Register Log In
  • Site
  • Search
  • Log In Register
  • About Us
  • Community Hub
    Community Hub
    • What's New on element14
    • Feedback and Support
    • Benefits of Membership
    • Personal Blogs
    • Members Area
    • Achievement Levels
  • Learn
    Learn
    • Ask an Expert
    • eBooks
    • element14 presents
    • Learning Center
    • Tech Spotlight
    • STEM Academy
    • Webinars, Training and Events
    • Learning Groups
  • Technologies
    Technologies
    • 3D Printing
    • FPGA
    • Industrial Automation
    • Internet of Things
    • Power & Energy
    • Sensors
    • Technology Groups
  • Challenges & Projects
    Challenges & Projects
    • Design Challenges
    • element14 presents Projects
    • Project14
    • Arduino Projects
    • Raspberry Pi Projects
    • Project Groups
  • Products
    Products
    • Arduino
    • Avnet Boards Community
    • Dev Tools
    • Manufacturers
    • Multicomp Pro
    • Product Groups
    • Raspberry Pi
    • RoadTests & Reviews
  • Store
    Store
    • Visit Your Store
    • Choose another store...
      • Europe
      •  Austria (German)
      •  Belgium (Dutch, French)
      •  Bulgaria (Bulgarian)
      •  Czech Republic (Czech)
      •  Denmark (Danish)
      •  Estonia (Estonian)
      •  Finland (Finnish)
      •  France (French)
      •  Germany (German)
      •  Hungary (Hungarian)
      •  Ireland
      •  Israel
      •  Italy (Italian)
      •  Latvia (Latvian)
      •  
      •  Lithuania (Lithuanian)
      •  Netherlands (Dutch)
      •  Norway (Norwegian)
      •  Poland (Polish)
      •  Portugal (Portuguese)
      •  Romania (Romanian)
      •  Russia (Russian)
      •  Slovakia (Slovak)
      •  Slovenia (Slovenian)
      •  Spain (Spanish)
      •  Sweden (Swedish)
      •  Switzerland(German, French)
      •  Turkey (Turkish)
      •  United Kingdom
      • Asia Pacific
      •  Australia
      •  China
      •  Hong Kong
      •  India
      •  Korea (Korean)
      •  Malaysia
      •  New Zealand
      •  Philippines
      •  Singapore
      •  Taiwan
      •  Thailand (Thai)
      • Americas
      •  Brazil (Portuguese)
      •  Canada
      •  Mexico (Spanish)
      •  United States
      Can't find the country/region you're looking for? Visit our export site or find a local distributor.
  • Translate
  • Profile
  • Settings
Eye On Intelligence Challenge
  • Challenges & Projects
  • Design Challenges
  • Eye On Intelligence Challenge
  • More
  • Cancel
Eye On Intelligence Challenge
Blog Sign Language Interpreter Blog 4: Using PYNQ overlays with HDMI and USB webcam on Arty Z7
  • Blog
  • Forum
  • Documents
  • Polls
  • Files
  • Members
  • Mentions
  • Sub-Groups
  • Tags
  • More
  • Cancel
  • New
Join Eye On Intelligence Challenge to participate - click to join for free!
  • Share
  • More
  • Cancel
Group Actions
  • Group RSS
  • More
  • Cancel
Engagement
  • Author Author: cbohra00627
  • Date Created: 23 Nov 2024 1:00 PM Date Created
  • Views 1164 views
  • Likes 4 likes
  • Comments 2 comments
  • arty z7
  • ml
  • fpga
  • Eye on Intelligence Challenge
  • pynq
  • zynq-7000
Related
Recommended

Sign Language Interpreter Blog 4: Using PYNQ overlays with HDMI and USB webcam on Arty Z7

cbohra00627
cbohra00627
23 Nov 2024

Introduction
In this blog, we will use PYNQ overlays to connect the video stream from a USB webcam to a TFT screen, and then overlay text onto the displayed video.

What is PYNQ Overlay?
Overlays are programmable FPGA designs that extend applications from ZYNQ's processing system into programmable logic. They can accelerate software or customize hardware for specific tasks and are dynamically loaded like software libraries. Created by hardware engineers and wrapped with PYNQ's Python API, these overlays allow software developers to control specialized hardware without needing to design it themselves.

Displaying Laptop Screen over a display using overlays

In this section, we will try to use the HDMI ports on the board to get display data from my laptop and display on another screen.

I purchased a 5 inch LCD HDMI Touch Screen Display TFT LCD Panel Module online for the project. Lets first, directly connect it to the laptop using hdmi cable and make sure it is working.
TFT LCD screen with Laptop

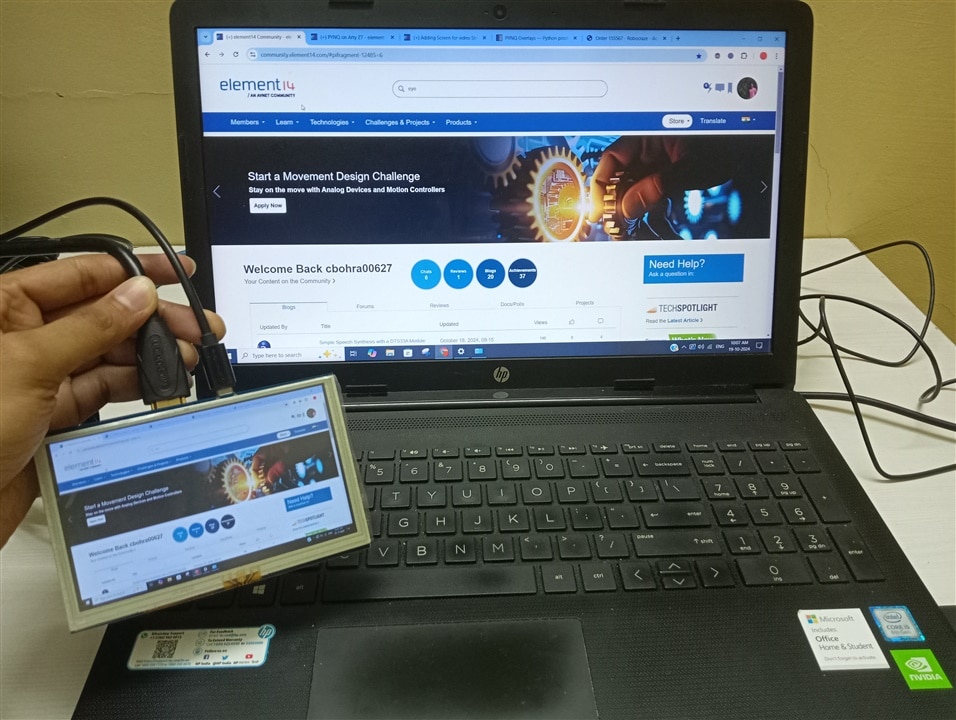
Now instead of directly connecting it to the laptop hdmi port, we will connect it to the HDMI out of the ZYNQ board and the output from the laptop will be connected to the HDMI in of the board as shown below. We will need two HDMI cables for this.
Turned off screen

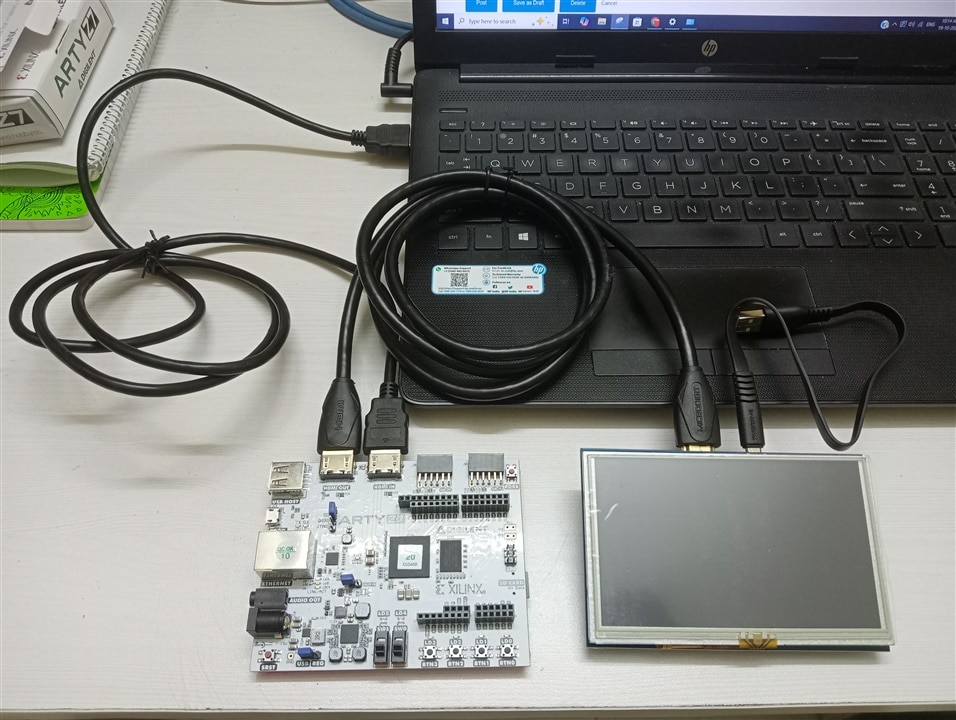
For this tutorial, we will need PYNQ installed on SD card and the card should be inserted in the board. Please follow this blog for the steps to install it.

Now, lets connect the board to the power and turn it in. Remember the jumper JP4 should select the SD card as boot mode.

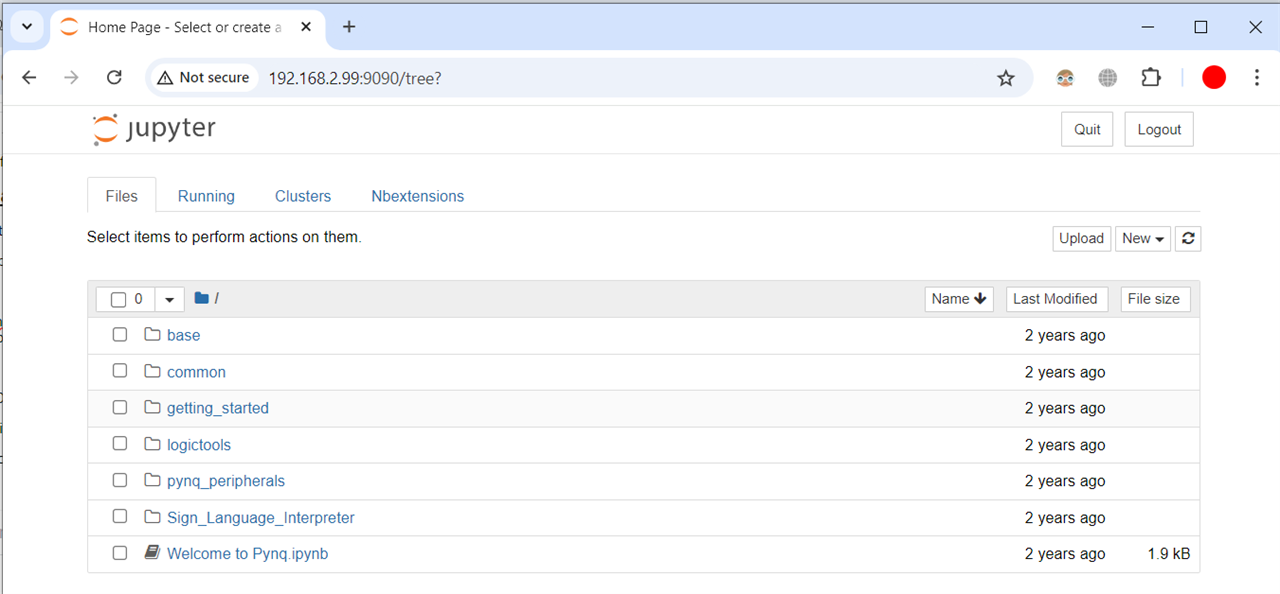
When the board boots up successfully, connect it to the PC using the ethernet cable. Now browse to http://192.168.2.99. This will open the jupyter notebook.

image

There is a good introduction jupyter notebook (/base/video/hdmi_introduction.ipynb) for HDMI which I have followed to create this demo.

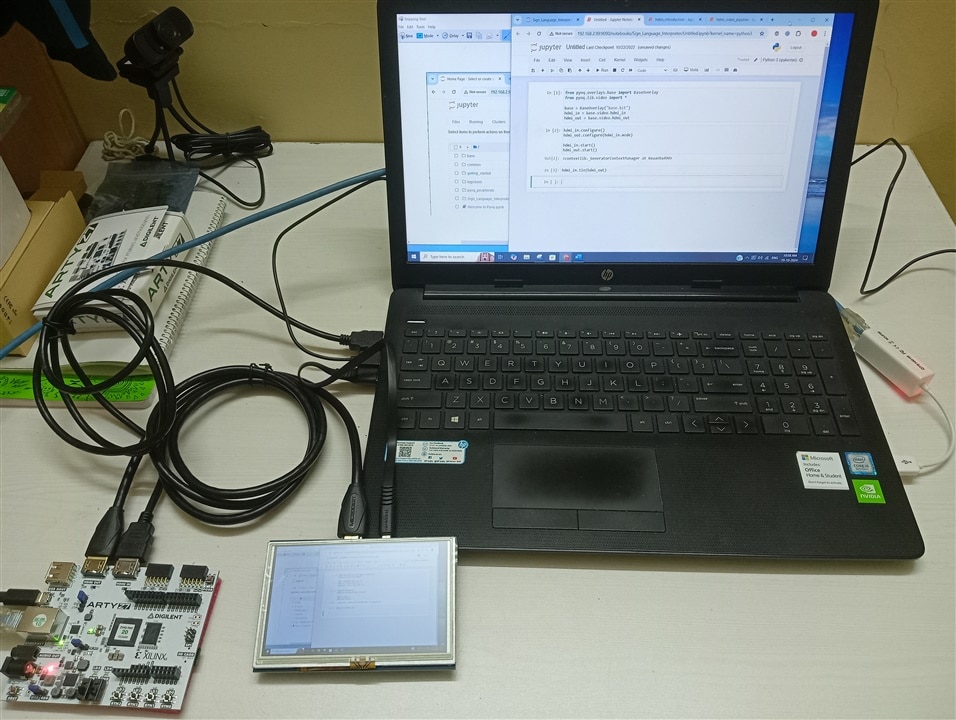
So, now we will create our notebook and start working there.

  1. First, we will import the required modules and instantiate hdmi_in & hdmi_out.
    from pynq.overlays.base import BaseOverlay
    from pynq.lib.video import *
    
    base = BaseOverlay("base.bit")
    hdmi_in = base.video.hdmi_in
    hdmi_out = base.video.hdmi_out
  2. Then, we'll use the default pixel format which is 24 bit-per-pixel BGR formatted data for ease of use with OpenCV.
    hdmi_in.configure()
    hdmi_out.configure(hdmi_in.mode)
    
    hdmi_in.start()
    hdmi_out.start()

  3. The monitor should turn on and show a blank screen.
  4. To pass the image data through we can tie the output to the input. The tie will last until we send something else to be displayed.
    hdmi_in.tie(hdmi_out)

    Laptop displayed on screen
  5. Now, we will close the connection.
    hdmi_out.close()
    hdmi_in.close()

Displaying video from USB webcam over a display using overlays

For this demo, I have followed the /base/video/opencv_filters_webcam.ipynb jupyter notebook.

  1. Load the overlays.
    from pynq.overlays.base import BaseOverlay
    from pynq.lib.video import *
    base = BaseOverlay("base.bit")
  2. Initialize HDMI output.
    # monitor configuration: 640*480 @ 60Hz
    Mode = VideoMode(640,480,24)
    hdmi_out = base.video.hdmi_out
    hdmi_out.configure(Mode,PIXEL_BGR)
    hdmi_out.start()
  3. Specify webcam resolution.
    # camera (input) configuration
    frame_in_w = 640
    frame_in_h = 480
  4. Initialize camera from opencv.
    import os
    os.environ["OPENCV_LOG_LEVEL"]="SILENT"
    import cv2
    
    videoIn = cv2.VideoCapture(0)
    videoIn.set(cv2.CAP_PROP_FRAME_WIDTH, frame_in_w);
    videoIn.set(cv2.CAP_PROP_FRAME_HEIGHT, frame_in_h);
    print("capture device is open: " + str(videoIn.isOpened()))
  5. Send webcam input to hdmi output.
    import numpy as np
    
    ret, frame_vga = videoIn.read()
    
    if (ret):
        outframe = hdmi_out.newframe()
        outframe[:] = frame_vga
        hdmi_out.writeframe(outframe)
    else:
        raise RuntimeError("Error while reading from camera.")

    Camera to screen
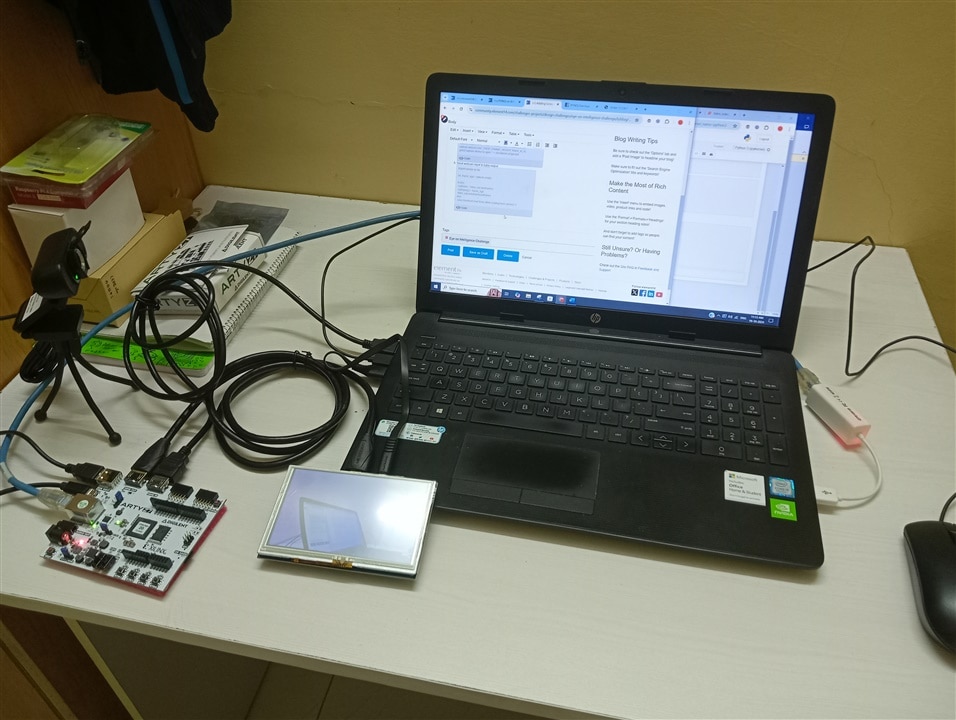
  6. Now, this will just give us one frame at a time. To get complete video. We can put the code in a while loop as shown below.
    while 1:
        ret, frame_vga = videoIn.read()
    
        if (ret):
            outframe = hdmi_out.newframe()
            outframe[:] = frame_vga
            hdmi_out.writeframe(outframe)
        else:
            raise RuntimeError("Error while reading from camera.")

    You don't have permission to edit metadata of this video.
    Edit media
    x
    image
    Upload Preview
    image
  7. We can also run edge detection on the video using the below code. This code is given in the examples jupyter notebook.
    import time
    
    num_frames = 20
    readError = 0
    
    start = time.time()
    for i in range (num_frames):   
        # read next image
        ret, frame_vga = videoIn.read()
        if (ret):
            outframe = hdmi_out.newframe()
            laplacian_frame = cv2.Laplacian(frame_vga, cv2.CV_8U, dst=outframe)
            hdmi_out.writeframe(outframe)
        else:
            readError += 1
    end = time.time()
    
    print("Frames per second: " + str((num_frames-readError) / (end - start)))
    print("Number of read errors: " + str(readError))

    Edge Detection

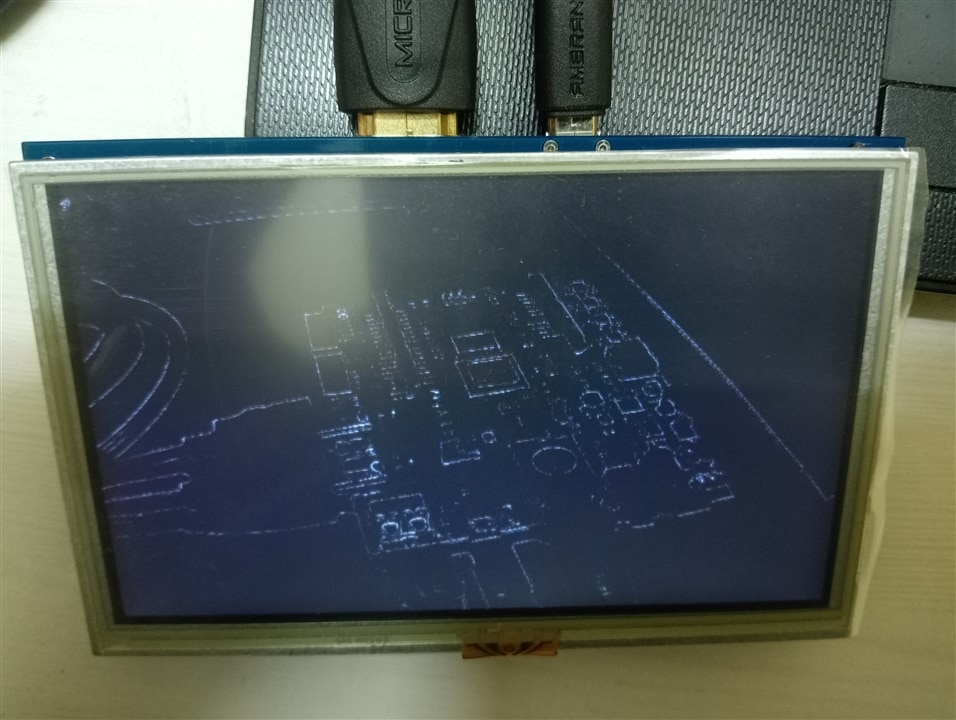
Adding text overlay on the video

We can just slightly modify our code to add some text over the video using Opencv.

while 1:
    ret, frame_vga = videoIn.read()
    
    # describe the type of font 
    # to be used. 
    font = cv2.FONT_HERSHEY_SIMPLEX 
    
    # Use putText() method for 
    # inserting text on video 
    cv2.putText(frame_vga,  
                'HEY THERE!',  
                (50, 200),  
                font, 3,  
                (0, 255, 255),  
                2,  
                cv2.LINE_4)

    if (ret):
        outframe = hdmi_out.newframe()
        outframe[:] = frame_vga
        hdmi_out.writeframe(outframe)
    else:
        raise RuntimeError("Error while reading from camera.")

You don't have permission to edit metadata of this video.
Edit media
x
image
Upload Preview
image

Summary
In this blog, we explored how to stream video from a webcam and display it on a screen using the Arty Z7 board. We also learned how to enhance the stream by adding a text overlay. This was easy as easy as working on jupyter lab in your PC.

References

  • Running PYNQ on Arty Z7
  • Sign in to reply
  • bidrohini
    bidrohini 8 months ago

    Thanks. Here I get to know about PYNQ overlays.

    • Cancel
    • Vote Up 0 Vote Down
    • Sign in to reply
    • More
    • Cancel
  • DAB
    DAB 9 months ago

    Nice update.

    • Cancel
    • Vote Up 0 Vote Down
    • Sign in to reply
    • More
    • Cancel
element14 Community

element14 is the first online community specifically for engineers. Connect with your peers and get expert answers to your questions.

  • Members
  • Learn
  • Technologies
  • Challenges & Projects
  • Products
  • Store
  • About Us
  • Feedback & Support
  • FAQs
  • Terms of Use
  • Privacy Policy
  • Legal and Copyright Notices
  • Sitemap
  • Cookies

An Avnet Company © 2025 Premier Farnell Limited. All Rights Reserved.

Premier Farnell Ltd, registered in England and Wales (no 00876412), registered office: Farnell House, Forge Lane, Leeds LS12 2NE.

ICP 备案号 10220084.

Follow element14

  • X
  • Facebook
  • linkedin
  • YouTube