


This blog aims to create a custom YOLOv3 model for object detection. But before going into the details I wish to check the web camera that came with the kit using the Arty Z7 board to confirm everything is working as expected. I created a Python notebook to check the webcam. I used OpenCV to capture the image and Matplotlib to display the image. The following image shows my hardware setup.
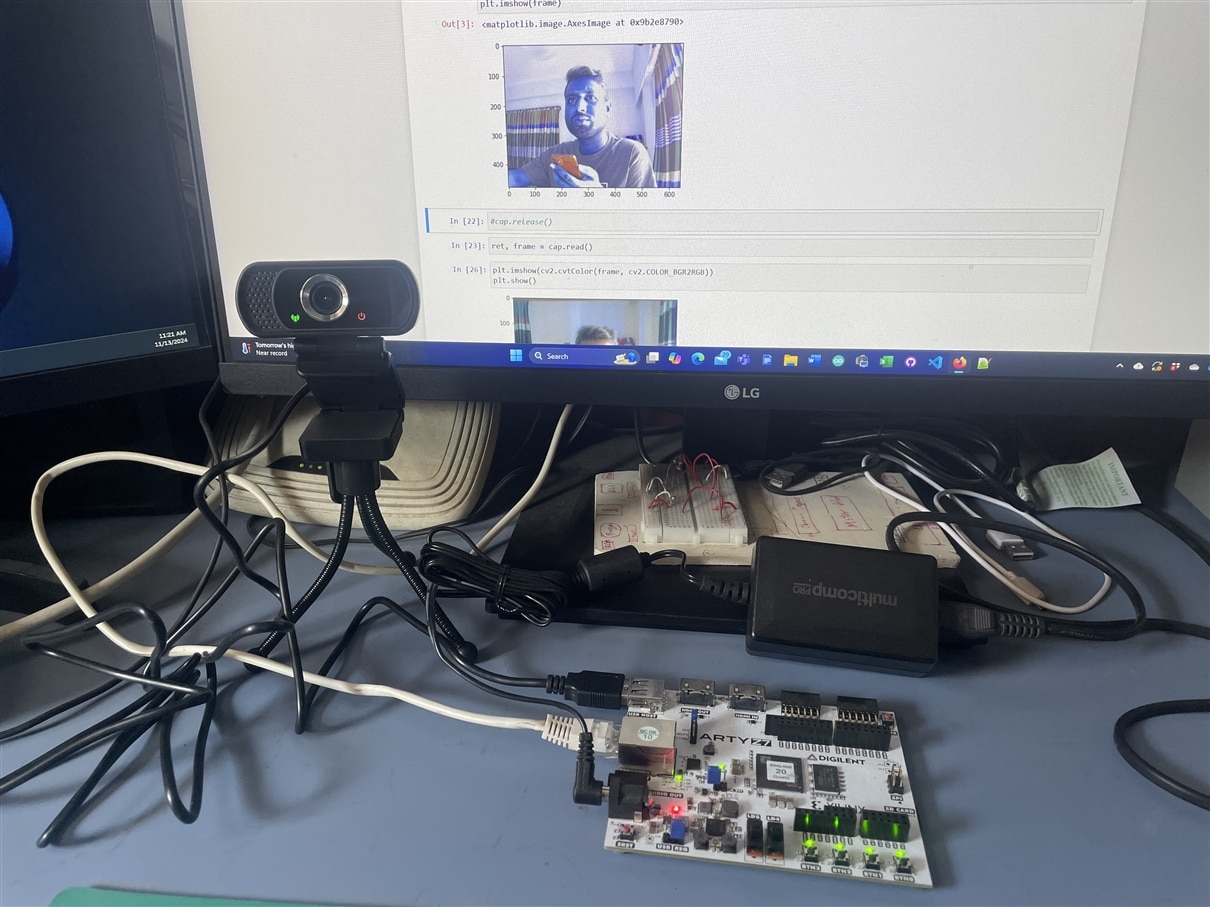
I used the following code snippet for checking the OpenCV library and the web camera.
import cv2
from matplotlib import pyplot as plt

#Initialize the camera using the VideoCapture() method
cap = cv2.VideoCapture(0)
# reading the input using the camera
ret, frame = cap.read()
#convert opencv image color to RGB format
plt.imshow(cv2.cvtColor(frame, cv2.COLOR_BGR2RGB))
#show the frame!
plt.show()

#shutdown the camera
cap.release()
A screenshot of the notebook is illustrated below.
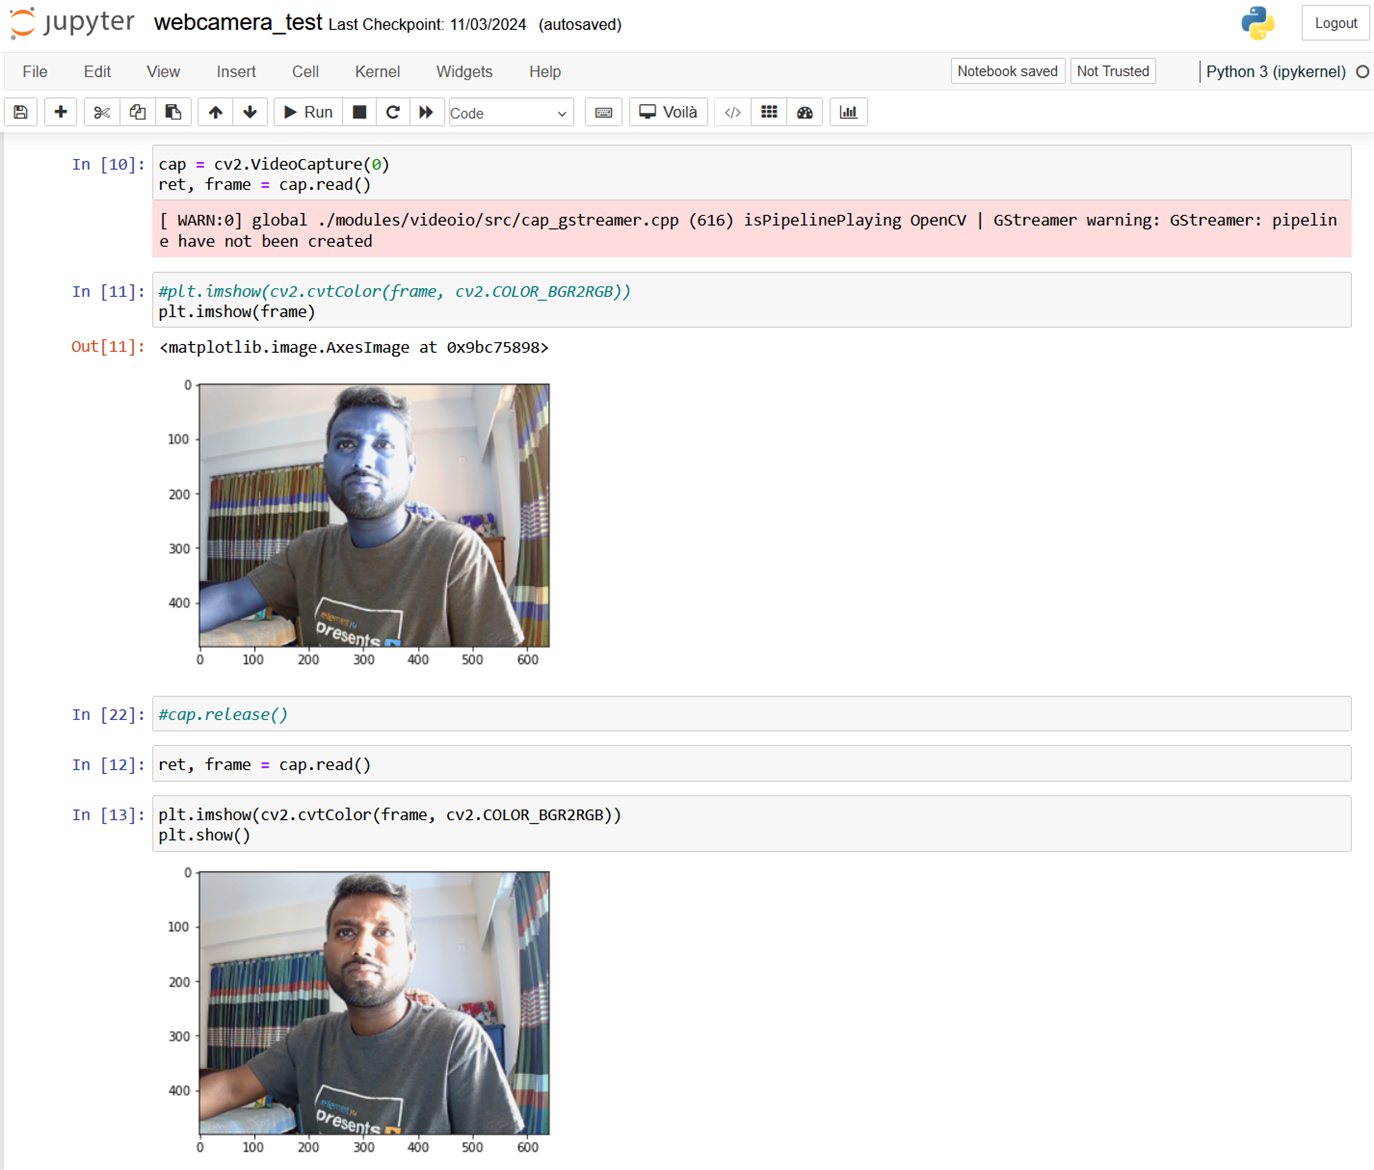
So, it confirms everything is working perfectly. Now let's try object detection!
Object Detection
When we look at images or videos, we can easily locate and identify the objects of our interest within moments. Passing one of this intelligence to computers is nothing but object detection. Object detection is a task that involves identifying the presence, location, and type of one or more objects in an image. Object detection, a fundamental task in computer vision, focuses on recognizing and locating various objects within visual data, enabling machines to interpret and understand their surroundings. While there are a handful of different object detection algorithms, I’ll use YOLOv3 (You Only Look Once).
YOLOv3 Algorithm
You Only Look Once (YOLO) is one of the fastest and most popular real-time object detection algorithm (45 frames per second) as compared to the R-CNN family (R-CNN, Fast R-CNN, Faster R-CNN, etc.)
The R-CNN family of algorithms uses regions to localise the objects in images which means the model is applied to multiple regions and high scoring regions of the image are considered as object detected. But YOLO follows a completely different approach. Instead of selecting some regions, it applies a neural network to the entire image to predict bounding boxes and their probabilities.
The biggest advantage of YOLOv3 in arcgis.learn is that it comes preloaded with weights pretrained on the COCO dataset. This makes it ready-to-use for the 80 common objects (car, truck, person, etc.) that are part of the COCO dataset.
Fig: Real-time Object detection using YOLOv3
YOLOv3 Architecture
YOLOv3 uses Darknet-53 as its backbone. This contrasts with the use of popular ResNet family of backbones by other models such as SSD and RetinaNet. Darknet-53 is a deeper version of Darknet-19 which was used in YOLOv2, a prior version. As the name suggests, this backbone architecture has 53 convolutional layers. Adapting the ResNet style residual layers has improved its accuracy while maintaining the speed advantage. This feature extractor performs better than ResNet101 and similar to ResNet152 while being about 1.5x and 2x faster, respectively.
YOLOv3 has incremental improvements over its prior versions. It uses upsampling and concatenation of feature layers with earlier feature layers which preserve fine-grained features. Another improvement is using three scales for detection. This has made the model good at detecting objects of varying scales in an image. There are other improvements in anchor box selections, loss function, etc. For a detailed analysis of the YOLOv3 architecture, please refer to this blog.

Figure: YOLOv3 architecture
Okay, we have a little bit of theory about YOLOv3 and object detection. Now let's do it practically.
We have two options to get started with object detection:
- Using the pre-trained model
- Training custom object detector from scratch
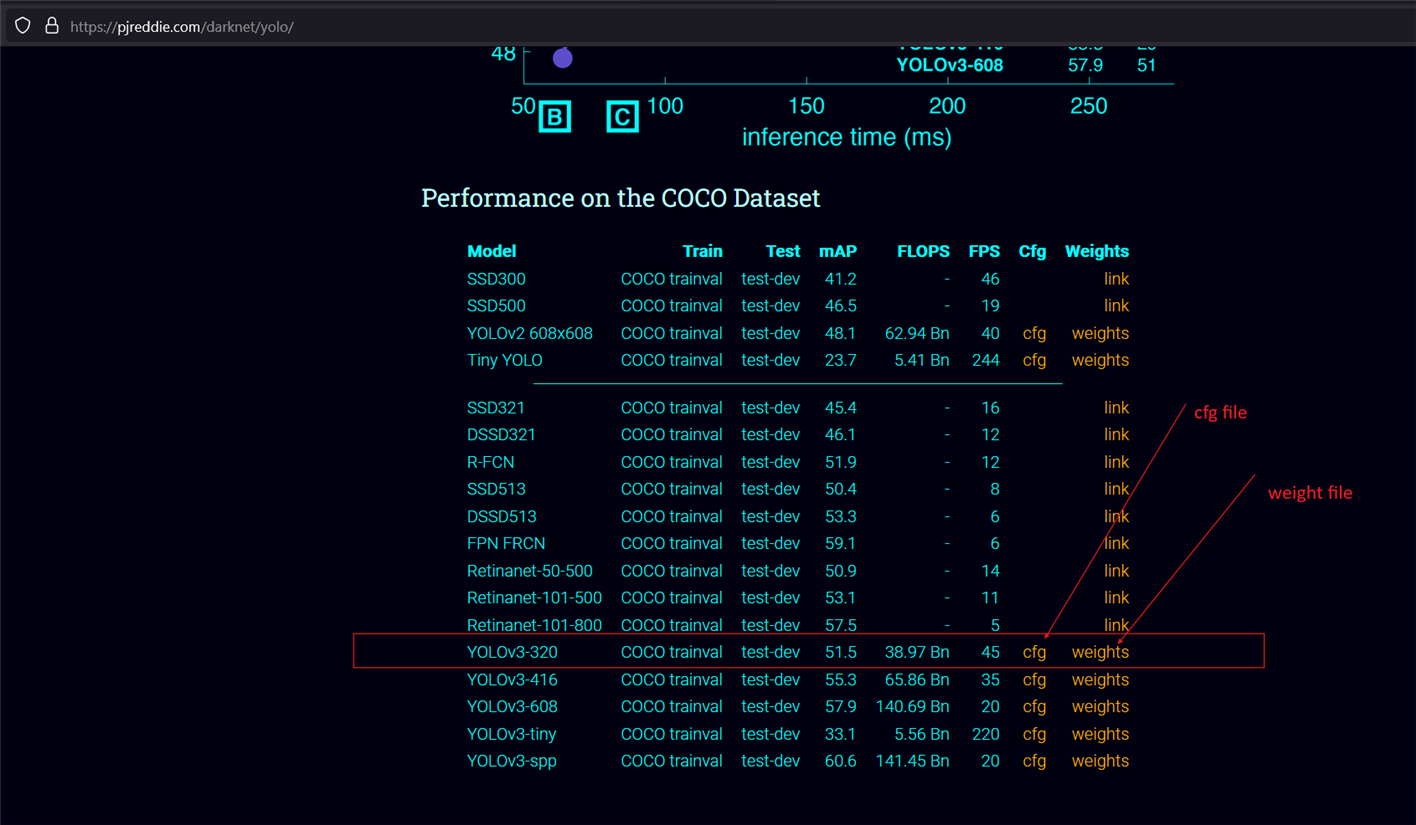
First, I will be looking at creating an object detector using the pre-trained model for images and real-time webcam. I will be using OpenCV, numpy and matplotlib. Before writing code I downloaded a couple of heavy files which includes the pre-trained weights of YoloV3, the configuration file and the names file.
I downloaded weight and cfg (configuration) files from the following link: https://pjreddie.com/darknet/yolo. The model has been trained for different sizes of images: 320 x 320 (high speed, less accuracy), 416 x 416 (moderate speed, moderate accuracy) and 608 x 608 (less speed, high accuracy). We downloaded the weights and cfg files for YOLOv3–320 for now.
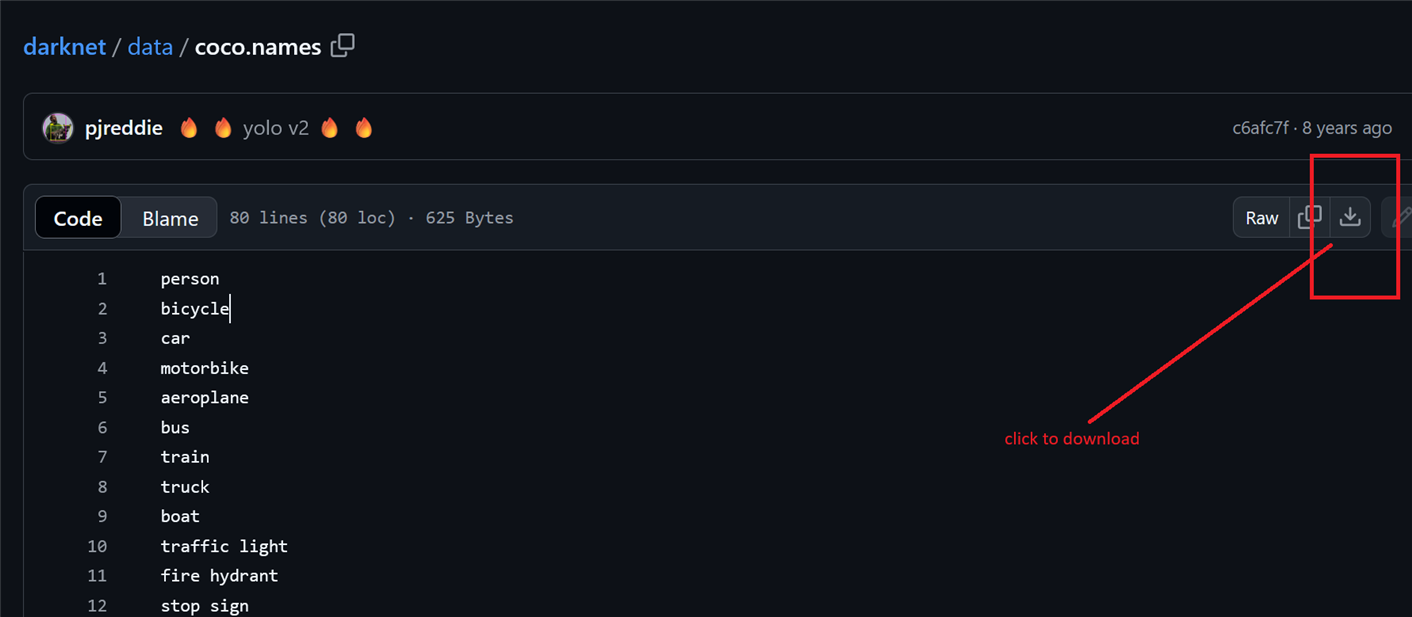
Names file was downloaded from https://github.com/pjreddie/darknet/blob/master/data/coco.names.
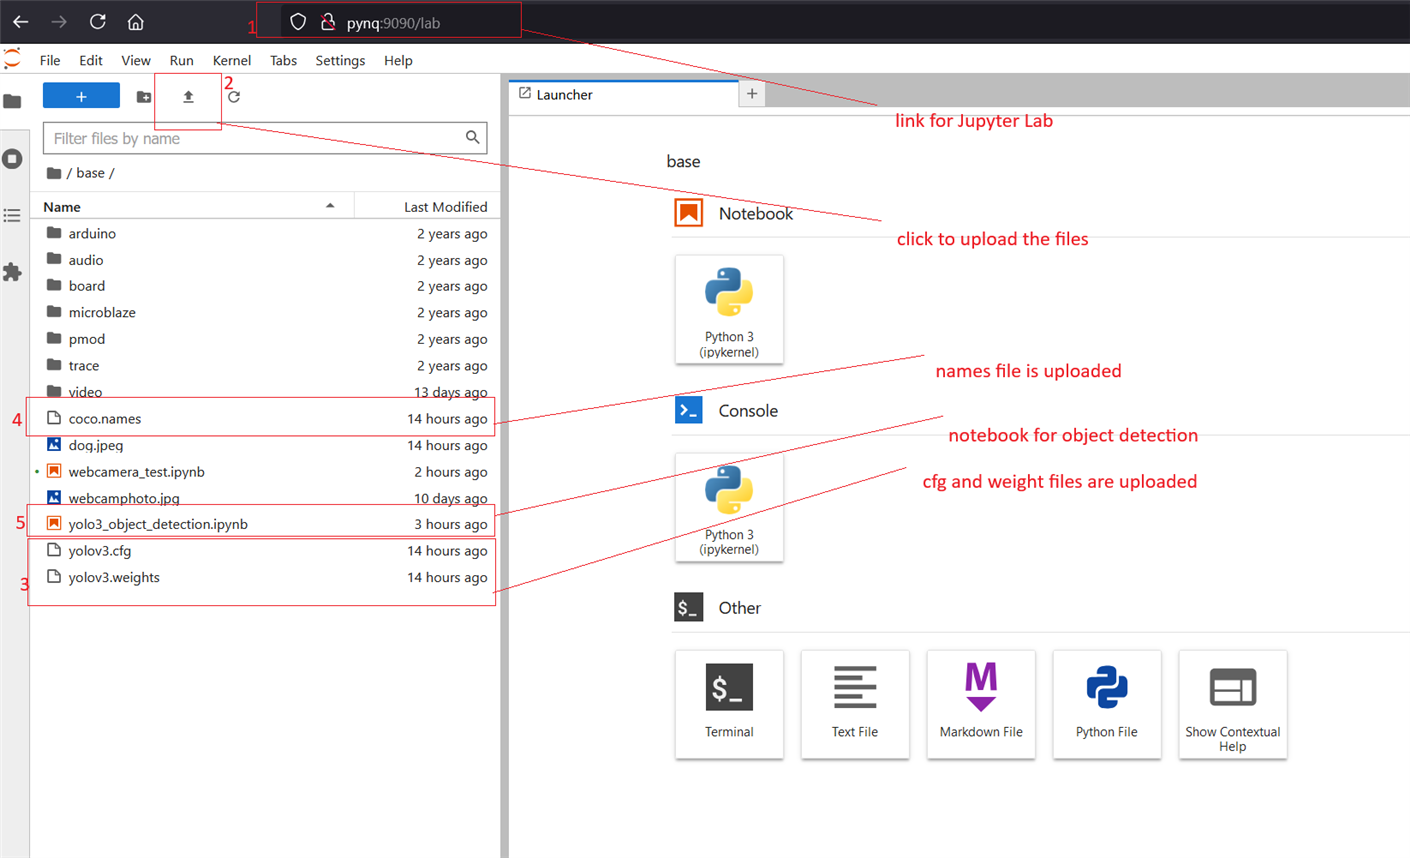
After downloading all the necessary files I opened the Jupyter Lab from ARTY Z7 board so that I can upload all the files to the board. For opening the Jupyter Lab use the link http://pynq:9090/lab. Then I created a new notebook file to write and run the code for object detection. The following screenshot illustrates all the steps I followed.
The next step is to write the code. I copied the code directly from the link: https://github.com/nandinib1999/object-detection-yolo-opencv/blob/master/yolo.py. I was able to run the code without any issues both for the image and the webcam.
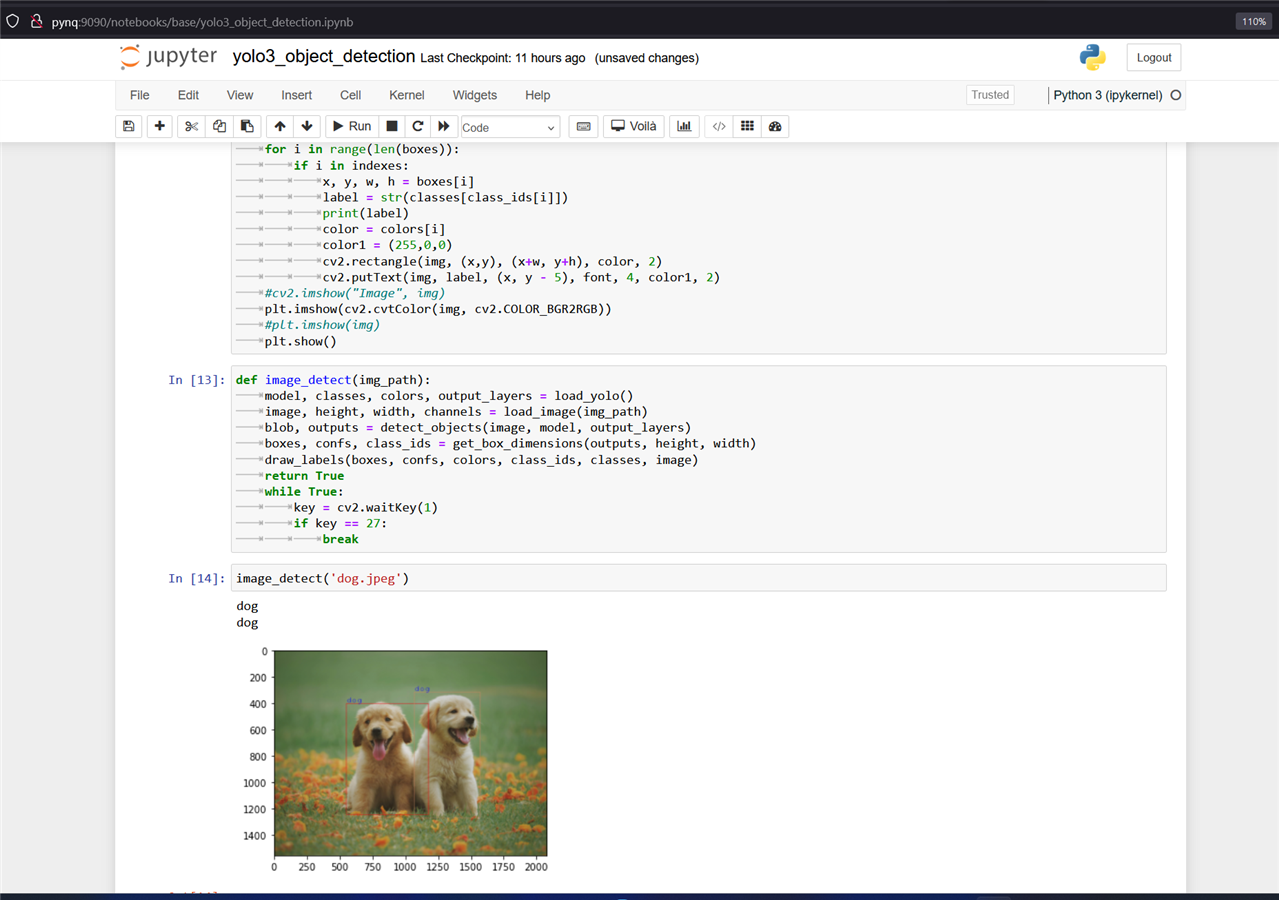
The above screenshot shows object detection from an image. There are two dogs in the image and both are identified with the right-sized bounding boxs.
The following image shows the object detection from the camera image.
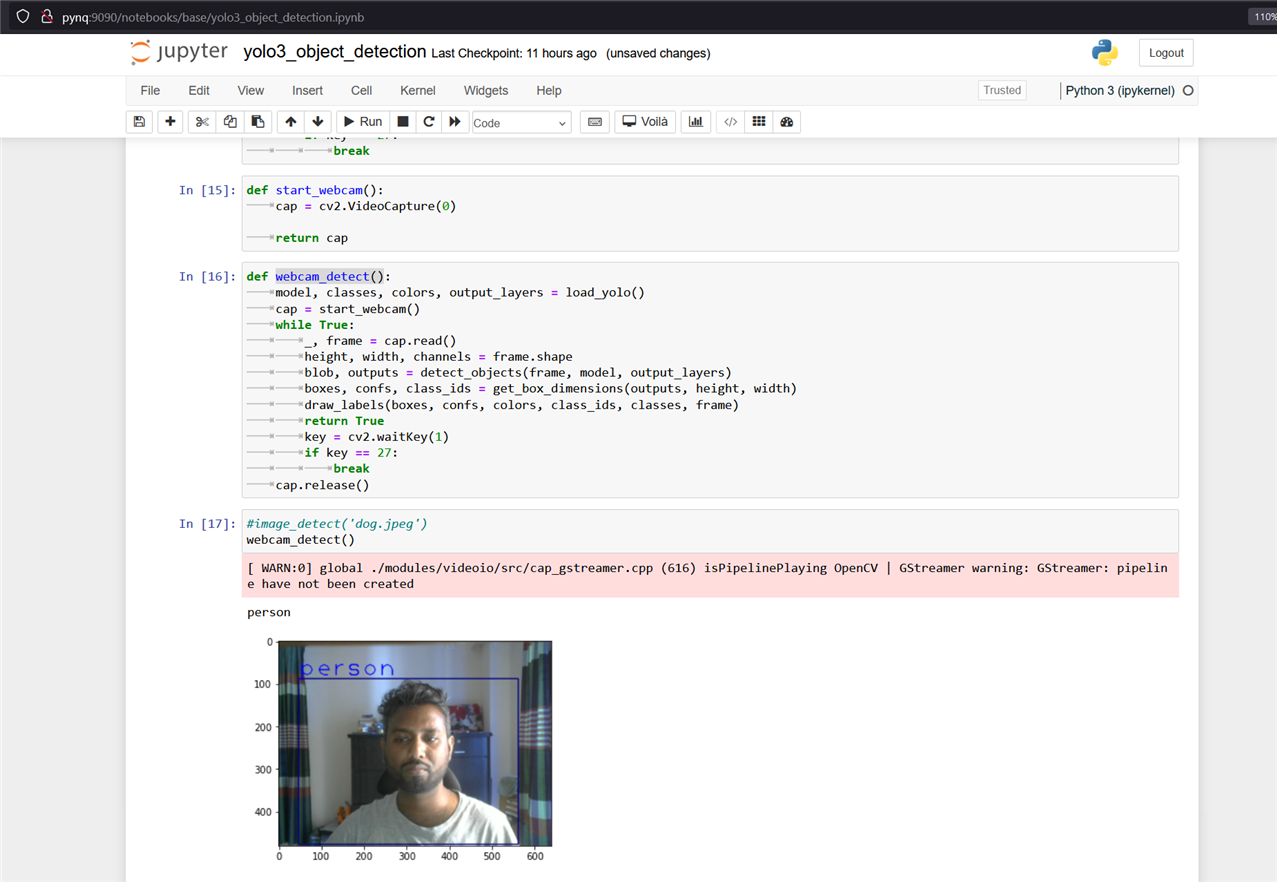
Though it was able to detect any object very accurately but the response was very slow because we are running the model from the processing part of the Zynq 7000 SoC. Utilizing the programming logic unit will improve the speed of the detection. For running the video detection we need to add an HDMI display to observe the result in real time.
Training Model With Custom Data
In the previous step, I experiment with the pre-trained model for detecting objects. But the pre-trained model is not capable of efficiently and accurately detecting all types of objects. So, it is a good idea to train the YOLOv3 model with the custom dataset involved in a specific task. As I am going to develop a model for blind people to navigate their way we should collect those type of images that a person usually faces while walking through a road. For indoor navigation the object types are different than the outside. Outside objects are more diversified than indoors. For indoor object detection, we need to work with common household appliances, furniture, walls, basins, doors and windows, electrical switchboards etc. As indoor objects are less diverse and easy to collect I will train the model with some indoor images only. Preparing a complete dataset is a huge task that requires time and cost.
Collecting and Preparing Custom Data
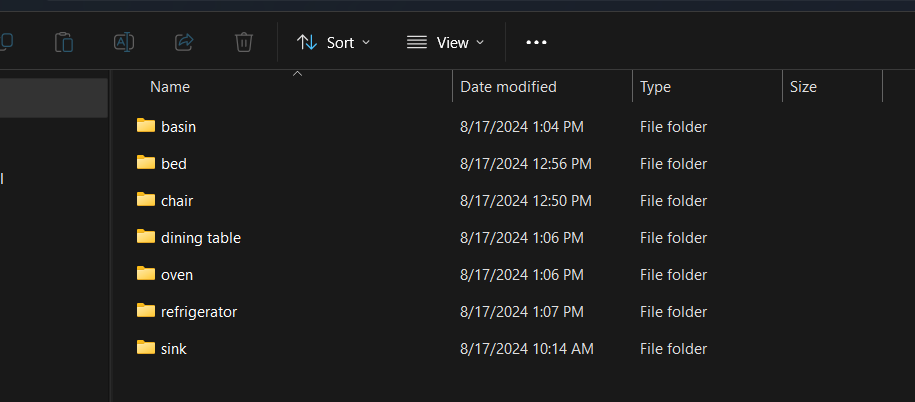
For preparing custom object detection model we need custom images for training and testing the model. For gathering the data we can download from the internet if the relevant dataset is already available or we can create the dataset using our own data. As I am going to create an image dataset for common indoor appliances and furniture I downloaded many images from internet and captured some images by myself. For the sample dataset, I created seven classes for the entire dataset. I took 50 photos for each class.
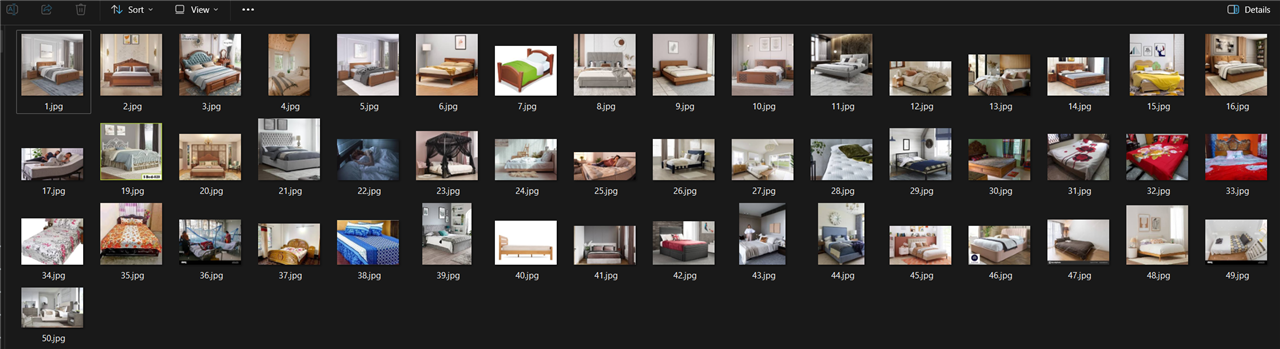
The images I took for the bed class are illustrated below. Images should be taken from different angles and different backgrounds.
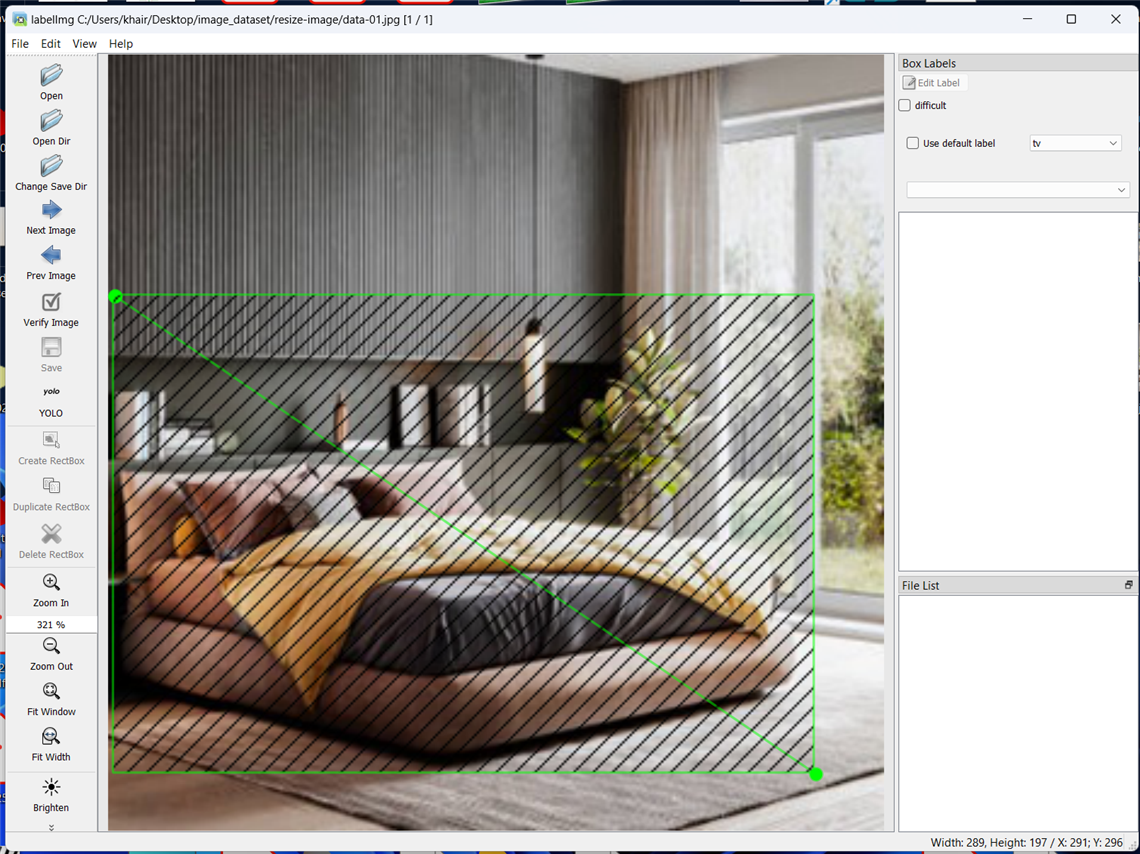
Next, we need to annotate these images. As we are going to use size 320 for training our model, all images should be of 320 size. For annotating there are many tools available. I used Labelimg for this purpose. For getting image annotations in YOLO format, https://github.com/tzutalin/labelImg is preferred as it is easy to install and use. For installing, check out https://github.com/tzutalin/labelImg. If you choose to use this tool for annotations, make sure to change the output format to YOLO.
Annotating YOLO Format
In YOLO labeling format, a .txt file with the same name is created for each image file in the same directory. Each .txt file contains the annotations for the corresponding image file, that is, object class, object coordinates, height, and width. For each object, a new line is created. Below is an example of annotation in YOLO format.

A good tutorial about labeling images is here: https://blog.roboflow.com/tips-for-how-to-label-images/.
Here are some screenshots I captured while annotating my data using Labelimg.
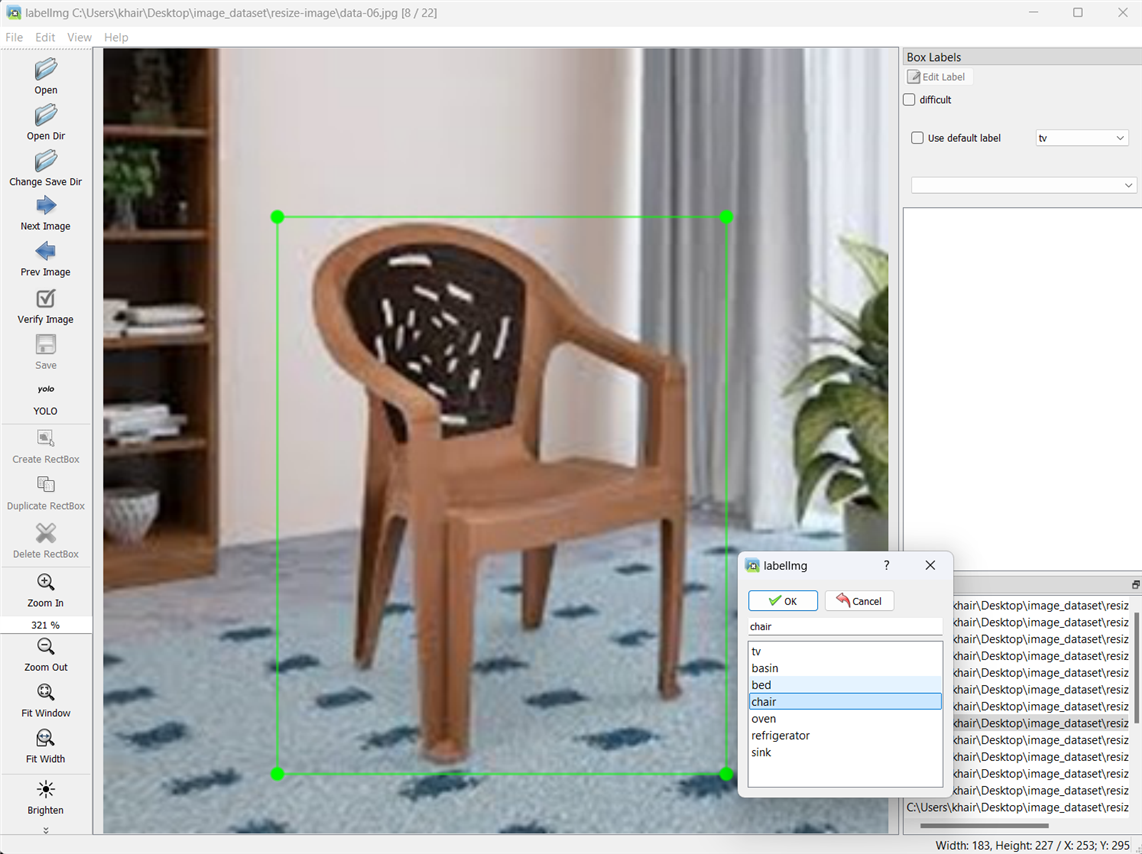
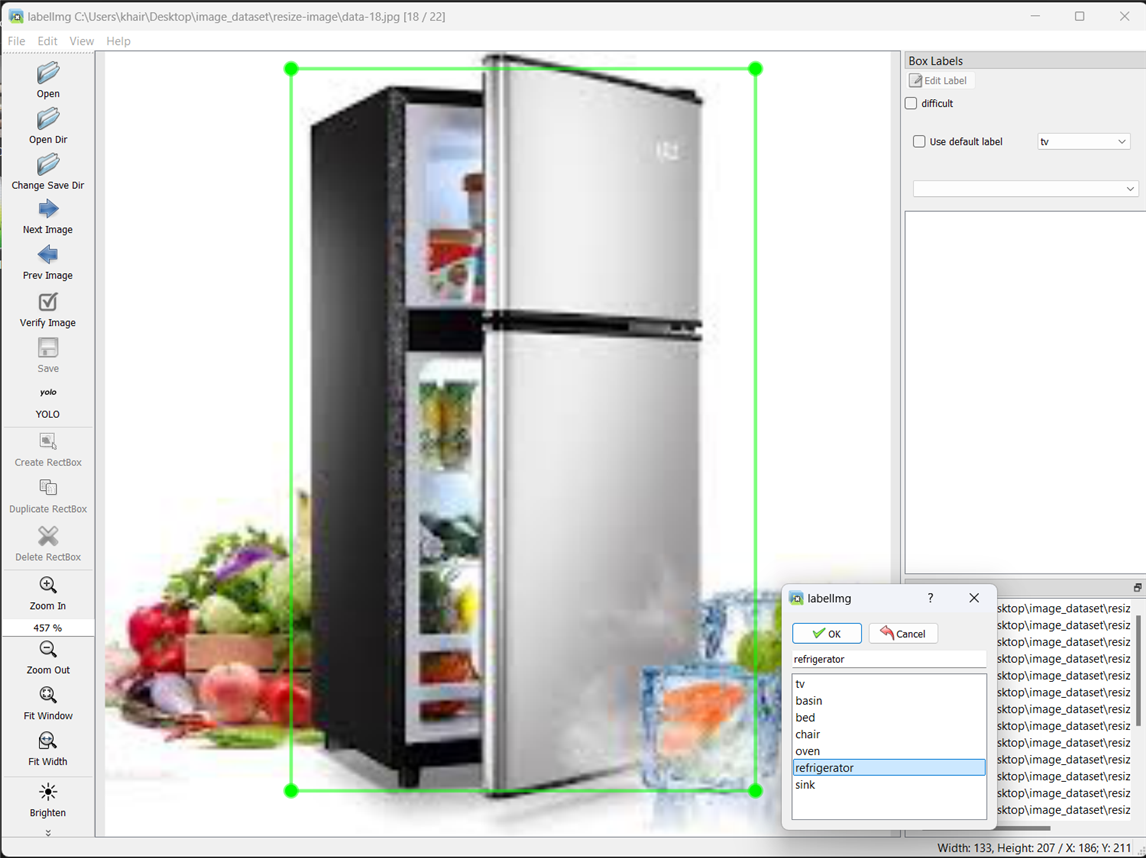
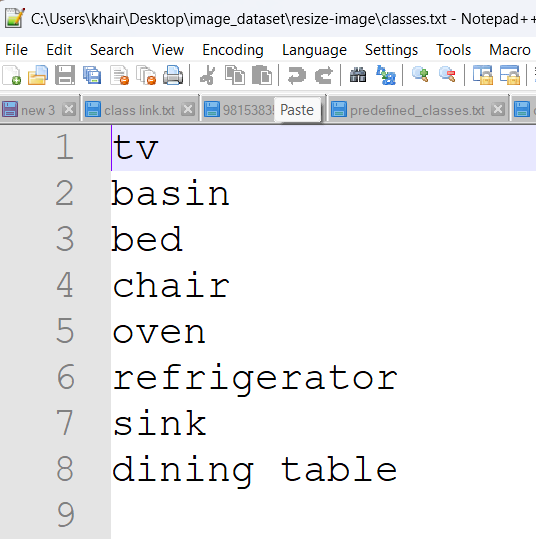
After YOLO labeling format, a .txt file with the same name is created for each image file in the same directory. Each .txt file contains the annotations for the corresponding image file, that is, object class, object coordinates, height, and width. A classes.txt file is also generated that includes the list of all classes I have annotated in the dataset.
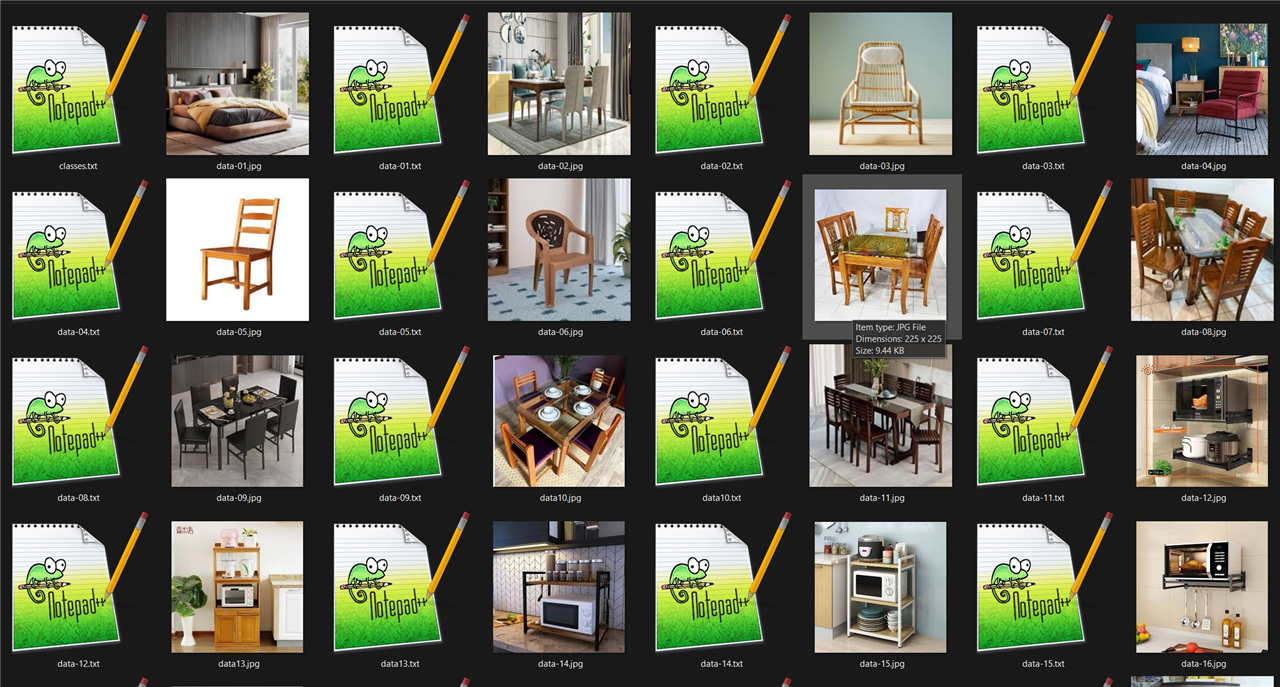
Annotation of the dataset is completed.
Traning the Dataset
I used a previously created Python notebook and Google Colab to train the model using my custom dataset. I followed https://geekyants.com/blog/how-to-train-yolov3-to-detect-custom-objects-demo-video-included and https://medium.com/@hitesh-gupta/custom-object-detection-by-yolov3-darknet-6a804c57f276 as a reference. This GitHub is also very comprehensive: https://github.com/kamipakistan/YOLOv3-Custom-Object-Detection.
As I could not use plenty of images for learning the result was not very accurate. I wish to train it again with more data later for better performance.
-

DAB
-
Cancel
-
Vote Up
0
Vote Down
-
-
Sign in to reply
-
More
-
Cancel
Comment-

DAB
-
Cancel
-
Vote Up
0
Vote Down
-
-
Sign in to reply
-
More
-
Cancel
Children