


Previous posts for this project:
Introduction
Last week, I described the project I intend to realise for this challenge.
Now, I have started experimenting with openHAB in combination with the Raspberry Pi B+ and the EnOcean sensor kit.
This post will cover the steps needed to get a basic openHAB configuration running with the sensors.
Setting Up RaspberryPi
I set up my Pi using the latest Wheezy image available from the RaspberryPi website.
You can find a step-by-step guide from shabaz here: Raspberry Pi Setup Guide
After the Pi booted, I configured the typical things I use with the raspi-config tool:
- expand file system
- enable ssh
- update
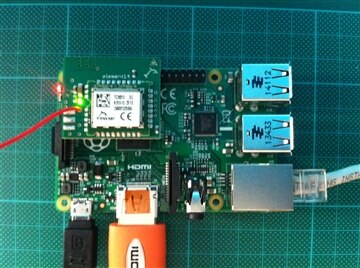
Once that was done, I powered off the Pi and connected the EnOceanPi module before powering on again.
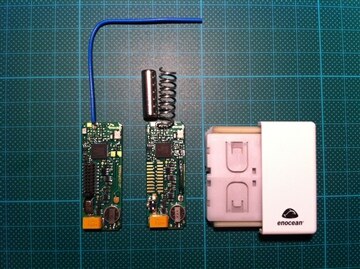
Setting Up EnOceanPi
Knowing the EnOceanPi and Sensors were Roadtested not so long ago, I browsed the reviews to read on their experiences.
This was particularly useful to know which problems they faced to get the sensors up and running.
malakai's EnOcean review provided a few simple commands to set everything up:
pi@webserver ~ $ sudo wget https://raw.github.com/lurch/rpi-serial-console/master/rpi-serial-console -O /usr/bin/rpi-serial-console && sudo chmod +x /usr/bin/rpi-serial-console
--2014-07-09 10:24:02--  https://raw.github.com/lurch/rpi-serial-console/master/rpi-serial-console
Resolving raw.github.com (raw.github.com)... 23.235.43.133
Connecting to raw.github.com (raw.github.com)|23.235.43.133|:443... connected.
HTTP request sent, awaiting response... 301 Moved Permanently
Location: https://raw.githubusercontent.com/lurch/rpi-serial-console/master/rpi-serial-console [following]
--2014-07-09 10:24:07--  https://raw.githubusercontent.com/lurch/rpi-serial-console/master/rpi-serial-console
Resolving raw.githubusercontent.com (raw.githubusercontent.com)... 23.235.43.133
Connecting to raw.githubusercontent.com (raw.githubusercontent.com)|23.235.43.133|:443... connected.
HTTP request sent, awaiting response... 200 OK
Length: 2829 (2.8K) [text/plain]
Saving to: `/usr/bin/rpi-serial-console'


100%[==============================================================================================>] 2,829       --.-K/s   in 0.001s


2014-07-09 10:24:11 (3.29 MB/s) - `/usr/bin/rpi-serial-console' saved [2829/2829]
Execute the script to disable the serial console, allowing it to be used by other programs:
# Script by AndrewS to make it easier to enable/disable the serial console
# (which allows the UART to be used by other programs)
# version 1.1 - better error handling
pi@webserver ~ $ sudo rpi-serial-console disable
Serial console has been disabled, a reboot is required to make this take effect
Reboot the Pi to apply the changes to the serial console:
pi@webserver ~ $ sudo reboot

Broadcast message from root@webserver (pts/0) (Wed Jul  9 10:28:09 2014):

The system is going down for reboot NOW!
Sensor IDs
To be able to use the sensors in openHAB, their unique ID is required.
To do this, I've installed FHEM, which auto-detects the IDs, wrote them down and disabled FHEM again.
Installing and using FHEM is also covered in the Road Test review linked earlier.
I haven't found an easier way to do this (yet).
Setting Up OpenHAB
There is a simple installation procedure on the OpenHAB website: openHAB - empowering the smart home
Following the instructions, and with a bit of common sense, installation went smoothly.
Core
First step is to install the OpenHAB core software. this is easily done by extracting the proper zip file to the correct location on the Pi:
pi@webserver ~ $ sudo mkdir /opt/openhab
pi@webserver ~ $ cd /opt/openhab/
pi@webserver /opt/openhab $ sudo unzip /home/pi/distribution-1.5.0-runtime.zip
Bindings
Next step is to add some bindings by extracting the addons zip file in the addons folder. This will however deploy *all* addons.
Once deployed, you can remove the addons which are not required by removing the correct *.jar files.
pi@webserver /opt/openhab $ cd addons/
pi@webserver /opt/openhab/addons $ sudo unzip /home/pi/distribution-1.5.0-addons.zip
pi@webserver /opt/openhab/addons $ cd ..
pi@webserver /opt/openhab $ sudo cp configurations/openhab_default.cfg configurations/openhab.cfg
Demo
There is a demo app available. In order to get to know the different components of an app, I deployed it:
pi@webserver /opt/openhab $ sudo unzip /home/pi/distribution-1.5.0-demo-configuration.zip
Running
With all OpenHAB components deployed, it was time to start it up. I noticed the "start.sh" script was not executable by default, so I updated that.
pi@webserver /opt/openhab $ sudo chmod +x start.sh
pi@webserver /opt/openhab $ sudo ./start.sh
Exploring
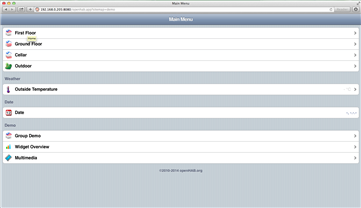
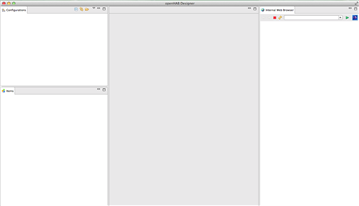
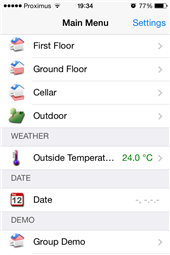
With the demo installed and started, I crossed my fingers and accessed the OpenHAB interface: http://192.168.0.205:8080/openhab.app?sitemap=demo
It works! The demo is up and running and there are various examples of widgets, multimedia, etc ... to browse:
Designer
Next I decided to install the designer on my Mac.
After launching the Designer, the program would just get stuck on the splash screen and nothing would happen.
I Googled a bit a came across this thread: https://code.google.com/p/openhab/issues/detail?id=439
As mentioned in one of the comments, I added a line to my openHAB-Designer.ini file:
-Djava.awt.headless=true
The designer now launches properly.
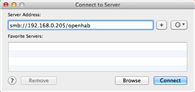
With the designer running on my Mac and the Core running on the Pi, I wanted an easy way to develop and deploy new OpenHAB configurations.
To do that, I defined a password for user "root", installed samba and shared the OpenHAB folder.
pi@webserver /opt/openhab $ sudo passwd root
pi@webserver /opt/openhab $ sudo apt-get install samba samba-common-bin
pi@webserver /opt/openhab $ sudo nano /etc/samba/smb.conf
[openhab]
   comment=OpenHAB
   path=/opt/openhab
   browseable=Yes
   writeable=Yes
   only guest=no
   create mask=0777
   directory mask=0777
   public=no
pi@webserver /opt/openhab $ sudo smbpasswd -a root
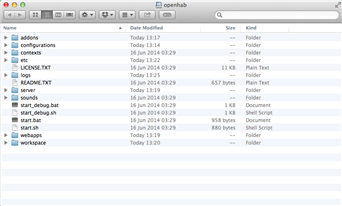
On my Mac, I mounted the shared folder and got access to the OpenHAB installation on the Pi:
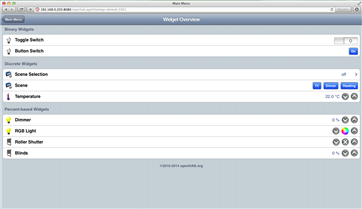
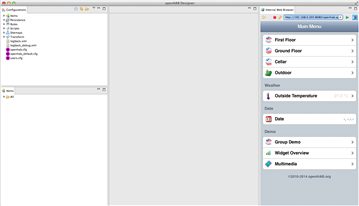
From the designer, I could now load the OpenHAB config and access the demo:
iOS App
Finally, I installed the OpenHAB app on my smartphone and pointed it to the Raspberry Pi, by:
- specifying the remote url: http://192.168.0.205:8080/openhab.app
- setting demo mode to off

RaspberryPi + EnOcean + OpenHAB
With all parts individually set up, I tried combining everything to a working solution.
Following the documentation found at https://github.com/openhab/openhab/wiki/EnOcean-Binding, I configured the serial port of my EnOceanPi in the openhab.cfg:
################################# EnOcean Binding #####################################
#
# EnOcean USB adapter serial port
enocean:serialPort=/dev/ttyAMA0
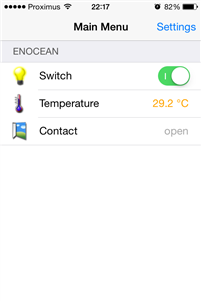
After the modification, I restarted OpenHAB and started modifying the demo example to have my EnOcean switch and temperature sensor available.
First, I edited the "demo.items" file to contain the following:
Switch EnOcean_switch_00298B1A {enocean="{id=00:29:8B:1A, eep=F6:02:01, channel=B}"}
Number EnOcean_sensor_01809DC1 "Temperature [%.1f °C]" <temperature> (enocean) {enocean="{id=01:80:9D:C1, eep=A5:02:05, parameter=TEMPERATURE}"}
Contact EnOcean_sensor_0180878B "Contact [MAP(en.map):%s]" <contact> (enocean) {enocean="{id=01:80:87:8B, eep=D5:00:01, parameter=CONTACT_STATE"}
I continued by updating the "demo.sitemap" to only visualise those three items:
sitemap demo label="Main Menu"
{
 Frame label="EnOcean" {
  Switch item=EnOcean_switch_00298B1A label="Switch"
  Text item=EnOcean_sensor_01809DC1 valuecolor=[>25="orange",>15="green",>5="orange",<=5="blue"]
  Text item=EnOcean_sensor_0180878B
  }
}
With everything configured, I started clicking my EnOcean switch like a madman. Nothing happened.
After searching for quite some time, I found I needed to make a modification to the OpenHAB "start.sh" script in order to recognise the serial port.
I edited "start.sh" as mentioned in this thread: https://groups.google.com/forum/#!searchin/openhab/enocean/openhab/8GtLqJAffcI/zJ1DGF95XOsJ
-Dgnu.io.rxtx.SerialPorts=/dev/ttyAMA0
Restarted OpenHAB and guess what? It worked!
This is already a great step forward!
Start at boot
To finalise this week's post, I ensured openHAB would start automatically when booting the Pi.
To do this, I edited "/etc/rc.local" and added this line:
sudo /opt/openhab/start.sh
To test this, I rebooted the Pi, and openHAB started automatically!
Top Comments