element14 Community
element14 Community
    Register Log In
  • Site
  • Search
  • Log In Register
  • Community Hub
    Community Hub
    • What's New on element14
    • Feedback and Support
    • Benefits of Membership
    • Personal Blogs
    • Members Area
    • Achievement Levels
  • Learn
    Learn
    • Ask an Expert
    • eBooks
    • element14 presents
    • Learning Center
    • Tech Spotlight
    • STEM Academy
    • Webinars, Training and Events
    • Learning Groups
  • Technologies
    Technologies
    • 3D Printing
    • FPGA
    • Industrial Automation
    • Internet of Things
    • Power & Energy
    • Sensors
    • Technology Groups
  • Challenges & Projects
    Challenges & Projects
    • Design Challenges
    • element14 presents Projects
    • Project14
    • Arduino Projects
    • Raspberry Pi Projects
    • Project Groups
  • Products
    Products
    • Arduino
    • Avnet & Tria Boards Community
    • Dev Tools
    • Manufacturers
    • Multicomp Pro
    • Product Groups
    • Raspberry Pi
    • RoadTests & Reviews
  • About Us
  • Store
    Store
    • Visit Your Store
    • Choose another store...
      • Europe
      •  Austria (German)
      •  Belgium (Dutch, French)
      •  Bulgaria (Bulgarian)
      •  Czech Republic (Czech)
      •  Denmark (Danish)
      •  Estonia (Estonian)
      •  Finland (Finnish)
      •  France (French)
      •  Germany (German)
      •  Hungary (Hungarian)
      •  Ireland
      •  Israel
      •  Italy (Italian)
      •  Latvia (Latvian)
      •  
      •  Lithuania (Lithuanian)
      •  Netherlands (Dutch)
      •  Norway (Norwegian)
      •  Poland (Polish)
      •  Portugal (Portuguese)
      •  Romania (Romanian)
      •  Russia (Russian)
      •  Slovakia (Slovak)
      •  Slovenia (Slovenian)
      •  Spain (Spanish)
      •  Sweden (Swedish)
      •  Switzerland(German, French)
      •  Turkey (Turkish)
      •  United Kingdom
      • Asia Pacific
      •  Australia
      •  China
      •  Hong Kong
      •  India
      • Japan
      •  Korea (Korean)
      •  Malaysia
      •  New Zealand
      •  Philippines
      •  Singapore
      •  Taiwan
      •  Thailand (Thai)
      • Vietnam
      • Americas
      •  Brazil (Portuguese)
      •  Canada
      •  Mexico (Spanish)
      •  United States
      Can't find the country/region you're looking for? Visit our export site or find a local distributor.
  • Translate
  • Profile
  • Settings
Path to Programmable
  • Challenges & Projects
  • Design Challenges
  • Path to Programmable
  • More
  • Cancel
Path to Programmable
Blog [PP-04] Lab 1 - building a basic Zynq design
  • Blog
  • Forum
  • Documents
  • Polls
  • Files
  • Events
  • Mentions
  • Sub-Groups
  • Tags
  • More
  • Cancel
  • New
  • Share
  • More
  • Cancel
Group Actions
  • Group RSS
  • More
  • Cancel
Engagement
  • Author Author: kk99
  • Date Created: 27 Oct 2018 5:45 PM Date Created
  • Views 517 views
  • Likes 1 like
  • Comments 1 comment
  • path to programmable
  • fpga
  • minized
Related
Recommended

[PP-04] Lab 1 - building a basic Zynq design

kk99
kk99
27 Oct 2018

The main purpose of this lab is to illustrate how to create a new Zynq project using UltraFast Design Methodology within Vivado Webpack.


Zynq Proccesing System (PS) has a configurable set of built-in peripherals and direct access to Programmable Logic (PL) that can build any custom IP. So, I we need we could create dedicated soft IP in PL and use it in PS.


1. Create a new Zynq project in Vivado

Below there is gallery with step-by-step instructions how to create a new project. Each step is described in image description.


{gallery} Creation of new project in Vivado

image

Click on Create Project.

image

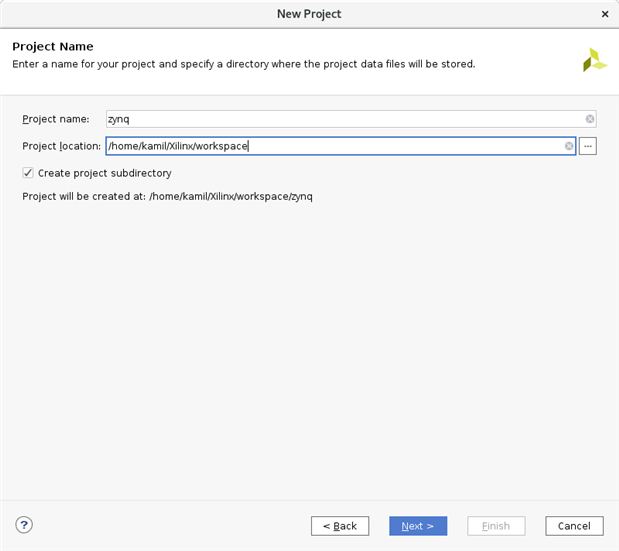
Set the project name and project location.

image

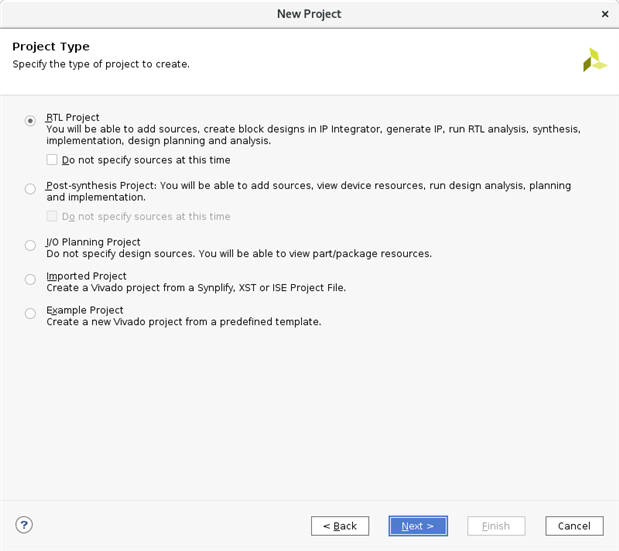
This will be a RTL-based project, so please leave the radio button for RTL project selected.

image

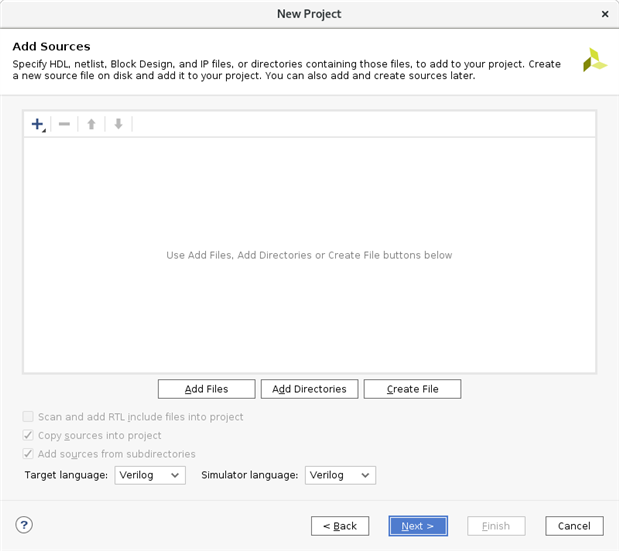
Select VHDL as target language. Click Next two times.

image

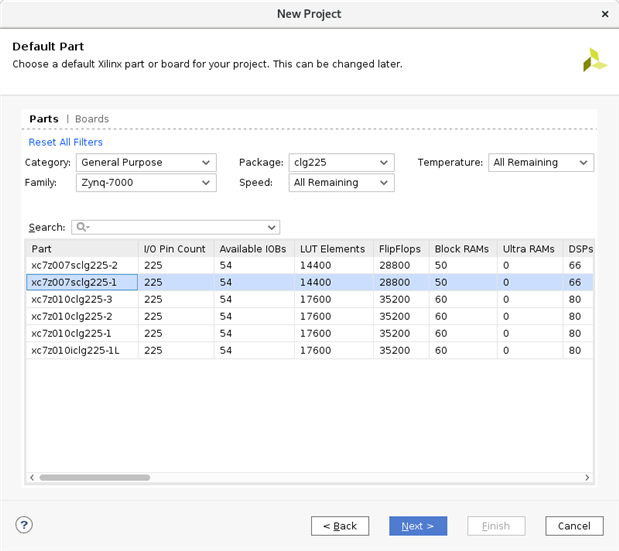
Select target device: xc7z007sclg225-1.

image

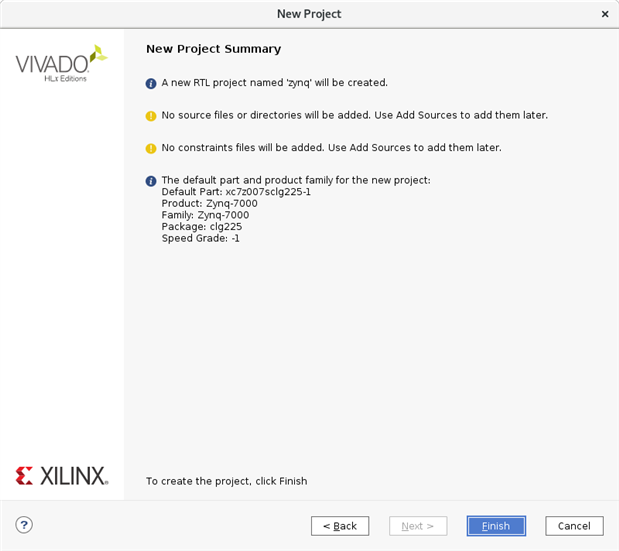
Click Finish button.

image

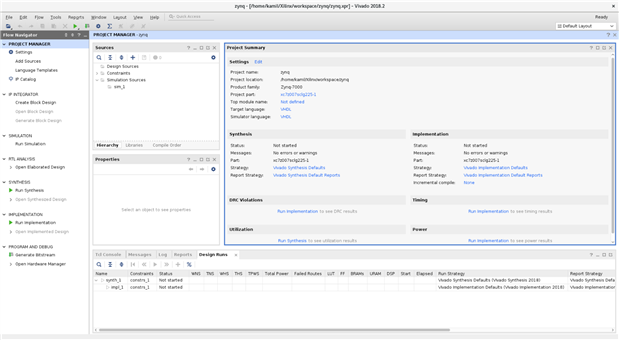
There is Vivado design cockpit.

2. Create a new block design in Vivado

Below there is gallery with step-by-step instructions how to create a block design. Each step is described in image description.

{gallery} Creation of a new block design

image

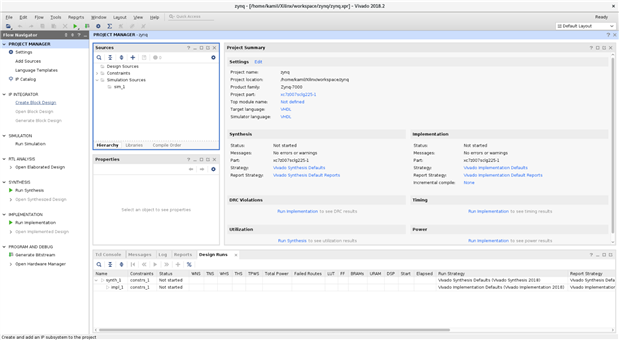
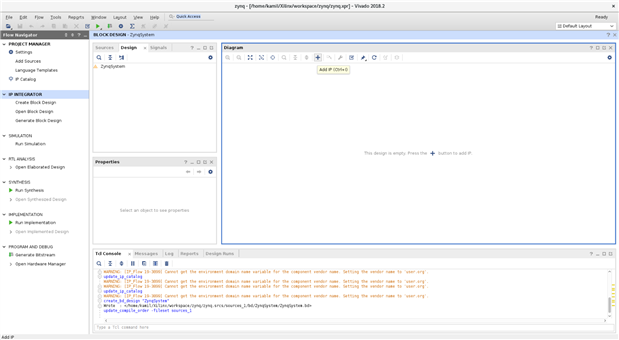
Select Create Block Design.

image

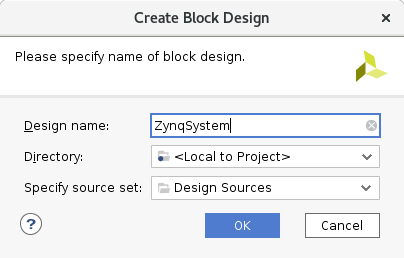
Enter the block design name.

image

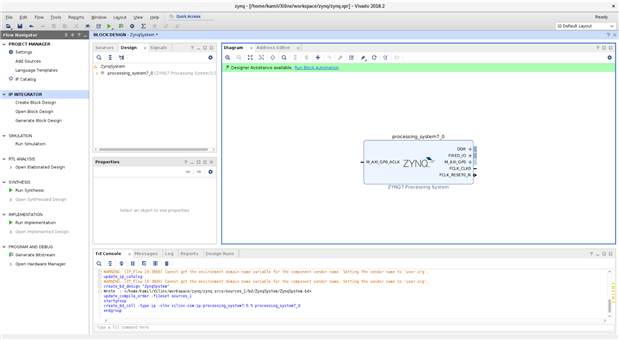
Select Add IP from the top bar of Diagram window. From search window choose ZYNQ7 Processing System.

image

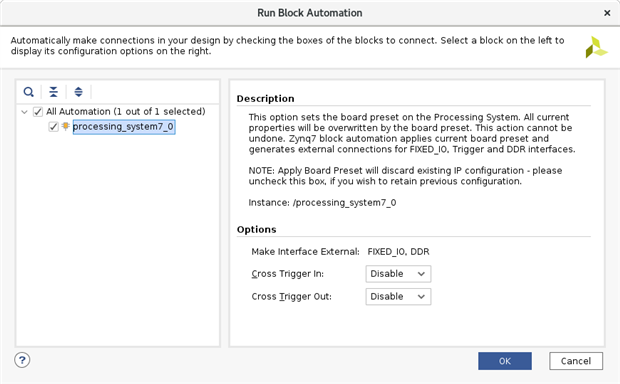
Click Run Block Automation to perform automatic connection of IPs in block design.

image

This wizard automatically detects if is required to connect external interfaces for FIXED_IO and DDR. FIXED_IO are dedicated peripherals in the Zynq PS like UARTs, USB or Ethernet. Click Ok.

image

Click the Save Block Design button to save the block design. You could launch customizations by double-click on the ZYNQ7 PS IP block.

image

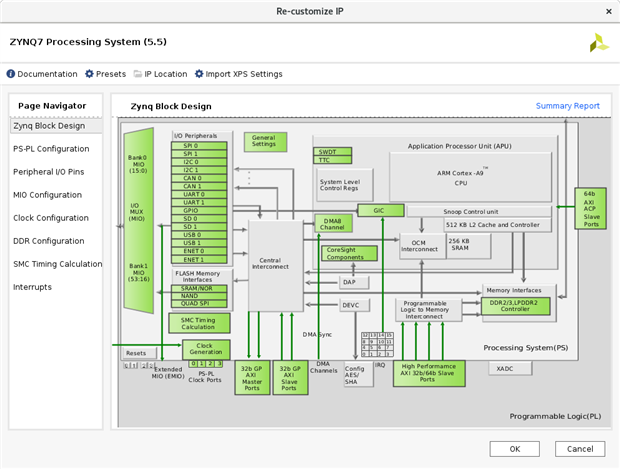
At this screen you could reconfigure ale PS features.

  • Sign in to reply

Top Comments

  • DAB
    DAB over 7 years ago +1
    Nice update. DAB
  • DAB
    DAB over 7 years ago

    Nice update.

    DAB

    • Cancel
    • Vote Up +1 Vote Down
    • Sign in to reply
    • More
    • Cancel
element14 Community

element14 is the first online community specifically for engineers. Connect with your peers and get expert answers to your questions.

  • Members
  • Learn
  • Technologies
  • Challenges & Projects
  • Products
  • Store
  • About Us
  • Feedback & Support
  • FAQs
  • Terms of Use
  • Privacy Policy
  • Legal and Copyright Notices
  • Sitemap
  • Cookies

An Avnet Company © 2025 Premier Farnell Limited. All Rights Reserved.

Premier Farnell Ltd, registered in England and Wales (no 00876412), registered office: Farnell House, Forge Lane, Leeds LS12 2NE.

ICP 备案号 10220084.

Follow element14

  • X
  • Facebook
  • linkedin
  • YouTube