


All my previous blogs can be read in detail here Path to Programmable This blog is further continued from Week 5: Done!! Lab 8 A good read of the previous blog 8 is necessary to understand this Lab 9 as they are related in the project context.
Aim of the Lab 9 Blog
In lab 9 we explore the benefits of scripting as we prepare to finalize our hardware project to be used in the Developing Zynq Software Speedway. We then explore and discuss the various changes that were made and interfaces added.
When you have completed Lab 9, you will know how to do the following
• Source a Tcl script
• Understand the power of scripting
• Understanding of the hardware platform that will be used in the Developing Zynq Software Speedway
Finish Hardware Build using Tcl
The advantages of using tcl are many. This being the hardware programmer can work independently from the GUI. There is no more dependance on the changing versions of the Vivado GUI but the learning curve for the tcl scripting is quite high and steep. I have seen experts struggling for quite some years to get a full hang of the tcl way of programming. Here the plan is to add an ip core from Avnet using the tcl window and also spending some time to look into the tcl code and analysing the tcl script. The tcl script was also sent to us by the training program and is not self written
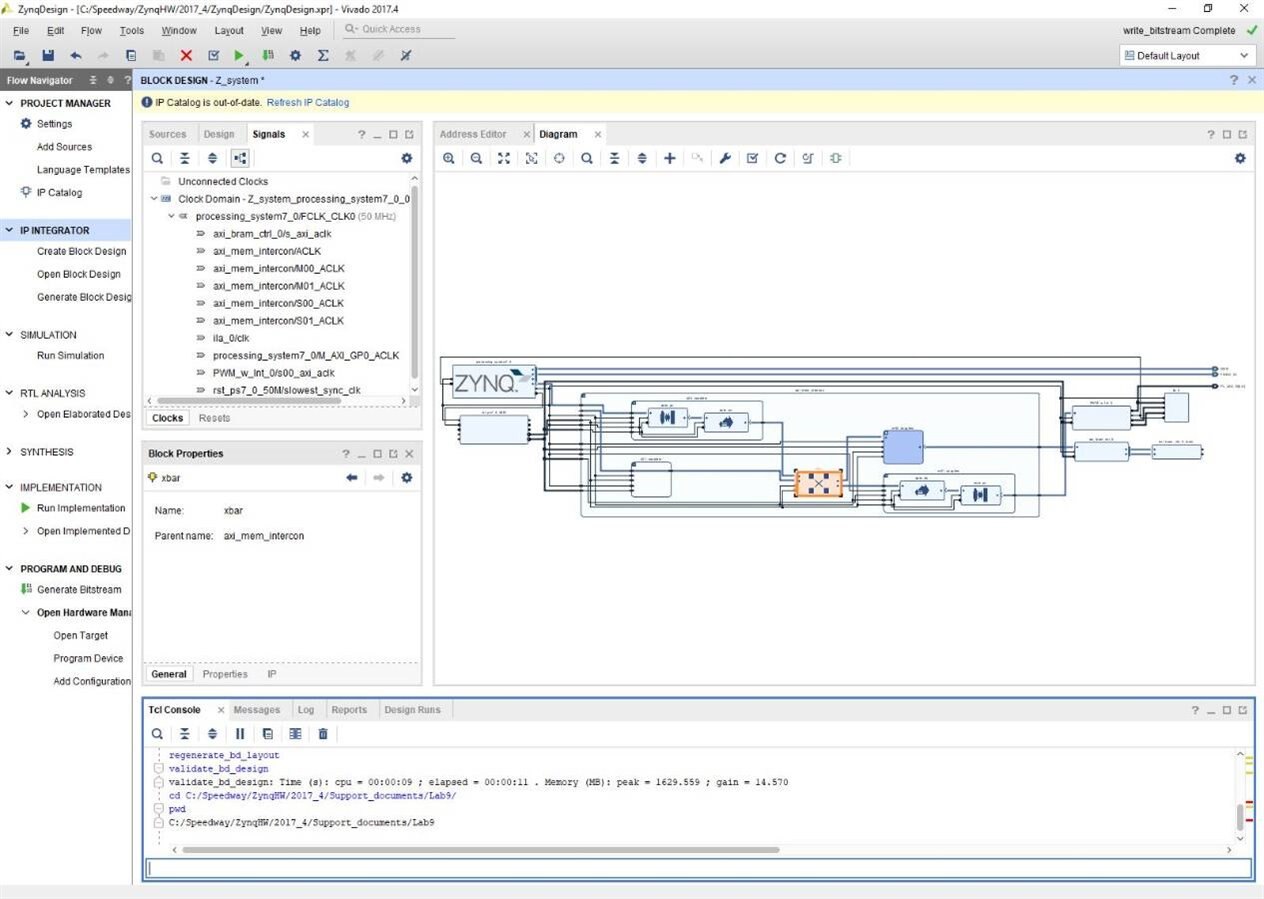
Continuing from the previous project lab 8
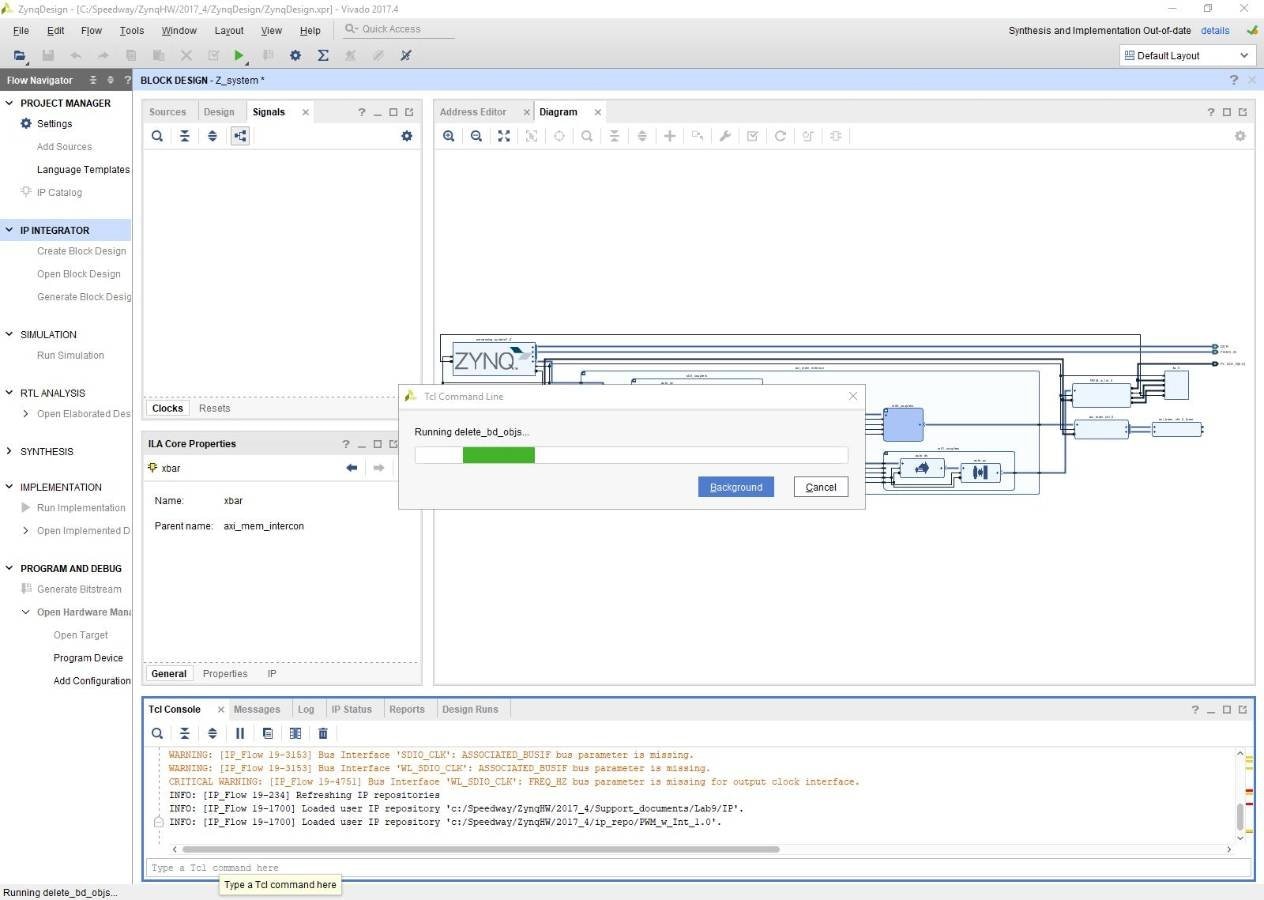
Adding the Avnet IP which is a wireless manager block. The block deals with all the wireless radio interfaces that are available via the Murata module located on the MiniZed.
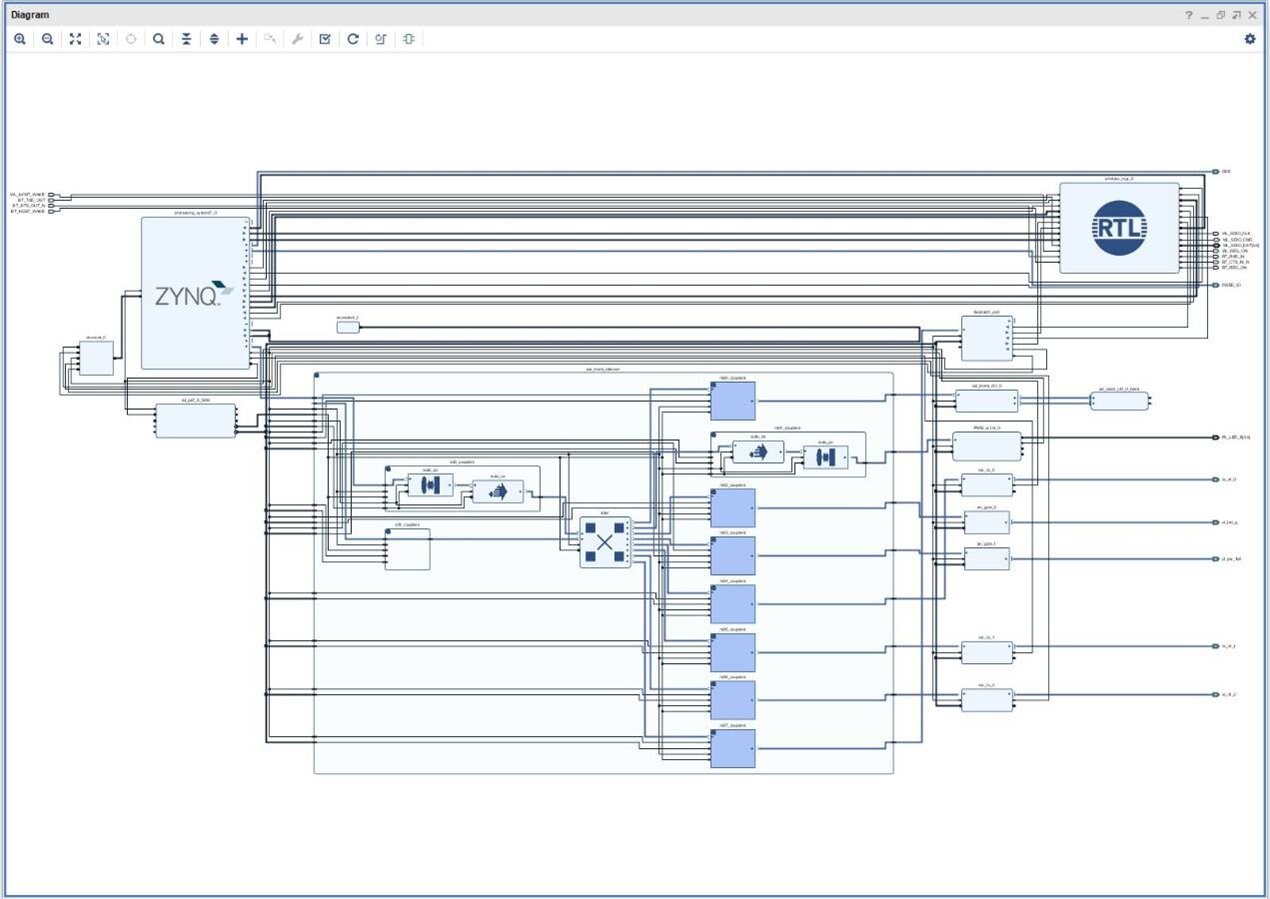
The full design after the Avnet IP wireless manager block is added to the current design.
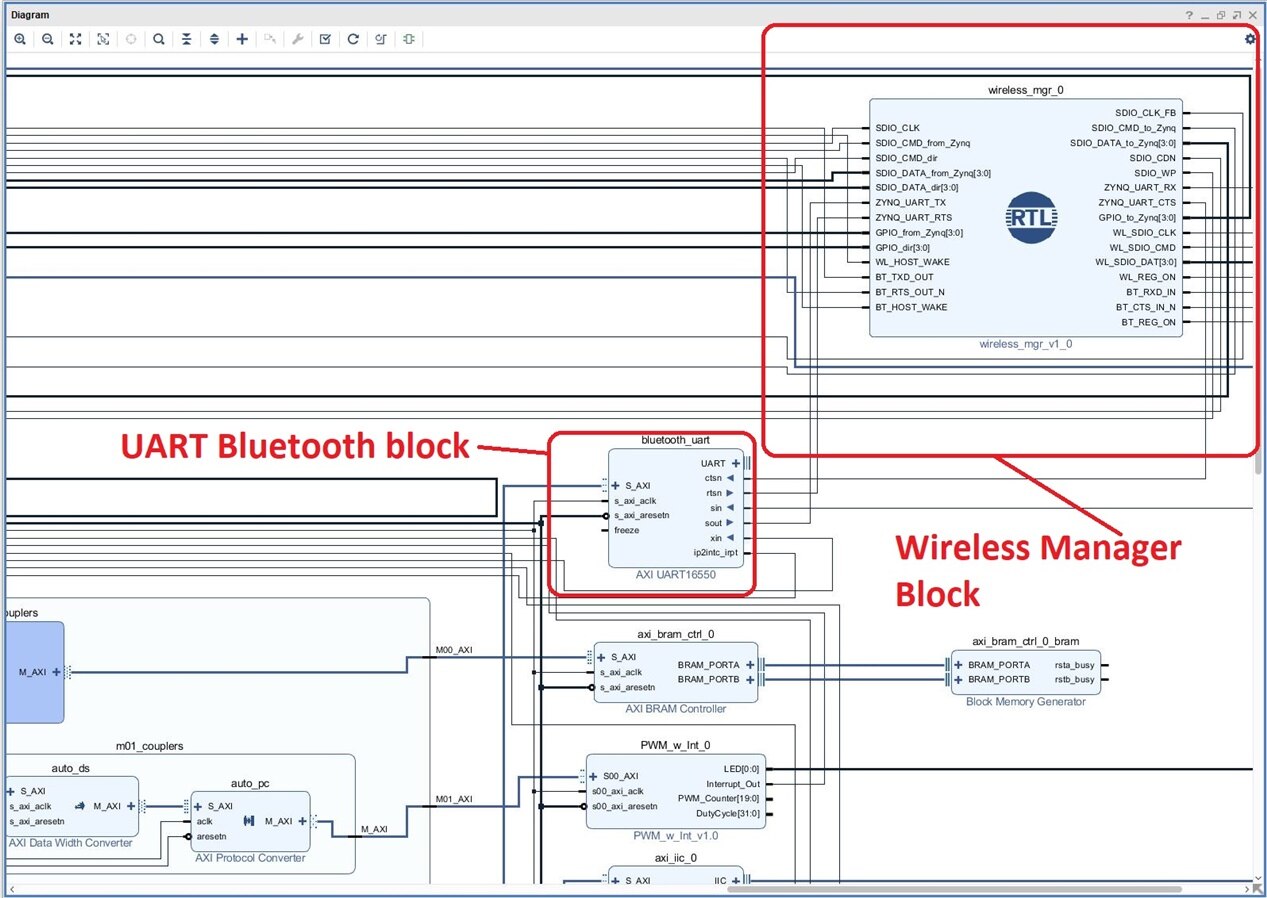
Deep look into the Avnet IP wireless manager block.

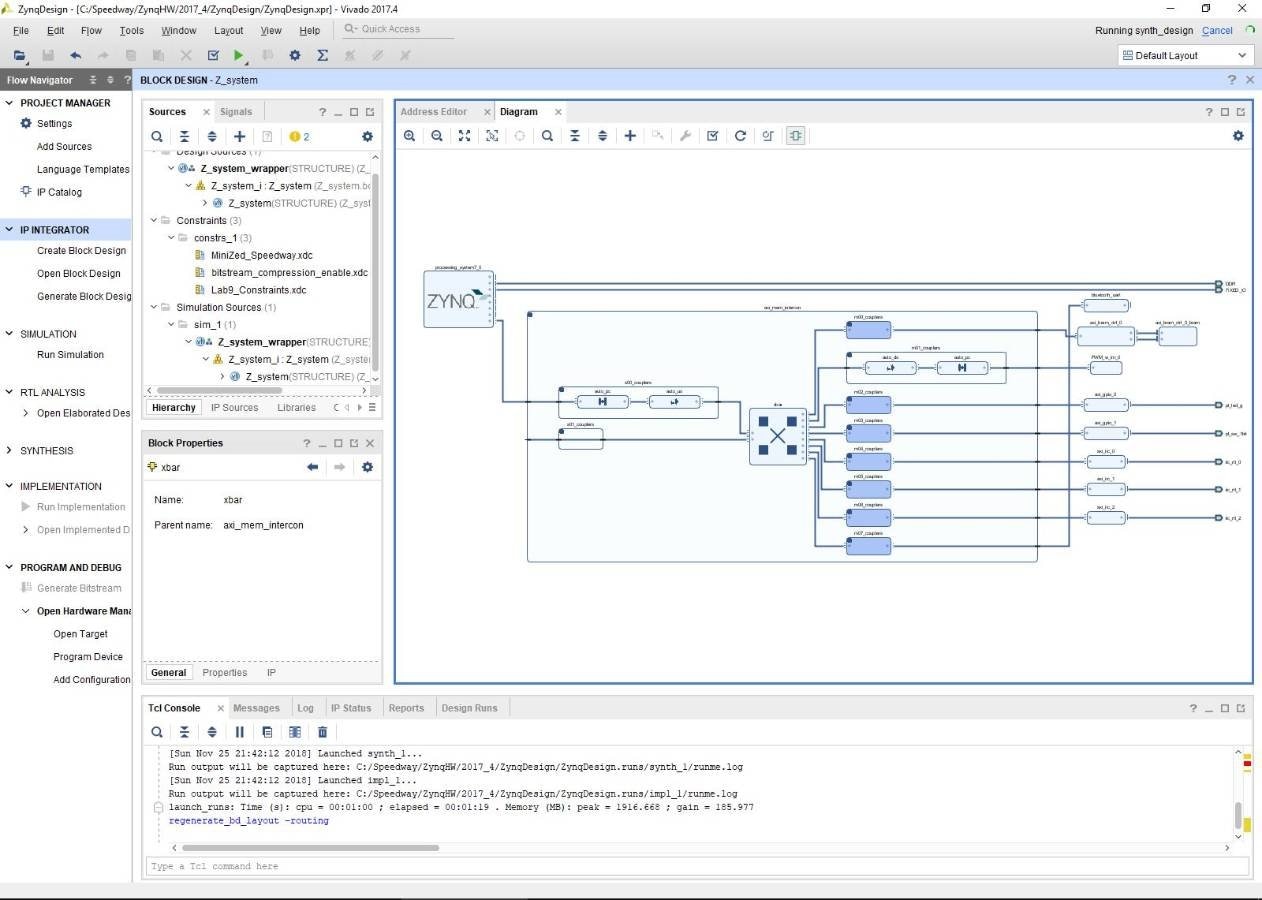
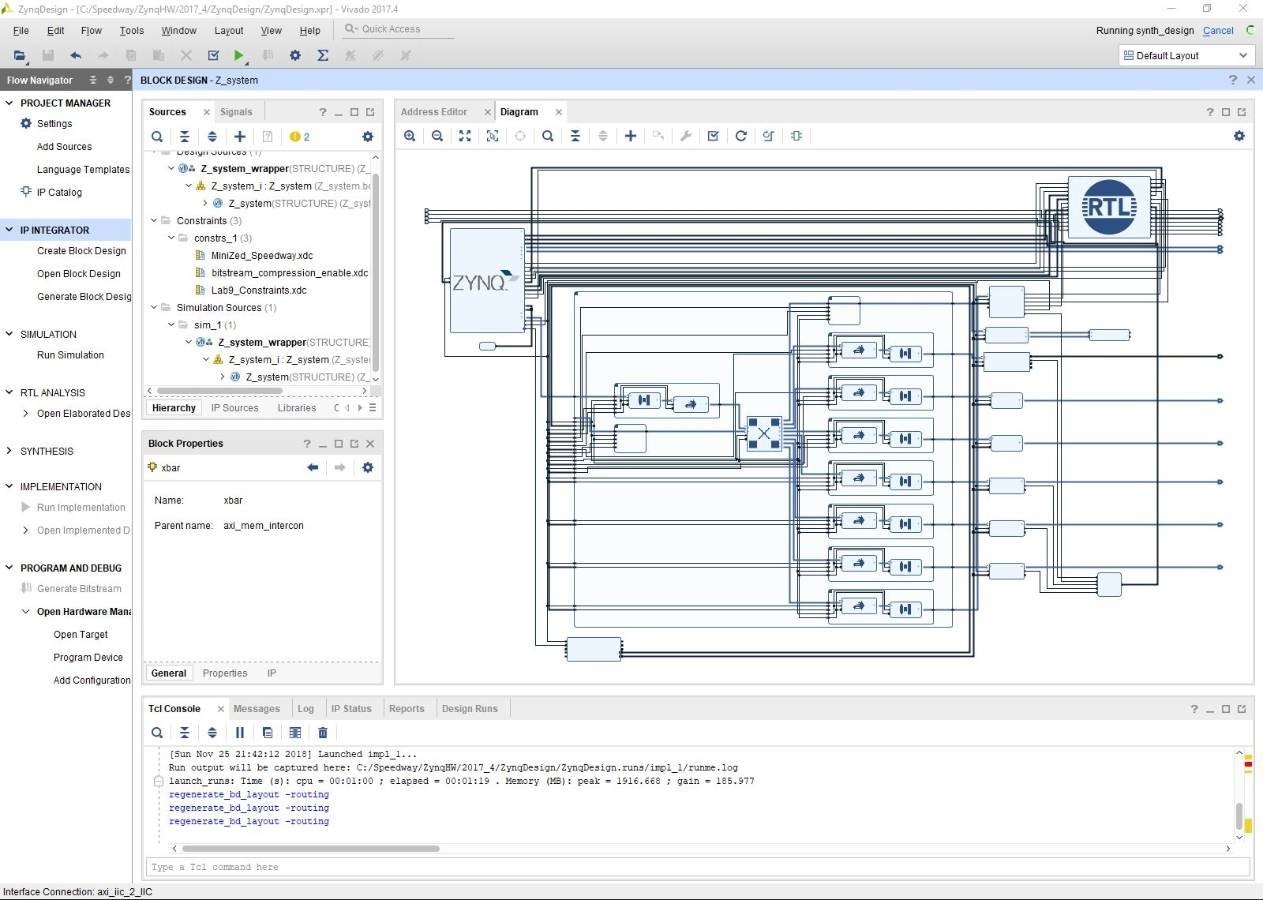
Many other ip block such as the GPIO blocks, AXI IIC Block and xlconcat are added to the design which are related to the wireless manager and the bluetooth ip cores. This makes the design very complex. I did spend a significant amount of time to understand what was going on in the design after the whole thing exploded in my face 
Many such downloadable Vivado IP core are available at the Avnet website
Look into the .xdc file
The timing constraints for the wireless manager ip core was also delivered with the project sample. As one can see each used hardware port in the fpga needs to be constrained by setting the correct LVDS IO standard and the pin package. writing your own .xdc files is a tricky job hence I am happy we were not asked to write our own files. The various constraints will route the interface signals through the Programmable Logic out to the various interfaces on the MiniZed.
Some links to understand xdc file
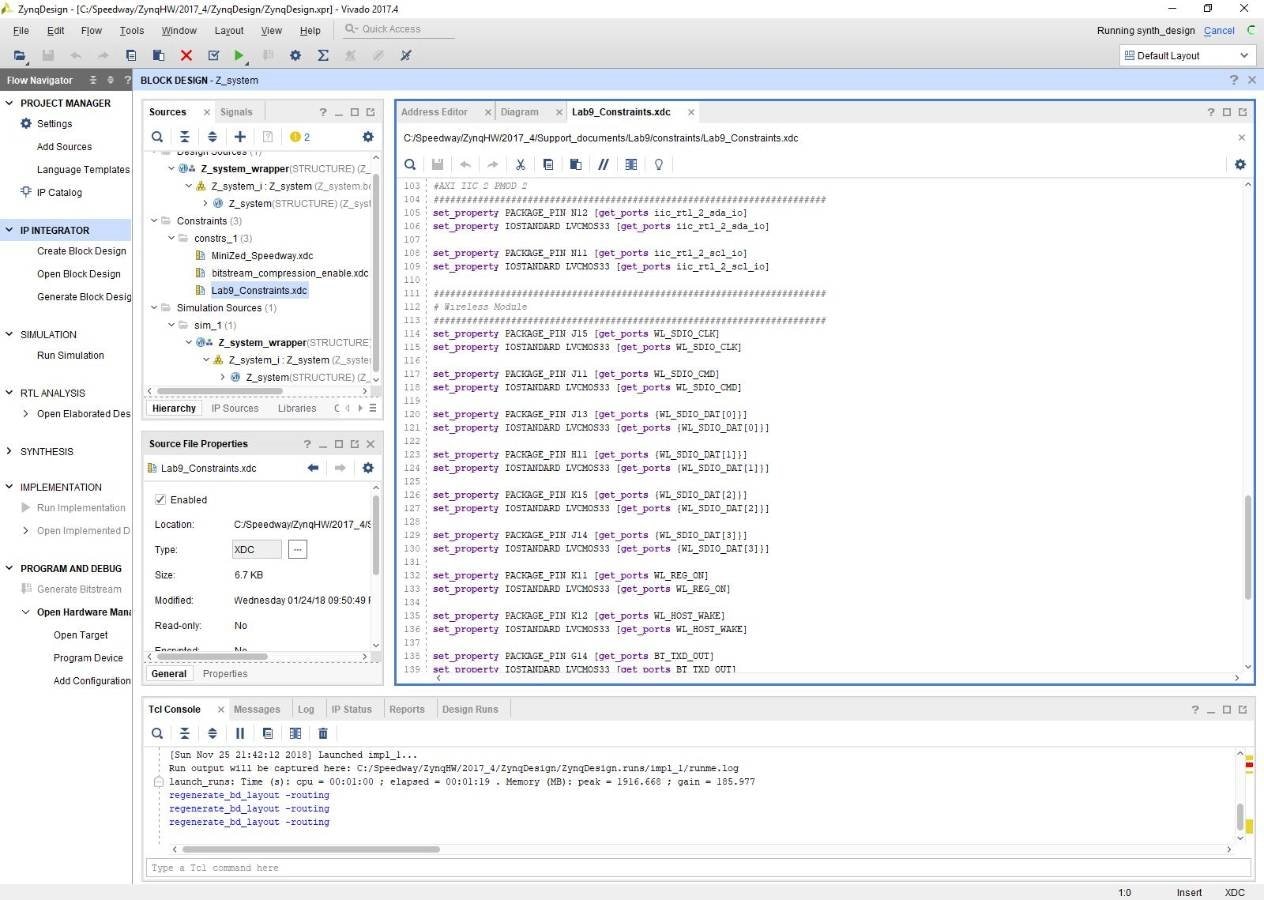
A detailed look into the .xdc files for the Lab 9
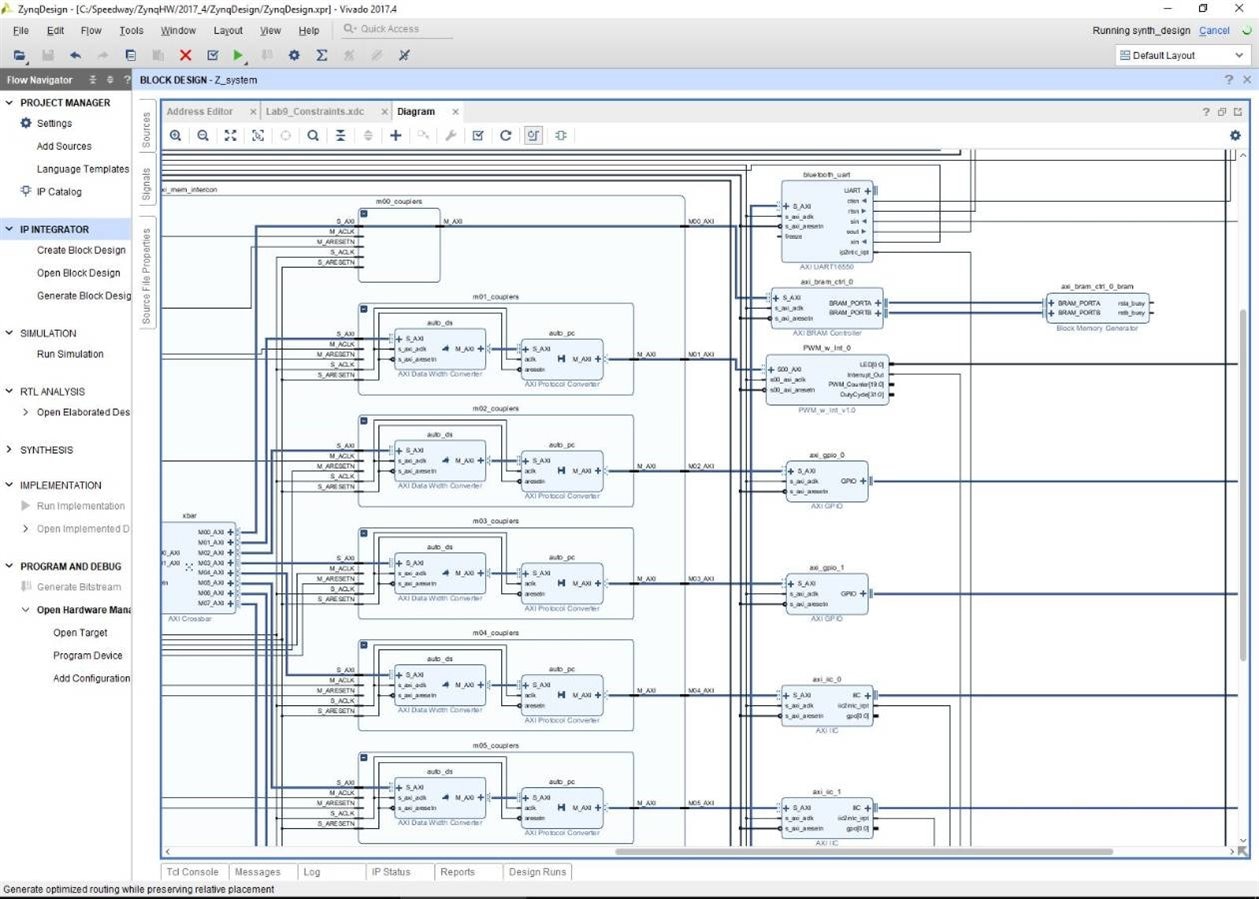

Playing around with the RTL reports of the generated project
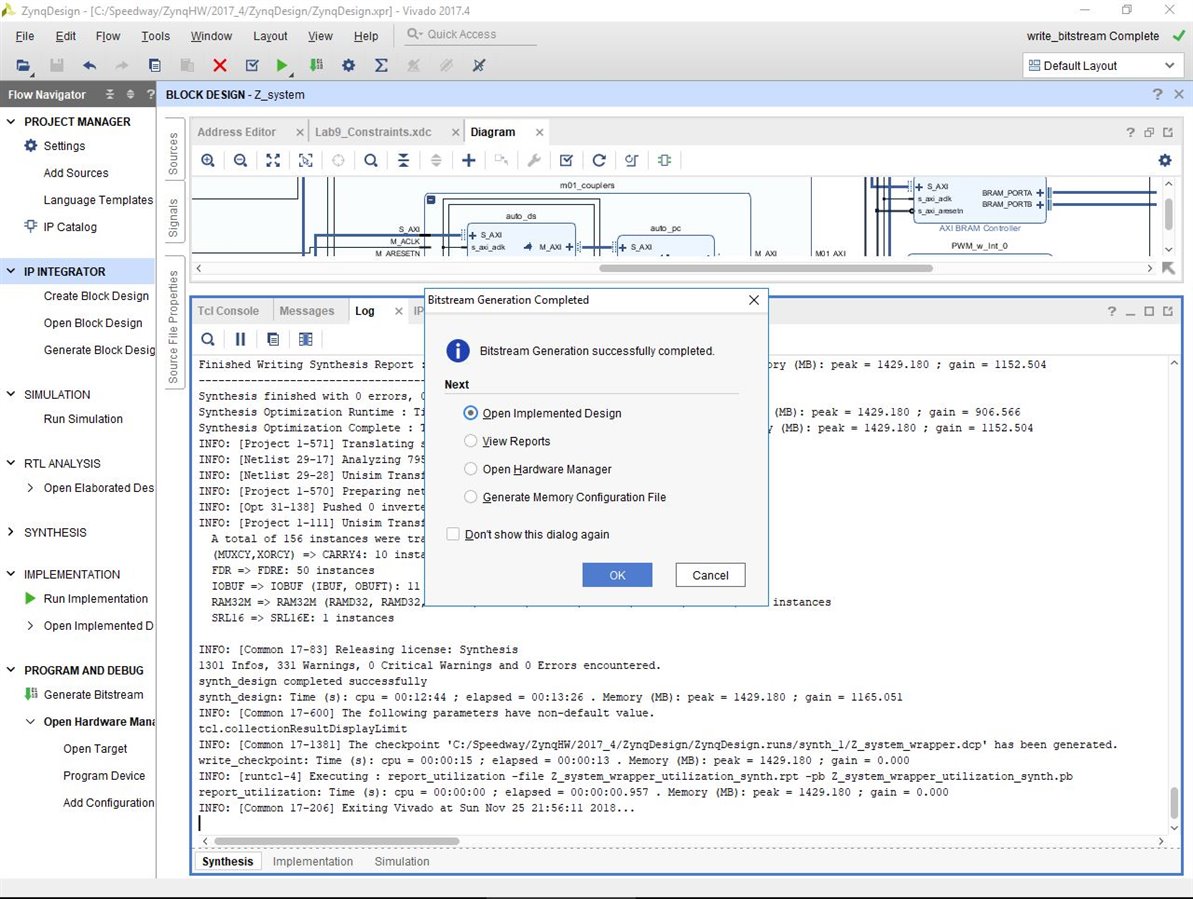
Finally generating the bit-stream ready to send/export the hardware to the software SDK.
 The below parts were not a part of the original training but I spent some time to go a bit deeper into the generated project and how it was added to the fpga on the device level.
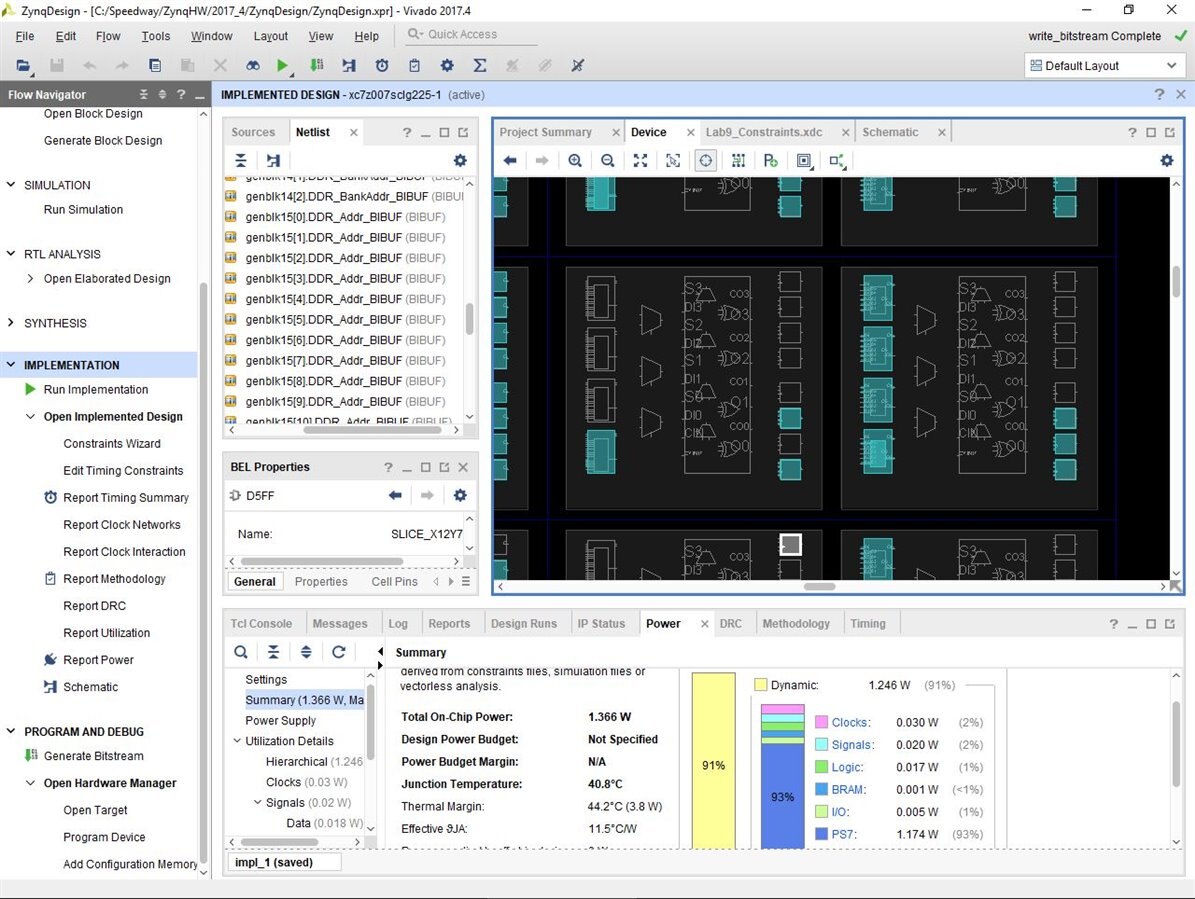
Power Utilization of the project
There is a lot to play around and I dedicated some time to see the power consumption graphs generated in the final project. There are also more detailed txt files of power consumption which one can play with share around.
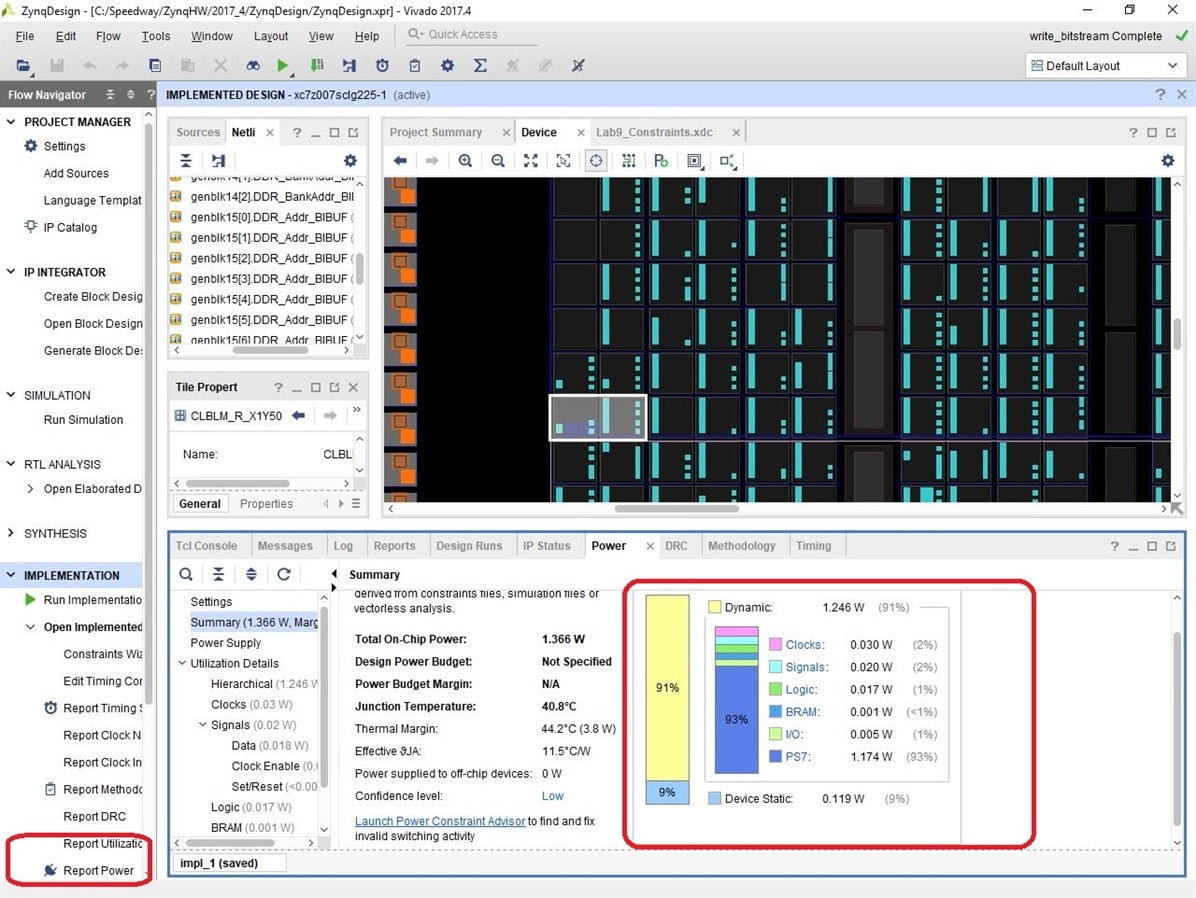
The final power utilization of the chip with the final project
Final Device and Schematics
As a self exploration I also went and looked into the generated schematics for each block. One can really zoom in and go as deep as to see the RTL blocks that are generated on the fpga chip.
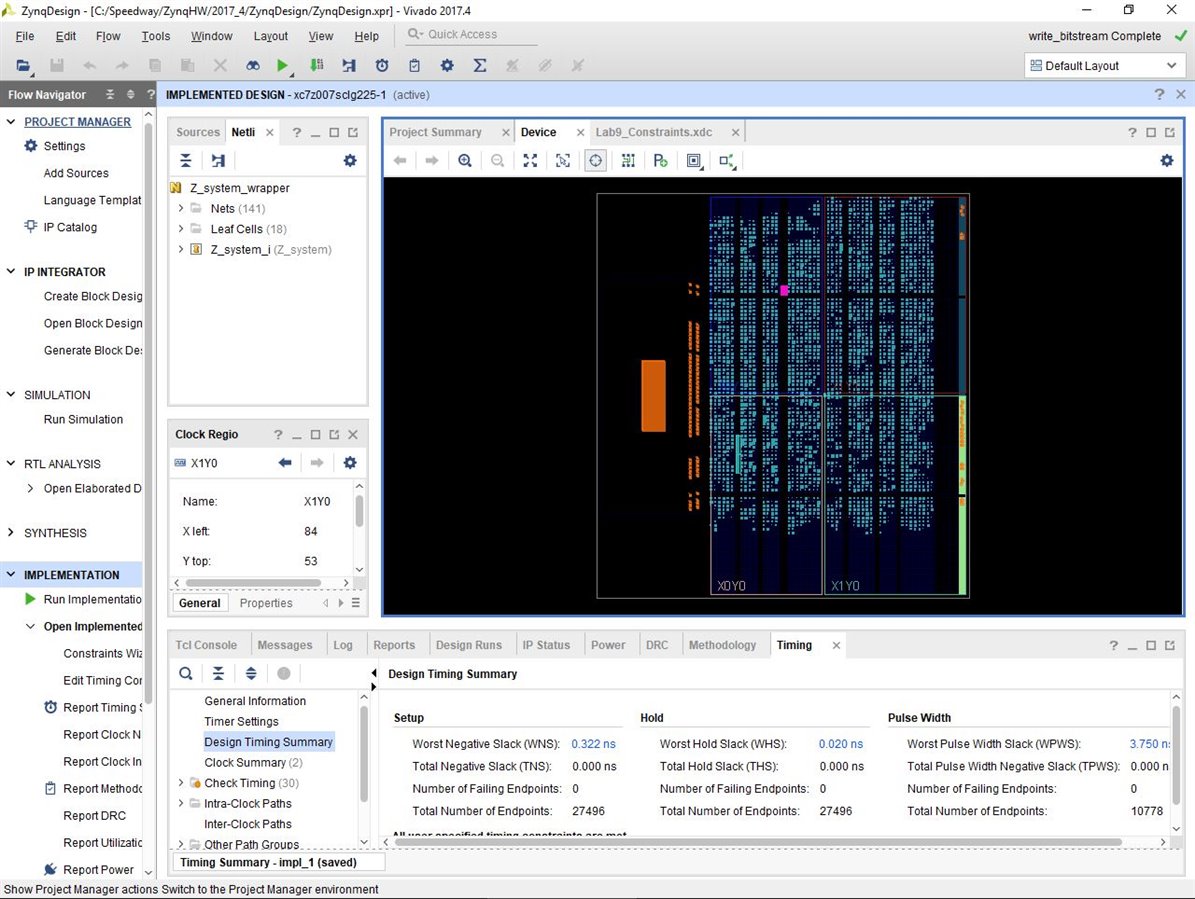
How the final project system on chip looks like above
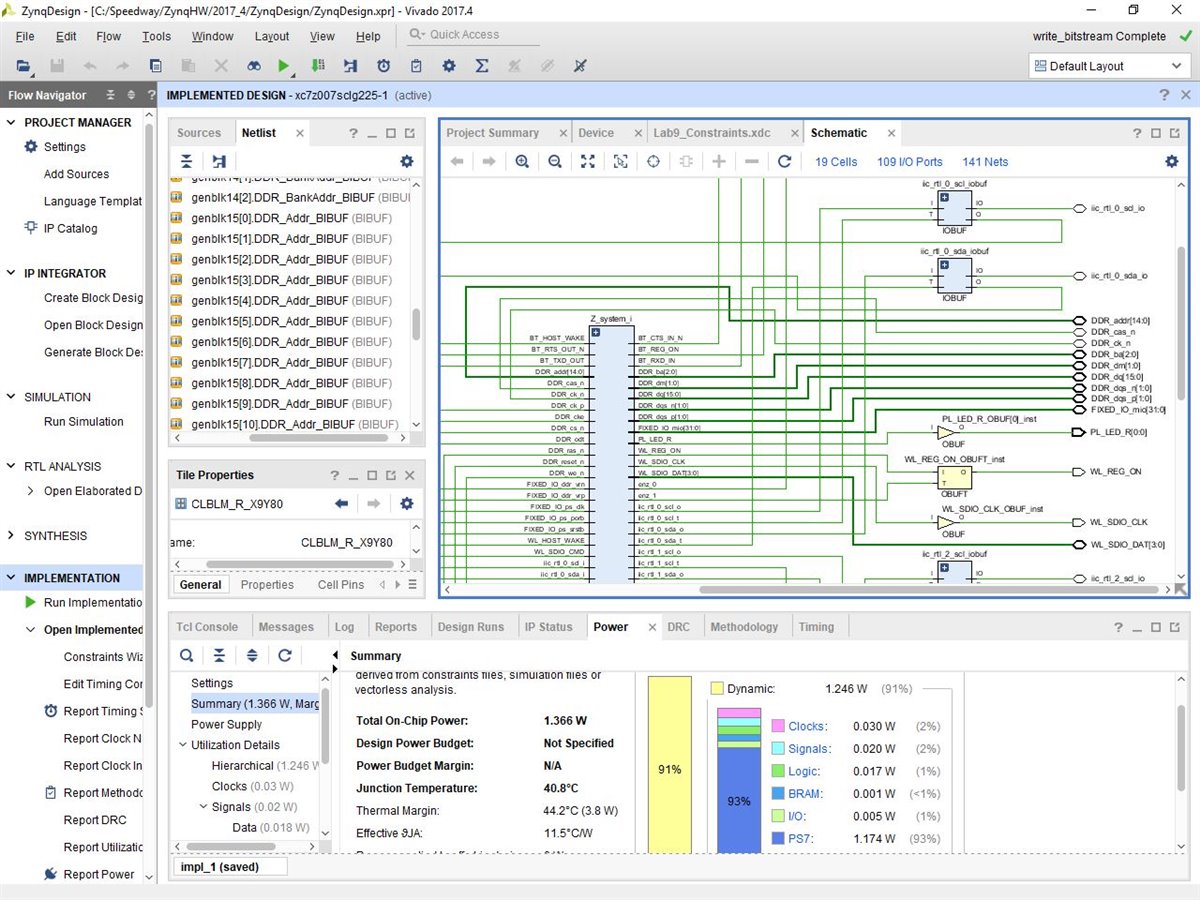
New schematics of the hardware in the project
Looking into the device blocks generated in RTL level on the fpga
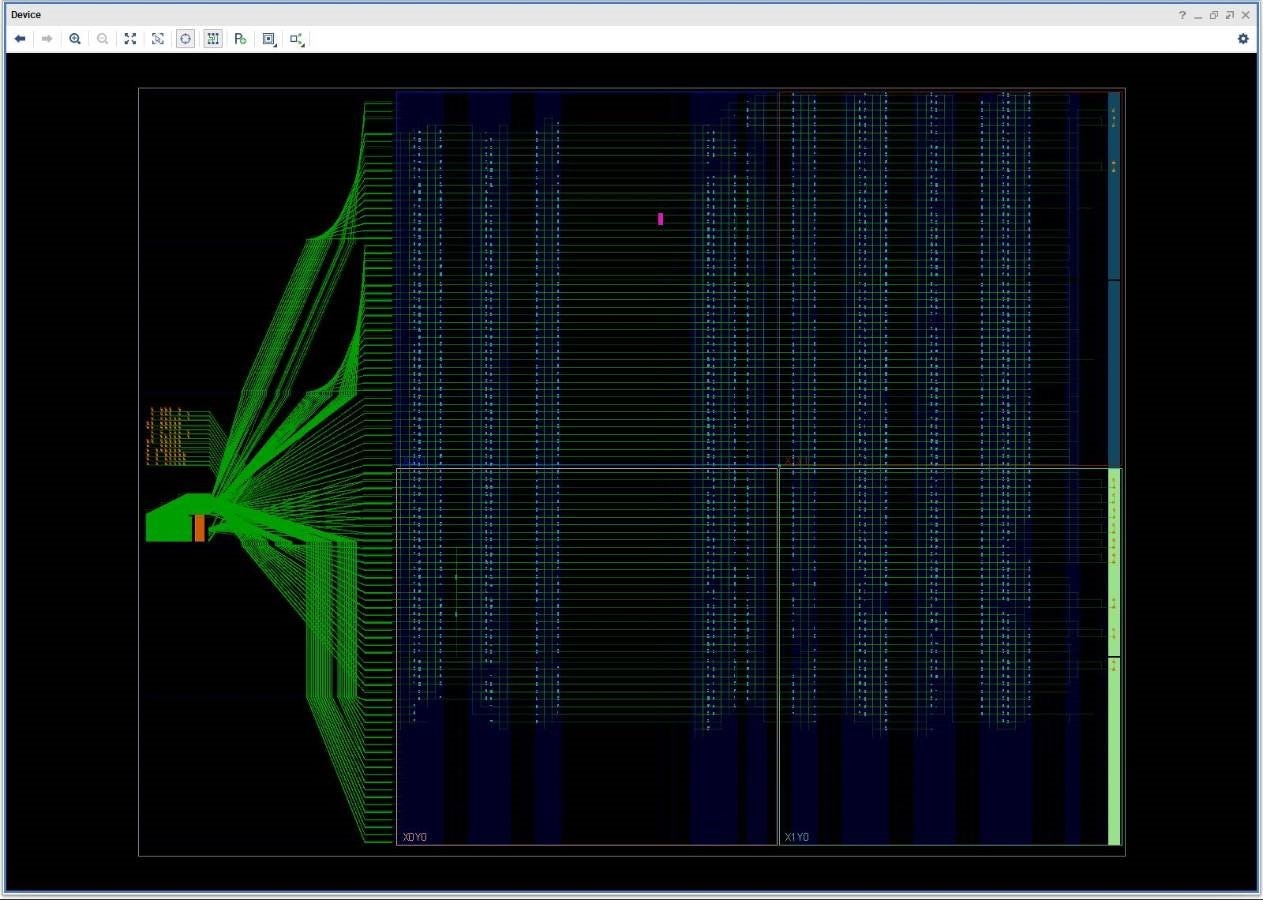
How the full device connectivity to different blocks look like. BY hovering over the lines one can see detailed descriptions of each of the connections.
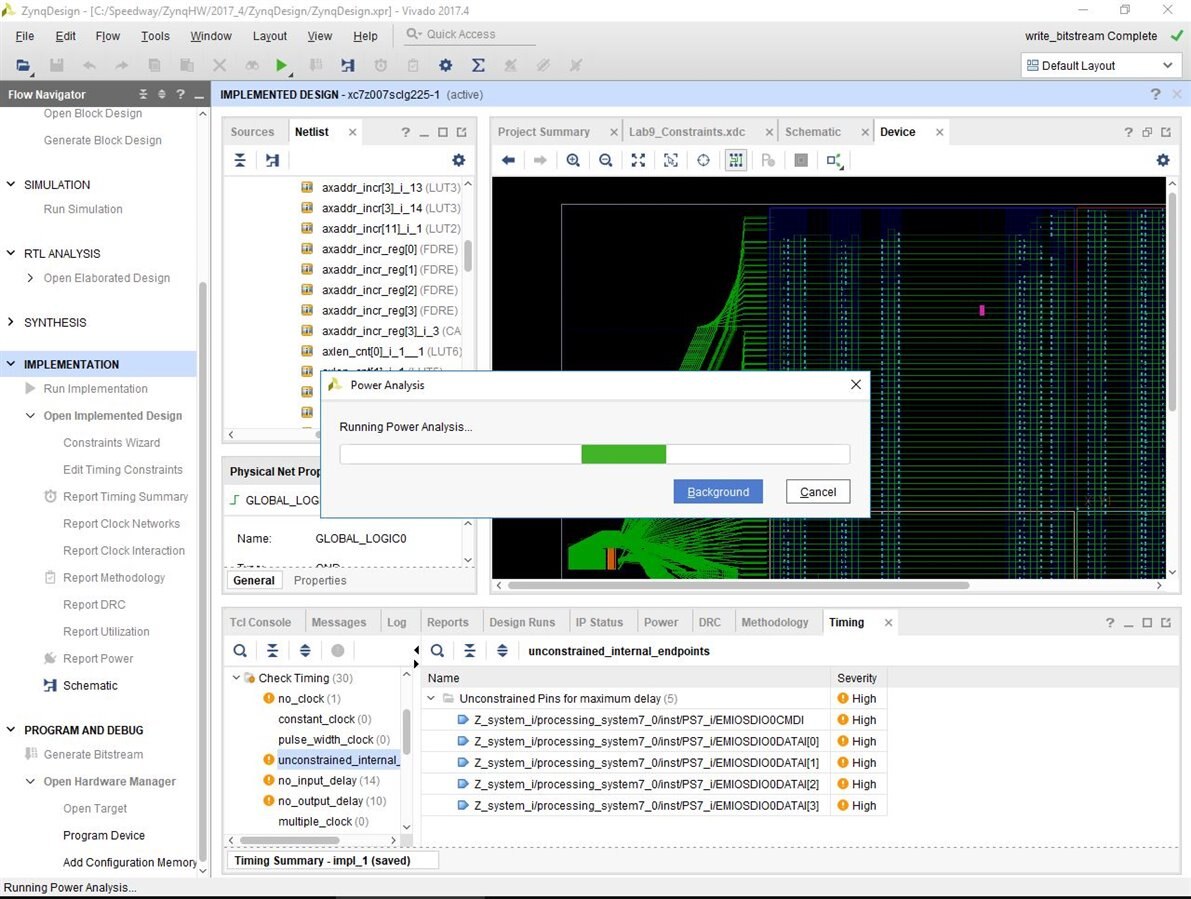
Reading the timing reports after the power analysis
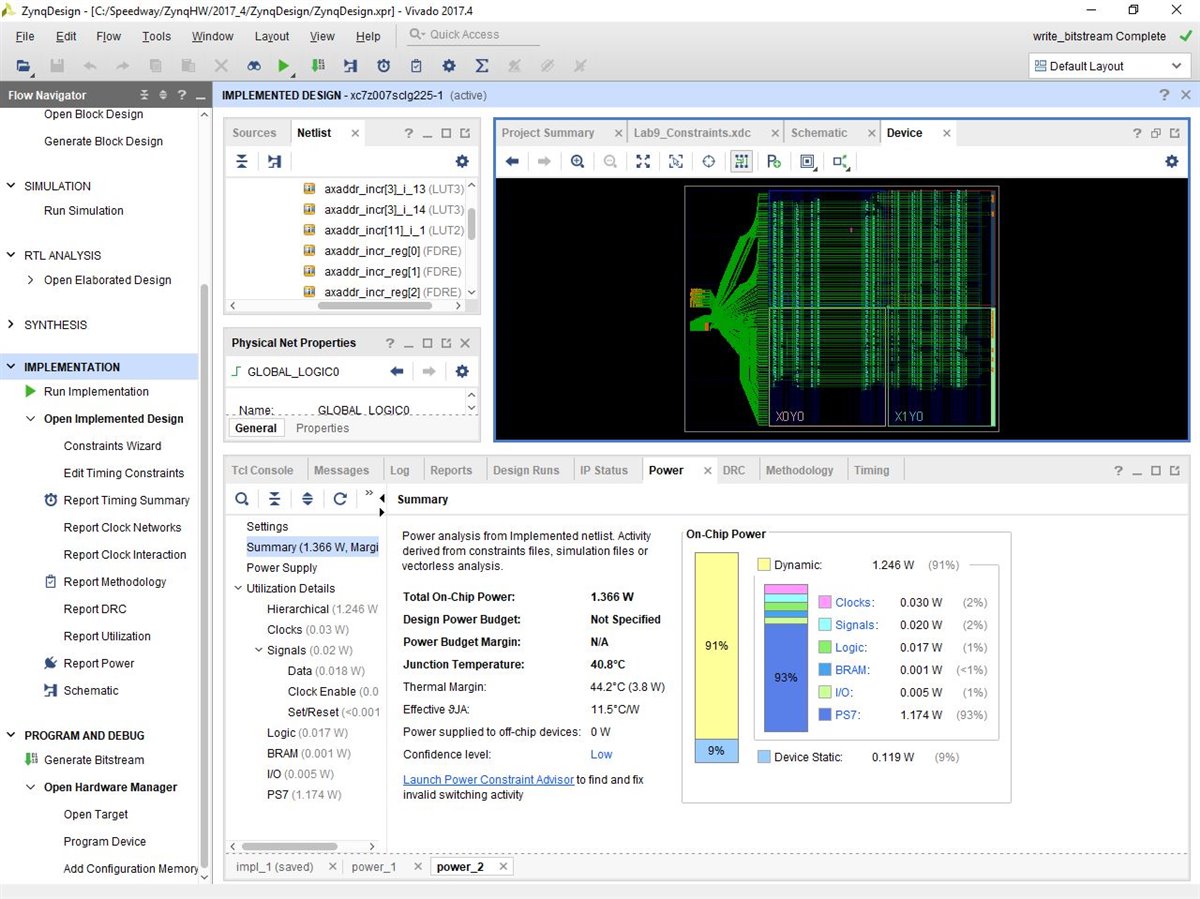
Power analysis Summary
Conclusion
This brought me to an end of the first part of the training series which was very interesting to learn. But as one can see from the previous projects there are a lot of things from hardware to software to constraints going into the design. There are also many hidden routes which can be made use of to see some unconventional but interesting results such as reading the generated logs and reports on power analysis.
I found the training to be fun with many levels of learning involved. Clearly I can see the the current fpgas are very time and labor intensive in terms of design point of view.
Top Comments