


This is continuation of previous blog post , where we installed motion to stream video from the Pi Camera, which acts as live preview of the security camera.For more details check out -
Pi Control Hub: Spoke 1 :Security Camera - setting up Motion to stream video
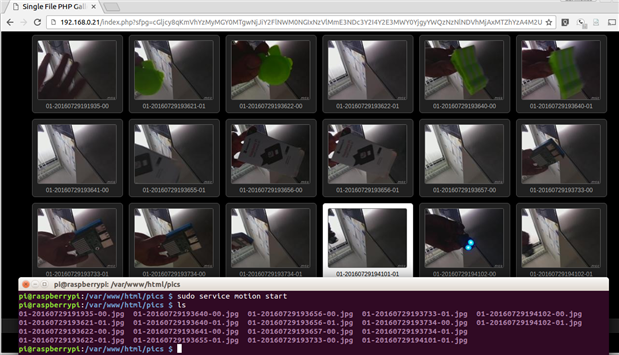
As part of this blog post we will setup a simple web server on the Pi using lighttpd and Single File PHP Gallery 4.6.1 by Kenny Svalgaard to display images that motion stores when an intruder/movement is detected.(I have used the single file PHP gallery a couple of years back, when using the original Pi model B and the Pi Camera on a simple bird watching project for the summer and which means I can vouch for it ). As part of the gallery as shown in the picture below, you can preview all the picture taken when movement is detected and also click on the pictures enlarge and even download the full size image to your laptop, if you have to  ..
..
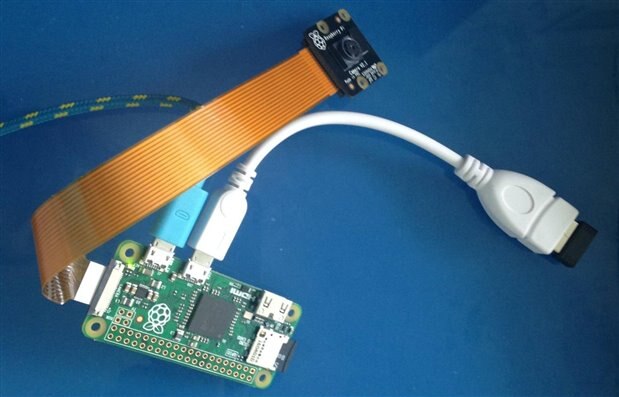
In addition, I am going to move the Pi NoIR cam + SD card + WiFi USB adapter to the Pi Zero as showing in the picture below, because I plan on using the Pi B+ on another spoke.
Here are the steps/list of commands to follow to setup lighttpd followed by single file PHP gallery
#1 SSH into your Pi and Install lighttpd
sudo apt-get install lighttpd
#2 Install the PHP packages
sudo apt-get install php5-common php5-cgi php5
at this point also enable Fastcgi module using the command
sudo lighty-enable-mod fastcgi-php
#3 Update the permissions of the www directory which was created by the install of lighttpd
Change the directory owner and group to
sudo chown www-data:www-data /var/www
Give the necessay permisions to the folder
sudo chmod 775 /var/www
Then add pi to the www-data group
sudo usermod -a -G www-data pi
#4 Stop and Start the the lighttpd service and test
sudo service lighttpd stop
sudo service lighttpd start
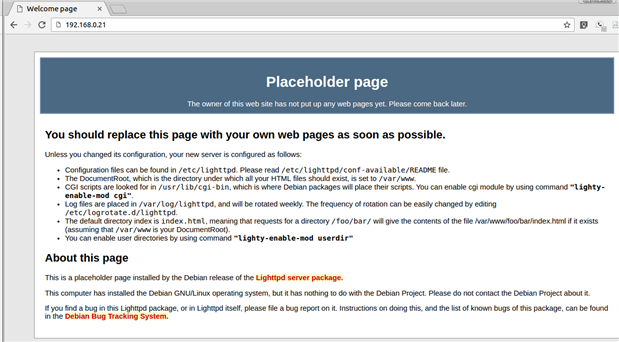
or you can also use - sudo service lighttpd restart , if everything is setup correctly, when you open your browser to test - http://ipaddressOfPi
In case you come across an error/or the page does not load, check your error logs to debug
sudo tail /var/log/lighttpd/error.log
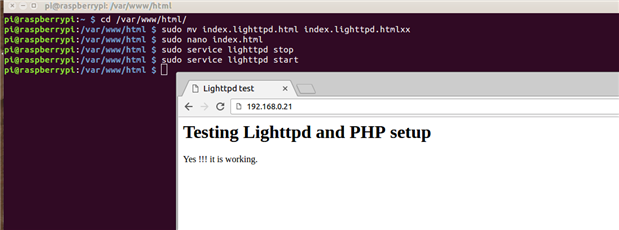
#5 Optionally, if you would like to run a test with a small html page of your own, use the following commands
cd /var/www/html/
rename the exist file that serves the page in the screenshot above
sudo mv index.lighttpd.html index.lighttpd.htmlxx
create an index.html file
sudo nano index.html
Copy paste the following code
<html>
<head>
<title>Lighttpd test</title>
</head>
<body>
<h1>Testing Lighttpd and PHP setup</h1>
<p>Yes !!! it is working.</p>
<p><?php phpinfo();?></p>
</body>
</html>
ctrl+X to save the file in the nano editor
Stop and start the lighttpd service
sudo service lighttpd stop
sudo service lighttpd start
#6 install php5-gd image processing libary to show the thumbnails on the web page, this is required Single File PHP Gallery
sudo apt-get install php5-gd
#7 downlad the Single File PHP Gallery
get the zip files from http://sye.dk/sfpg/
sudo wget http://sye.dk/sfpg/Single_File_PHP_Gallery_4.6.1.zip
Unzipping and move the files to
sudo unzip Single_File_PHP_Gallery_4.6.1.zip -d /var/www/html
also dont forget to rename the index.html file created in step 5
sudo mv index.html index.htmlxx
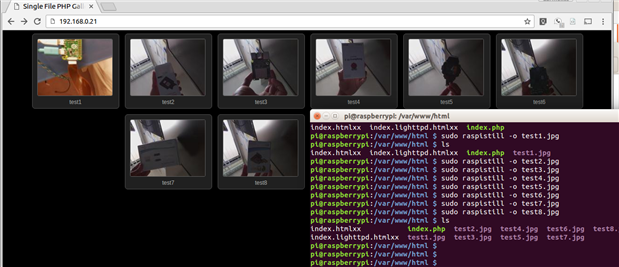
#8 Upload acouple of picture to the html folder or take a couple of pictures using the pi camera
use a FTP tool like filezilla to upload a couple of images to the /var/www/html
Or if you dont have an FTP tool navigate to the /var/www/html folder and take a couple of pictures using
sudo raspistill -o test1.jpg
once done open a URL in the browser http://ipaddressOfPi , where you should see the images you have just taken.
#9 Setting up the motion.conf file to point to the newly create pics folder
Now create a new folder called pics
sudo mkdir pics
Stop the motion service, if you have not done it as part of the previous steps
sudo service motion stop
Assign ownership to the target directory for motion
sudo chown motion /var/www/html/pics
Now modify the following parameter in the motion.conf file
sudo nano /etc/motion/motion.conf
- the target direcotry the new one we created
target_dir /var/www/html/pics

- Set a new threshold value to determine when motion is detect, i bumped mine to 3500.You will have to experiment with this value ..Basically Threshold for number of changed pixels in an image that triggers motion detection (default: 1500).
threshold 3500
- And I also choose to have turn off video by setting the ffmpeg_output_movies to off
ffmpeg_output_movie off
#10 Start motion service and test
sudo service motion start
now when you click on the pics section in the browser http://ipaddressOfPi , you should see all the images captured by motion , when an intruder is detected
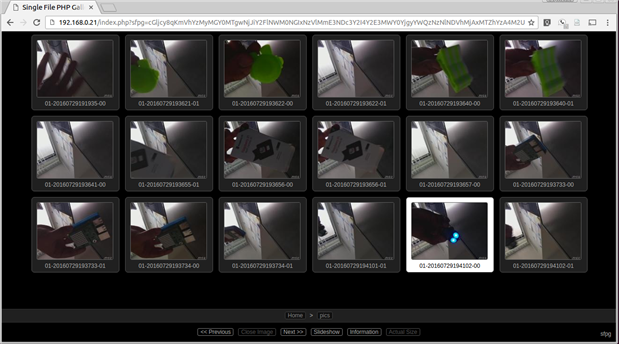
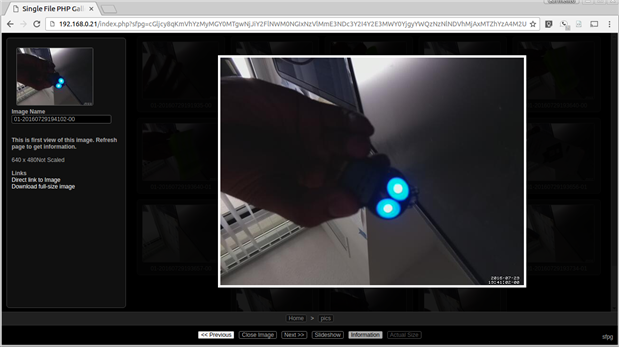
<in my case i am using random things around me on my table  >, you can also click on the picture enlarge it as shown in the picture below and click the link to download the full size image to your laptop.
And yes, the steam from the pi cam is still available at http://ipaddressOfPi:8081
-

DAB
-
Cancel
-
Vote Up
0
Vote Down
-
-
Sign in to reply
-
More
-
Cancel
-

carmelito
in reply to DAB
-
Cancel
-
Vote Up
0
Vote Down
-
-
Sign in to reply
-
More
-
Cancel
Comment-

carmelito
in reply to DAB
-
Cancel
-
Vote Up
0
Vote Down
-
-
Sign in to reply
-
More
-
Cancel
Children