


I'm back! It's been a while since my last update ... I've been moving to a new house and things were quite hectic. On the plus side, I'm getting a new office/lab and a big shed just for me. They're still full of boxes and I can't find half my things though, but that should be cleared in the coming week 

Anyway ... The next component I wanted to integrate in my project were some philips Hue lights. These are RGB remote controlled lights. The first application I'm thinking of, is to install one light in each of my children's room and use it as a night light and wake up light. Using OpenHAB, the light woud turn on when going to bed, and be turned off by the time they fall asleep. In the morning, a similar action would be performed. Turn on the light just before they have to wake up, and a few moments later, turn it off for the rest of the day. Because these lights are RGB, they can be configured to use the theme colour of their rooms.
Let's get into the details of this integration
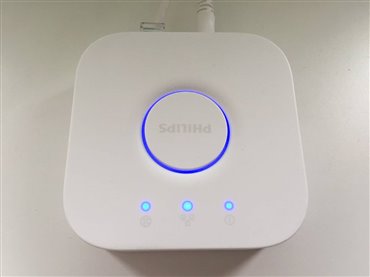
Hue Bridge
The Philips Hue Bridge is, as the name implies, a bridge device allowing your smart devices (phone, computer, Raspberry Pi, ...) to control up to 50 Hue lights and accessories. It connects to the network via an ethernet cable and receives an IP address via DHCP. As I'll be controlling the bridge from OpenHAB, it will need to be configured with a static IP address instead. This can be done using the Hue app.

OpenHAB
Porting the Hue functionality to OpenHAB is not that hard, using the Hue binding. But that would only give control of the light, as in the app on the smartphone. Although it would be possible to control remotely over the internet, rather than via the local network only.
Items
As described in the following thread, the item definition for Hue lights in OpenHAB 2.0 is slightly different. Rather than defining them like this:
Switch  Hue_Bulb_1_Switch    {hue="1"}
Color   Hue_Bulb_1_Color     {hue="1"}
Dimmer  Hue_Bulb_1_Dimmer    {hue="1;colorTemperature"}

Switch  Hue_Bulb_2_Switch    {hue="2"}
Color   Hue_Bulb_2_Color     {hue="2"}
Dimmer  Hue_Bulb_2_Dimmer    {hue="2;colorTemperature"}
The items are defined like this:
Switch  Hue_Bulb_1_Switch    {channel="hue:LCT007:0017882155ad:1:color"}
Color   Hue_Bulb_1_Color <colorwheel>    {channel="hue:LCT007:0017882155ad:1:color"}
Dimmer  Hue_Bulb_1_Dimmer    {channel="hue:LCT007:0017882155ad:1:color"}
Dimmer  Hue_Bulb_1_ColorTemperature    {channel="hue:LCT007:0017882155ad:1:color_temperature"}

Switch  Hue_Bulb_2_Switch    {channel="hue:LCT007:0017882155ad:2:brightness"}
Color   Hue_Bulb_2_Color <colorwheel>    {channel="hue:LCT007:0017882155ad:2:color"}
Dimmer  Hue_Bulb_2_Dimmer    {channel="hue:LCT007:0017882155ad:2:brightness"}
Dimmer  Hue_Bulb_2_ColorTemperature    {channel="hue:LCT007:0017882155ad:2:color_temperature"}
Sitemap
The sitemap is like any other integration, where you define how and where the defined items are visualised.
        Frame label="Lights" {
                Switch         item=Hue_Bulb_1_Switch   label="Room 1 Switch"
                Switch         item=Hue_Bulb_2_Switch   label="Room 2 Switch"
                Colorpicker    item=Hue_Bulb_1_Color    label="Room 1 Color"
                Colorpicker    item=Hue_Bulb_2_Color    label="Room 2 Color"
                Slider         item=Hue_Bulb_1_Dimmer   label="Room 1 Brightness"
                Slider         item=Hue_Bulb_2_Dimmer   label="Room 2 Brightness"
                Slider         item=Hue_Bulb_1_ColorTemperature   label="Room 1 Color Temperature"
                Slider         item=Hue_Bulb_2_ColorTemperature   label="Room 2 Color Temperature"
        }
The above configuration results in something that should look like this:

Pairing
Once the Hue binding was installed, OpenHAB detected the bridge automatically. In order to be able to pair with the bridge and send commands, the button on the bridge needs to be pressed. This is made clear in the "openhab.log" file.
After pressing the button, a unique user is created, allowing OpenHAB to interface with the bridge. The bridge then goes from OFFLINE to ONLINE, as stated in the logs:
2016-07-19 22:38:31.845 [INFO ] [binding.hue.handler.HueBridgeHandler] - Creating new user on Hue bridge 192.168.0.142 - please press the pairing button on the bridge.
2016-07-19 22:38:41.843 [INFO ] [binding.hue.handler.HueBridgeHandler] - Creating new user on Hue bridge 192.168.0.142 - please press the pairing button on the bridge.
2016-07-19 22:38:51.846 [INFO ] [binding.hue.handler.HueBridgeHandler] - Creating new user on Hue bridge 192.168.0.142 - please press the pairing button on the bridge.
2016-07-19 22:39:01.843 [INFO ] [binding.hue.handler.HueBridgeHandler] - Creating new user on Hue bridge 192.168.0.142 - please press the pairing button on the bridge.
2016-07-19 22:39:11.841 [INFO ] [binding.hue.handler.HueBridgeHandler] - Creating new user on Hue bridge 192.168.0.142 - please press the pairing button on the bridge.
2016-07-19 22:39:21.844 [INFO ] [binding.hue.handler.HueBridgeHandler] - Creating new user on Hue bridge 192.168.0.142 - please press the pairing button on the bridge.
2016-07-19 22:39:21.867 [INFO ] [binding.hue.handler.HueBridgeHandler] - User '9cx84jRFcbP4e7sCRm4FuYr3e7laPR55oDzTpptj' has been successfully added to Hue bridge.
2016-07-19 22:39:21.951 [INFO ] [smarthome.event.ThingUpdatedEvent   ] - Thing 'hue:bridge:0017882155ad' has been updated.
2016-07-19 22:39:31.903 [INFO ] [me.event.ThingStatusInfoChangedEvent] - 'hue:bridge:0017882155ad' changed from OFFLINE (CONFIGURATION_ERROR): Not authenticated - press pairing button on the bridge. to ONLINE
2016-07-19 22:39:31.963 [INFO ] [g.discovery.internal.PersistentInbox] - Added new thing 'hue:LCT007:0017882155ad:3' to inbox.
2016-07-19 22:39:31.965 [INFO ] [smarthome.event.InboxAddedEvent     ] - Discovery Result with UID 'hue:LCT007:0017882155ad:3' has been added.
2016-07-19 22:39:32.011 [INFO ] [smarthome.event.ThingUpdatedEvent   ] - Thing 'hue:bridge:0017882155ad' has been updated.
Rules
Now begins the fun part: defining automated events using the lights. That's where OpenHAB's powerful rules engine comes into play. Using rules, the wake up light and night light functionality can be implemented. Because both my children have the same routine in general, one set of rules can be applied for both.
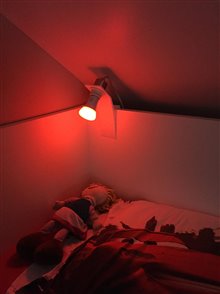
Night Light
This first implementation of the night light has following properties:
- turn on the light every single day, at 19:00
- use color blue foor room 1, green for room 2 (children have themed rooms
 )
) - use 50% brightness
A first timer is created at the same time, set to trigger 1 hour later, to dim the brightness to 10%.
A second timer turn the light completely off, another hour later.
import org.joda.time.*
import org.openhab.model.script.actions.Timer


var Timer nightLightDim
var Timer nightLightOff


rule "Night Light"
when
    Time cron "0 0 19 * * ?"   // Every day 19:00 hours
then
    // Light 1
    sendCommand(Hue_Bulb_1_Switch, ON)
    sendCommand(Hue_Bulb_1_Color, HSBType::BLUE)
    sendCommand(Hue_Bulb_1_Dimmer, 50)
    sendCommand(Hue_Bulb_1_ColorTemperature, 0)


    // Light 2
    sendCommand(Hue_Bulb_2_Switch, ON)
    sendCommand(Hue_Bulb_2_Color, HSBType::GREEN)
    sendCommand(Hue_Bulb_2_Dimmer, 50)
    sendCommand(Hue_Bulb_2_ColorTemperature, 0)


    // Timer Dim
    if(nightLightDim!=null) {
       nightLightDim.cancel()
    }
    nightLightDim = createTimer(now.plusMinutes(60)) [|
        sendCommand(Hue_Bulb_1_Dimmer, 10)
        sendCommand(Hue_Bulb_2_Dimmer, 10)
    ]


    // Timer Turn Off
    if(nightLightOff!=null) {
        nightLightOff.cancel()
    }
    nightLightOff = createTimer(now.plusMinutes(120)) [|
        sendCommand(Hue_Bulb_1_Switch, OFF)
        sendCommand(Hue_Bulb_2_Switch, OFF)
    ]
end
For testing purposes, I temporarily changed the cron expression to trigger within a few minutes. As expected, the rule triggered, and the lights were configured!
The logs show all actions being triggered within less than 100 milliseconds:
2016-07-20 21:36:03.346 [INFO ] [smarthome.event.ItemCommandEvent    ] - Item 'Hue_Bulb_1_Switch' received command ON
2016-07-20 21:36:03.361 [INFO ] [marthome.event.ItemStateChangedEvent] - Hue_Bulb_1_Switch changed from OFF to ON
2016-07-20 21:36:03.369 [INFO ] [smarthome.event.ItemCommandEvent    ] - Item 'Hue_Bulb_1_Color' received command 240,100,100
2016-07-20 21:36:03.377 [INFO ] [marthome.event.ItemStateChangedEvent] - Hue_Bulb_1_Color changed from 238,88,0 to 240,100,100
2016-07-20 21:36:03.402 [INFO ] [smarthome.event.ItemCommandEvent    ] - Item 'Hue_Bulb_1_Dimmer' received command 50
2016-07-20 21:36:03.407 [INFO ] [marthome.event.ItemStateChangedEvent] - Hue_Bulb_1_Dimmer changed from 0 to 50
2016-07-20 21:36:03.428 [INFO ] [smarthome.event.ItemCommandEvent    ] - Item 'Hue_Bulb_1_ColorTemperature' received command 0
The timer also does its work and reduces the brightness after a given amount of time, as specified in the rule:
2016-07-20 21:42:01.321 [INFO ] [smarthome.event.ItemCommandEvent ] - Item 'Hue_Bulb_1_Dimmer' received command 10
Wake Up Light
The wake up light does something similar, as it turns on 15 minutes before having to wake up. The exception here is the cron expression takes into account the day of the week. Wouldn't want to wake up the kids too early during the weekend, right? 
var Timer wakeUpLightOff


rule "Wake Up Light"
when
    Time cron "0 45 6 * * 1-5"   // Every weekday 6:45 hours
then
    // Light 1
    sendCommand(Hue_Bulb_1_Switch, ON)
    sendCommand(Hue_Bulb_1_Color, HSBType::BLUE)
    sendCommand(Hue_Bulb_1_Dimmer, 80)
    sendCommand(Hue_Bulb_1_ColorTemperature, 0)


    // Light 2
    sendCommand(Hue_Bulb_2_Switch, ON)
    sendCommand(Hue_Bulb_2_Color, HSBType::GREEN)
    sendCommand(Hue_Bulb_2_Dimmer, 80)
    sendCommand(Hue_Bulb_2_ColorTemperature, 0)


    // Timer
    if(wakeUpLightOff!=null) {
        wakeUpLightOff.cancel()
    }
    wakeUpLightOff = createTimer(now.plusMinutes(30)) [|
        sendCommand(Hue_Bulb_1_Switch, OFF)
        sendCommand(Hue_Bulb_2_Switch, OFF)
    ]
end
Build
To build the frame of the light and be able to mount it on the beds, I experimented with a new method (new for me at least): heat forming acrylic. Applying heat to certain areas of a piece of acrylic, it can be formed in different shapes. Since this is my first time doing it, the shape is not so complex, but it turned out quite well if I may say so myself.
Here are some pictures of the acrylic being bent into shape:
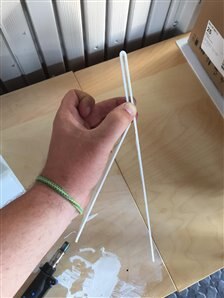
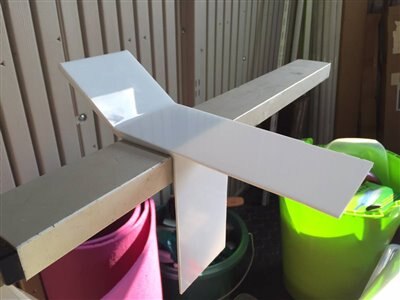

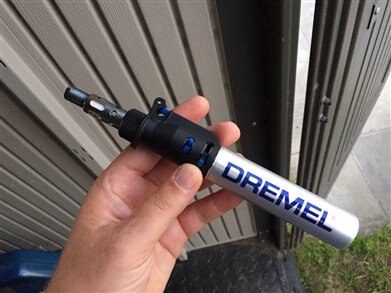
As you can see, it's possible to make interesting shapes out of a straight piece of acrylic. The tricky part is figuring out the best order to perform the bends in.
To apply heat, I used a mini blow torch and passed back and forth in a line across the section that needed to be bent. Using a different head of the tool, I carved out a hole in the top section to fit the light's socket. Handy little tool!

Now I just need to repeat this for the second bedroom!
With most of the desired components integrated, I'll start working on the actual alarm clock portion of the project. There's only a bit more than a month left!
 |
Navigate to the next or previous post using the arrows. |  |
Top Comments