element14 Community
element14 Community
    Register Log In
  • Site
  • Search
  • Log In Register
  • About Us
  • Community Hub
    Community Hub
    • What's New on element14
    • Feedback and Support
    • Benefits of Membership
    • Personal Blogs
    • Members Area
    • Achievement Levels
  • Learn
    Learn
    • Ask an Expert
    • eBooks
    • element14 presents
    • Learning Center
    • Tech Spotlight
    • STEM Academy
    • Webinars, Training and Events
    • Learning Groups
  • Technologies
    Technologies
    • 3D Printing
    • FPGA
    • Industrial Automation
    • Internet of Things
    • Power & Energy
    • Sensors
    • Technology Groups
  • Challenges & Projects
    Challenges & Projects
    • Design Challenges
    • element14 presents Projects
    • Project14
    • Arduino Projects
    • Raspberry Pi Projects
    • Project Groups
  • Products
    Products
    • Arduino
    • Avnet Boards Community
    • Dev Tools
    • Manufacturers
    • Multicomp Pro
    • Product Groups
    • Raspberry Pi
    • RoadTests & Reviews
  • Store
    Store
    • Visit Your Store
    • Choose another store...
      • Europe
      •  Austria (German)
      •  Belgium (Dutch, French)
      •  Bulgaria (Bulgarian)
      •  Czech Republic (Czech)
      •  Denmark (Danish)
      •  Estonia (Estonian)
      •  Finland (Finnish)
      •  France (French)
      •  Germany (German)
      •  Hungary (Hungarian)
      •  Ireland
      •  Israel
      •  Italy (Italian)
      •  Latvia (Latvian)
      •  
      •  Lithuania (Lithuanian)
      •  Netherlands (Dutch)
      •  Norway (Norwegian)
      •  Poland (Polish)
      •  Portugal (Portuguese)
      •  Romania (Romanian)
      •  Russia (Russian)
      •  Slovakia (Slovak)
      •  Slovenia (Slovenian)
      •  Spain (Spanish)
      •  Sweden (Swedish)
      •  Switzerland(German, French)
      •  Turkey (Turkish)
      •  United Kingdom
      • Asia Pacific
      •  Australia
      •  China
      •  Hong Kong
      •  India
      •  Korea (Korean)
      •  Malaysia
      •  New Zealand
      •  Philippines
      •  Singapore
      •  Taiwan
      •  Thailand (Thai)
      • Americas
      •  Brazil (Portuguese)
      •  Canada
      •  Mexico (Spanish)
      •  United States
      Can't find the country/region you're looking for? Visit our export site or find a local distributor.
  • Translate
  • Profile
  • Settings
Pi IoT
  • Challenges & Projects
  • Design Challenges
  • Pi IoT
  • More
  • Cancel
Pi IoT
Blog [Pi IoT] Alarm Clock #14: Front Panel
  • Blog
  • Forum
  • Documents
  • Polls
  • Files
  • Events
  • Mentions
  • Sub-Groups
  • Tags
  • More
  • Cancel
  • New
  • Share
  • More
  • Cancel
Group Actions
  • Group RSS
  • More
  • Cancel
Engagement
  • Author Author: fvan
  • Date Created: 8 Aug 2016 8:15 PM Date Created
  • Views 2935 views
  • Likes 5 likes
  • Comments 21 comments
  • fvan_piiot
  • piiot
  • cnc
Related
Recommended

[Pi IoT] Alarm Clock #14: Front Panel

fvan
fvan
8 Aug 2016

  • CNC
  • Gallery


Found some time this weekend to start the actual build of the alarm clock. I started with the front panel and thought I'd collect some feedback on the progress so far. So be sure to let me know what you think in the comments!


CNC


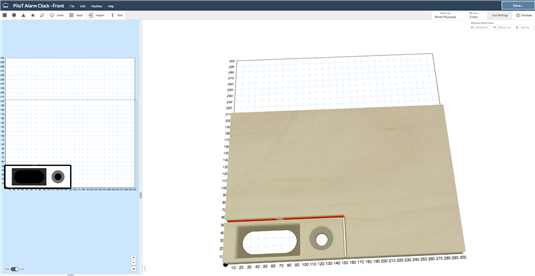
To make the necessary cutouts for the clock display and button, I'm using my ShapeOko2 Desktop CNC machine. It uses a Dremel to mill and is controlled via an Arduino UNO with gShield used to control the stepper motors of the CNC.

On the software side I'm using Easel, Inventables' web-based all-in-one software application for CNC milling. It combines the CAD software to create the design, the CAM software to set the tool paths, and additional software to send the resulting G-Code to the Arduino.


imageimage


Since it was my first time milling a solid board like this one, I used conservative milling speeds and depths, to avoid breaking anything or having the stepping motors skip steps.


The settings used were:

  • feed rate: 750mm / min
  • plunge rate: 500mm / min
  • pass depth: 1.0mm


This means that in the horizontal plane (X & Y), the mill moves at 750mm / minute, in the vertical plane, 500mm / minute (Z). Every layer is milled 1mm deep, so for a board like this one which is 18mm thick, 18 passes are required.


The entire process took about 1h30min. Apart from the occasional vacuuming of the wood dust, not interference was required image


Finally, if you have an Inventables account, you can access my file using the following link, allowing you to copy and modify my design to your needs: Easel - PiIoT Alarm Clock - Front


Gallery


Here's a gallery of different steps in the milling and fitting process. I've added descriptions to every picture image


{gallery} CNC

image

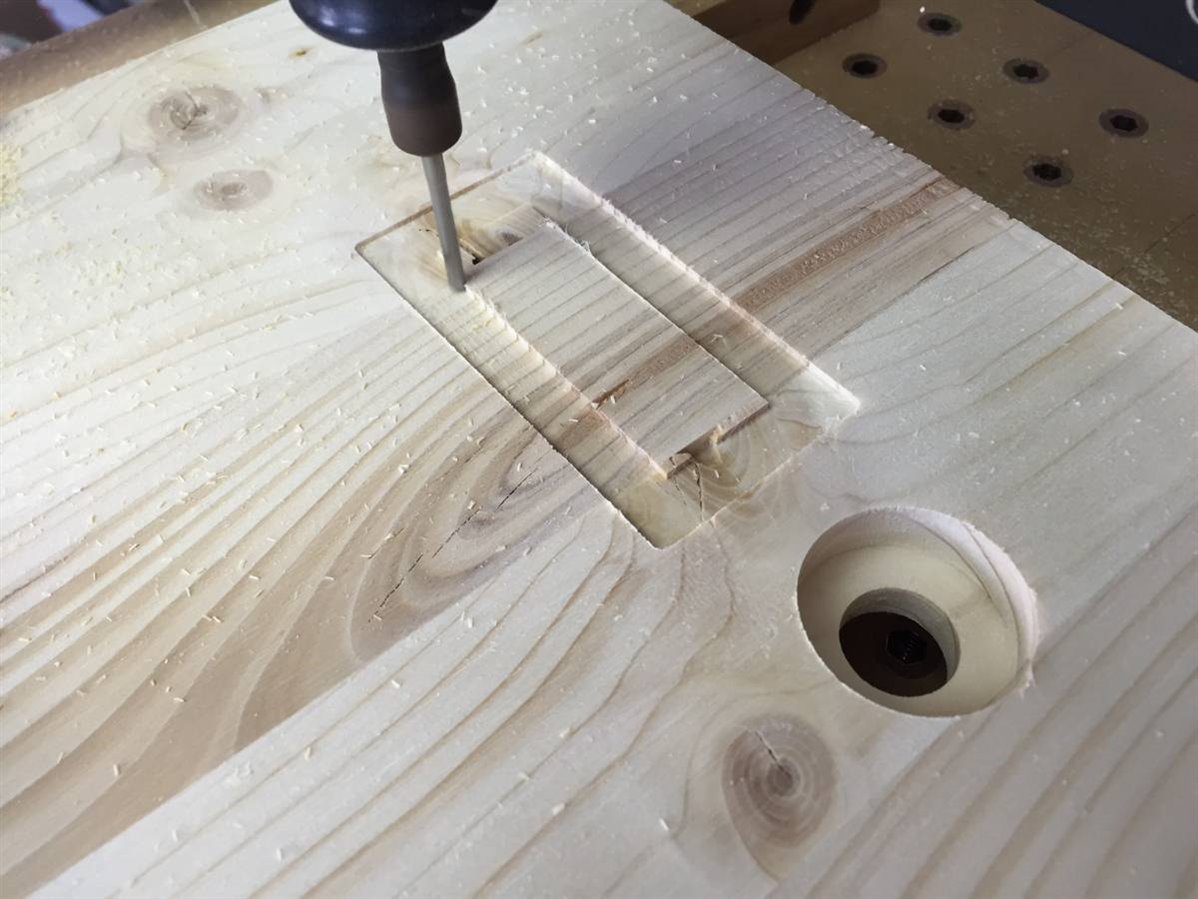
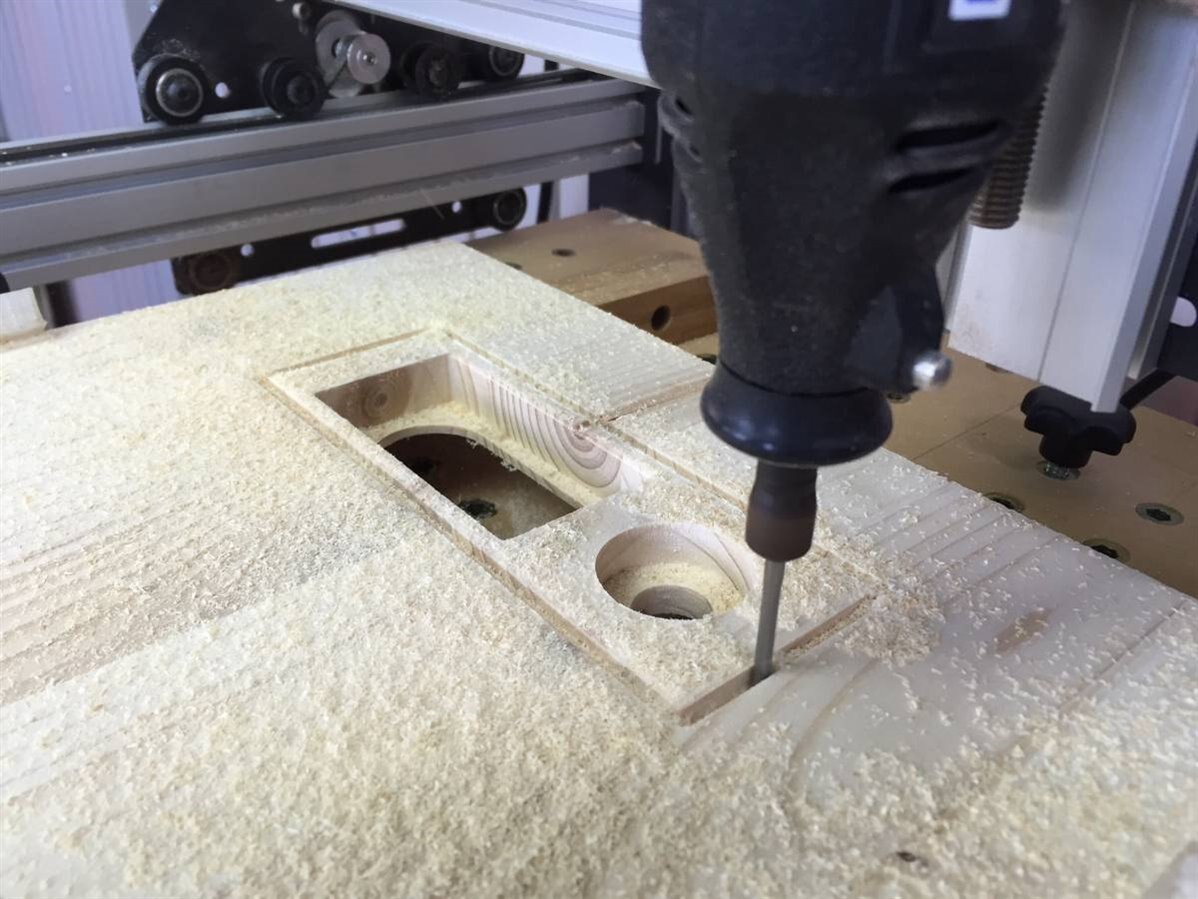
Solid Board: The starting piece, a solid board from the hardware store.

image

Passes: Unlike a 3D printer adding layers of material, the mill removes it, layer by layer.

image

Order: It is important to define the shapes to be milled in the correct order. The outside perimeter is done last to avoid the piece coming loose before milling other shapes.

image

Tabs: The piece remains attached to the board with easy to cut "tabs".

image

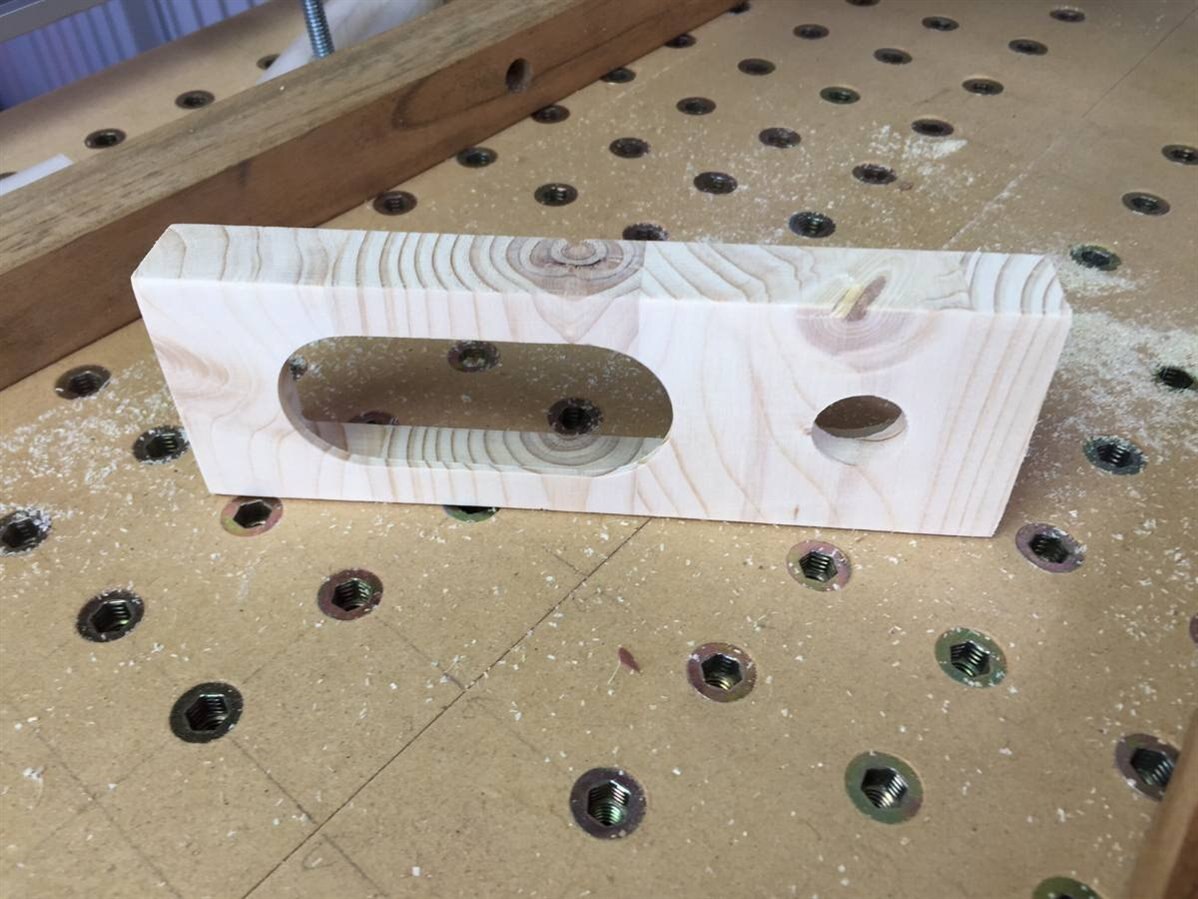
Sanding: With minimal sanding, the piece is cleaned up and ready for fitting.

image

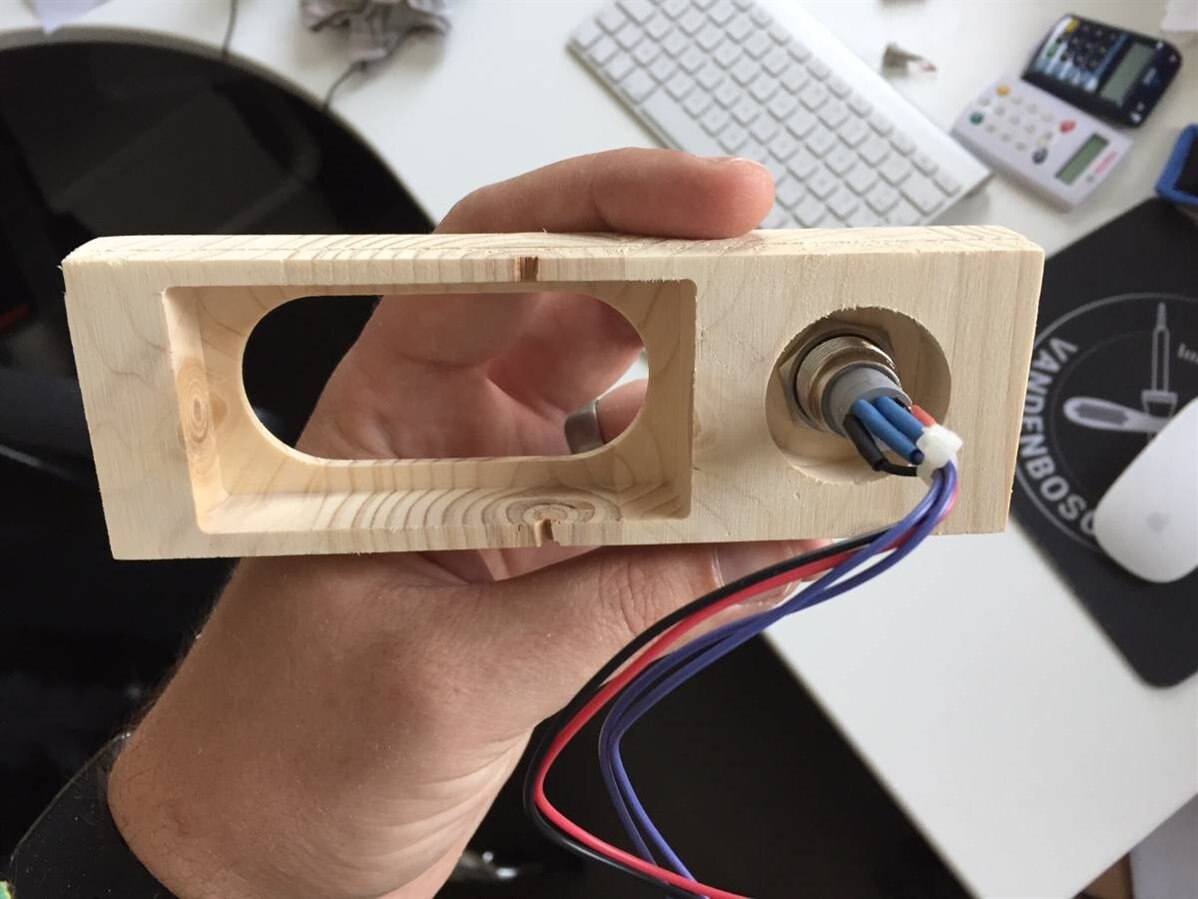
Fitting: Fitting a push button, and attaching it with a nut. Enough space was foreseen for easy access.

image

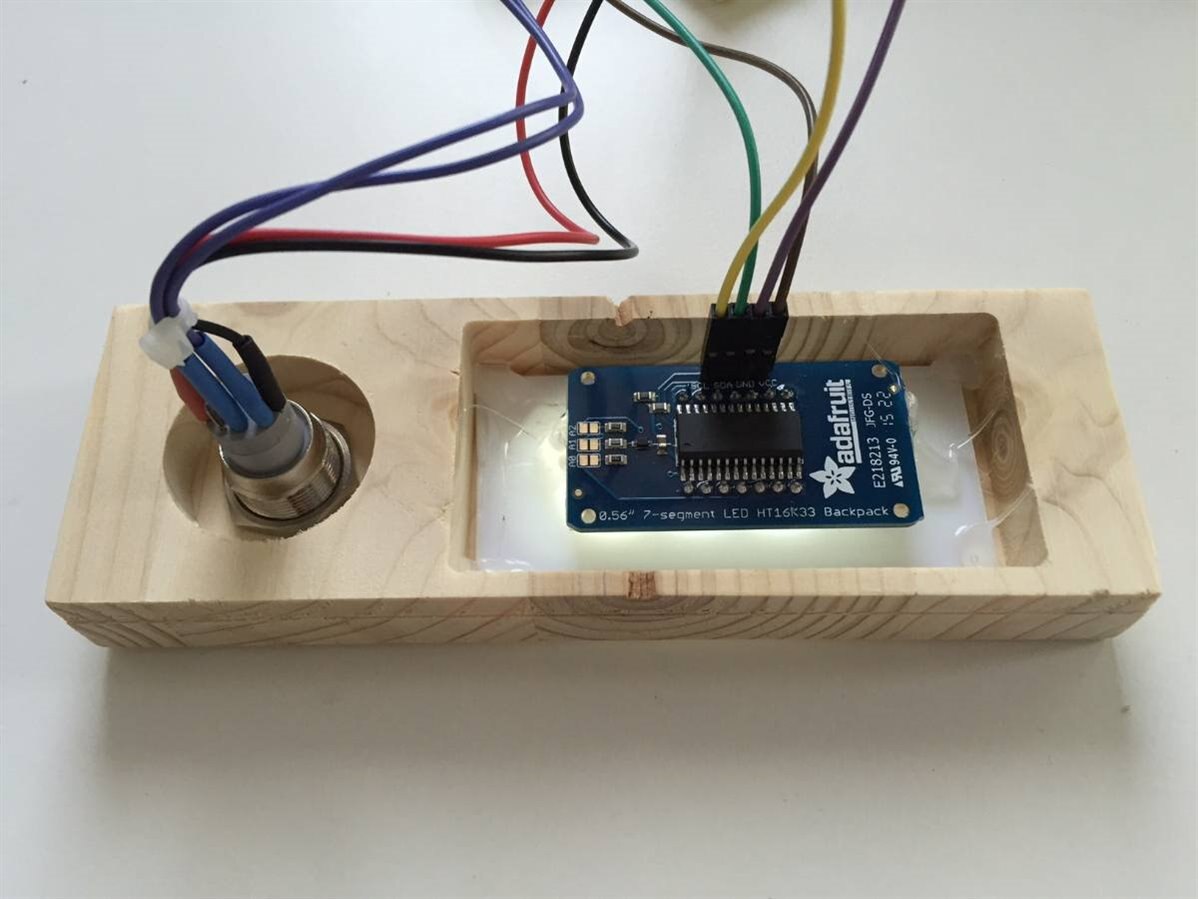
Acrylic: A small acrylic plat is fitted, acting as a diffuser for the clock's display.

image

Display: The plate and display are held into place using a few drops of hot glue.

image

Result: The result from the front. What do you think?


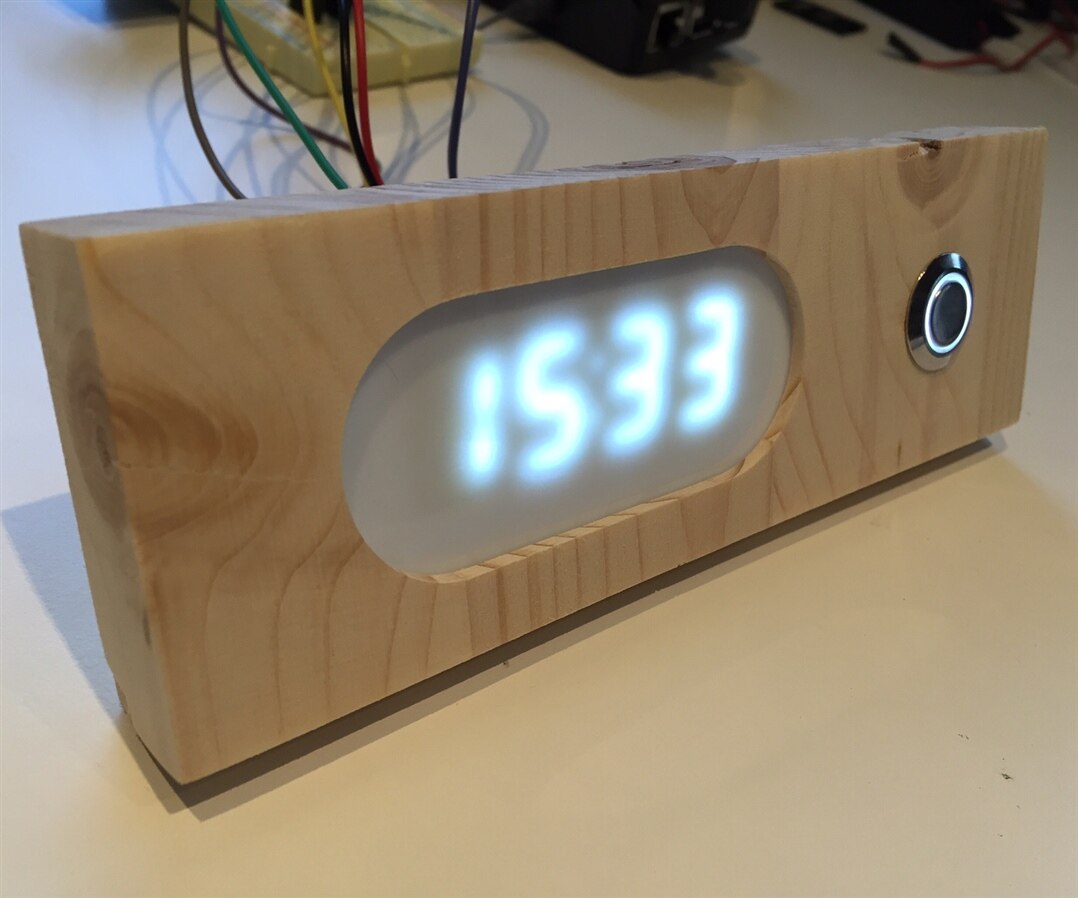
With the front finished, I can now proceed with the rest of the enclosure. image


image


Navigate to the next or previous post using the arrows.

image
  • Sign in to reply

Top Comments

  • element14Dave
    element14Dave over 9 years ago +3
    I'm not sure whether or not to be more impressed with the build, or the fvan branded mouse pad. Ok, I'm more impressed with the build
  • fvan
    fvan over 9 years ago in reply to mcb1 +2
    I have purchased an actual router (DeWalt D26204K), but have to make the brackets to be able to mount it on the frame. Should be plenty powerful to try things like aluminium in the future
  • fvan
    fvan over 9 years ago +2
    Finished the next piece, a side piece, holding a speaker!
  • mcb1
    mcb1 over 9 years ago in reply to Robert Peter Oakes

    That looks like a serious routing table ...

    It's the sort of one I need so I can go big or go home ...

    • Cancel
    • Vote Up 0 Vote Down
    • Sign in to reply
    • More
    • Cancel
  • mcb1
    mcb1 over 9 years ago in reply to element14Dave

    I'd ask for one, but I'd be worried it would be considered a conflict of interest

    Naah, you'd have top bragging rights.

    • Cancel
    • Vote Up +1 Vote Down
    • Sign in to reply
    • More
    • Cancel
  • mcb1
    mcb1 over 9 years ago in reply to fvan

    We had a very clever man in our club that was going to make a 1200 x 600 mm table.

    He advocated using off the shelf routers as they were cheaper, easier to replace and had a warranty.


    If you progress to plastic, the initial feed in speed (until it starts routing) needs to be a lot slower than wood.

    According to the woodworking crowd that did some work for us some years ago.


    Wait till the kids work out what dad can do with his new routing table. .... image


    mark

    • Cancel
    • Vote Up 0 Vote Down
    • Sign in to reply
    • More
    • Cancel
  • fvan
    fvan over 9 years ago in reply to Robert Peter Oakes

    Certainly looks similar. Would love the file if you don't mind sharing it image Thanks Peter!


    image

    • Cancel
    • Vote Up 0 Vote Down
    • Sign in to reply
    • More
    • Cancel
  • Robert Peter Oakes
    Robert Peter Oakes over 9 years ago in reply to fvan

    would something like this do, I designed for the Bosch but the only change would be the diameter of the router hole, I think I designed in Autocad123D or DesignSpark Mechanical, either way I can provide the file (I Think). All the holes are based on 20mm pitch to suite the extrusions

    image

    • Cancel
    • Vote Up +1 Vote Down
    • Sign in to reply
    • More
    • Cancel
>
element14 Community

element14 is the first online community specifically for engineers. Connect with your peers and get expert answers to your questions.

  • Members
  • Learn
  • Technologies
  • Challenges & Projects
  • Products
  • Store
  • About Us
  • Feedback & Support
  • FAQs
  • Terms of Use
  • Privacy Policy
  • Legal and Copyright Notices
  • Sitemap
  • Cookies

An Avnet Company © 2025 Premier Farnell Limited. All Rights Reserved.

Premier Farnell Ltd, registered in England and Wales (no 00876412), registered office: Farnell House, Forge Lane, Leeds LS12 2NE.

ICP 备案号 10220084.

Follow element14

  • X
  • Facebook
  • linkedin
  • YouTube